
*********************
I am very excited to be this month's Guest Artist and I have been anxiously awaiting this kit! My family and I love to hike and visit parks of all kinds, especially national parks. This kit will not stay in the box for very long at my house!
SET A: 5x7” WHITE CARDS
 Use clear embossing ink to stamp the large "Yellowstone" poster image. Color with a variety of chalk colors, blending as you go. Stamp sentiment onto Kraft Plain and snip ends of paper strip and ribbon with scissors to create "banners".
  The chalking technique is so fun; I love how the colors match the adorable moose ribbon! (The blue in the corners is Dungarees Dark Blue Plain.)
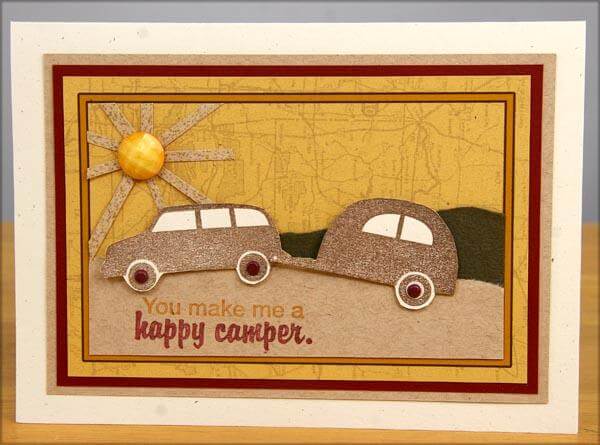
  For this card, stamp car and trailer image in brown ink onto White Plain; fussy cut from paper. Add wine brads to the "tires". Tear Kraft and Brown Plain papers to create the road and hills in the background. Use gold and wine markers to color in the stamped sentiment; adhere to Maize G2G Cutapart.
  Trim Kraft paper into strips and adhere with a Gold Resin Gem to create the sun. The trailer and car stamp are so cute and a perfect match for the "...happy camper" stamp. They also go well with the "Enjoy the adventure" stamp below, which would be the perfect card for high school graduates heading off to college.
  This card also features the car and trailer fussy-cut images, but this time I used the "kissing" technique. The map is from the National Parks Digital Kit printed and used for the background.
  Ink the car and trailer stamps in brown, then "kiss" them onto the Art Nouveau background stamp. The images will transfer to the background image so you can stamp it onto paper. (Note the images will be reversed.)
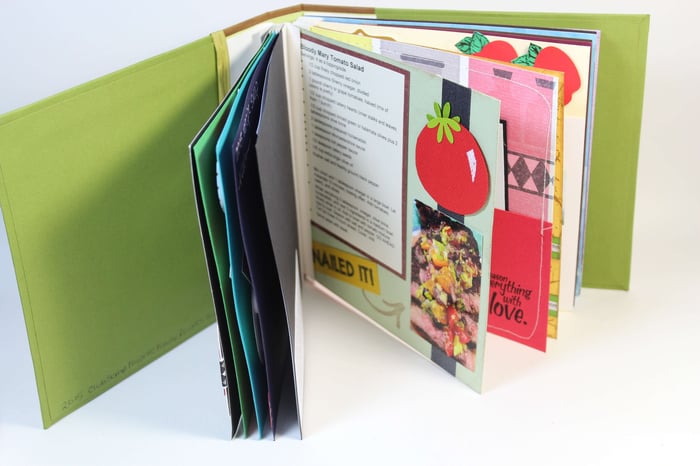
  Use various torn paper scraps to create a collage background on a card panel. Cover the entire panel in Glossy Mod Podge, and let dry. (Club Scrap's Bookbinding Glue in a 50/50 mixture with water would yield similar results.)
  Stamp Art Nouveau map background image onto Maize Plain panel. Heat emboss "Thank You" stamp with brown EP. Layer onto collaged panel when dry.
SET B: 4¼x5½” MAIZE CARDS
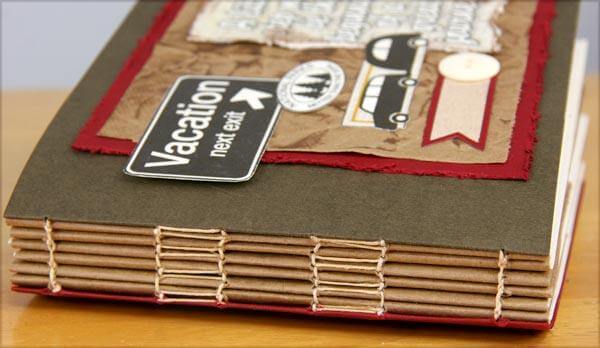
 This card was inspired by a scrapbook layout Julie posted on the blog a while ago. You can find detailed instructions HERE. To create my version, stamp the inside cover with the map background and brown ink. Using a pencil, lightly draw a rectangle in the center of the card. Draw pencil lines from corner to corner (diagonally) of the rectangle. Cut along the diagonal lines with craft knife and cutting mat.
  Fold triangles around to front of card, using brads to hold the folds in place. Fill the opening with an image from the Maize Embellishment Cutaparts. Add Greetings to Go Cutapart sentiment and ribbon to embellish.
  Stamp brown panel with map background using brown ink. Ink the recycle symbol image with embossing ink onto White Plain and heat emboss with Copper Foil EP (from Adobe Kit). Trim and round the corners. Matte with a square from the White G2G Cutapart, tearing the edges.
  Clip two corners of a White G2G Cutapart sentiment to create a tag shape. Punch hole and set copper eyelet using Crop-a-dile tool.
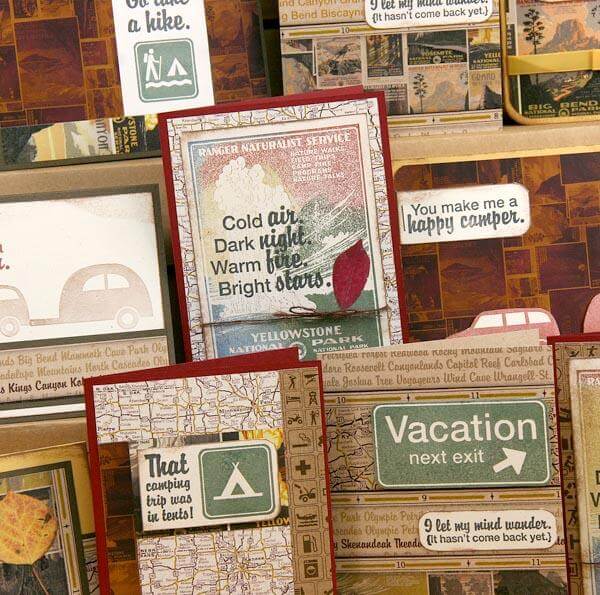
  This is another card where I inked the Yellowstone poster image with clear embossing ink and colored with chalks. I love how soft the colors are.
  Tear edges of printed Cutapart sentiment and adhere.
  I created the background of this card using the Puzzler Technique from the Carpet Tape Chronicles video series and the Yellowstone poster image stamp.
  I love this technique because now I have three additional mosaic panels to play with!
SET C: 3½x5” KRAFT CARDS
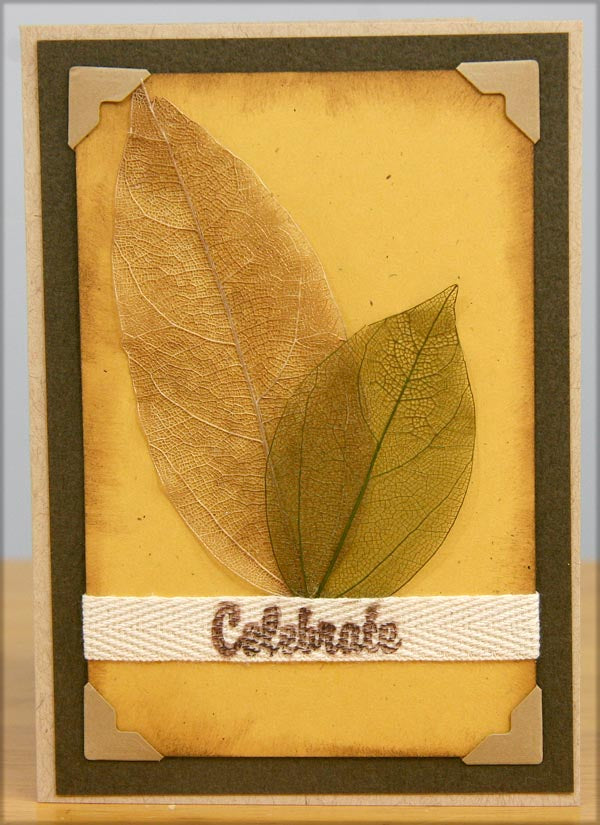 To replicate this card, glue skeleton leaves onto the Maize panel with a light coat of Bookbinding Glue. Ink the "Celebrate" portion of the "Celebrate getting older" stamp using brown marker or ink. (I used my brown Zig Writer Marker, as it makes it easier to ink only a specific part of the stamp.) Stamp onto twill ribbon.
  Adhere ribbon to panel and add photo corners to finish the card.
  This card was made from leftover paper scraps, except for the Cutapart Greeting. It was inspired by a card I saw in a magazine.
  Don't you just love the modern look?
  For this card, glue down the skeleton leaves with Bookbinding Glue and then coat the entire panel in Matte Mod Podge. I just love how the coating deepens the beautiful wine color!
  Add Cutapart Greeting and grosgrain ribbon to finish.
  Star Wars is a big favorite in our house. We also love trees, leaves and the forest. This stamp sentiment was just begging for a "forest" companion. I pulled this tree image stamp from the December 2012 Aurora Borealis collection--there are lots of other "tree" Club Scrap stamps that would work. To create a similar look, ink the tree image with different shades of green ink; applying the lightest first. Stamp several times to create the "forest" background. Stamp sentiment with clear embossing ink and heat emboss with brown EP. Distress panel edges with paper distressing tool before adhering to Kraft card base.
  This card would be perfect for a high school grad heading off to college, or anyone undertaking a new endeavor in his or her life. I hope you enjoyed this little tour of my version of the Greetings to Go. Have a great day, and "May the forest be with you!"