
If you look up retiform in the dictionary, it is defined as something being composed of crossing lines and intersections. In stamping, the retiform technique is an oldie but goodie and it's fairly easy to do.

With a quick search, you can find quite a few YouTube videos demonstrating this technique, but I'll demonstrate the basics below.
RETIFORM TECHNIQUE
Gather supplies:- Stamps
- Sticky notes for masking
- Ink
- Ink applicators, sponges, or other blending tool
- Card stock panels

After stamping your main greeting, use sticky notes to mask over the sentiment. Use additional notes to create intersections.

Apply ink with a blending tool along edges of the masks to create subtle lines.

Use a single ink, or select several coordinating shades.

Lift and rearrange masks to create a variety of shapes on a single panel. Once you remove all of the post it notes, you can see the overall design taking shape.

Reapply the post it notes to mask the areas where you DO NOT want stamping to appear. Stamp into the exposed areas. You can make it as colorful or monochromatic as you wish. (Cherry Blossoms images and sentiment.)

Rearrange the masks to add stamping where desired.

Remove all of the sticky note masks to reveal the final design.

Mat and adhere to a card base. Add embellishments as desired.

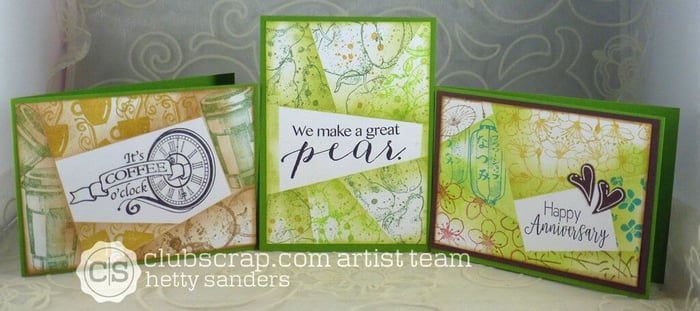
Here are some additional examples. The one below features papers and stamps from the Orchard collection.

And I couldn't resist making a coffee-themed card with Orchard papers and stamps from past CS offerings. Visit my personal blog to see more.

Go and have fun with this technique! Be sure to check out the many tutorials found online, try your favorite and share the results with us.

Hetty's blog: http://craftchaos.blogspot.com/