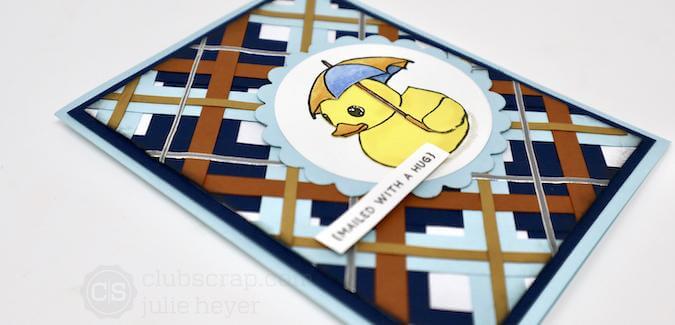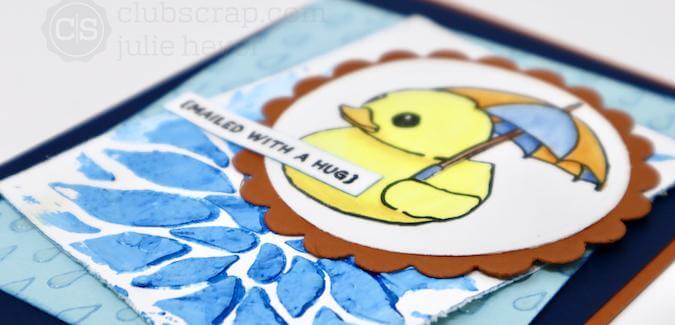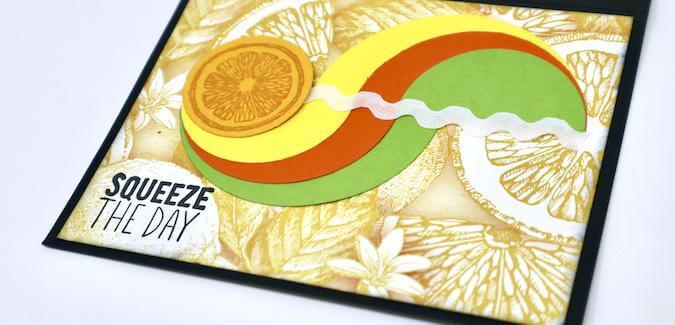

Create a unique embellishment on any card, page or project with the Split Circle Technique. I have seen this card design popping up all over my Pinterest feed recently and couldn't wait to try it on a Zest for Life card.

Split Circle Technique
Die cut several circle shapes in varying sizes with Zest for Life panels.

Trim each circle in half with a paper trimmer.

- Yellow - one each 3" and 2"
- Dk. Yellow - one 1.5"
- Green - one each 3" and 2"
- Orange - one 2.5"

Layer the largest yellow half circle with the orange and green. Adhere flush with the straight edges. Repeat a second set of half circles with the largest green layered with orange and yellow.

Place a small amount of adhesive on the back of the 1.5" Dk. Yellow circle and place into a stamping platform. Position the citrus slice stamp over the circle and pick it up with the lid on the platform. Add Tangerine Ink to the stamp and press onto the circle and repeat the step to darken the image, as needed.

Card Assembly
Trim a 4x5.25" orange print and add the sentiment with India Ink.

Adhere the split circles onto the orange print with the pieces aligned at the straight edges.

Squeeze a small line of Bookbinding Glue dispensed from a Needle-tipped Applicator along the cut edges.

Lay a piece of white rick rack over the glue and press down until it is properly adhered.

Trim a foam adhesive circle in half and stick to the back top portion of the orange slice. Adhere over the rick rack to complete the card.

Time to split some circles! Happy Crafting!
 Julie
Julie