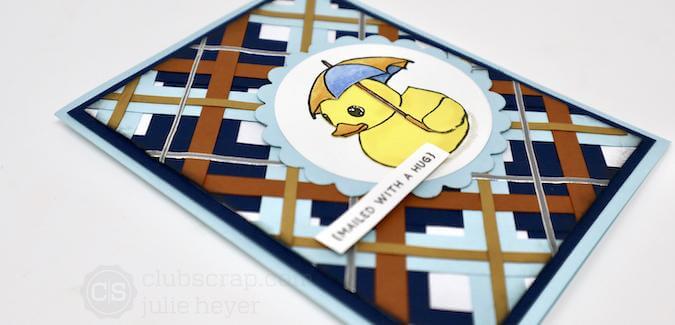

Create a whimsical card featuring the Rainy Day Rubber Ducky stamp and a paper strips plaid background made with the Pack of Panels. Do you remember my Christmas in the Neighborhood card featuring the technique? Visit the blog post for a detailed tutorial.

Plaid Rubber Ducky Card
Trim Navy (1"), Sky (1/2"), Rust (1/4") and Gold (1/8") panels into strips with a paper trimmer. (I trimmed the Gold panels into 1/8" strips after this photo was taken.)

Adhere strips with Bookbinding Glue dispensed from a Needle-tipped Applicator onto a piece of copy paper, starting with the Navy. The 2x8" grid ruler helps keep everything in perfect alignment.

Flip the panel over and trim away any overhanging paper with scissors or a paper trimmer.

Continue to adhere strips in a plaid pattern. Finish the background with Dazzles included in the Geodes Page Kit. Trim the finished panel to 3-3/4x5".
Stamped Embellishment
Place a white panel into a stamp positioning platform. Lightly stamp the umbrella image onto the panel. Keep the stamp on the positioning tool.

Remove the panel and cut along the umbrella and its handle with a craft knife.

Color in the image with markers.

Place the paper back in the platform.

Add India Ink to the stamp and press firmly to transfer the darker image onto the umbrella.

Stamp the Rubber Ducky image twice onto a Zest for Life Yellow panel with India Ink. Remove the wing from one of the images with a craft knife or scissors.

Add details with yellow and orange markers to the second ducky and fussy cut with scissors. Add a bit of white gel pen to the eye highlights.

Slip the duck's head beneath the umbrella and the body under the handle.

Add a bit of Bookbinding glue to the wing and adhere over the handle to secure.

Continue to add small dots of glue with the Needle-tipped Applicator to adhere the duck and umbrella in place.

Center a circle die over the stamped images and temporarily secure with washi tape.

Run the panel through a die cutting machine.

Stamp the sentiment onto white paper, trim and add to the panel with dimensional adhesive.

Adhere the circle to a die cut scalloped Sky shape and add to the front of the plaid background.

Let's take a closer look at the completed card.

I hope you will give this fun background technique a try and share it with all of us on our Facebook Chat Group. Happy Crafting.
Julie