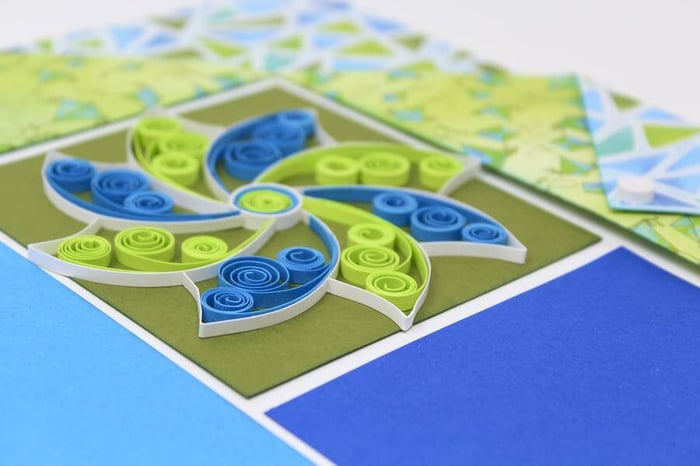

Create a whimsical quilled pinwheel made with 1/8" strips trimmed from a variety of panels. Add the embellishment to a scrapbook page made with the beautiful duplex paper from the Fly A Kite collection.
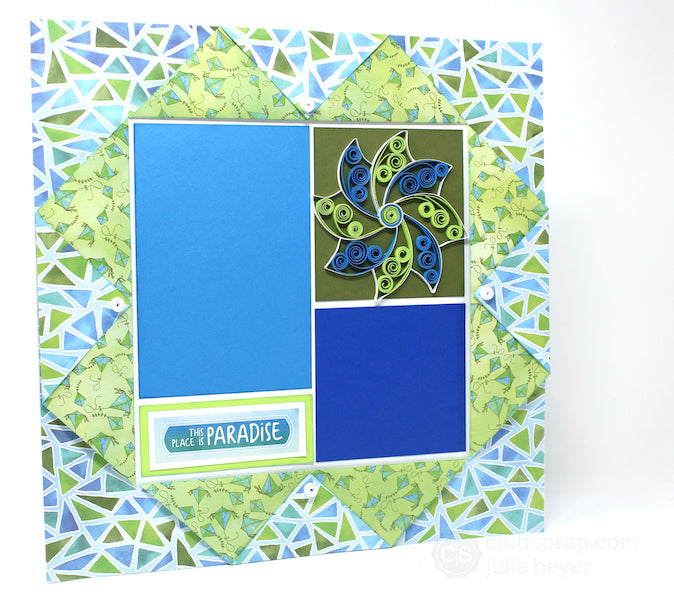
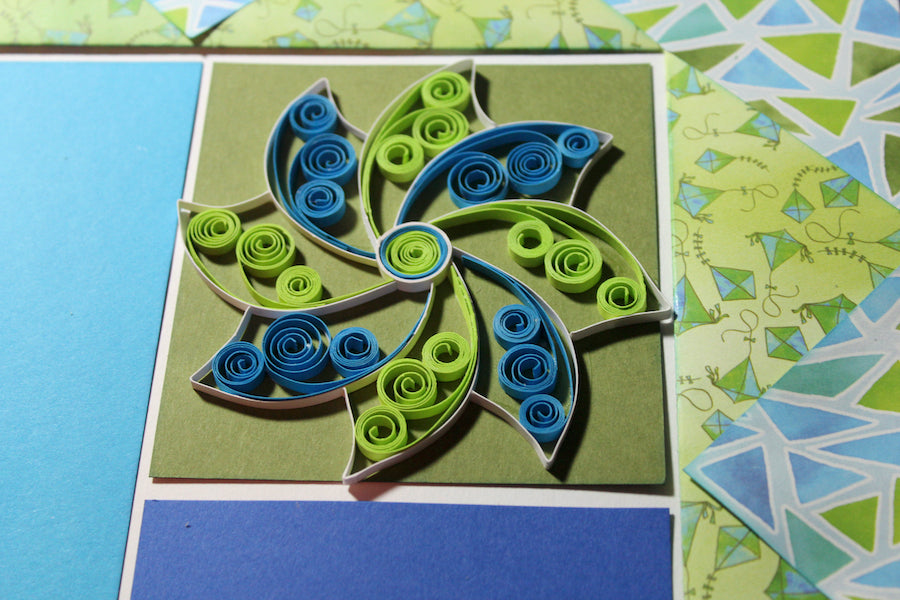
Quilled Pinwheel
Purchase and download the Fly A Kite Hybrid kit. Resize and print the pinwheel image onto scrap paper to use as a template.

Trim nine 1/8" white strips to create the framework and center of the pinwheel. Form each of the blades using the template as a guide.

Adhere each pinwheel blade to the center circle with Bookbinding Glue dispensed from a Needle-tipped Applicator.

Glue each blade to its adjacent blade using the template as a guide for placement.

Trim and roll 12 Blue and 12 Lt. Green 1/8" strips with a quilling tool or rounded toothpick.

Create rolled shapes with small tails secured with a dot of Bookbinding Glue. Make one smaller Lt. Green circle wrapped with a Blue strip for the center.

Page Assembly
I have always admired this vintage sketch from the 2003 Aromatherapy collection.

Trim the 12x12" Fly A Kite duplex print as shown in the diagram and photo below. Visit this post for detailed cutting instructions.


Adhere the print onto a 12x12" White paper.

Cut panels to fit the opening, leaving an 1/8" reveal and gutter between the trimmed panels. I added a Blue Confetti panel which paired with the Fly A Kite print perfectly. Tip: A grid ruler is the perfect tool to assist with precise panel alignment.


Trim the sentiment from the Hybrid cutapart.

Adhere the sentiment to the Green block.

Cover a large acrylic block or nonstick surface with glue.

Spread the glue into a thin layer on the block.

Carefully press the pinwheel frame into the glue.

Pick up the frame with tweezers and carefully place it onto the Dk. Green panel.

Press the frame onto the panel with even pressure to ensure proper adhesion.

Adhere the quilled papers to the frame with the same glue application technique.
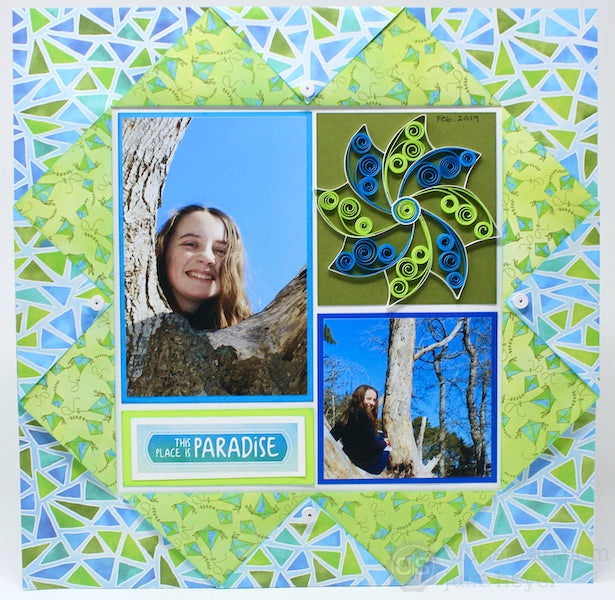
Tightly roll four white 1/4" diameter circles and glue to the points on the duplex print.

Let's take a look at the finished page.
Check out these posts for more quilled project inspiration.
Quilled Embellishments - Take Wing Blog Hop
Join me on the Club Scrap Chat Group to view my Facebook Live Quilling Demo. Not a chat group member? Answer a few simple questions, and we will accept your request in no time!
Julie