Audio generated by DropInBlog's Blog Voice AI™ may have slight pronunciation nuances. Learn more
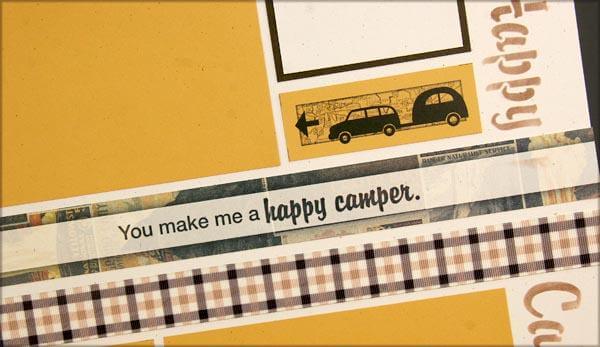
Hello, Happy Campers! Are you enjoying the National Parks Deluxe Kit as much as I am? Here is the most recent page I created with this magnificent collection.
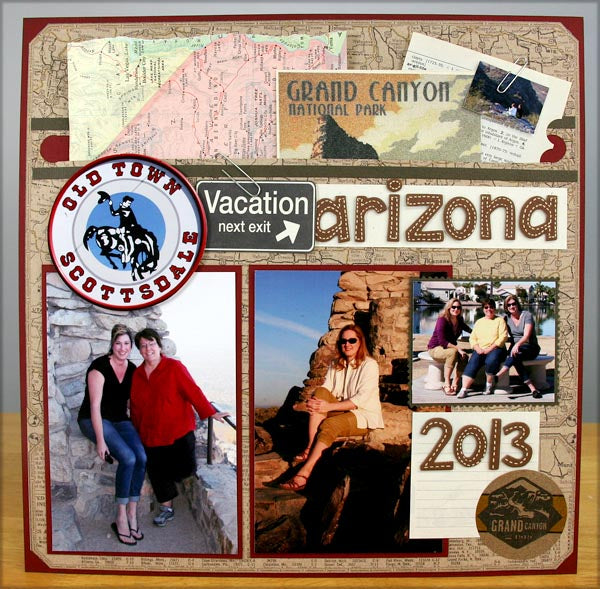
Pocket Page Layout on National Parks Kraft Print
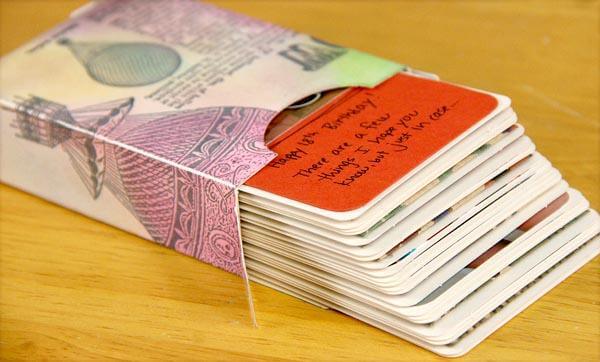
I often collect maps, flyers and memorabilia while traveling. Once I get home, I don't always know what to do with these keepsakes. A pocket page is the perfect parking spot for this sort of thing. 1. Trim .25" from the left and right edges of a 12x12 National Parks Kraft Print. On the back of the paper, mark two horizontal guidelines 2-3/8" and 3" from the top edge of the print with a grid ruler and pencil. 2. Use a 5/8" circle punch to create holes approximately 1/4" from the left and right edge of the Kraft print; punch within the pencil guidelines. 3. Cut along the pencil guidelines with a ruler and craft knife to create an opening. 4. Temporarily place memorabilia onto the pocket page, allowing room for it to peek out above the slit. Draw pencil guidelines around the item on the back side of the print. 5. Place adhesive above the opening and around guidelines. Keep the area where memorabilia will be placed free of adhesive. 6. Layer the prepared paper onto 12x12 Wine Plain. 7. Insert memorabilia into the pocket and reflect on all the fun you had while collecting it! 8. Finish the layout with photos, a title, captions and journaling.
Pocket Page National Parks Scrapbook Page
I hope you'll give this technique a try! Happy camping to you . . . Kay at Club Scrap
 Pocket Page Layout on National Parks Kraft Print
 2. Use a 5/8" circle punch to create holes approximately 1/4" from the left and right edge of the Kraft print; punch within the pencil guidelines.
 3. Cut along the pencil guidelines with a ruler and craft knife to create an opening.
 4. Temporarily place memorabilia onto the pocket page, allowing room for it to peek out above the slit. Draw pencil guidelines around the item on the back side of the print.
  5. Place adhesive above the opening and around guidelines. Keep the area where memorabilia will be placed free of adhesive.
  6. Layer the prepared paper onto 12x12 Wine Plain.
  7. Insert memorabilia into the pocket and reflect on all the fun you had while collecting it!
  8. Finish the layout with photos, a title, captions and journaling.
 Pocket Page National Parks Scrapbook Page
 I hope you'll give this technique a try! Happy camping to you . . . Kay at Club Scrap