
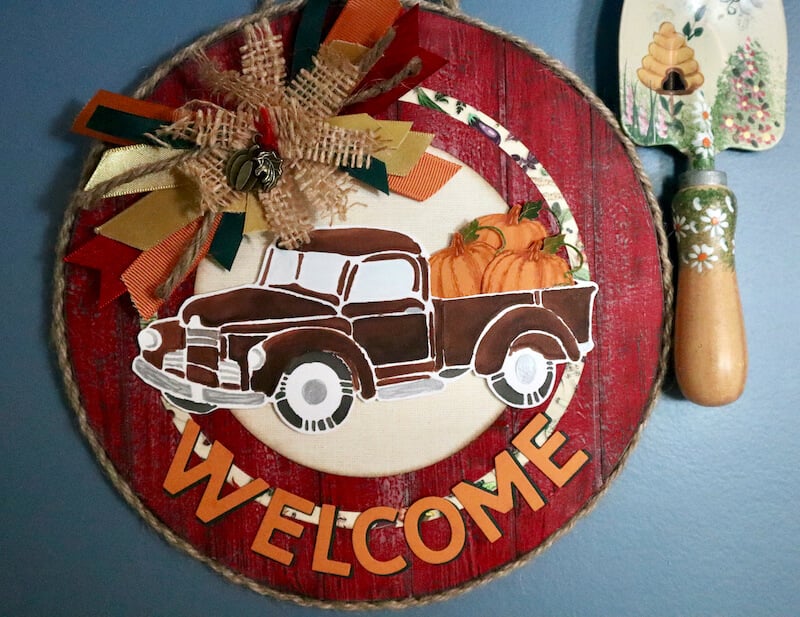
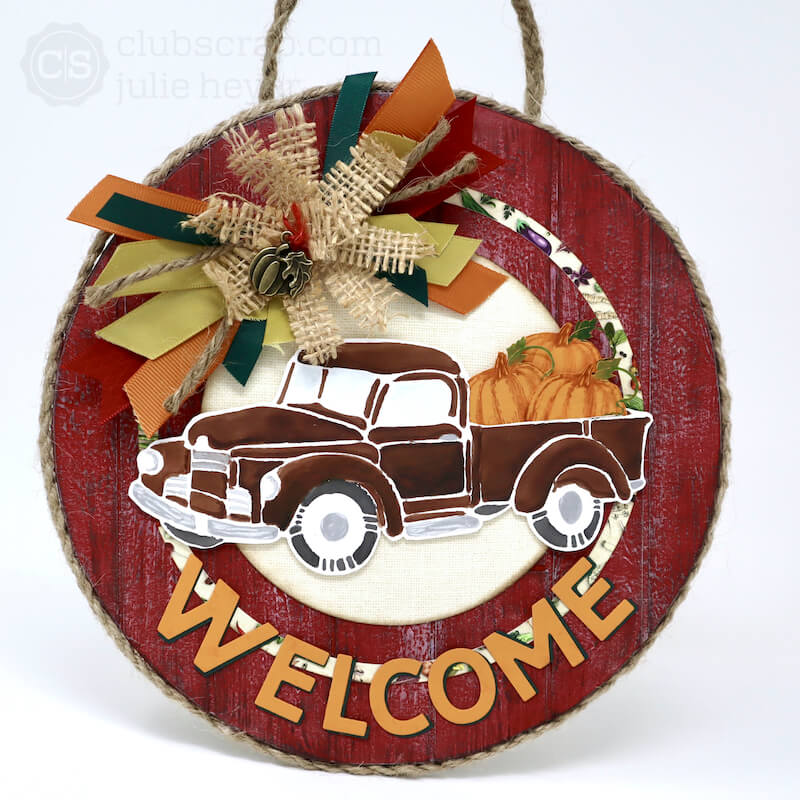
Transform a Club Scrap pizza box and the Farmstand collection into a welcome sign with some clever techniques to give it a vintage vibe. I was inspired to recreate this project after seeing tons of ideas featuring an old truck with pumpkin cargo on Pinterest. They are all the rage!
Welcome Sign Tutorial
Pizza Box Prep
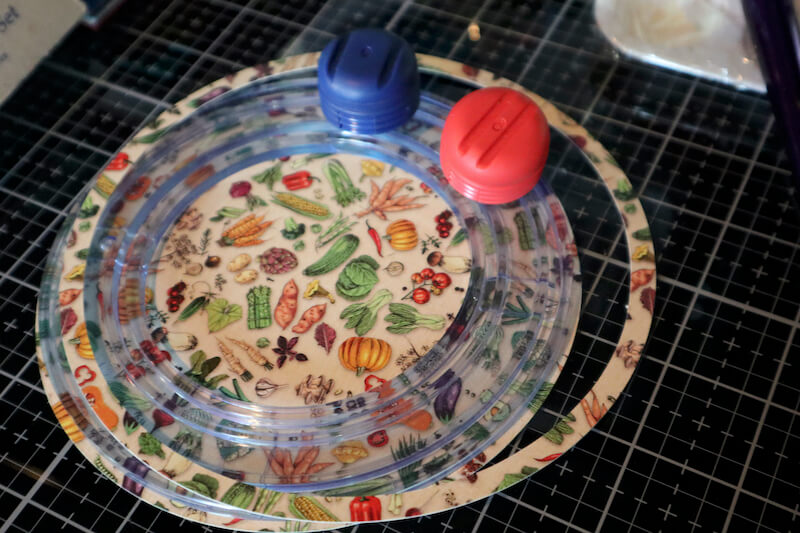
Deconstruct a pizza box and lay it flat on a cutting mat. Cut around an 8.5" diameter salad plate twice with a utility craft knife. Laminate the two circles together with Bookbinding Glue, ensuring the fluting of the corrugate on each circle is running in opposite directions. Brush glue evenly over the circle and cover with kraft packing paper. (This is often included in a retail order from Club Scrap!)
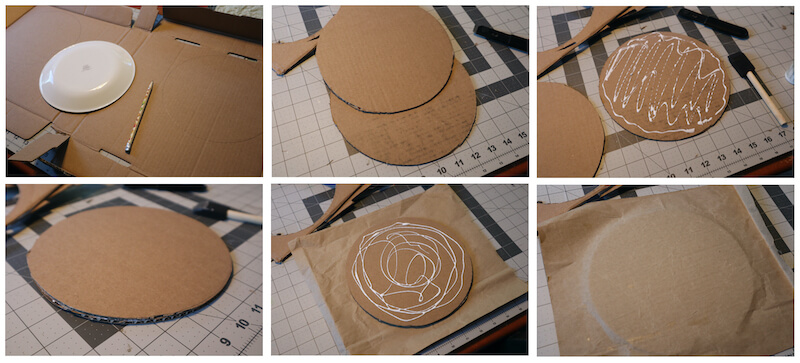
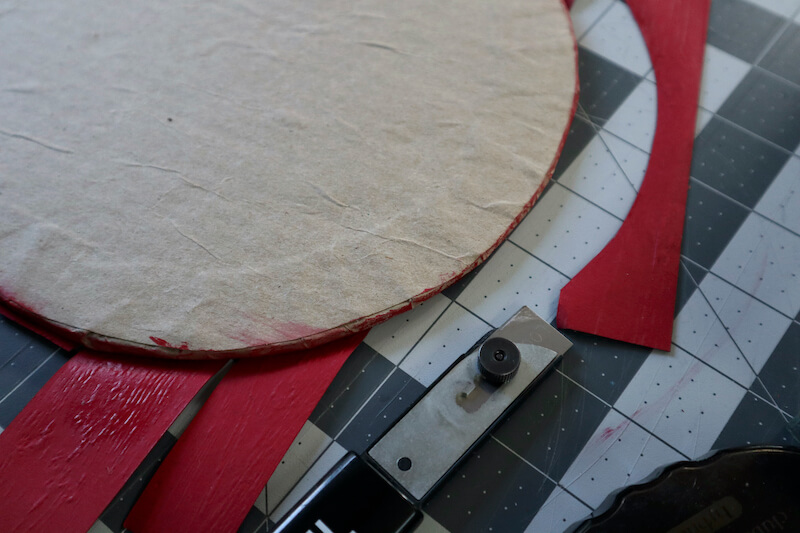
Flip the circle over and remove the excess paper, leaving a 1" reveal around perimeter of the circle. Cut small slits into the paper approximately 3/4" apart with scissors. Brush Bookbinding Glue on the back of the flaps and wrap around the edges of the circle. Trace a circle using the cut pizza box as a template on another piece of kraft packing paper. Cut out the shape with scissors, brush glue on the back of the pizza box circle and cover with the kraft paper.
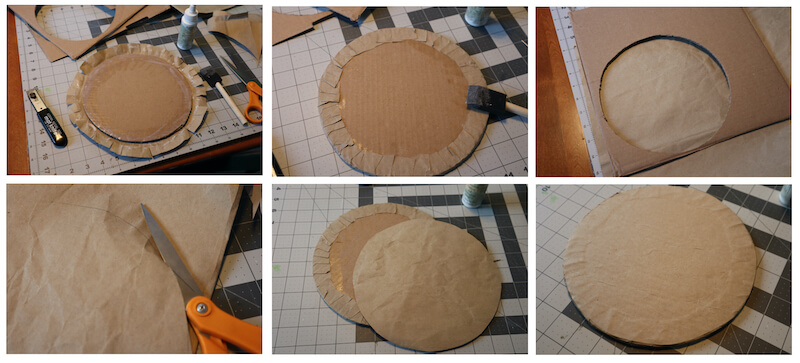
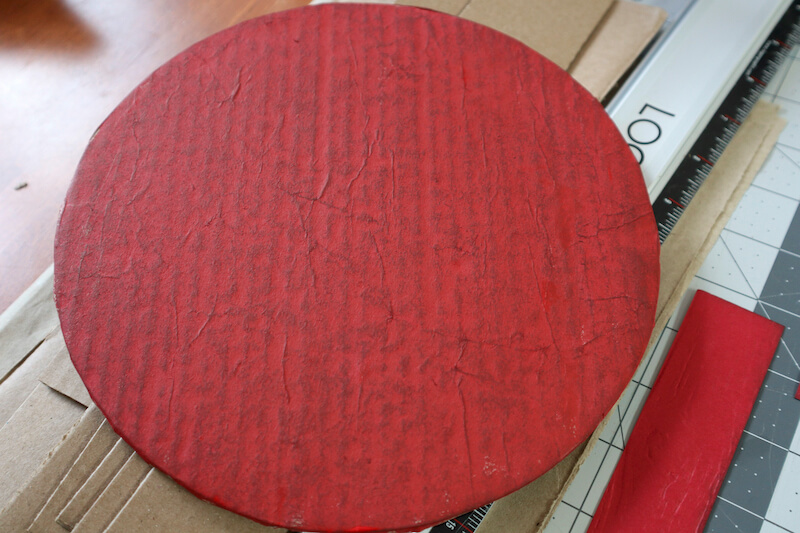
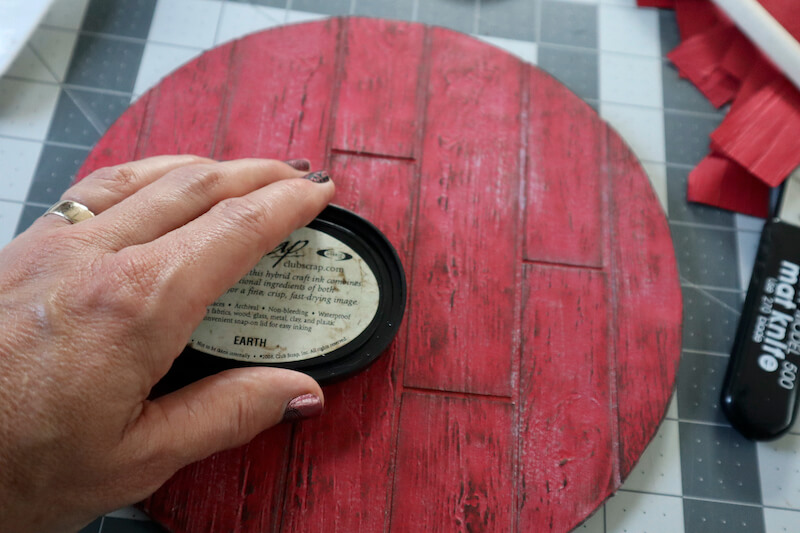
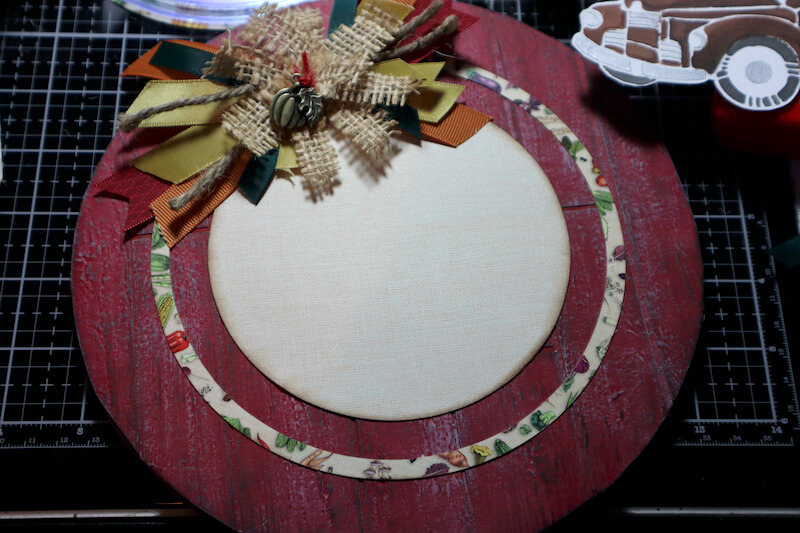
Cover the front of the circle with light coat of red acrylic paint. Once dry, rub over the surface of the circle with an Earth Ink pad.
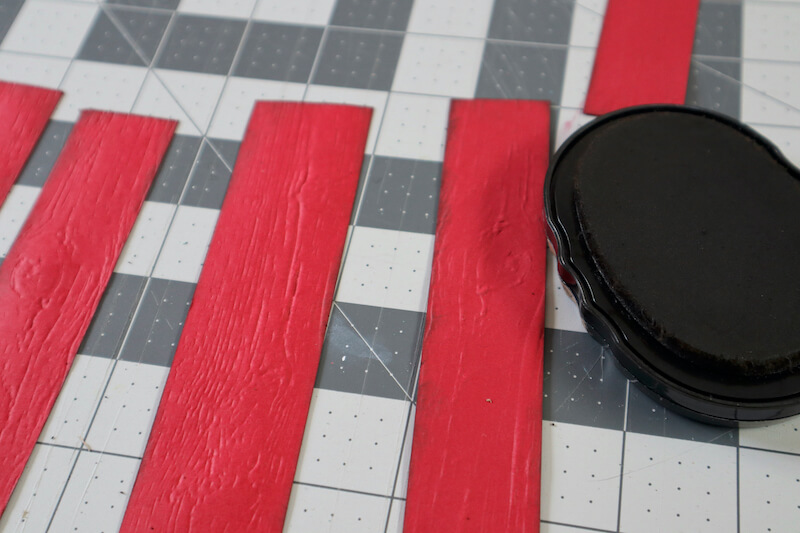
Faux Barn Board Technique
Emboss several Red panels with a wood grain folder.
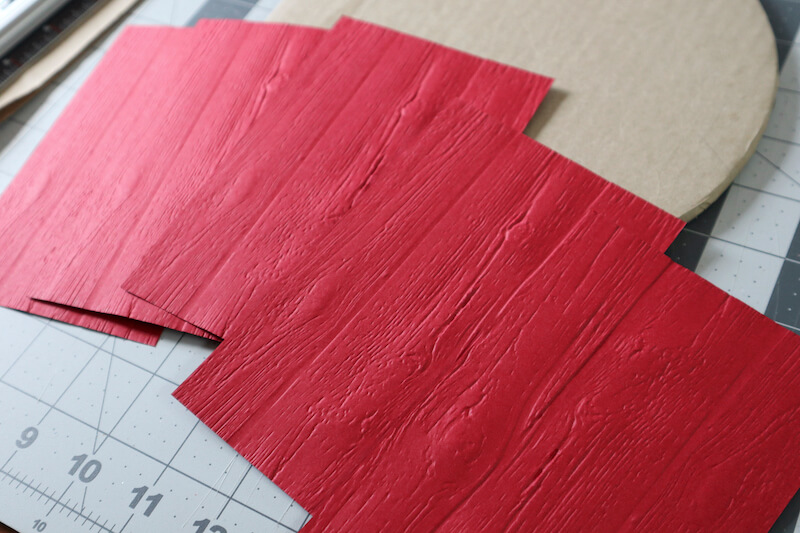
Trim the embossed papers into strips of varying widths.
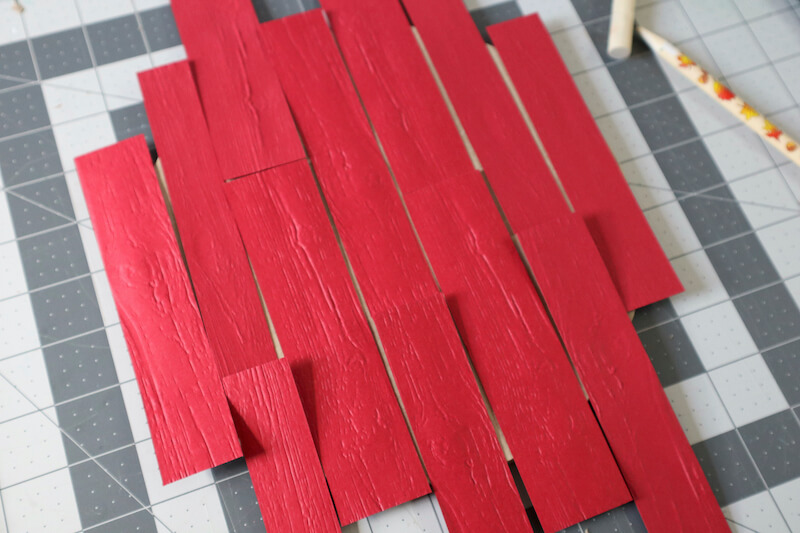
Distress the edges of each strip with Earth Ink.
Brush Bookbinding Glue on the back of each strip and adhere to the front of the prepared pizza box circle in a brick-like pattern.
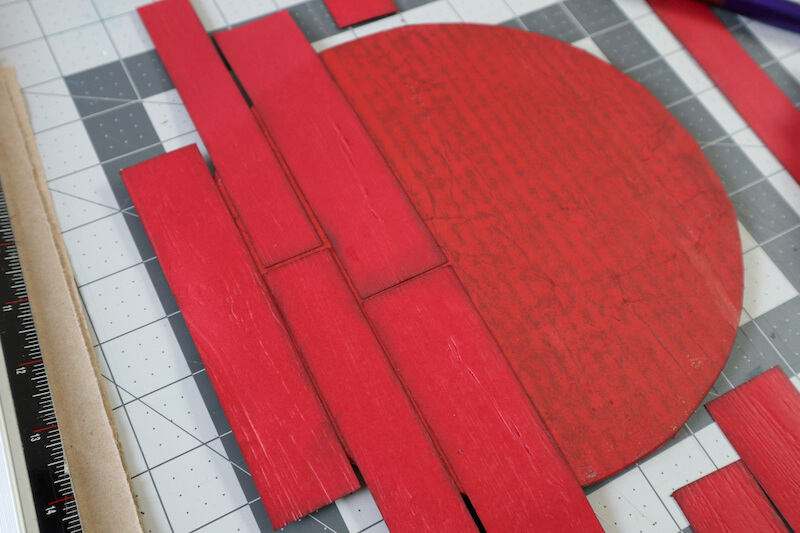
Continue to adhere the strips until the circle is covered.
Flip the circle to carefully remove the overhanging strips with a utility or craft knife.
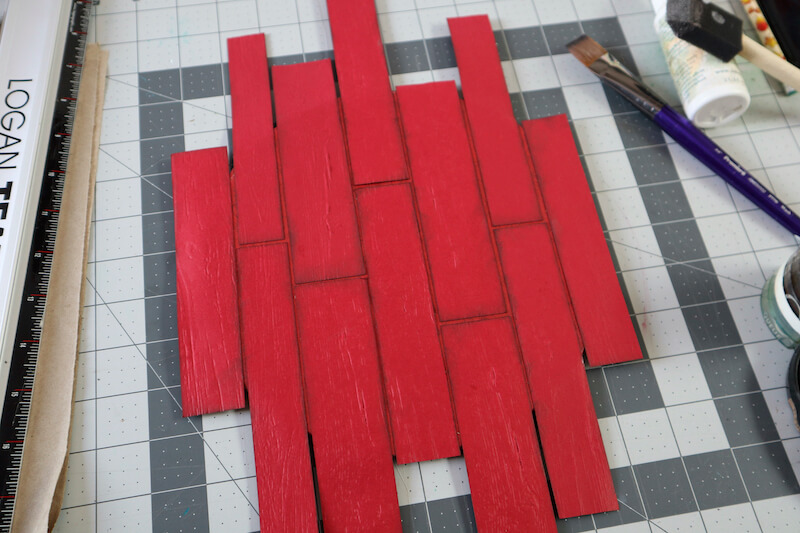
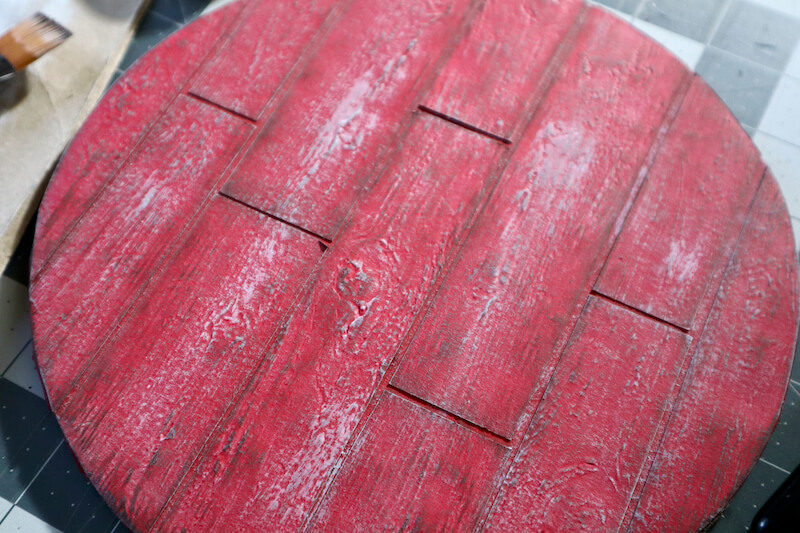
Apply a small amount of white acrylic paint to a paint brush and wipe off the excess paint on a scrap paper. Swipe the paint brush over the raised surface of red embossed strips.

Rub an Earth Ink Pad over the surface of the panels to achieve the faux barn
Embellishments
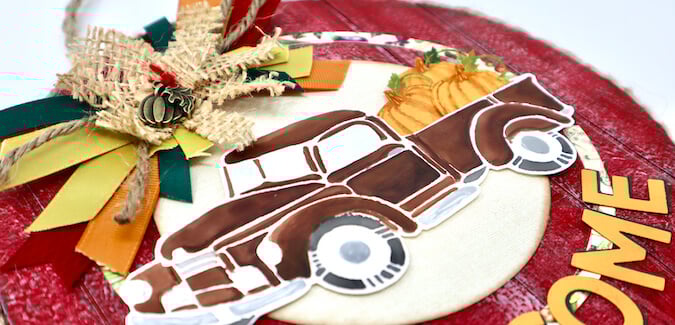
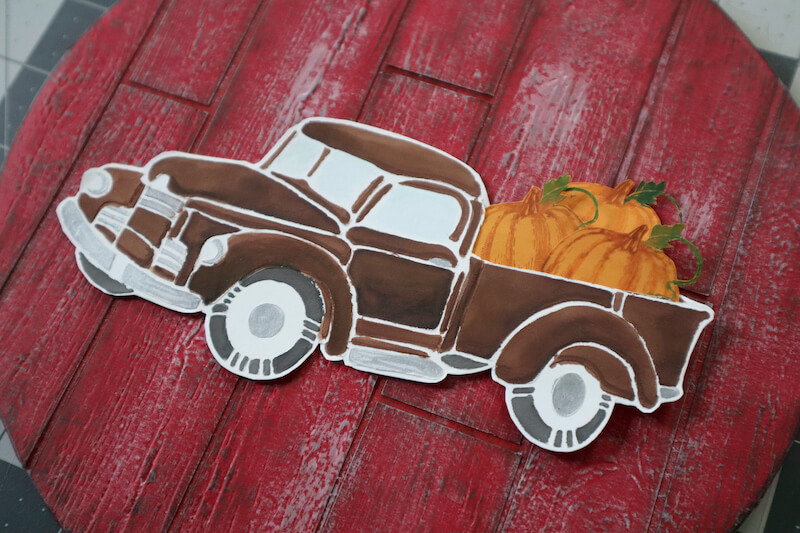
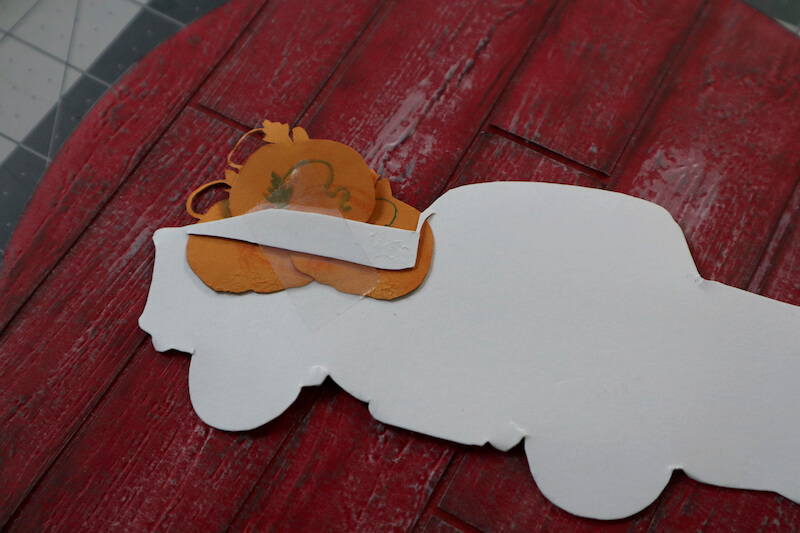
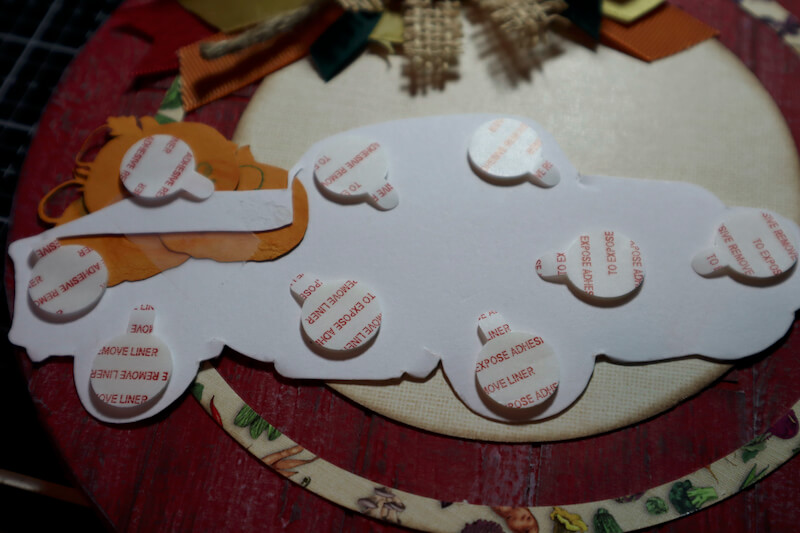
Fussy Cut three stamped pumpkins and a painted texture paste stenciled truck.
Make a slit in the bed of the truck with a craft knife. Insert the three pumpkins and secure on the back of the truck with clear tape.
Trim a circle from the Farmstand Border Print and a circle frame from the Card Print.

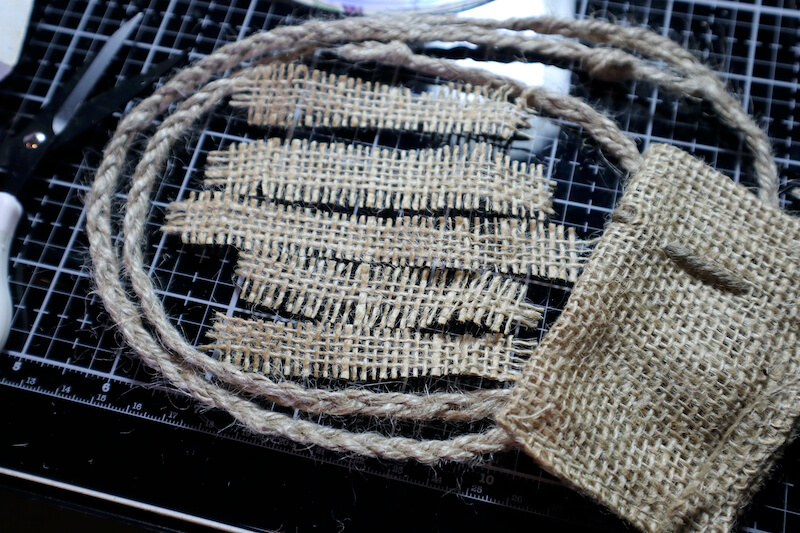
Cut apart the mini burlap bag and trim into small strips. Weave together three yard lengths of twine (from my stash) into a long braid.
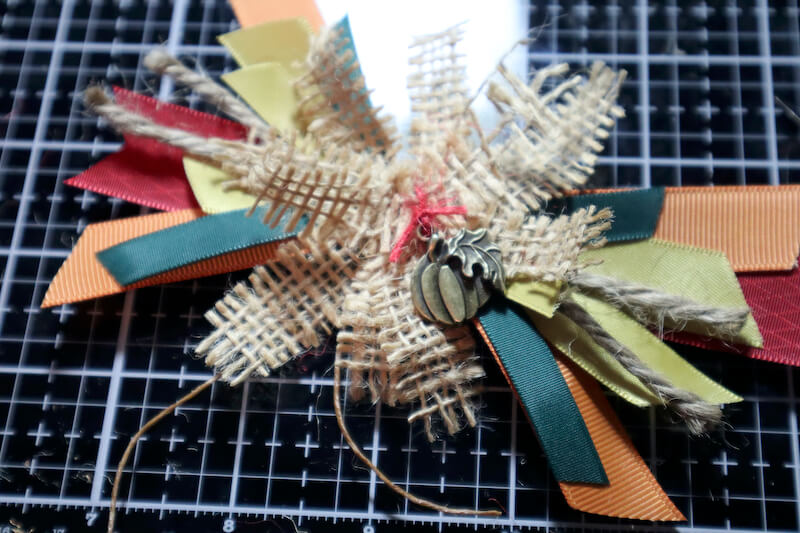
Lay the burlap strips in a criss cross fashion over an 8" length of red thread. Gather and secure in the center with a knot. Add a pumpkin charm to the center with an additional piece of red thread. Trim ribbons from the card and page kits into varying lengths, lay across an 8" length of wax linen thread, gather together in the center, and secure with a knot. Adhere the cluster of burlap strips over the ribbons with hot glue.
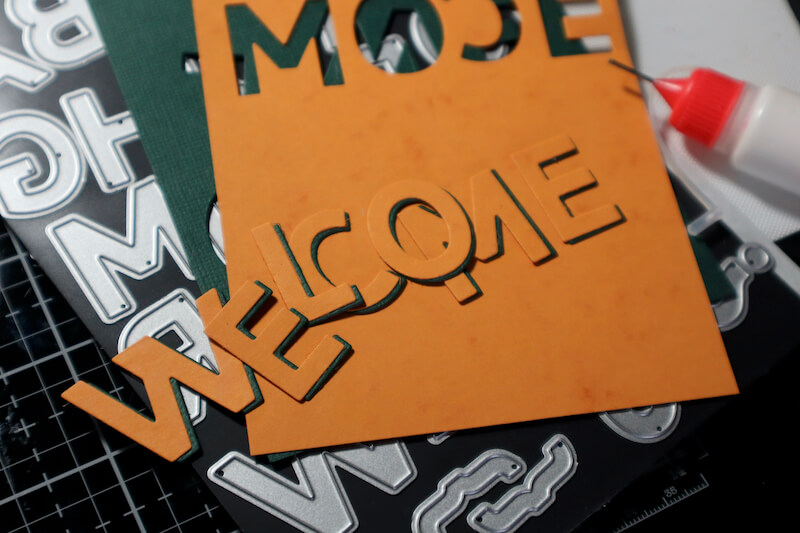
Die cut letters to spell WELCOME from Orange and Green panels. Offset the orange over the green letters to create dimension.
Adhere all the embellishments on the sign.
Position the truck over the large circle with foam adhesive circles.
Let's take another look at the finished project.
Happy Fall Crafting!
 Julie
Julie