Jac's artwork in the Reunion collection simply made me happy! The whimsical tree featured on the UM Borders & Backgrounds sheet of stamps kept calling out to be decorated for the seasons. I chose to create a wall hanging, and here are the steps to help you make one of your own . . . 1. Stamp the tree image on four sheets of white paper with Earth Ink.
2. Mix Blue metallic Gelato and Sapphire Blue ink on an acrylic block palette with a water brush.
3. Paint the sky blue on all four stamped panels and set aside to dry.
4. Stamp the tree onto the non-textured side of Reunion Red paper. Cut out the leaves and adhere to one stamped tree image, texture side up, with small dabs of Bookbinding Glue.
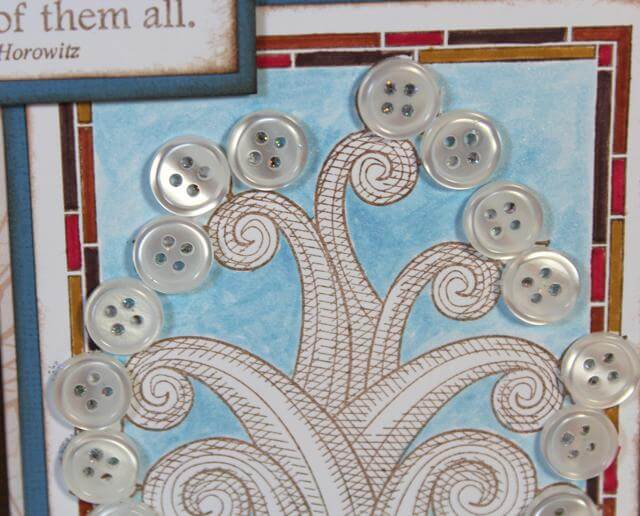
5. Adhere white buttons with silver glitter glue to the leaves on the second tree panel.
6. Fill in the leaves of the third stamped tree with Leaf Green Gelatos and a water brush; set aside to dry. Punch pink flowers and adhere to the top of the leaves with glue. Add a center to each flower with Platinum Pearl Liquid Pearls.
7. Fill in the leaves of the fourth panel with Dark Green Gelatos and allow it to dry. Embellish the leaves with green glitter glue.
8. Color the borders with four coordinating markers.
9. Create a hybrid print with your favorite digital scrapbooking application. (I use iScrapbook.) Print onto white paper and trim to 7- 7/8 x 10-3/8". Layer onto 8.25 x 10.75" Brown paper to create a base for the tree panels.
10. Matte each panel with Red, Tan, Brown or Blue papers from the Reunion collection and nest onto the hybrid print/base created in step 9.
11. Stamp the Autumn Garden sentiment onto white paper with Earth ink and nest onto a Blue matte.
12. Attach the sentiment to the to center of the artwork with 3D foam adhesive squares.
Hang on the wall and enjoy!


