
Thanks to Tricia's efficient crafting methods, Club Scrap's page kits and card kits rarely produce scraps. However, when transforming a page or card kit into a project, the potential for leftovers increases, and I hate to see those beautiful snippets go to waste. The solution? Create eight Little One cards with scraps left over from a recent project.
Little One Cards
After assembling the Little One Photo Drop Box, I had quite a few paper strips and a handful of Cutaparts and embellishments left over.
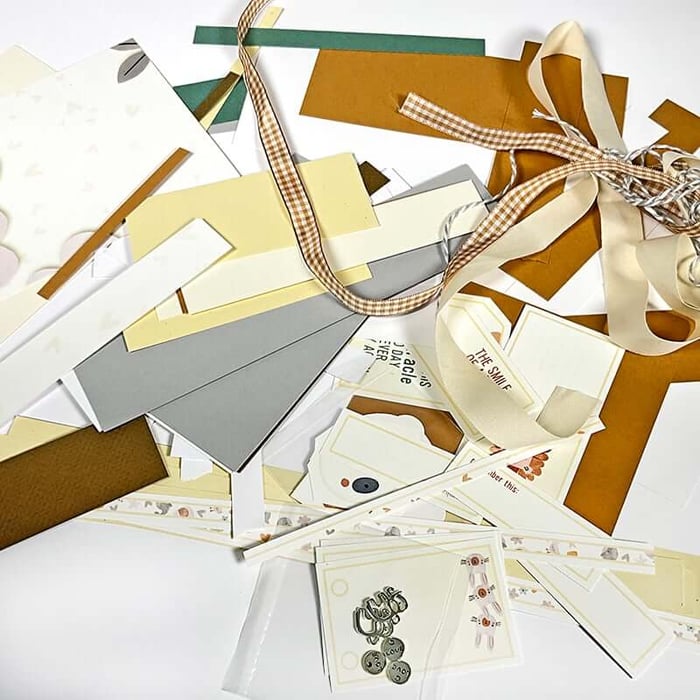
I decided to put those paper strips and scraps to good use by collaging them onto thin, double-sided adhesive. Plain papers from my stash create the card bases, and the remaining embellishments enhance each card.
Gather Supplies
I have two favorites when it comes to double-sided adhesive for "scrappy" cards. For A2 cards, I simply trim these 8.5x11 sheets* into four equal (4.25x5.5") panels. For larger cards or decorative panels for other projects, I like this 5" wide tape*. I can tear (or cut) it to any length to fit my needs. It works great as nested panels for A6 and A7 cards; of course, it works for A2 as well. I always keep a supply of these two products on hand. Both work equally well as a substrate for arranging the strips, and each material only adds 9 - 10 cents to the cost of each card.
To replicate my cards, pair your paper scraps with the following supplies:
- Double-sided Adhesive*
- Embellishments
- Stamps, Card Cutaparts or Sentiment Dies
To create each panel, simply remove the backing from your adhesive sheet, place it sticky-side up onto a non-stick work surface, and start adding scraps. You can create simple stripes, a herringbone pattern, or any other pattern that strikes your fancy. Side note: I don't know why, but I find creating panels with scraps very soothing and therapeutic. Once I sit down, I have a hard time stopping—it can be very addictive.
Once the adhesive panel is completely covered, trim it to size on your paper trimmer. (A cotton ball dipped into rubbing alcohol will remove any residual adhesive "goo" from your trimmer blade. Just be careful—safety first!)
*As an Amazon Associate, Club Scrap earns from qualifying purchases. This means we may earn a commission if you make a purchase through links on our site. Thank you for supporting us!

Card Assembly
After completing the scrappy panels, peel the backing and carefully adhere it to a nesting mat, or directly onto the card base. Then it's time to embellish!
The finished size of each card below is 4.25x5.5", unless otherwise noted.
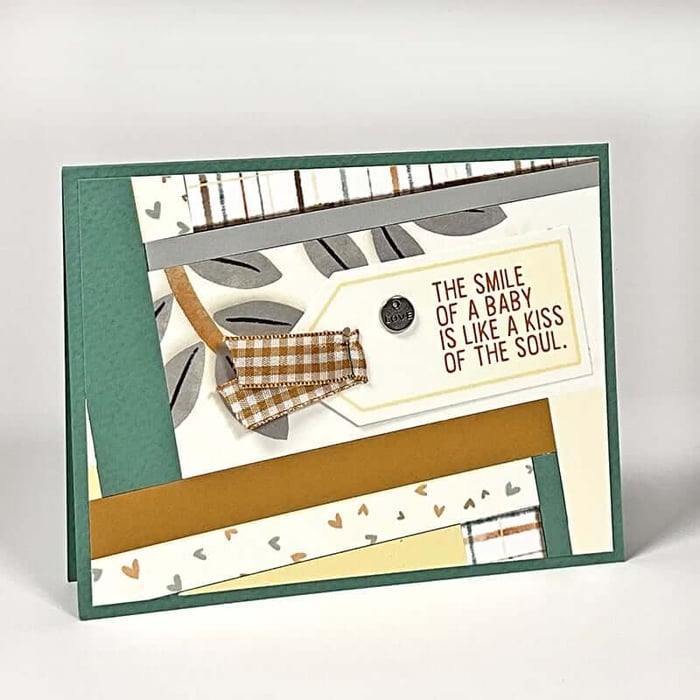
When designing the cards, I usually start with leftover sentiment cutaparts. In this case, the sentiment on the tag was perfect for a card—just staple a bit a of ribbon at the top, add the "love" charm, and add it to the panel.
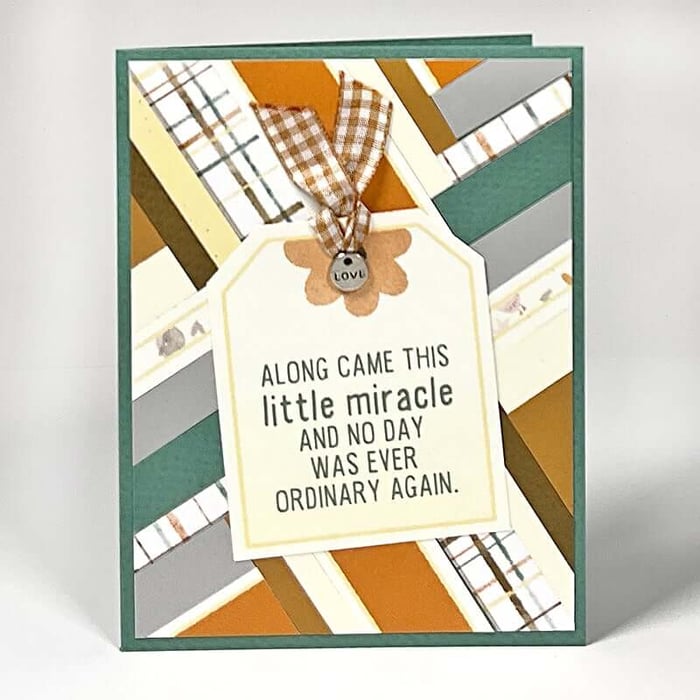
This card features another sentiment tag with ribbon and charm accent.
Once the pre-printed cutapart sentiments are gone, I usually see if there are other "alter-able" pieces available. The journaling cutapart below is customized with a sentiment stamped with Ash ink. (Starry Night 12.24)

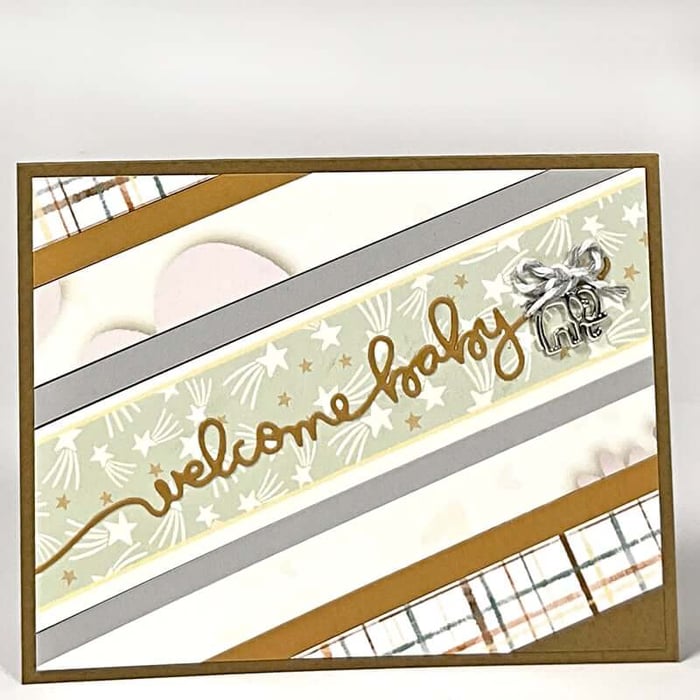
Once THOSE options run out, it's time to improvise a bit more. I found this sentiment die in my stash (still in the package—yikes!) It was the perfect size to die cut leftover strips from the project.
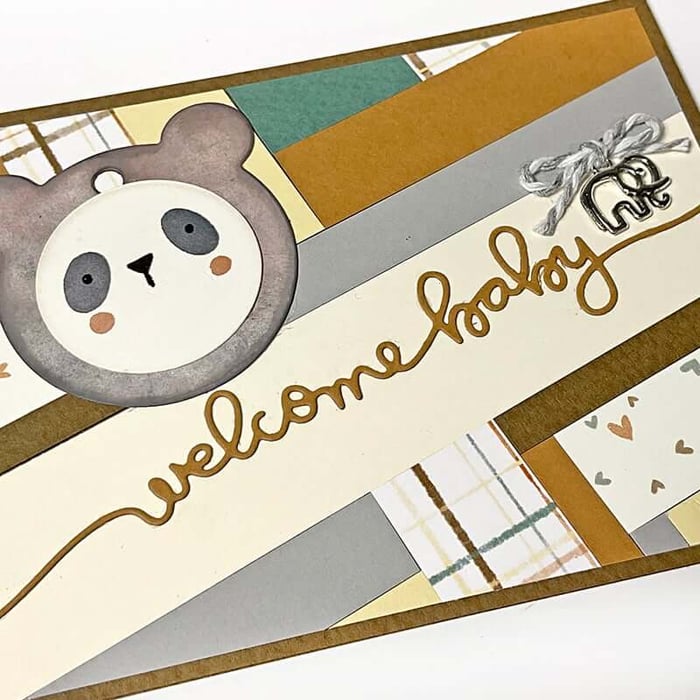
Apply Ash ink to the Bear Tag with an Ink Applicator Brush; center the panda bear (cut out with a 1.5" circle die*) onto the tag. Tie a bit of baker's twine onto the elephant charm and add all elements to the scrappy panel.
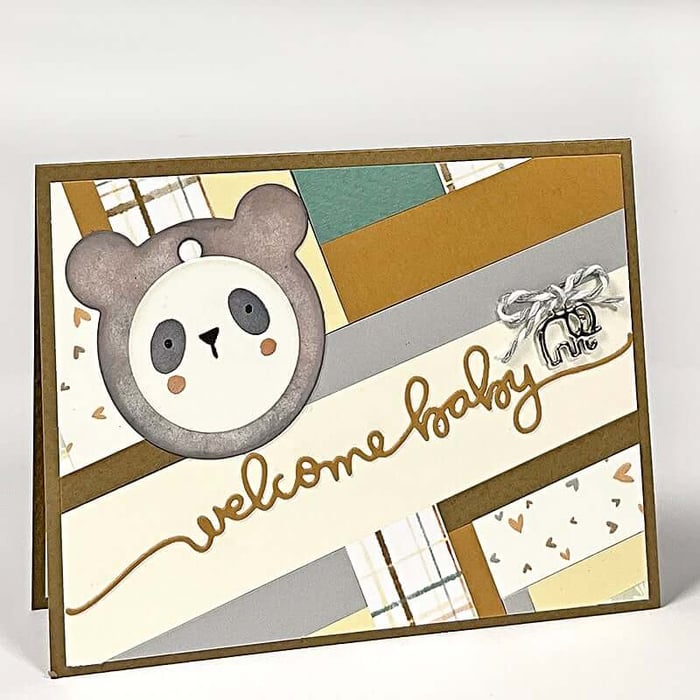
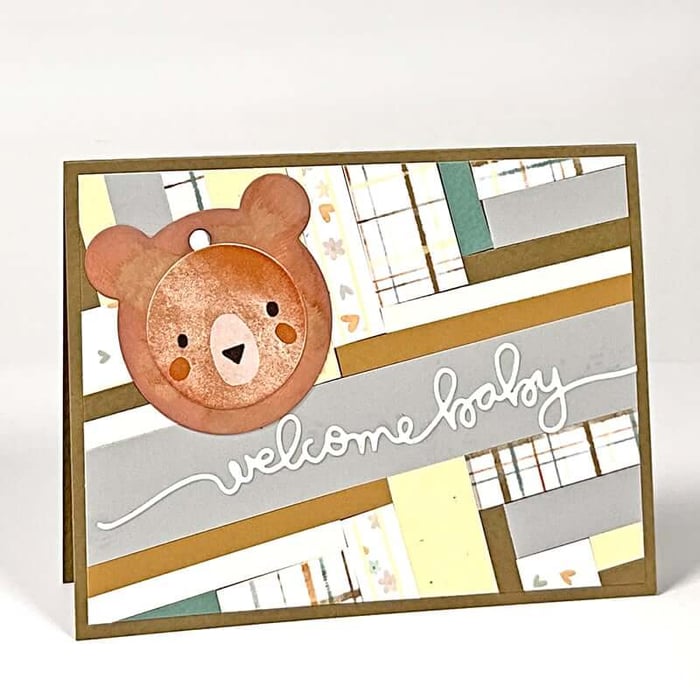
A repeat of the above card, but this time a blend of Earth and Mahogany ink was applied to the Bear Tag.
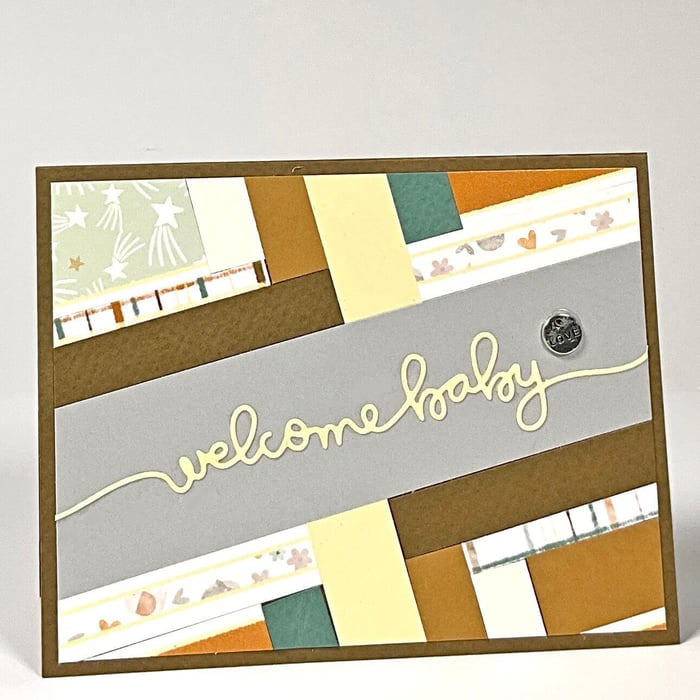
As you can see, the cards got simpler as I ran out of supplies—but no less interesting due to the fun design of the scrappy panels.
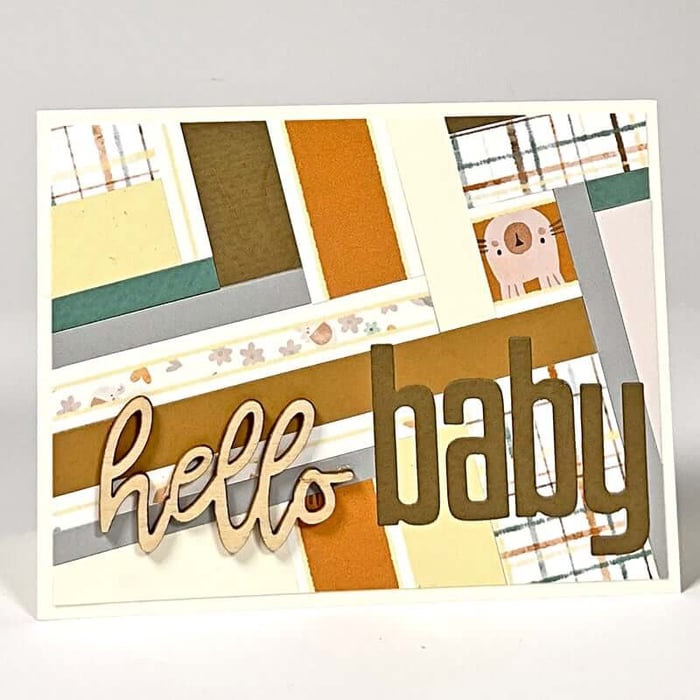
The final card mimics the design I created on one side of my baby-themed Photo Drop Box; I paired the "hello" woodcut (Bright Blooms 05.24) with die cut letters to create the word "baby". Since the woodcut is pretty dimensional, this card will likely accompany a hand-delivered gift.
If you like what you see here, be sure to visit the links below for additional inspiration and tutorials.
- Unique Cards from Scraps
- Crafting with Scraps
- Scrappy Cards
- Scrappy Borders
- Woodland Christmas Cards
- Scrappy Stripes
- Get Scrap Happy
I hope you find inspiration in my Little One cards. I challenge you to give this a technique a try the next time you find yourself unable to part with your precious CS scraps!
We invite you to share your finished artwork on our Facebook Chat Group. Not a member of the group yet? Simply answer a few questions and we'll get your request processed in no time!