Even though I prefer to enjoy a bit of the fall season before anticipating the holidays, members always seem to appreciate an early release of our special edition Christmas collections! (Remember, this kit will not ship to you automatically. It must be purchased separately.)
We have several choices for you including a scrapbook collection that makes eight layouts, a "Stamper's Kit" that features stamps, papers, and instructions to make twenty cards, and a digital hybrid kit! The design was inspired by elements from the Garden Shed collection. You'll spot them if you look carefully!
THE SCRAPBOOK COLLECTION
LAYOUTS 1 & 2
The six-pack of kraft tags features a darling little tree die cut in the lower right corner. If the small tree still happens to be stuck in the tag, save it for later! Top the tags with the multi-colored rayon ribbon in the kit.
There is a wide cutapart strip with three small squares. Ink the edges of the three corresponding small square cutparts with CS® Earth ink, and adhere to the frames with Foam Adhesive Circles.
LAYOUTS 3 & 4
Adhere the rusty tin star to the peak of the roof on the cottage for a sweet touch.
LAYOUTS 5 & 6
If you're in the mood, trim the cute frame shapes from the cutapart sheet with a scissors or ruler and craft knife. If you're not in the mood, skip that step and simply place the entire rectangular cutapart on the layout.
LAYOUTS 7 & 8
Use our new needle-tipped glue applicator to adhere the kraft die cut trees to the layout if they are available.
Adhere a tin star to the top of the tree on the Ivory Tree/Cottage print. Adorable!
Click HERE to purchase the scrapbooking kit.
THE STAMPER'S COLLECTION
Wow, this is a deal. Check out the twenty cards you can make with the stamper's collection. It includes a 5.5x8.5" sheet of unmounted stamps, 16 sheets of paper, fibers, ribbon, and charms. It makes a total of twenty cards if you follow the assembly instructions included with the purchase of your kit. (Be sure to pick up a 20-pack of our super-smooth A2 ivory envelopes if you plan to make the cards.)
CARDS 1-4
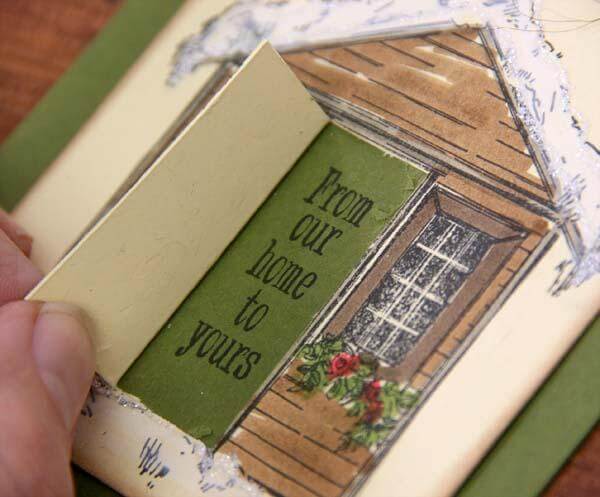
Use your favorite markers to color the house. Add snow to the ground and rooftop with a white opaque marker and accent with glitter glue. Cut an opening on the top, bottom, and right edge of the door and fold open to reveal a stamped greeting.
CARDS 5-8
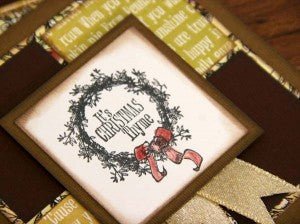
(I'm about ready to start an indoor herb garden, grow some thyme, and add it as an embellishment to these cards!) I developed a special "four-sheets-cut-the-same-way" formula for this set of cards. I wanted to highlight the small thyme wreath and quote while still featuring all of the fun prints and colors of the collection. Each matted wreath is complemented with a folded metallic gold ribbon.
CARDS 9-12
After designing the four "thyme wreath" cards, you'll have some scraps. Use the scraps to create this set of four additional cards. Adhere the bronze bow charms with our new Needle-tip Glue Applicator. Stamp on dark paper colors with our incredibly opaque White Pigment Ink.
CARDS 13 & 14
Stamp the pinecone and sentiment with our pretty Mahogany ink for a lovely color combination with the Ivory, Gold and Burgundy papers.
CARDS 15 & 16
We love puns around here, and we thought the sentiment sort of sounded like "Have yourself a merry little Christmas." We hope it brings you a groan and a grin!
CARDS 17 & 18
This is a colorable classic. In spite of the detail on the tree and sentiment, it colors in quickly with your favorite pencils or markers. Finish with a simple knotted ribbon at the bottom of the card.
CARDS 19 & 20
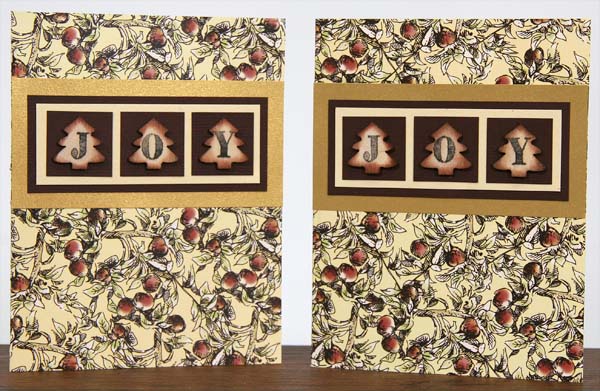
The kit includes an 8-pack of these darling wood trees. Trim the UM stamp of the word "joy" into separate letters and adhere to the 1" squares. (The word "joy" also fits within the door on the cottage stamp.) You'll want to hand-deliver these two cards or add a little extra postage to accommodate the bulk.
Have a great "thyme" preparing for the holidays, and pick up your scrapbook collection, stamper's kit, and digital hybrid kit today!
Tricia
