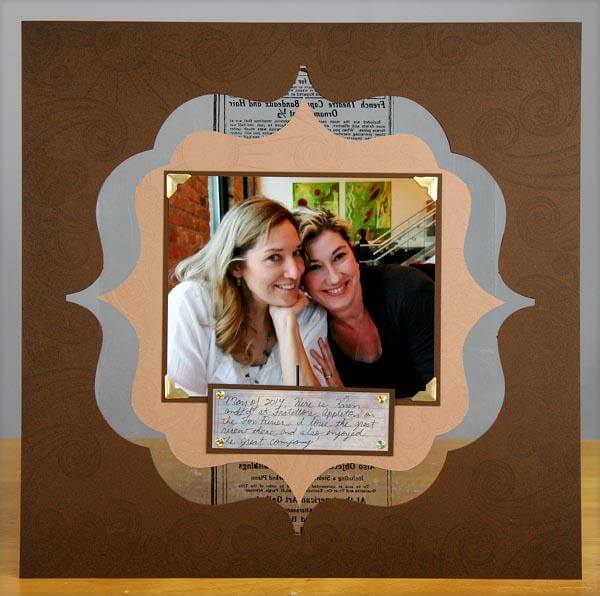
The Reunion kit features a clever Nestable Die Cut and Frame combination. The die cuts and "parent sheets" can easily be incorporated into your pages "as is".


However, there's more than one way to use a die cut. Combine the smallest die cut with the largest frame to create a "floating" layout!


Floating Die Cut Technique
1. Remove all die cuts from the parent sheets. Locate the Tan and Blue (smallest) die cuts, and the Red and Brown parent sheets (largest opening). Rubber stamp and alter, as desired.


2. Add photos, journaling and embellishments to the Blue and Tan die cuts.

3. Center the Tan die cut within the Brown frame face down on your work surface. TIP: This desk blotter with a printed grid aids in centering the project. Add adhesive.

4. Trim a 4x12" transparency and center vertically onto the piece. (I used a printed transparency featured long ago in the Extra, Extra! collection.)

5. Add adhesive to the transparency.

6. Nest the Red frame right side up onto the Brown frame, aligning all edges.

7. Nest the Blue die cut onto the Tan die cut, aligning all edges.


And that's all there is to it. I hope you give this floating die cut technique a whirl!
Kay