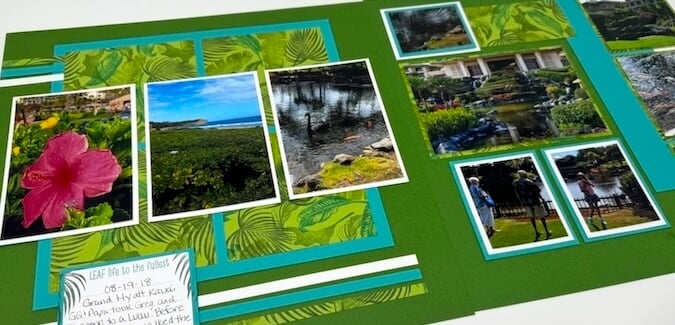

Create your own custom "print" when you pair plain 12x12 paper with Club Scrap's Rainforest Stamps. I love making my own printed papers. It's easy with stamps, paper and a few other basic supplies.

Do you have lots of paper in your stash? I bet the answer is yes. Have you ever started to put together a layout but didn't have coordinating patterned papers to match? I'll show you how easy it is to design your own printed paper to feature on a layout created with Club Scrap's super efficient page formulas.
Custom Print Tutorial
Gather three coordinating plain papers, plus two sheets in a complimentary color to serve as the base of the two-page spread.

Select the Lt. Green to create your custom print. Gather four foliage images (Rainforest Stamps) along with Spruce, Moss, Leaf, and Ocean Hybrid Inks.

Place the paper on a Club Scrap Grid Paper Pad or other cushioned surface ideal for stamping. Assign one ink color to each leaf variety. Begin stamping the images onto the paper as shown.

Repeat the stamping process until the paper is completely covered with images. Tip: Be sure to rotate the images with each impression, and allow some images to land "off" the edges of the paper.

The custom print is now ready to be incorporated into your layout!

Trimming and Assembly
Once your custom printed paper is complete it's time to incorporate it into scrapbook pages. I created my layout with Club Scrap's March 2024 (member-exclusive) Page Formula.

Trim the three 12x12" papers (gathered earlier) according to the cutting instructions using the following paper assignments: White (Paper A), Aqua (Paper B), Lt. Green Custom Print (Paper C), and two Med. Green (Paper D).
After the paper trimming and sorting is complete, refer to the sketch to dry fit all of the trimmed pieces.

Ensure perfect placement and alignment of the papers and mats with the zero center on a 3x14" Grid Ruler.

Add Bookbinding Glue in a Needle-tipped Applicator to each of the 1/4" paper strips.

Adhere the strips along the bottom of the left page with the Grid Ruler as your guide.

Before cropping, test fit your photos over each mat to ensure proper placement.

Create your own journalling block from one of the small photo mats. Stamp a sentiment along the top with Leaf Ink. Add leaf images to the top corners with Spruce Ink.

Draw faint pencil lines with the help of a Grid Ruler.

Crop photos to fit each mat. Adhere permanently to the pages. Divide one larger photo in half and crop to fit the two small photo mats on the bottom of the right page.

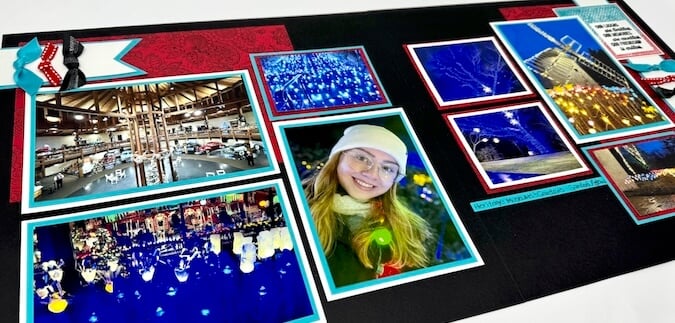
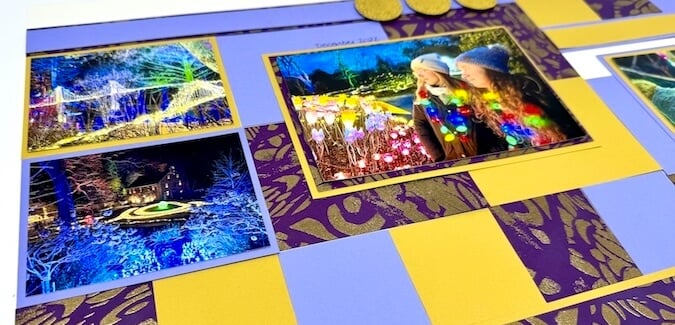
Let's take another look at the finished layout.
Now that you know the secret to crafting your own custom prints, we hope you'll give this technique a try. We encourage you to share your finished pages on our Club Scrap Chat Group on Facebook. Not a group member yet? Simply answer a few questions and we will get your request processed in no time.
Happy scrapping!
CS Hybrid Ink Pads

$6.35
Exclusively Club Scrap®, this hybrid craft ink combines the most exceptional ingredients of both pigments and dyes for a fine, crisp, fast-drying image! Don't forget to stock up on the coordinating re-inkers. Each ink pad sold separately. Please select the… Read More
3x14 Acrylic Ruler
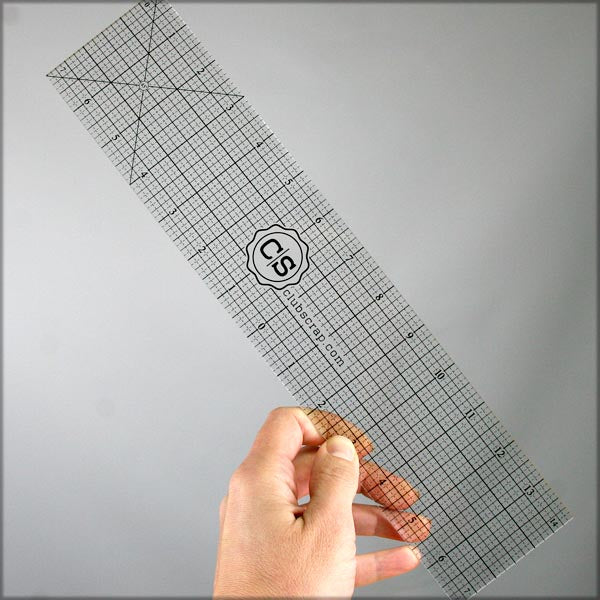
$15.50
You'll love our full-size clear grid ruler with easy to read grid marks, and big numbers. We've designed it just for paper crafters! You'll get perfect measurements every time; ideal for all your craft projects. Be sure to check out… Read More