Members: Have you downloaded your October Bonus Formula yet? If you're not using this incredibly valuable monthly membership benefit, I suggest you start ASAP!
Not sure where to find it? Check your inbox for your member-exclusive email with important links to the bonus formula, instructions, video tutorials and more. It is sent to active members* on their scheduled shipping day and looks like this:

*An active member is defined as one who paid for and received the current monthly kit.
October Bonus Formula
Layout Sketch
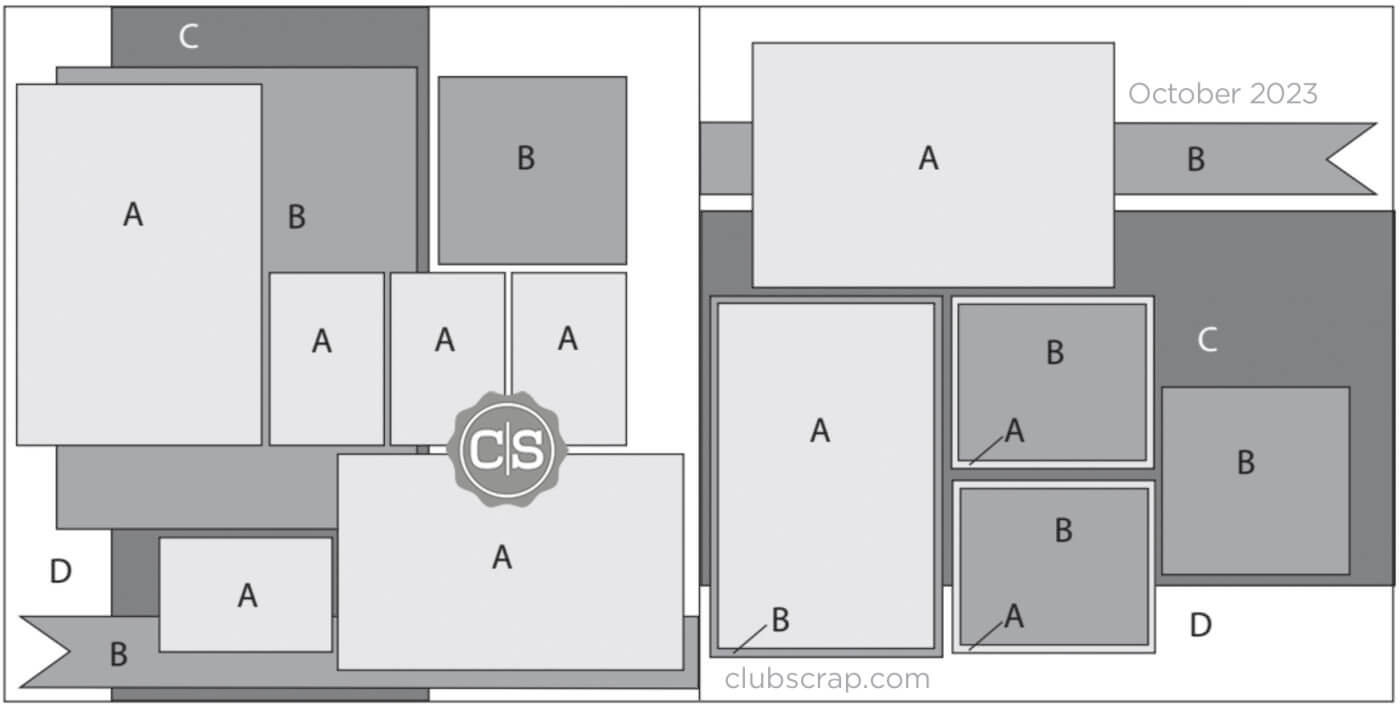
The October Bonus Formula creates a well-balanced two-page spread that is home to a dozen (or more) photos. To make the layout, gather five 12x12 papers. Follow the trimming instructions on the printable document, then assemble the pages using the sketch as your guide.
October Bonus Layout
To replicate my layout, gather the following Chocolate papers: Brown (Paper A), Red (B), and Card Print (C). Two Kraft Plains (from my stash) form the base of the two-page spread (Paper D).
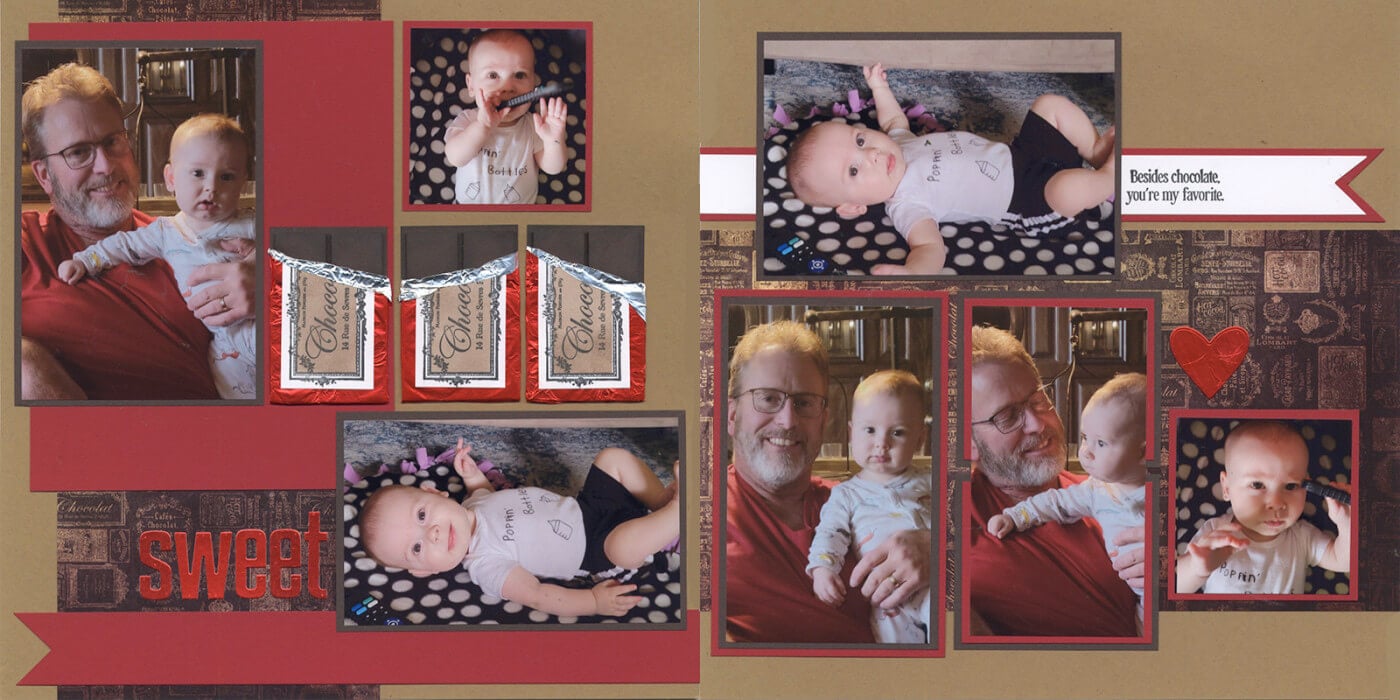
As you can see, I strayed very little from the original sketch this time.
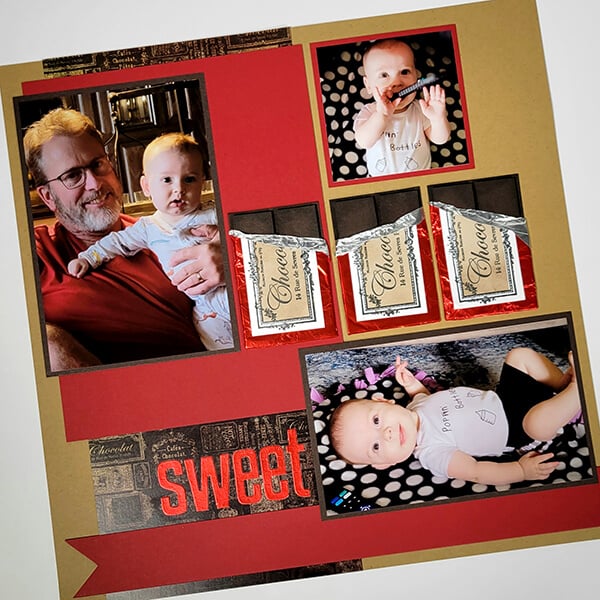
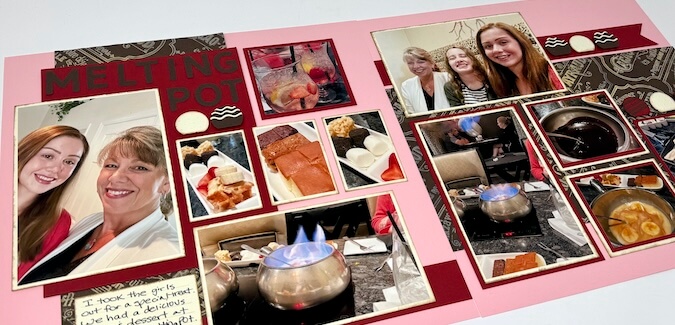
On the left page, I was inspired by Julie's stamp blog to transform three 2x3" panels into faux chocolate bars. (Scroll to the bottom for the "how to".)
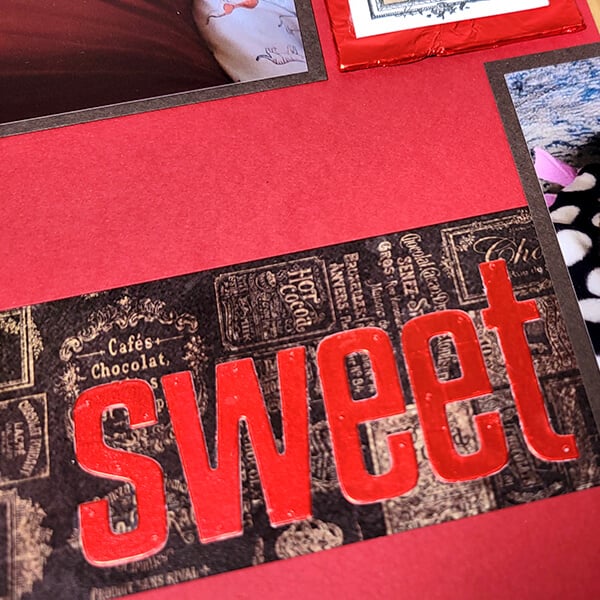
To create the page title, lightly coat a 3x3 paper scrap with Bookbinding Glue. Carefully apply a 3x3 piece of Red Foil Wrapper to the paper; burnish with a bone folder and allow to dry. Once dry, cut out the word "sweet" with alphabet dies.
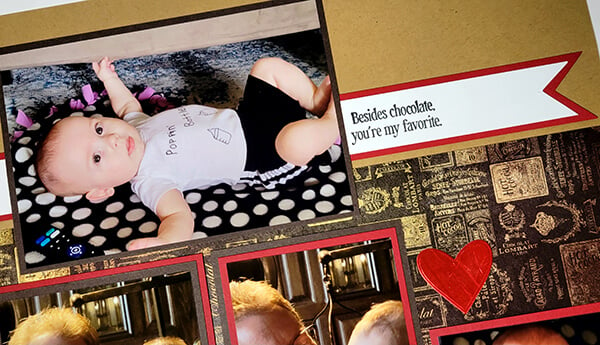
On the right side, trim a scrap of white plain to nest onto the banner at the top of the page. Add the sentiment with India ink.

Die cut a heart shape from the Red Foil panel created earlier.

In lieu of two smaller photos, crop a single vertical photo at 3x5-5/8" to span the space created by the 3.5x3" stacked double mats.
These formulas are designed to help you make even more pages, above and beyond the eight in your monthly page kit, while utilizing paper and supplies you already own.
Have you scrapped the October Bonus Formula yet? If so, inspire others by sharing your work on the Club Scrap Chat Facebook group. Hope to "see" you there!
Faux Wrapped Chocolate Bars
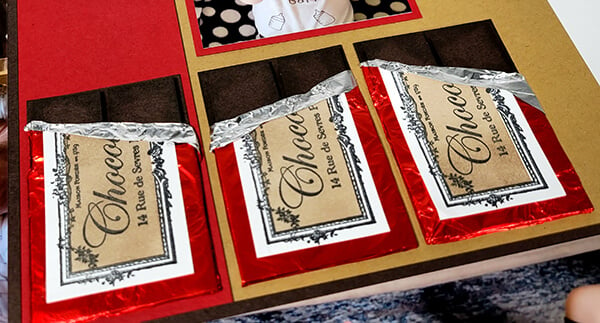
- Trim one 2x3" rectangle into six 7/8" squares. Ink the edges with Earth Hybrid ink.
- Mount two squares at the top end of each of the remaining 2x3 panels with foam adhesive.
- Adhere a 1-7/8x2" scrap of mat board at the bottom of the 2x3 panel (to match the thickness of the dimensional squares).
- Trim one 6x6 Red Foil Wrapper into four 3x3 squares.
- Apply adhesive to the center of the 1-7/8x2" mat board and carefully place the foil wrapper on top. Gently fold the top edge at an angle to expose the faux chocolate squares, and reveal the silver side. Wrap the remainder of the foil around to the back of the Brown panel and secure with tape.
- Stamp the "Chocolat" label onto a white scrap. Crop the label with a trimmer, leaving about an 1/8" reveal.
- Mask the perimeter of the border with sticky notes. Fill the center of the label with color using a ink applicator brush and Earth Hybrid ink.
- Trim the top edge of the label at an angle (to match that of the turned down foil). Adhere the stamped label to the Red Foil, tucking it underneath the silver edge. Repeat for the remaining two Brown panels.