The overlay stencil included in the 50s Kitchen Deluxe kit is a classic! Take advantage of the opacity of acrylic paints to create a classic page embellishment.
1. Squeeze a small amount of black and white acrylic paints onto a palette. Place the full cat clock portion of the stencil onto a sheet of 50s Kitchen Red Plain and carefully paint the opening with black acrylic.

2. Remove the stencil and allow the paint to dry completely before moving to the next step. Use a heat tool to hasten drying time.

3. Align the clock face/numbers onto the stenciled cat and paint the openings with white acrylic. TIP: Use a very small amount of paint. Too much paint will seep beneath the stencil and create a blurry image. (This happened to me, so I had to return to the step one and try again.) Carefully lift the stencil and allow the paint to dry.

4. Align the fourth and final overlay over the eyes/mouth of the cat and paint with black acrylic. Wash the stencil while you wait for the image to dry.
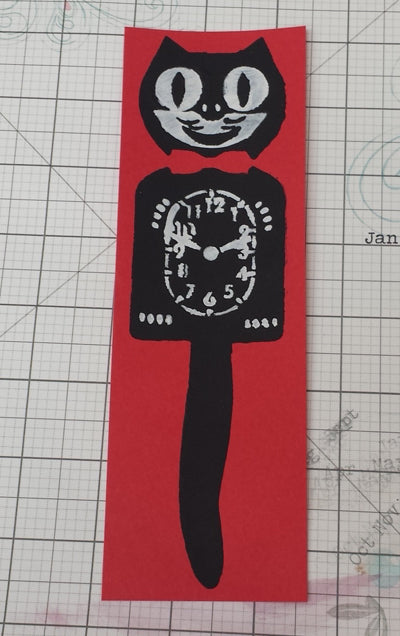
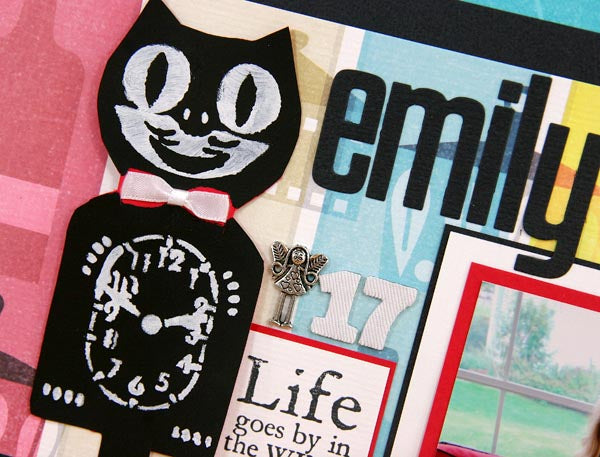
5. Cut out the clock with a scissors and layer onto a card or page. If desired, add a white ribbon to the necktie on the cat clock.
Finish the page with three ribbons stapled onto the right edge of the photo mat...

...and some journaling.

I love how the theme of the collection tied in with my daughter's homecoming day photo when combined with the quote from the Nice to See You Unmounted Stamps. They really do grow up in a blink of an eye!

Happy stenciling!
Tricia