It's time to get ready for the upcoming holiday season by making a big batch of beautiful cards with the Blue Christmas Stamps.
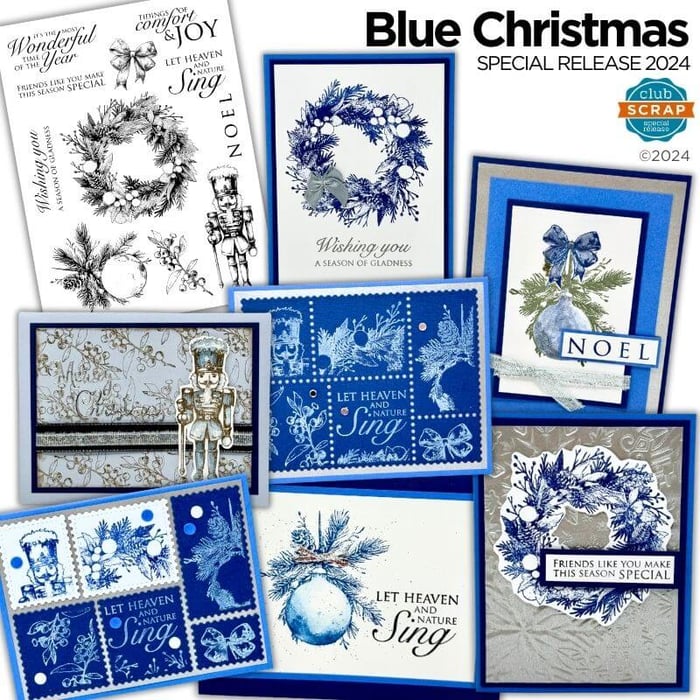
Blue Christmas Stamps

(The finished size of each card below is 4.25x5.5", unless otherwise noted.)
Card 1
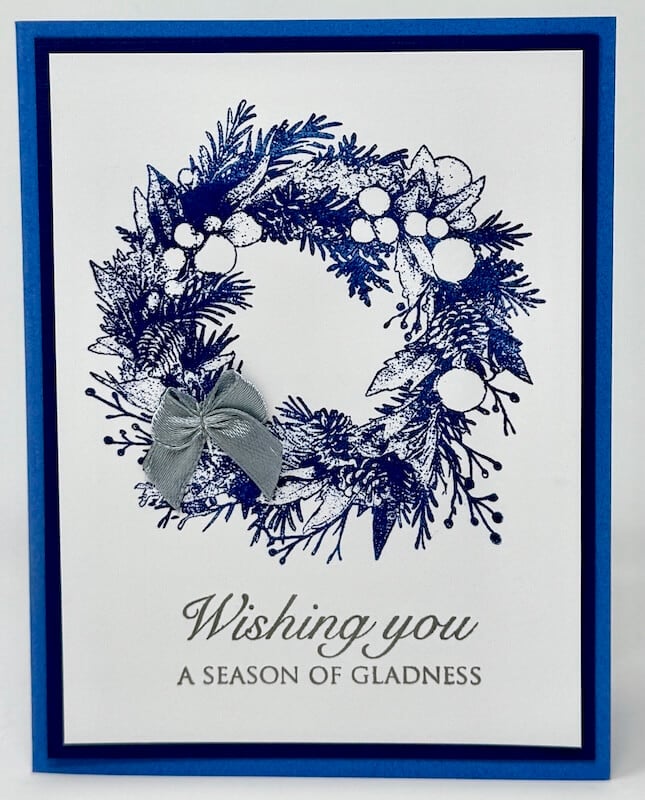
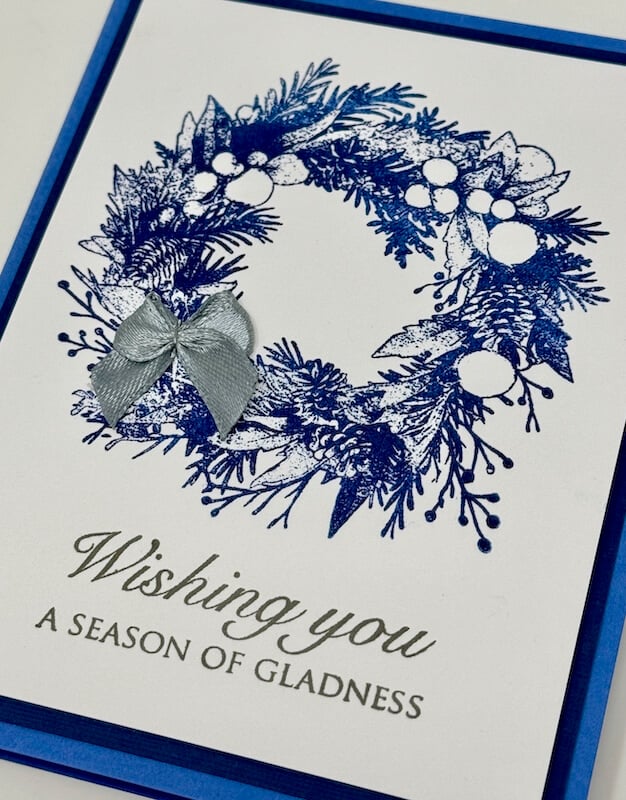
Stamp the wreath image onto a white panel with Sapphire Ink.
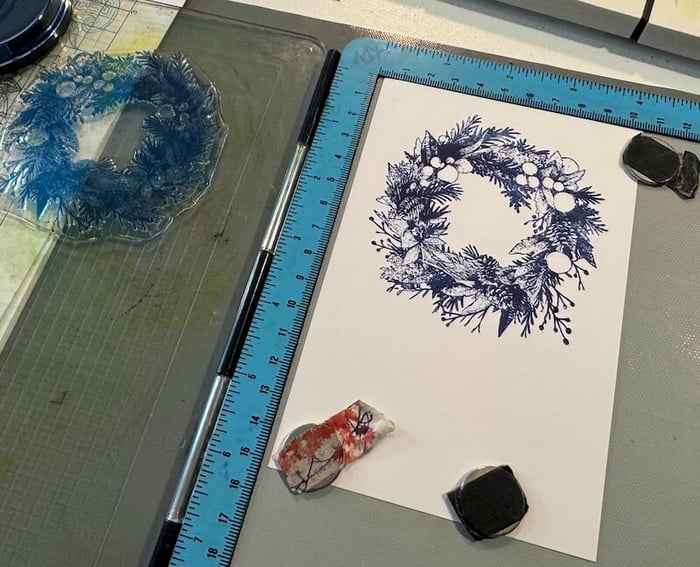
Add a dot of Bookbinding Glue dispensed from a Needle-tipped Applicator to the back of a silver bow. Adhere to the panel.
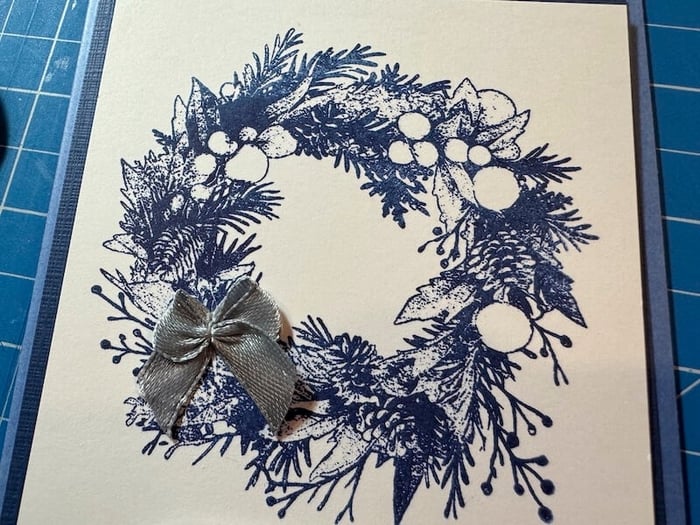
Position the sentiment beneath the wreath and stamp with Ash Ink.
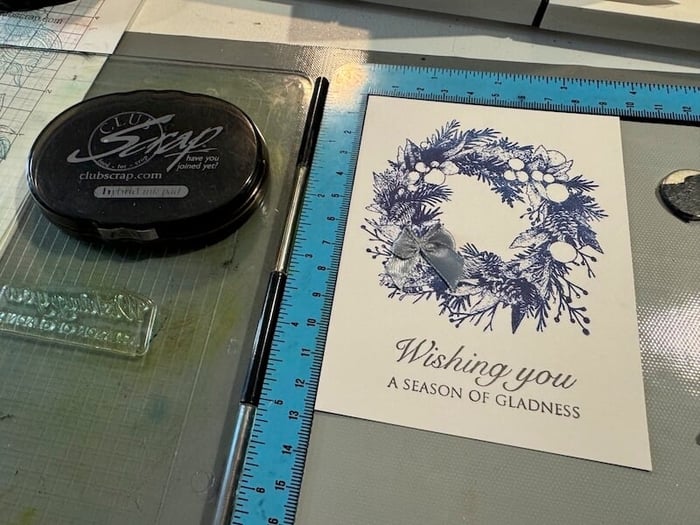
Mat with a Dk. Blue panel and add to a Med. Blue folded card base.
Card 2
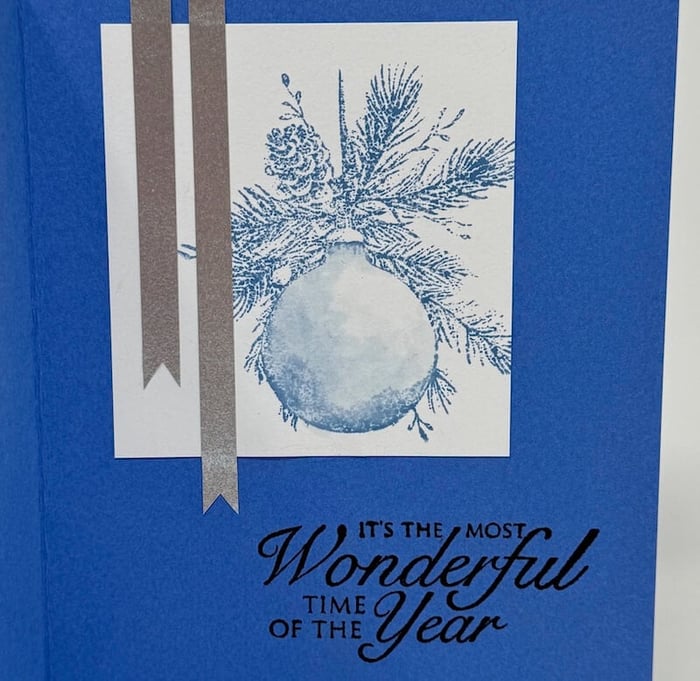
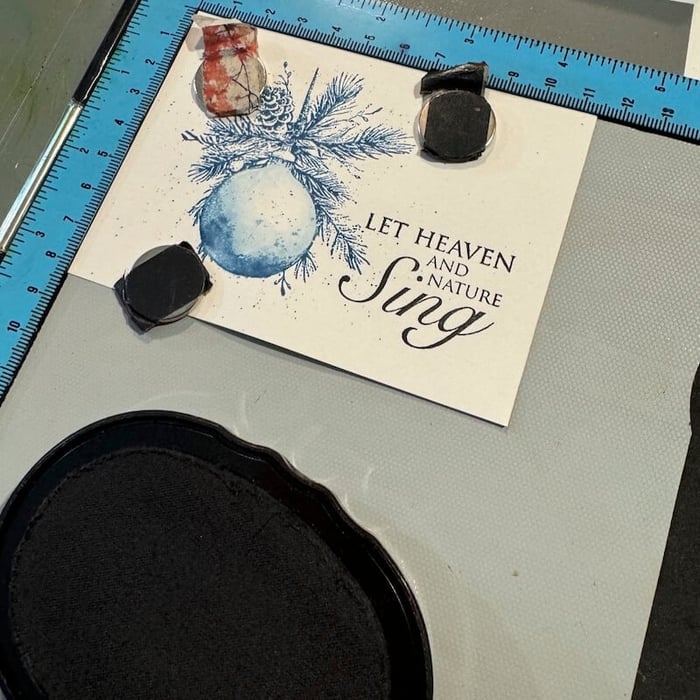
Stamp the ornament image onto a white panel with Faded Jeans Distress Ink.
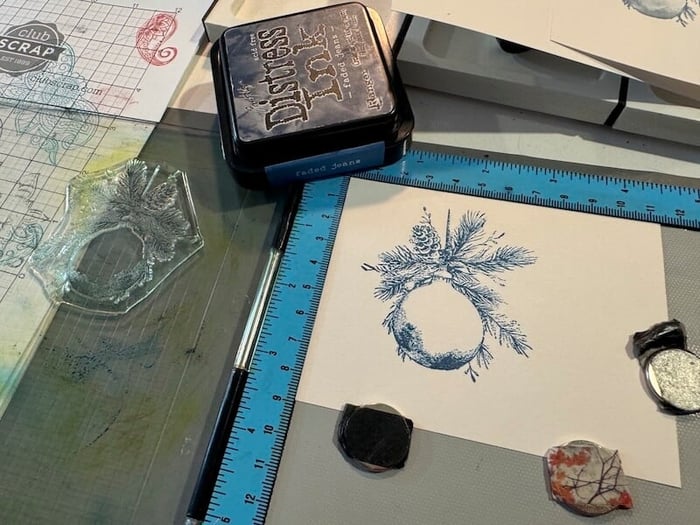
Distress Inks are water-reactive, allowing you to "pull" ink from the edges of the image toward the center with a water brush.
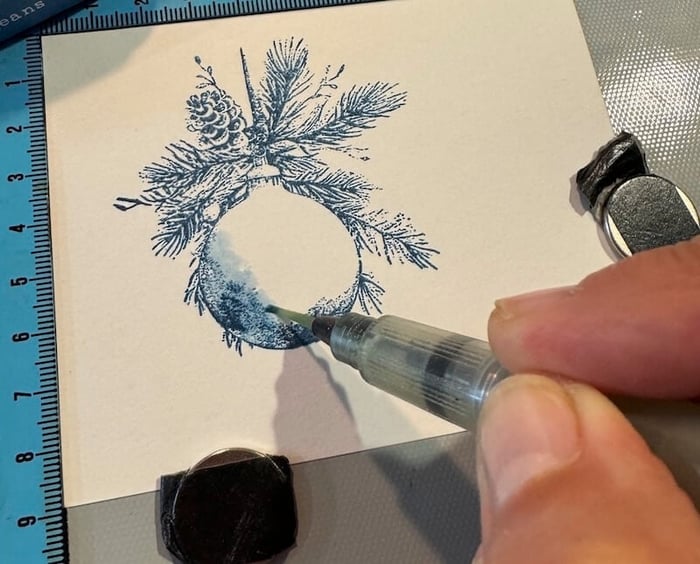
If more color is needed, press the ink pad onto a non-stick surface. Pick up the ink with the brush and continue to fill the image.
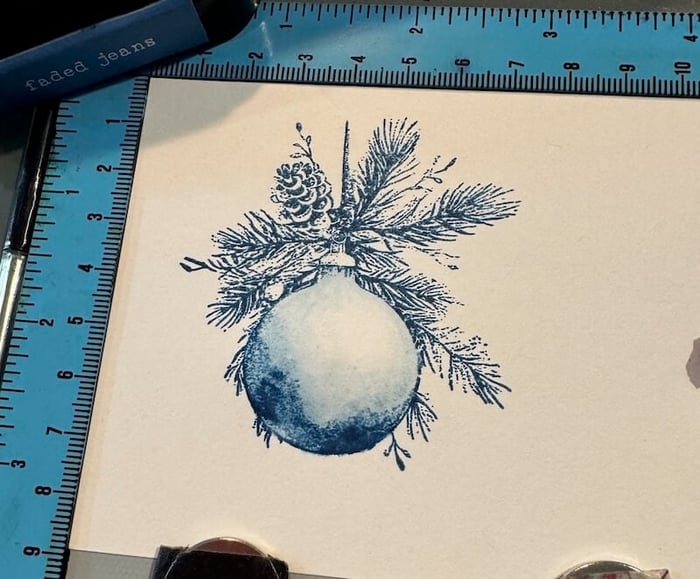
Pick up more color with the water brush and tap lightly over the image.
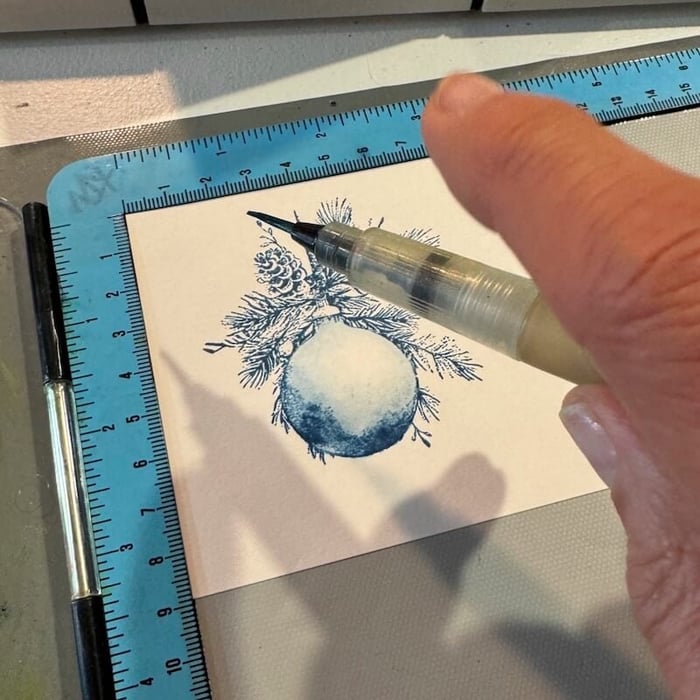
Add droplets of color until the desired effect is achieved.
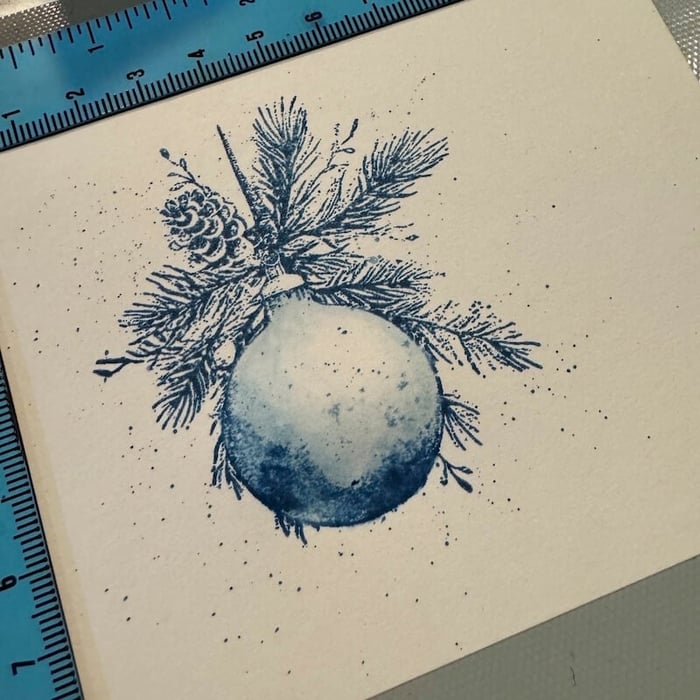
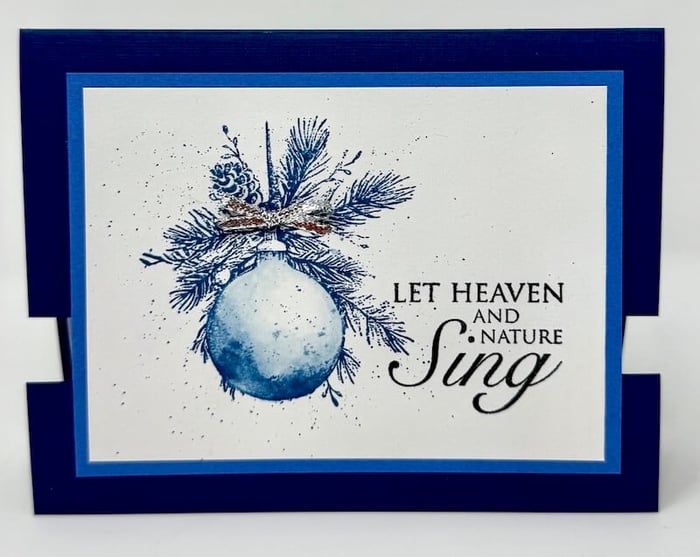
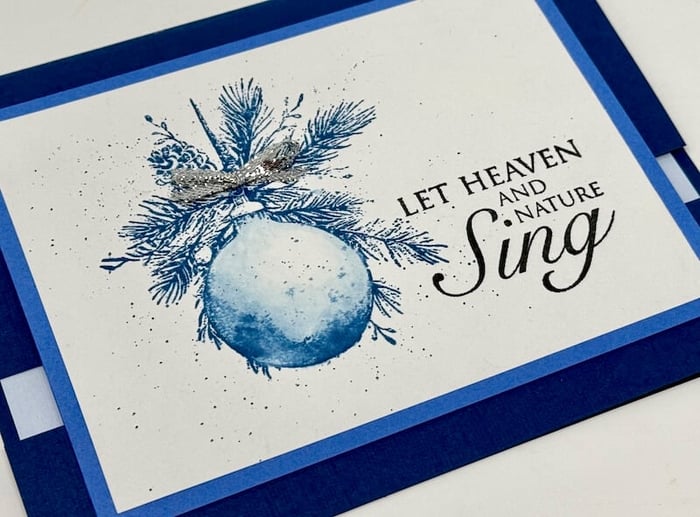
Add a sentiment to the right of the image with Sapphire Ink.
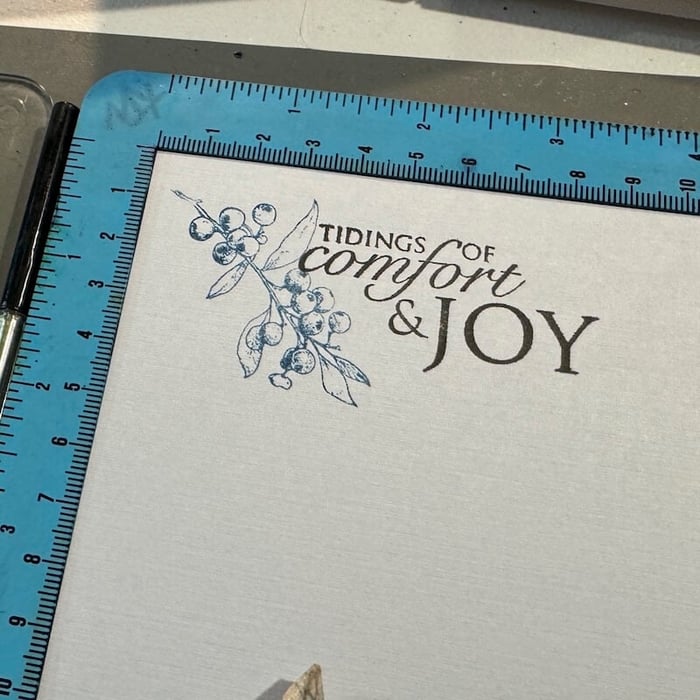
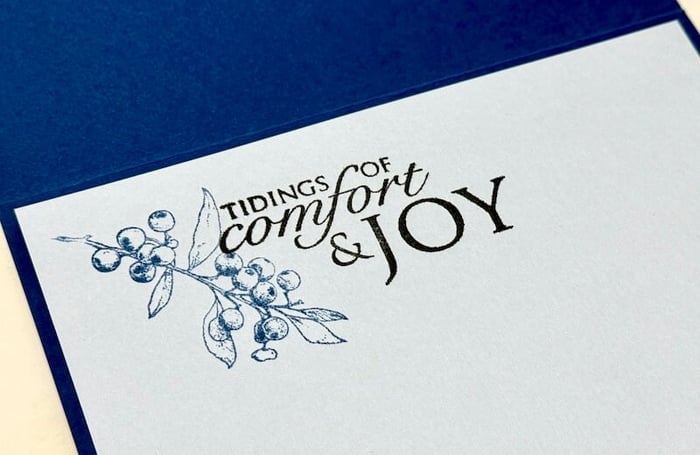
Stamp an inner sentiment with India Ink onto a 4x5-1/4" Lt. Blue panel. Accent it with a berry branch stamped with Sapphire Ink.
Adhere to the inside of a folded Dk. Blue card base.
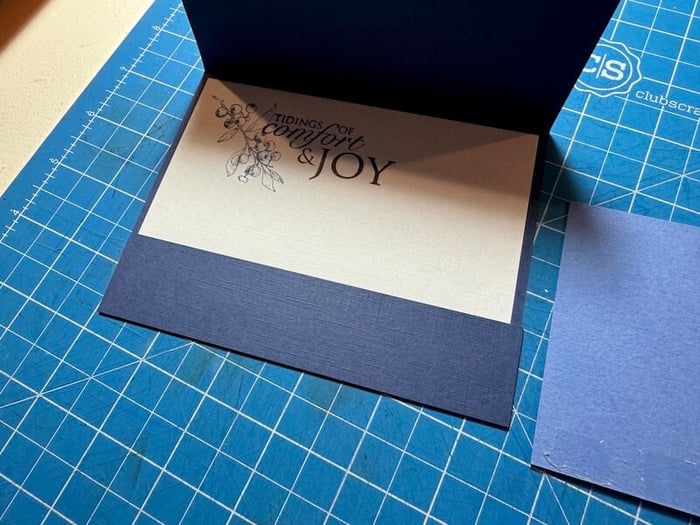
Position the Dk. Blue 1-1/4x5-1/2" split flap panel flush with the bottom of the open card base.
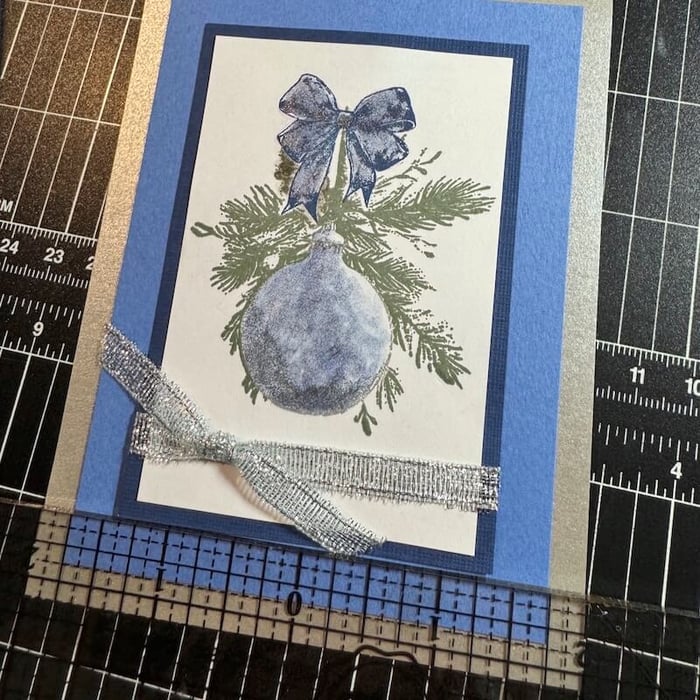
Close the card. Center the ornament stamped panel (mat with Med. Blue) onto the card front using the zero center of a Grid Ruler as your guide.
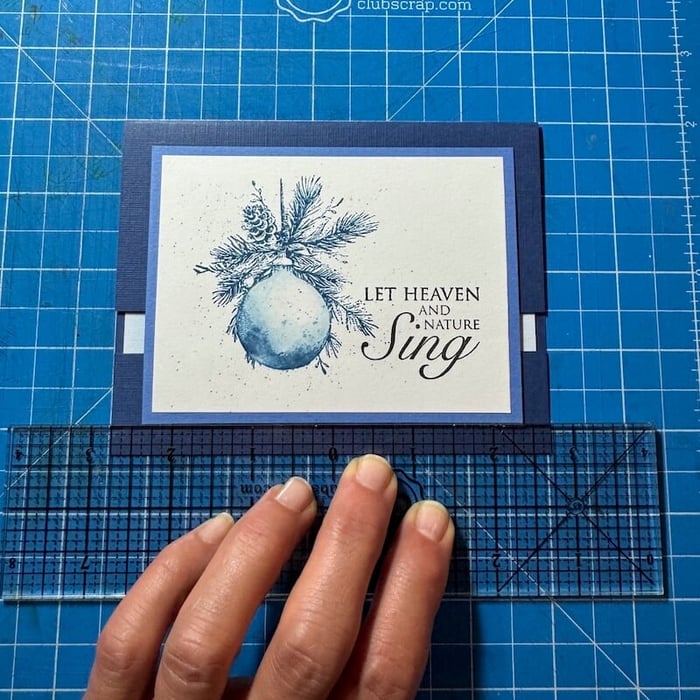
Be careful not to add adhesive near the opening.
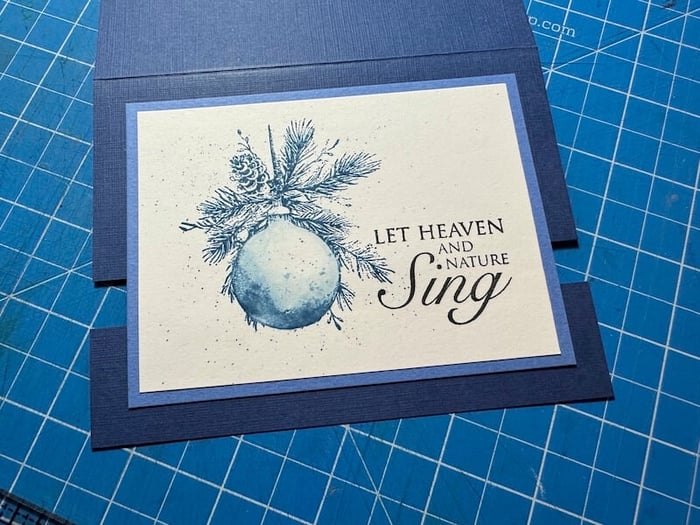
Tie silver ribbon into a bow and adhere to the ornament with Bookbinding Glue.
Card 3
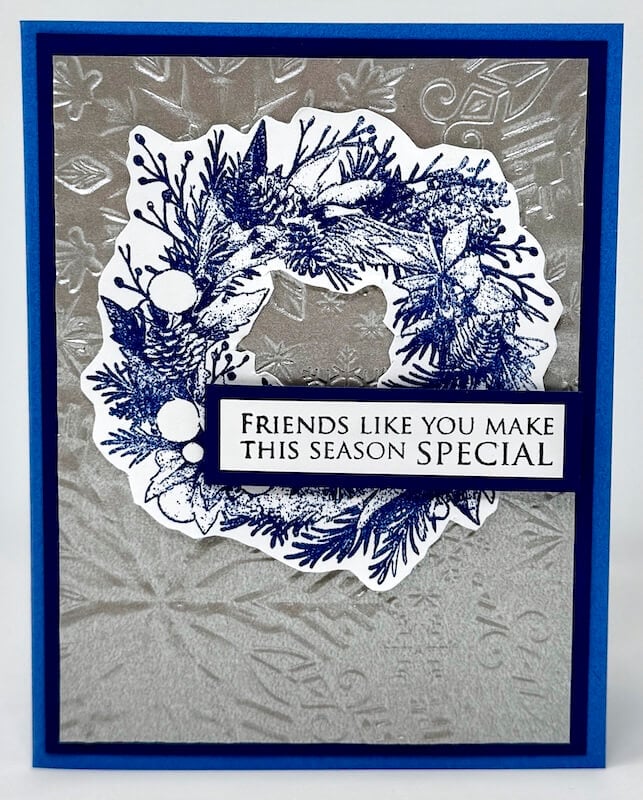
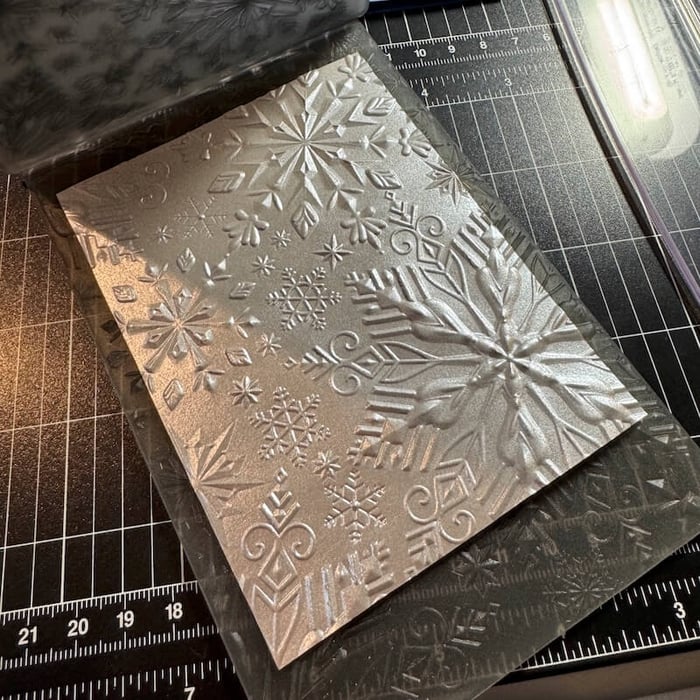
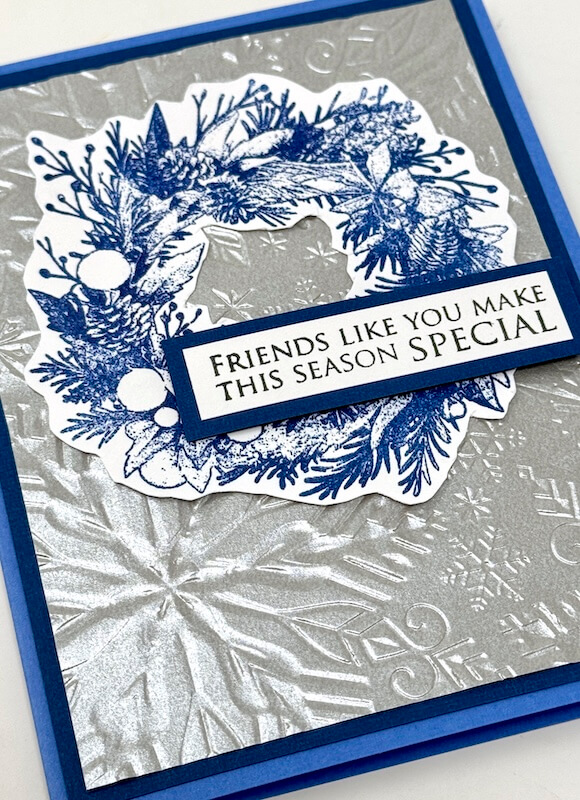
Emboss a 3-3/4x5" Silver panel with a Sizzix 3-D snowflake folder.
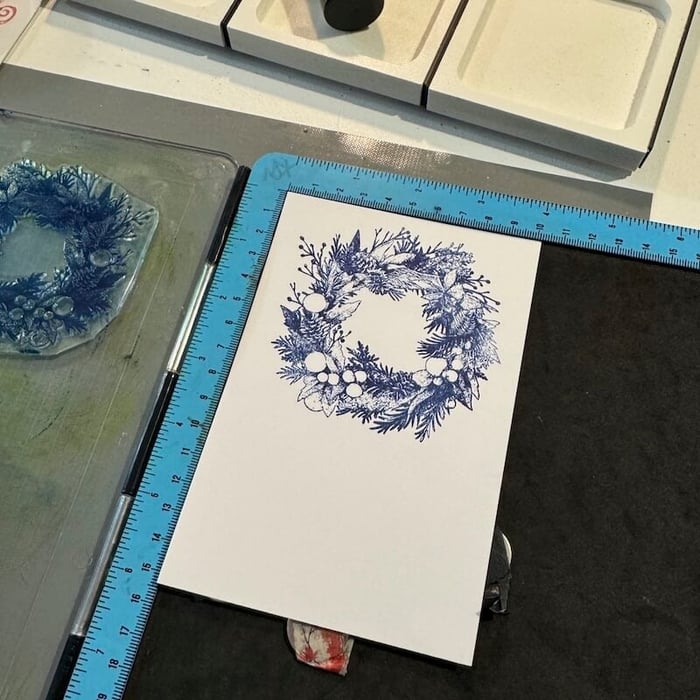
Stamp the wreath image onto a white panel with Sapphire Ink.
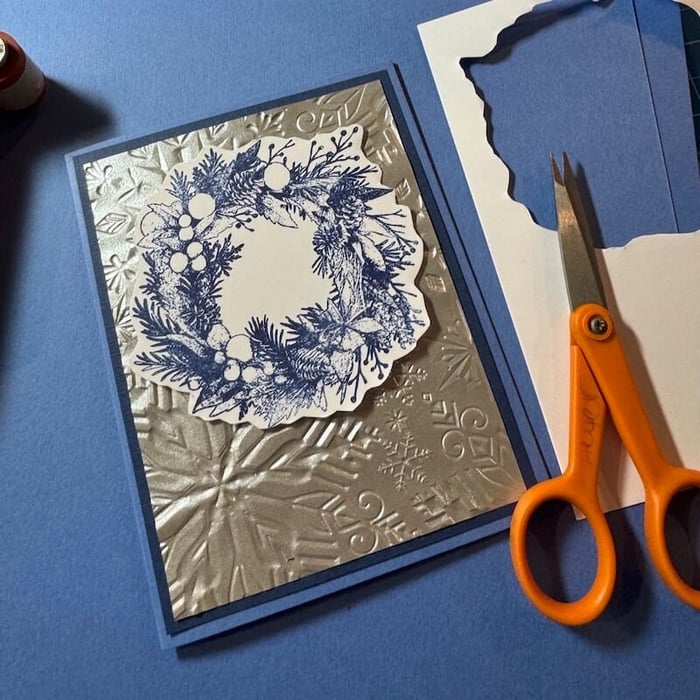
Remove the image with scissors. Flip the Silver panel to the debossed (indented areas facing up) side and adhere to a 4x5-1/4" Dk. Blue panel before adding it to the Med. Blue folded card base.
Cut an "x" into the center of the wreath with a craft knife and cutting mat.
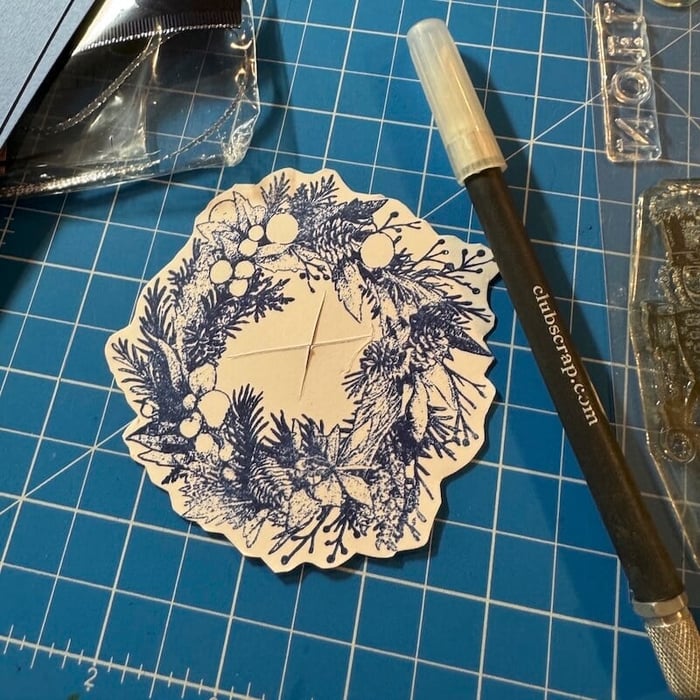
Remove the center of the wreath with scissors.
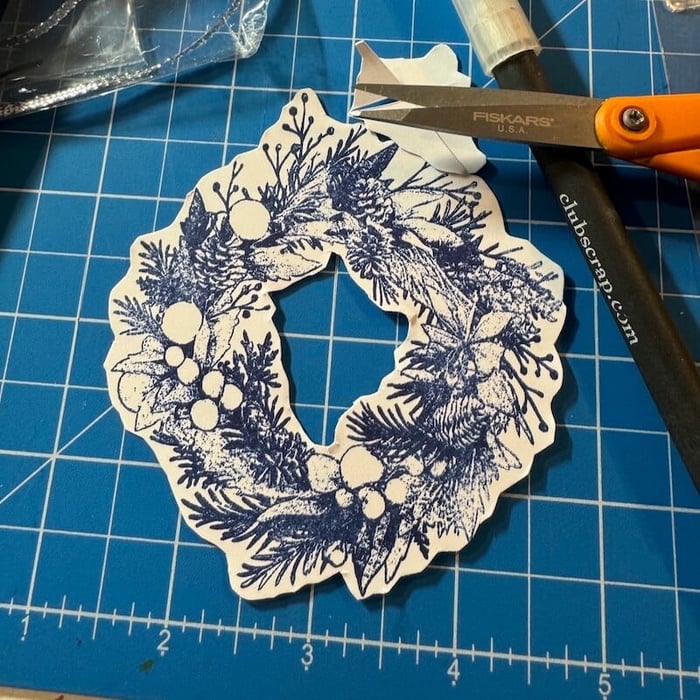
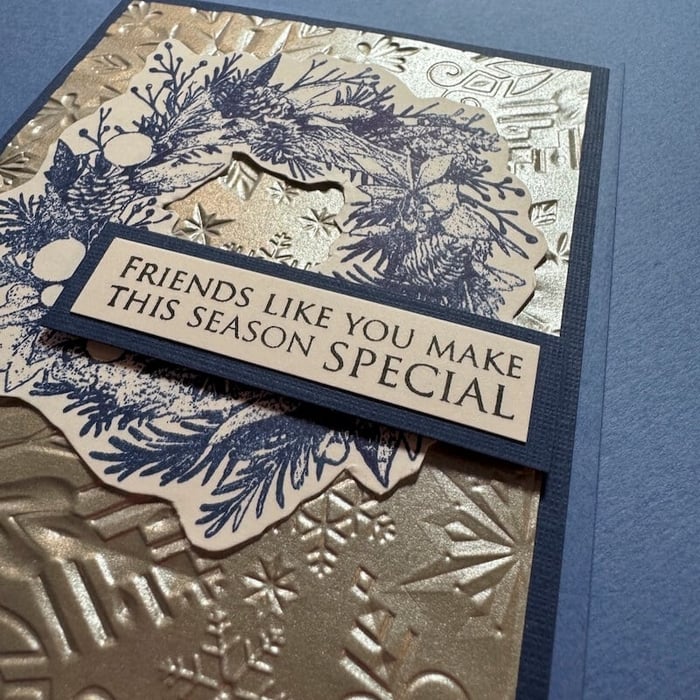
Stamp the sentiment in India Ink on a small white strip. Layer with a Dk. Blue panel. Add Foam Adhesive Circles to the back of the sentiment.
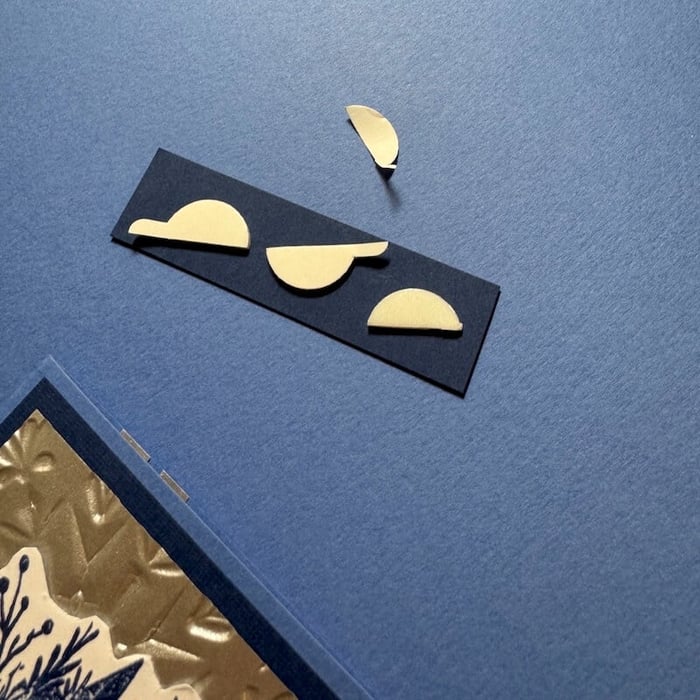
Adhere the wreath to the Silver panel; add the sentiment over the wreath.
Add a watercolored ornament panel inside of the card. Pair it with a stamped sentiment and Silver strips trimmed with swallowtail details.
 Card 4
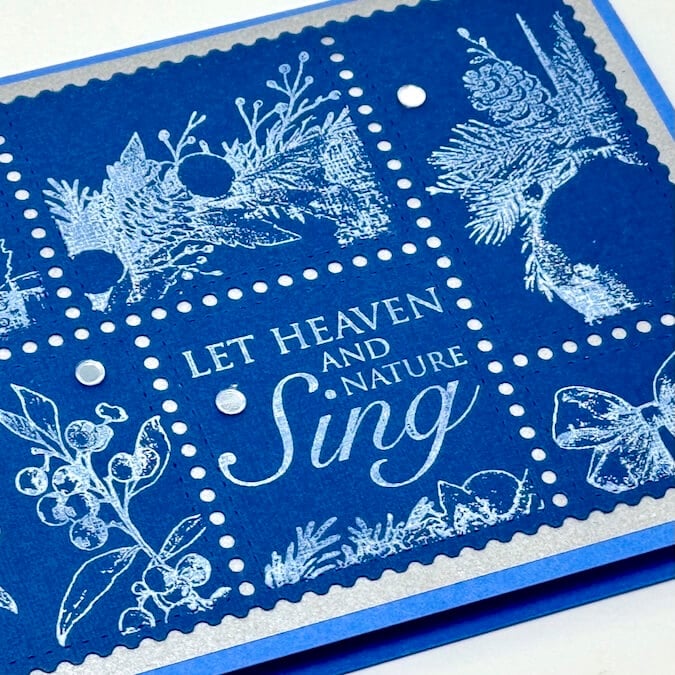
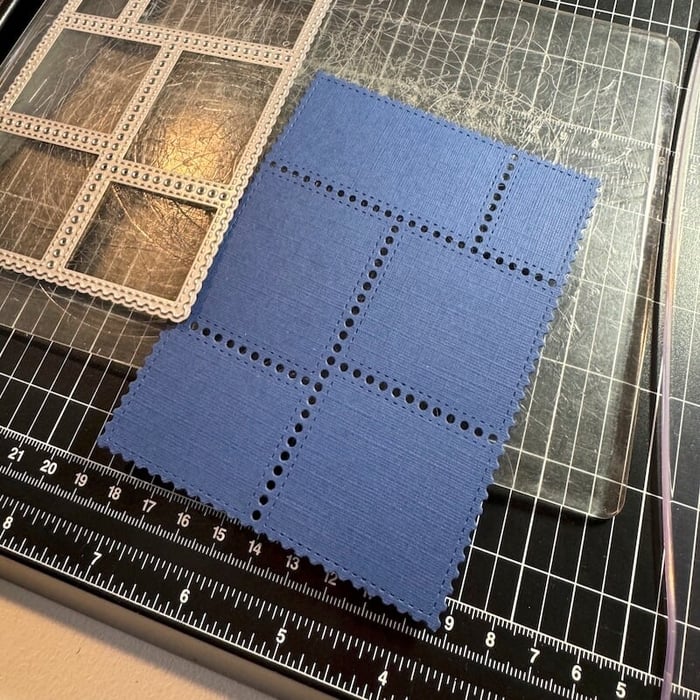
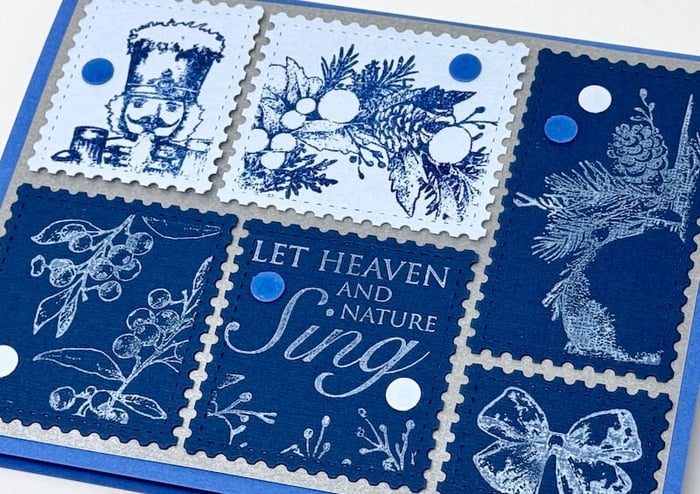
Die cut a Dk. Blue panel with a postage die (Waffle Flower*).
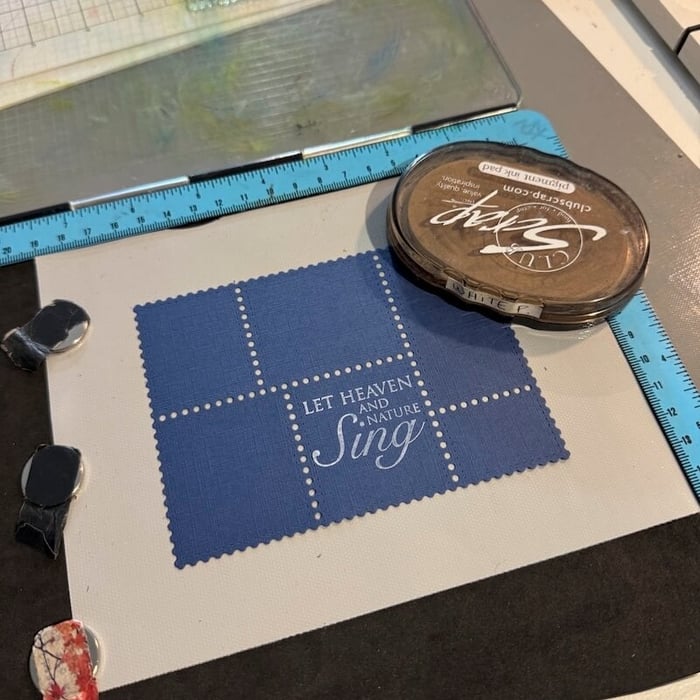
Stamp the sentiment with White Pigment Ink.
Mask off areas of the panel with Post-It Note paper. Add a portion of the wreath image with White Pigment Ink.
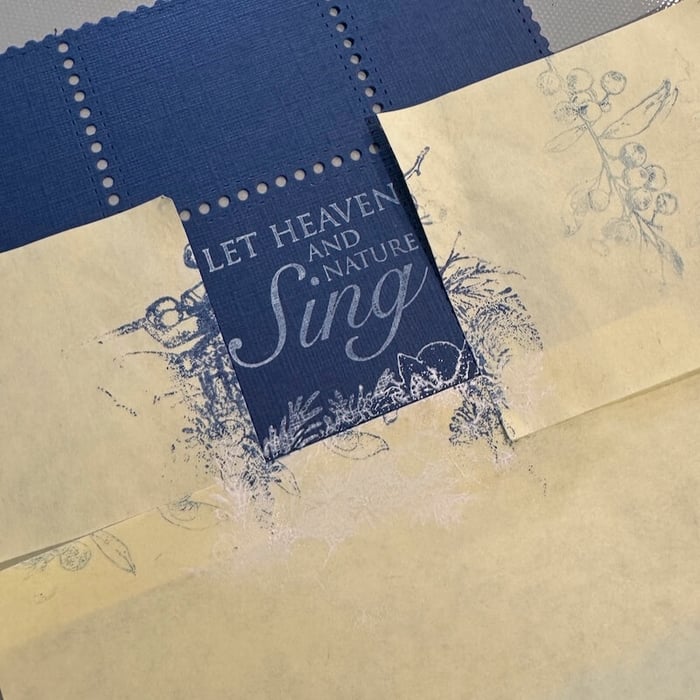
Continue to mask areas and add images to each section.
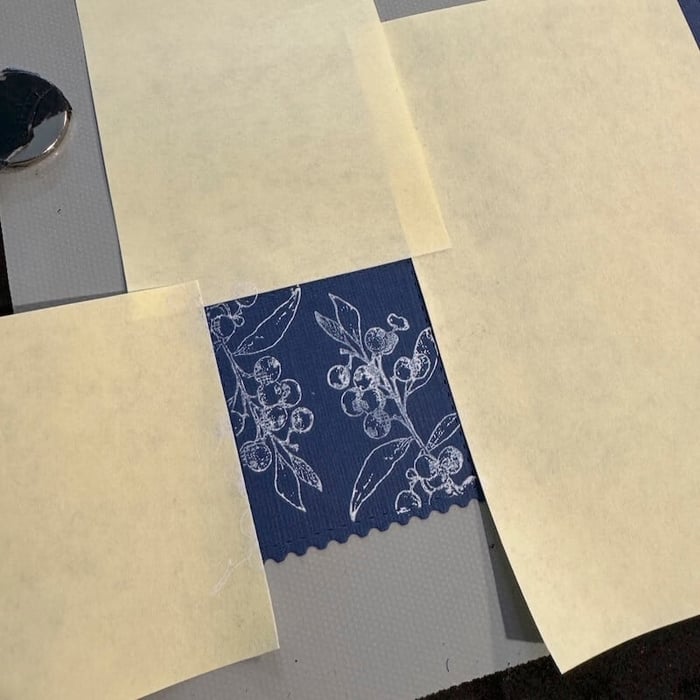
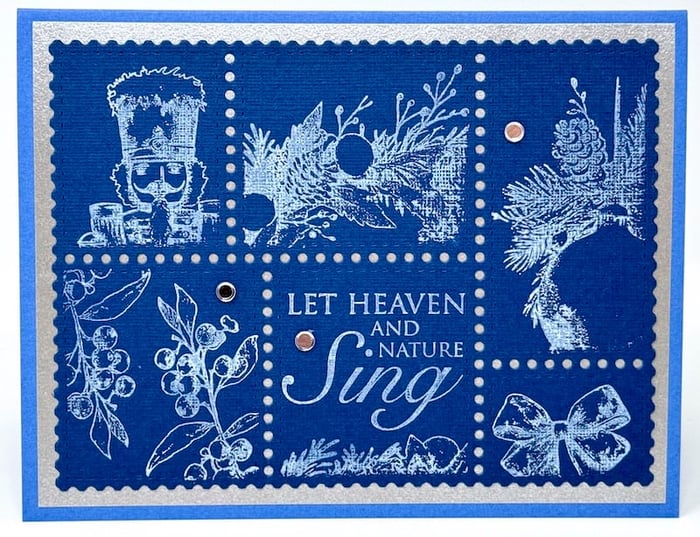
Remove the masks to reveal the completed panel.
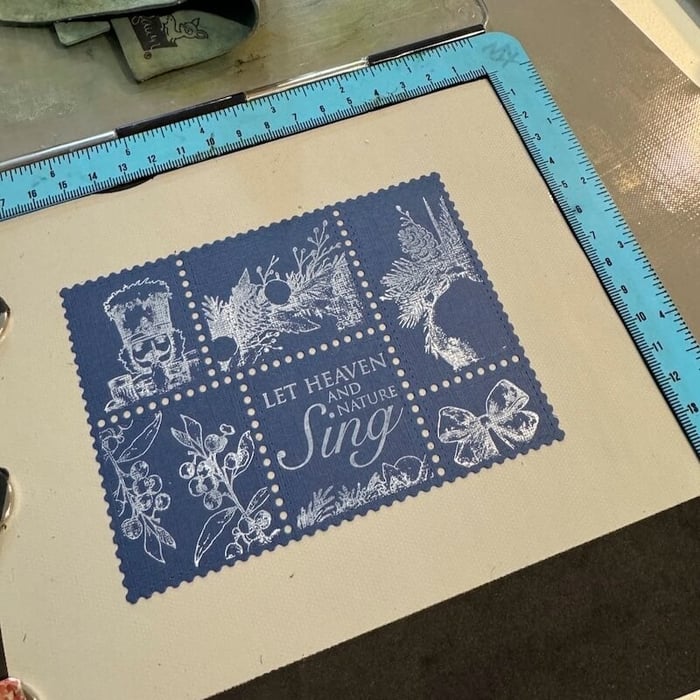
Add Shaker Confetti (Tropicale Card Kit 2021) to the panel with Bookbinding Glue to complete the card.
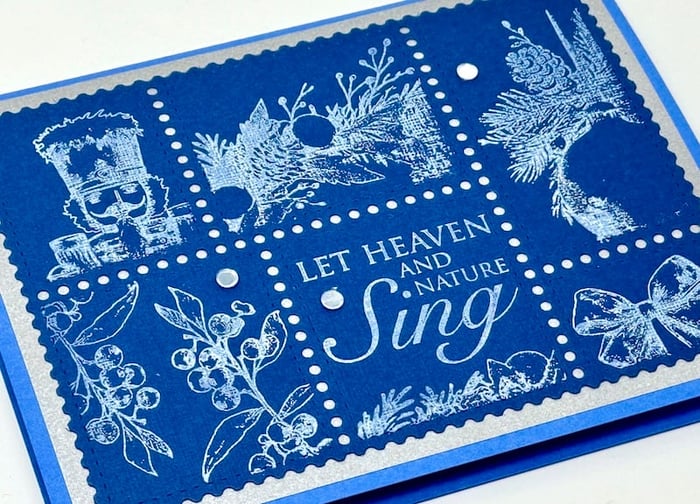
Card 5
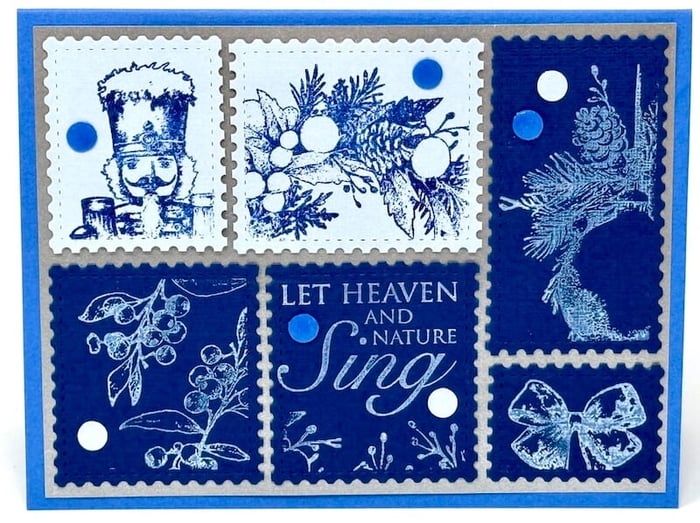
Cut a Lt. Blue and Dk. Blue Panel with the postage die. Trim the die cut with scissors to create individual postage stamps. Mask the areas as demonstrated in Card 4 and add the stamped images with Sapphire and White Pigment inks.
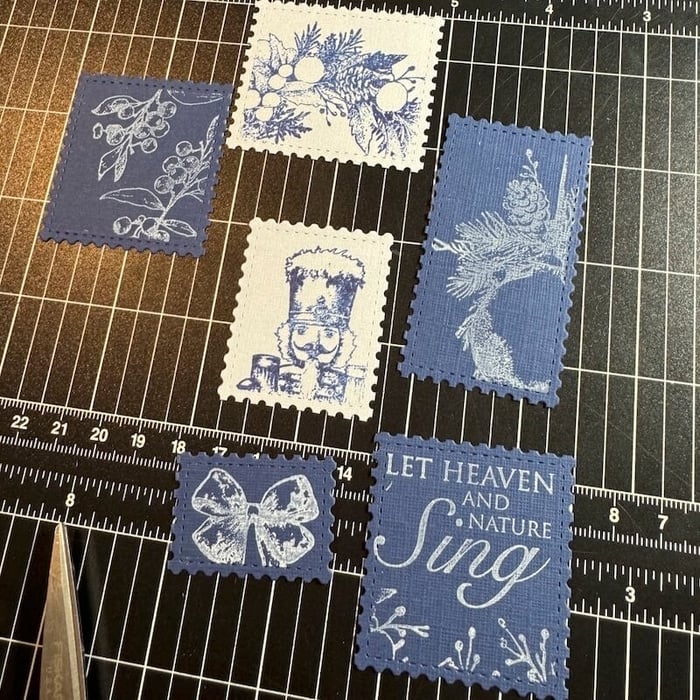
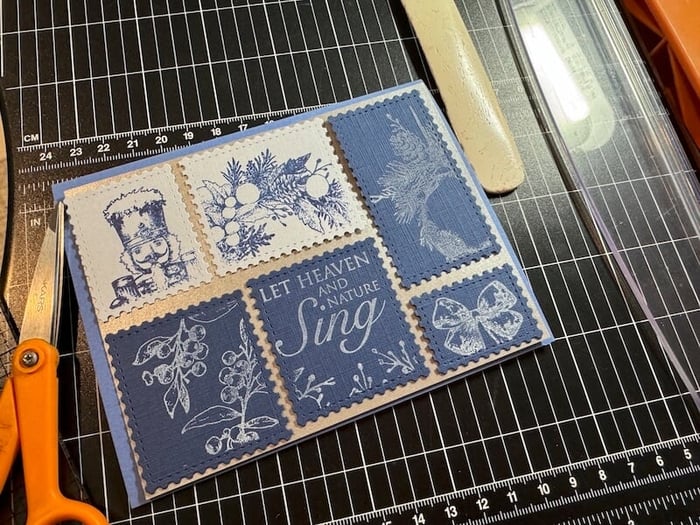
Reassemble the postage stamp collage on a 4x5-1/4" Silver panel.
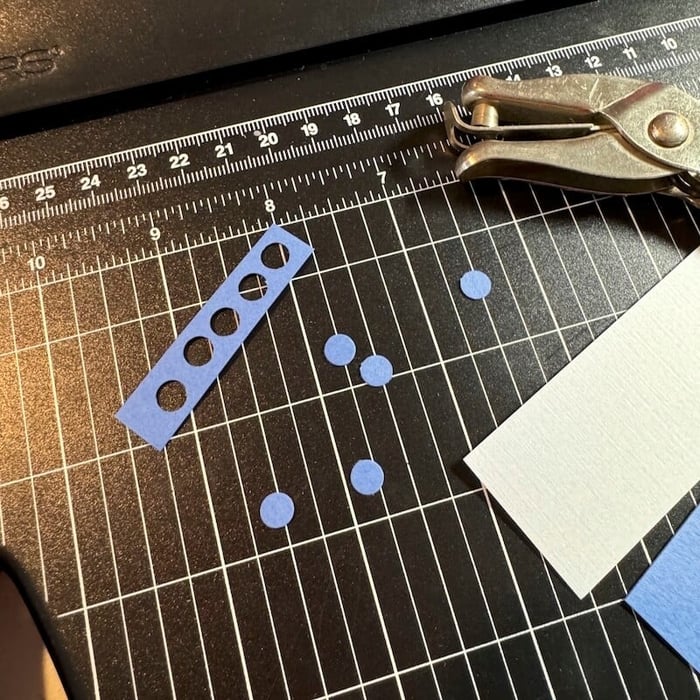
Make faux enamel dot embellishments. Cut small circles from scraps of Lt. Blue and Med. Blue papers with a standard hole punch.
Adhere the circles with Bookbinding Glue dispensed from a Needle-tipped Applicator. Dispense a bit of glue on top of each circle as shown; allow to dry.
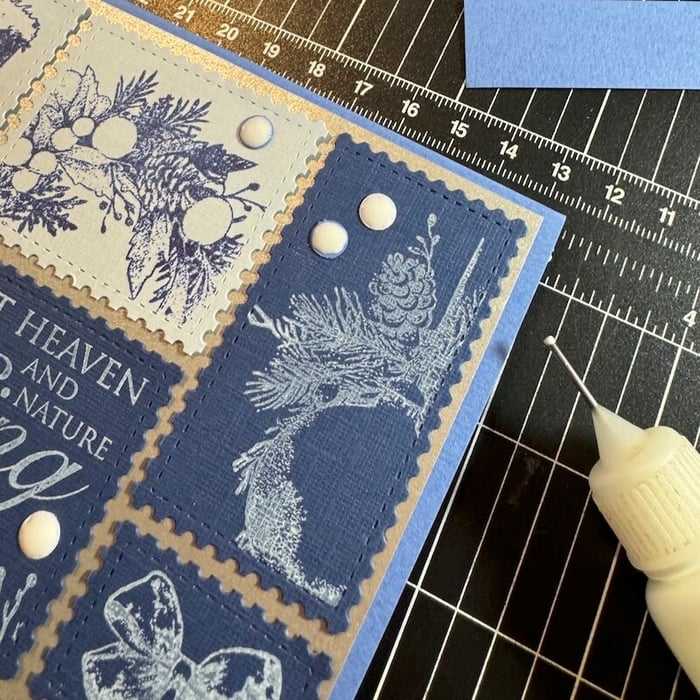
The dry glue will have a shiny finish.
Card 6
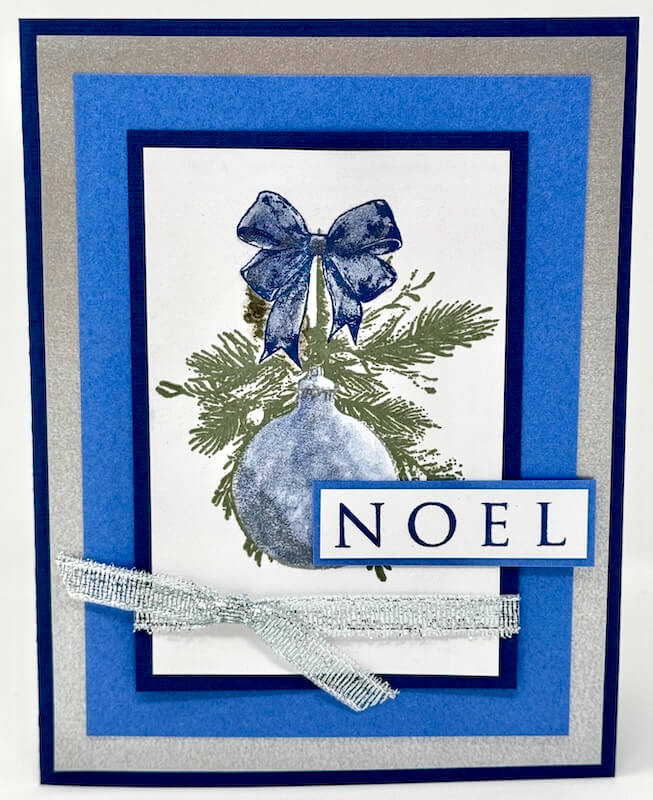
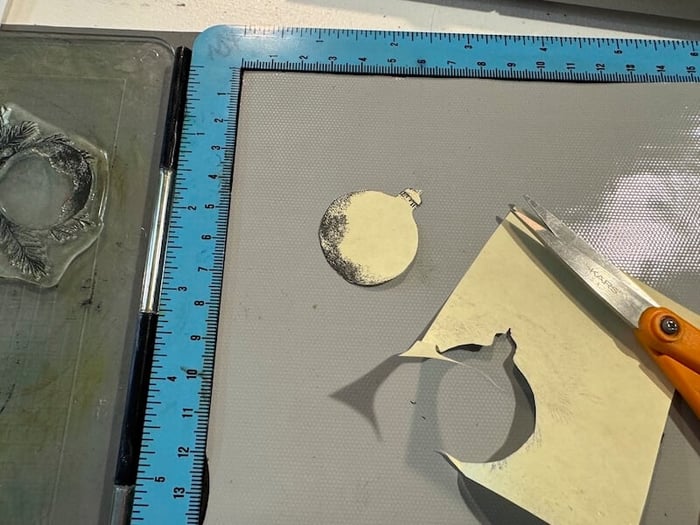
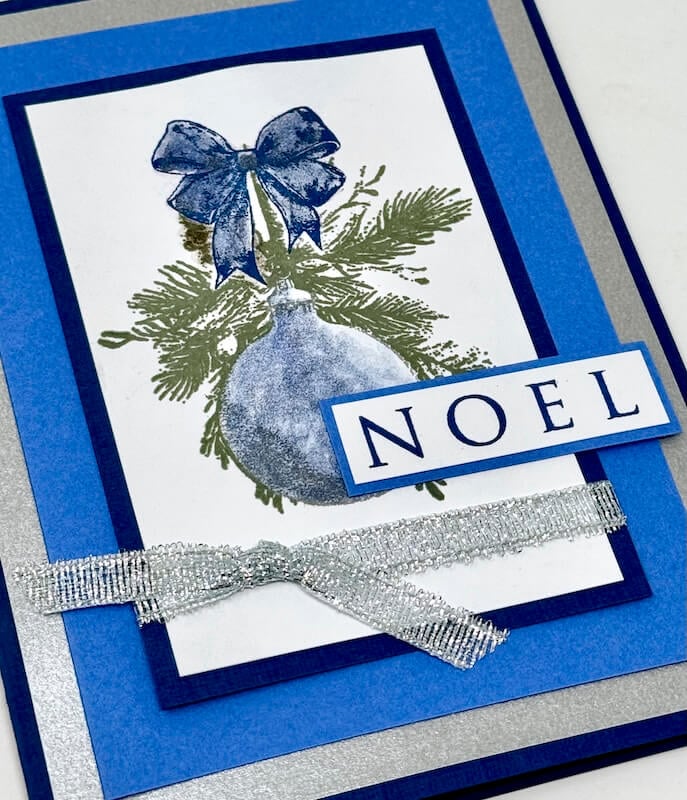
Stamp the bow and ornament images onto sticky notes. Remove the images with scissors to create a mask.
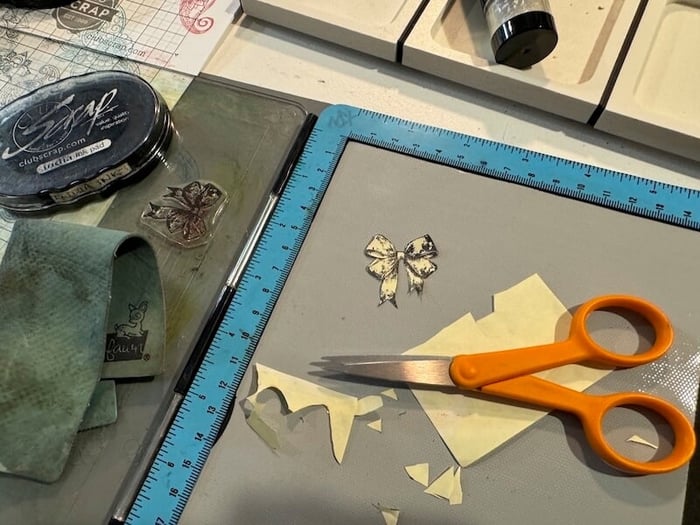
Stamp the bow image onto a white panel with Sapphire Ink.
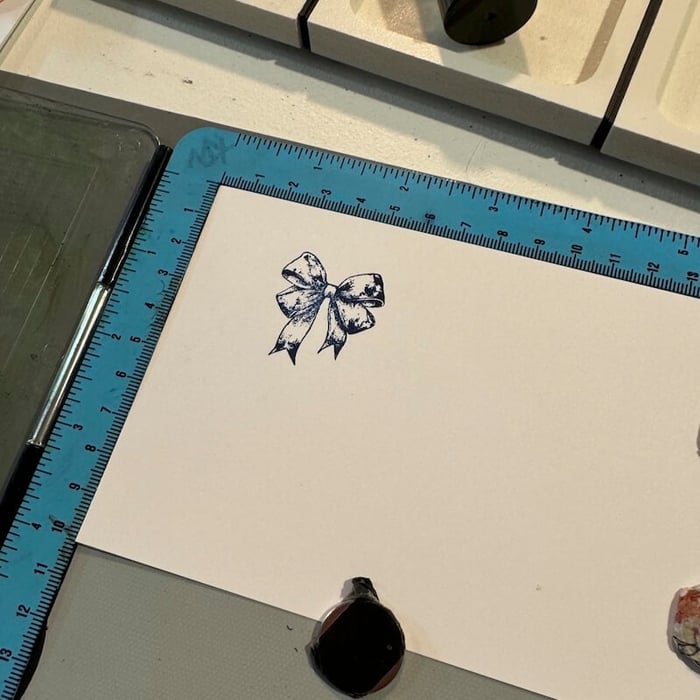
Position the mask over the bow.
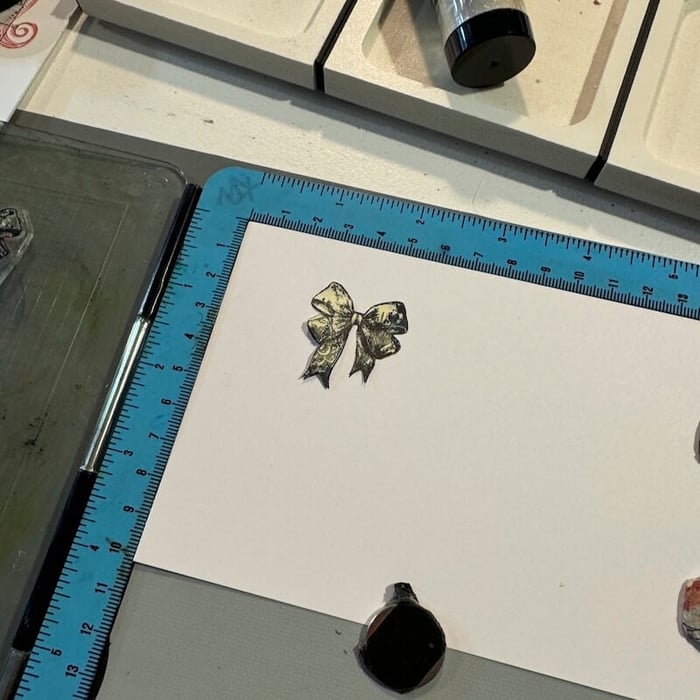
Add the ornament image with Ash Ink.
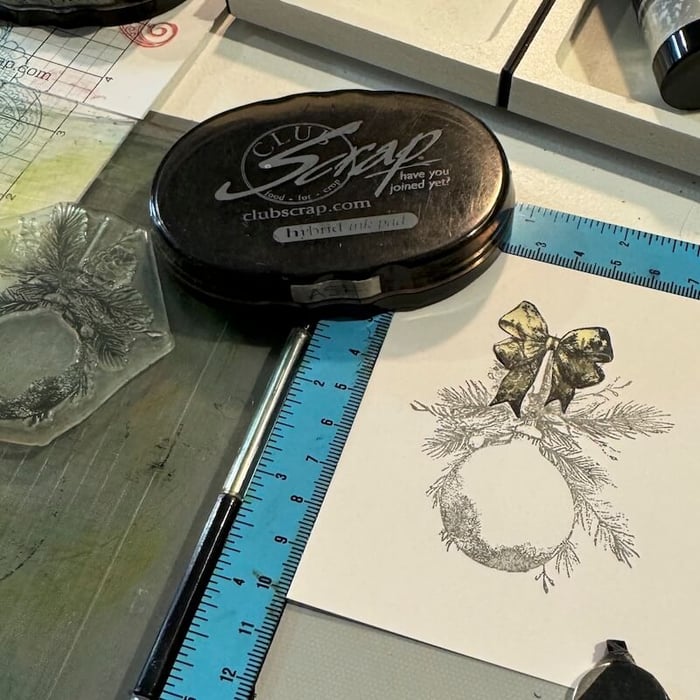
Apply the mask to the ornament image, while leaving the bow mask in place.
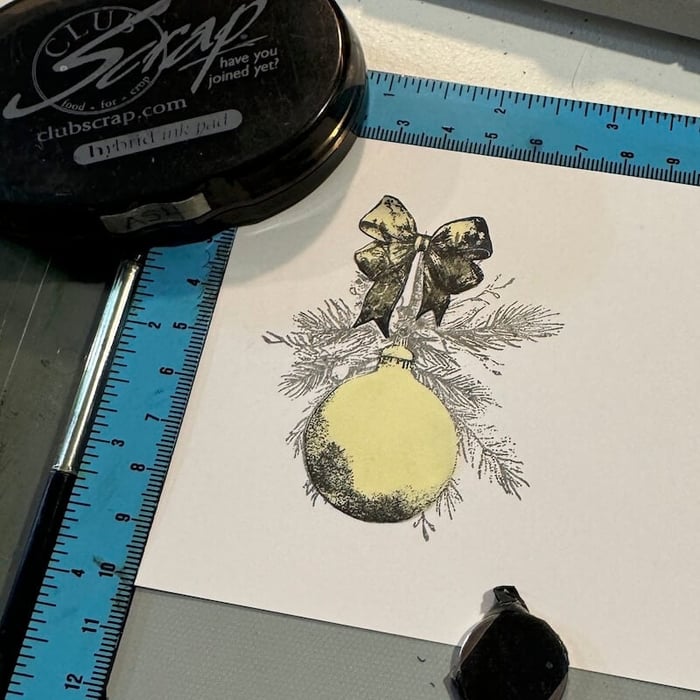
Stamp the ornament a second time with Spruce Ink.
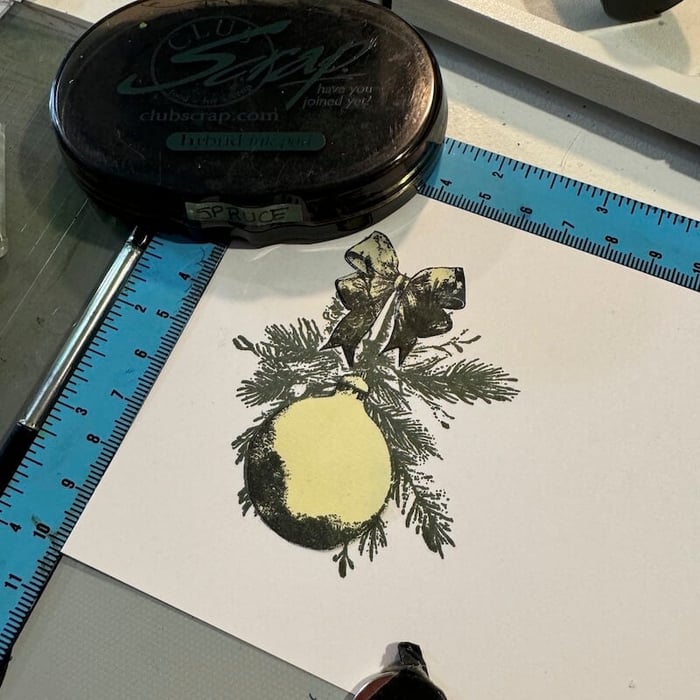
Remove the masks to reveal the multi-colored images.
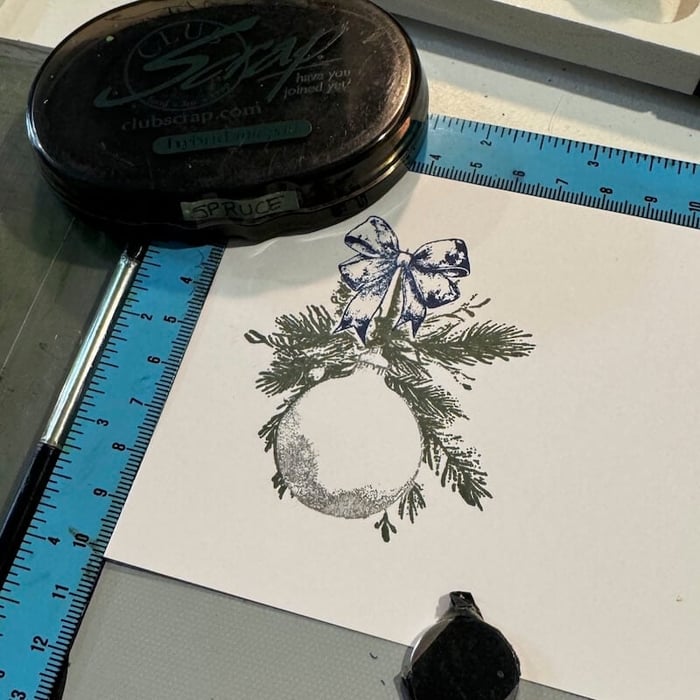
Paint the bow, ornament and pinecone with watercolors.
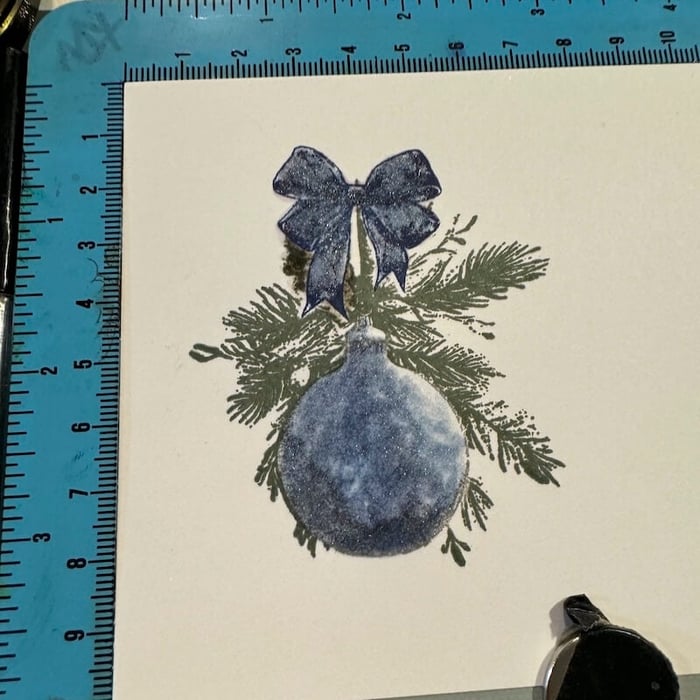
Trim the panel and nest onto a Dk. Blue mat. Wrap a piece of Silver ribbon around the bottom of the panels.
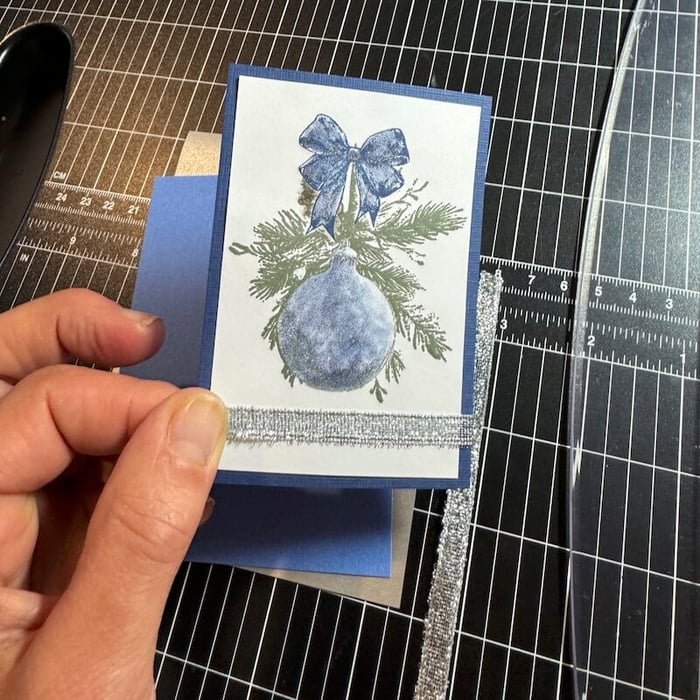
Secure the ends of the ribbon on the back with clear tape.
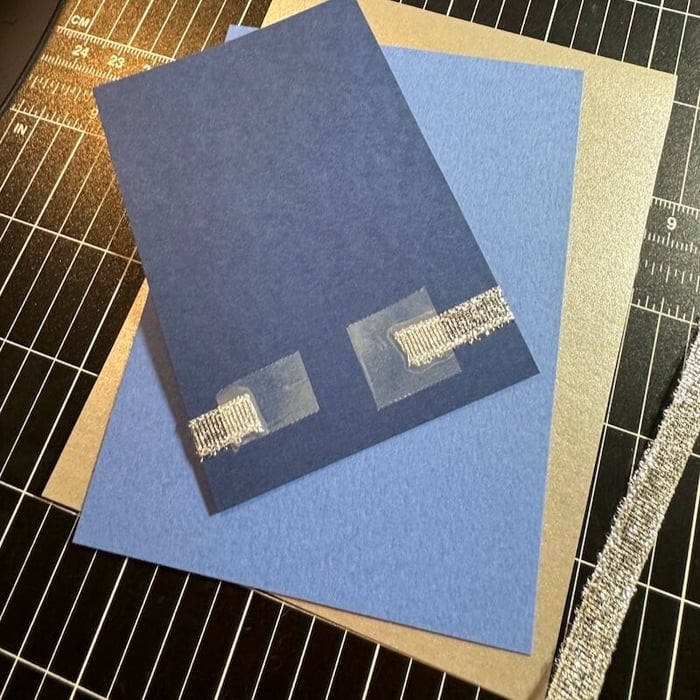
Cut a smaller section of silver ribbon and tie into a simple knot.
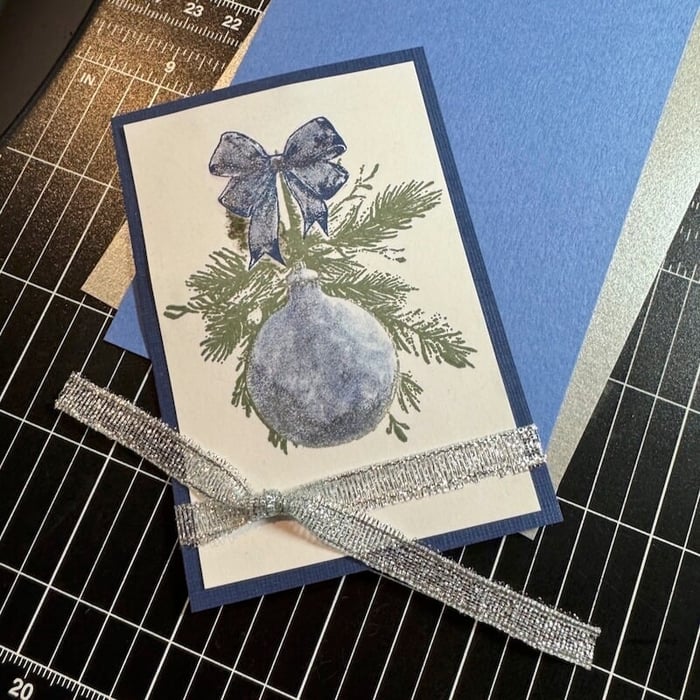
Trim the ribbon ends. Adhere to nesting Med. Blue and Silver mats using the Grid ruler as a guide.
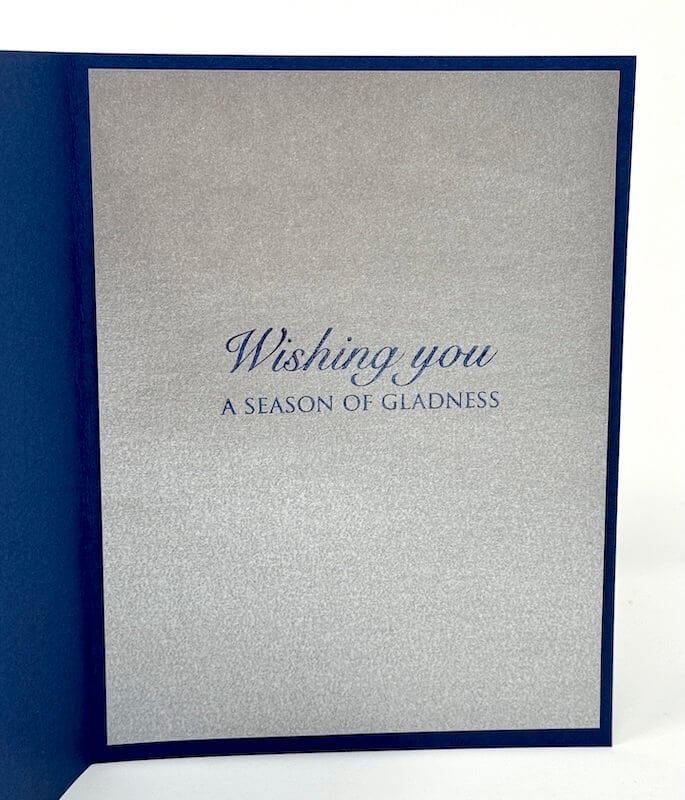
Stamp the sentiment onto a 4x5-1/4" Silver Panel with Sapphire Ink; adhere to the inside of the card.
Stamp "NOEL" onto a white scrap, mat with Med. Blue. Adhere to the front of the card.
Card 7
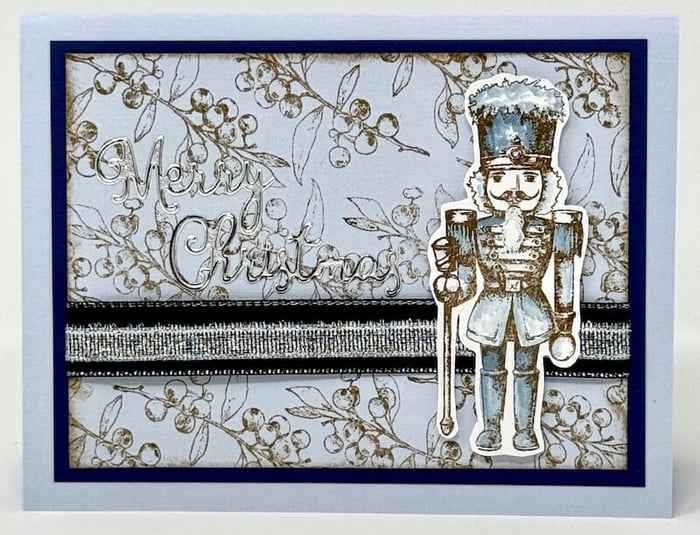
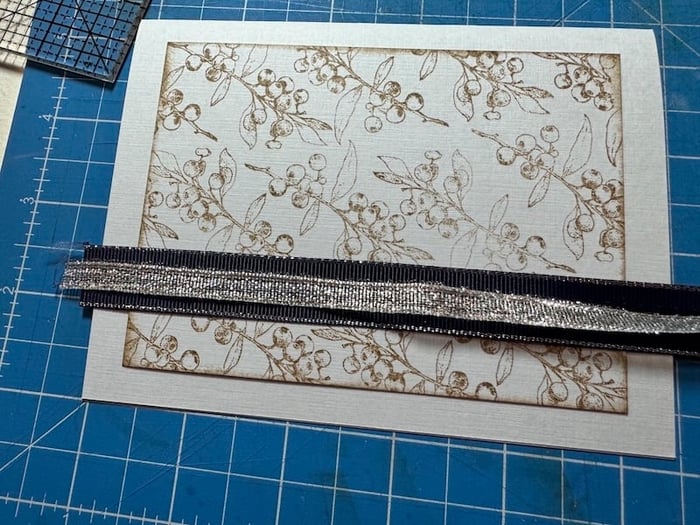
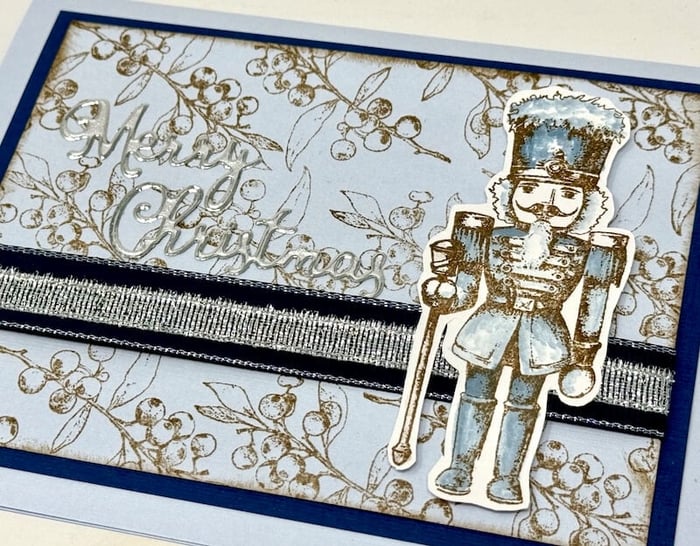
Cover a 3-1/2x4-3/4" Lt. Blue panel with berry branch images in Earth Ink.
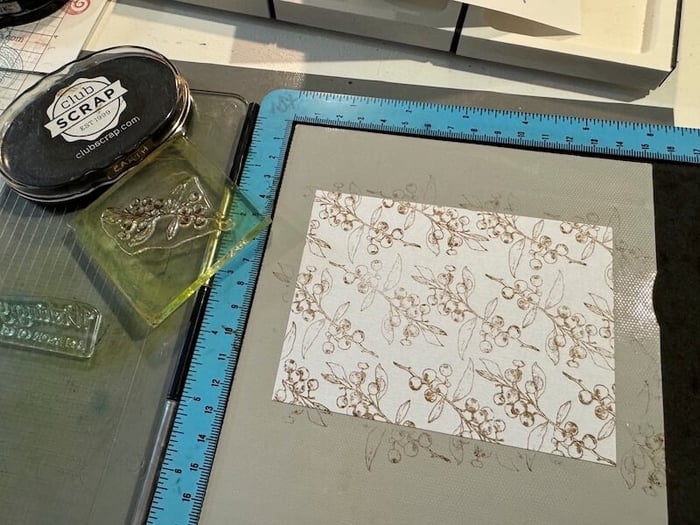
Stamp the nutcracker on White paper with Earth Ink. Paint the image with watercolors.
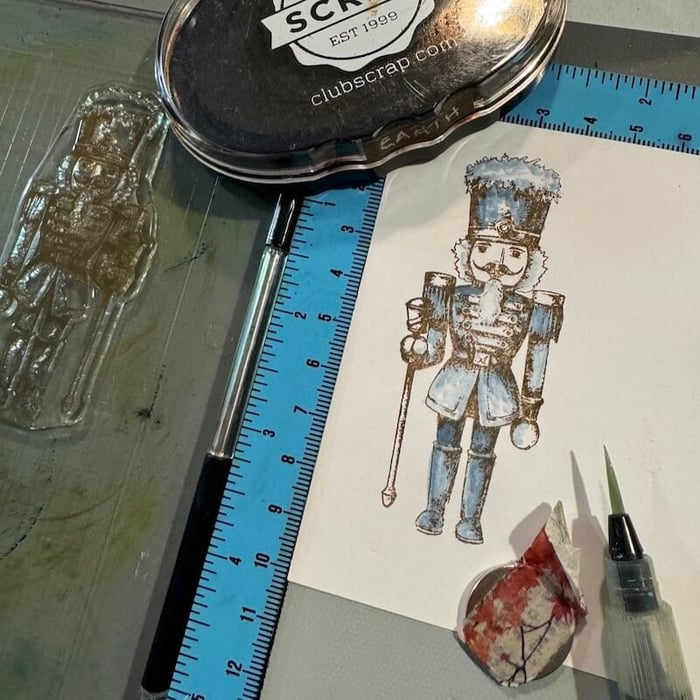
Remove the nutcracker image with detail scissors.
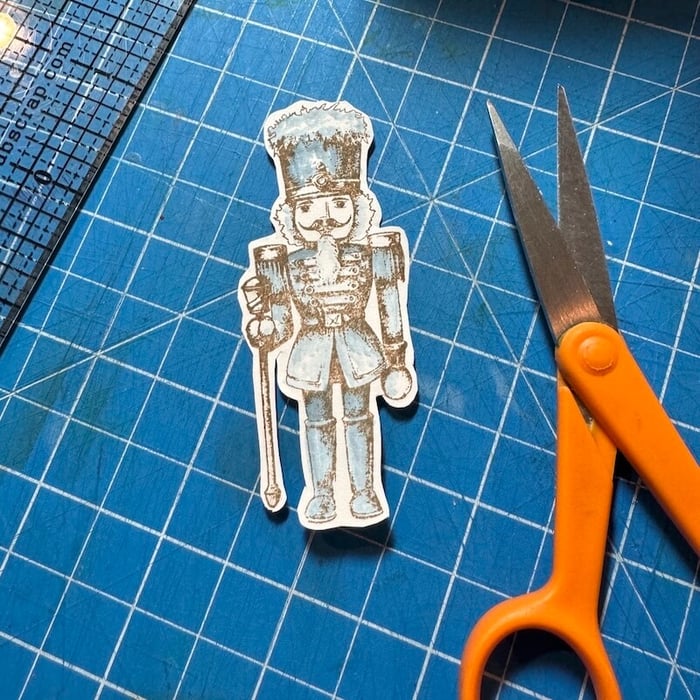
Layer silver ribbon over Dk. Blue; wrap around the stamped panel and secure to the back with clear tape.
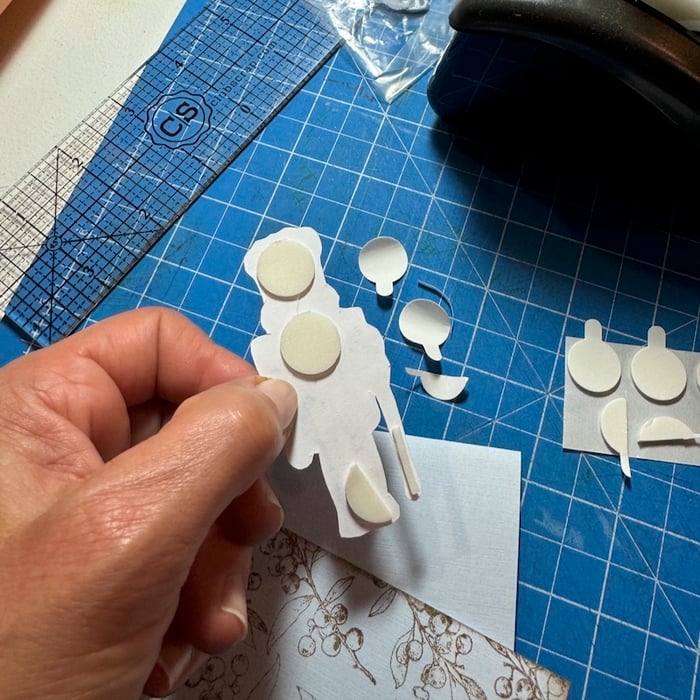
Trim Foam Adhesive Circles to fit the back of the nutcracker.
Remove the backing and add to the card, over the ribbon.
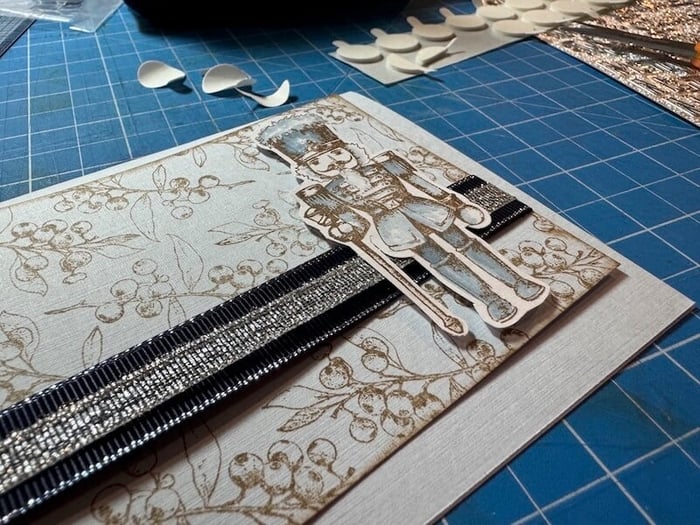
Position a "Merry Christmas" Dazzles to the left of the nutcracker.
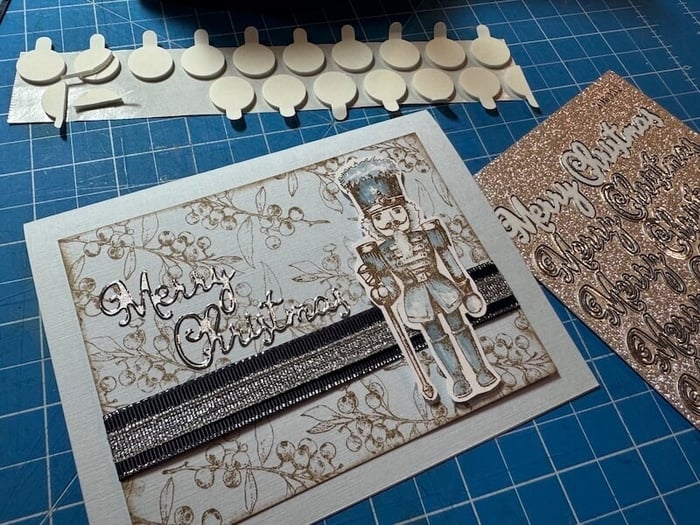 Nest the stamped panel onto a 3-3/4x5" Dk. Blue panel to complete the card.
*As an Amazon Associate, Club Scrap earns from qualifying purchases. This means we may earn a commission if you make a purchase through the links on our site. Thank you for supporting us!
What will YOU make with the Blue Christmas stamp sheet? The images and sentiments are perfect for pairing with your favorite simple - or not so simple - card designs.
Happy holiday card making!
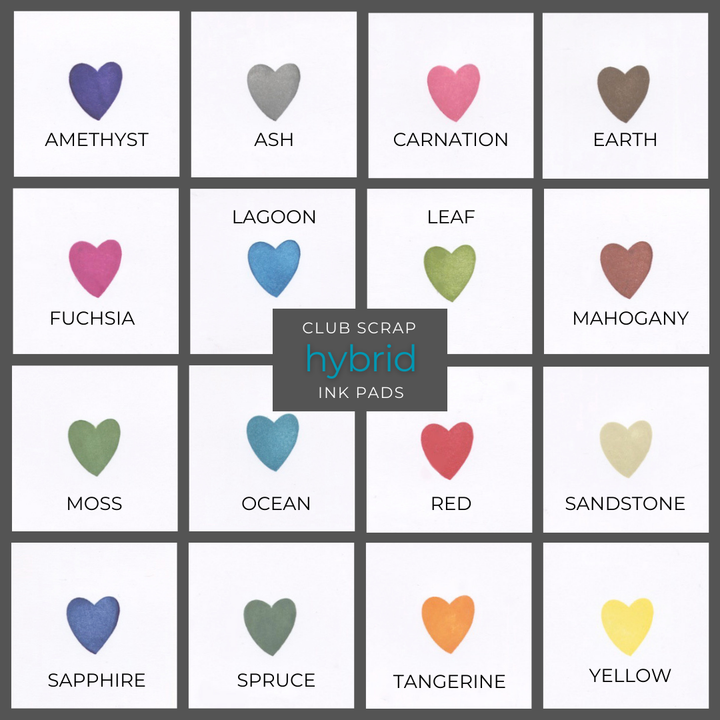
CS Hybrid Ink Pads
$6.35
Exclusively Club Scrap®, this hybrid craft ink combines the most exceptional ingredients of both pigments and dyes for a fine, crisp, fast-drying image! Don't forget to stock up on the coordinating re-inkers. Each ink pad sold separately. Please select the… Read More
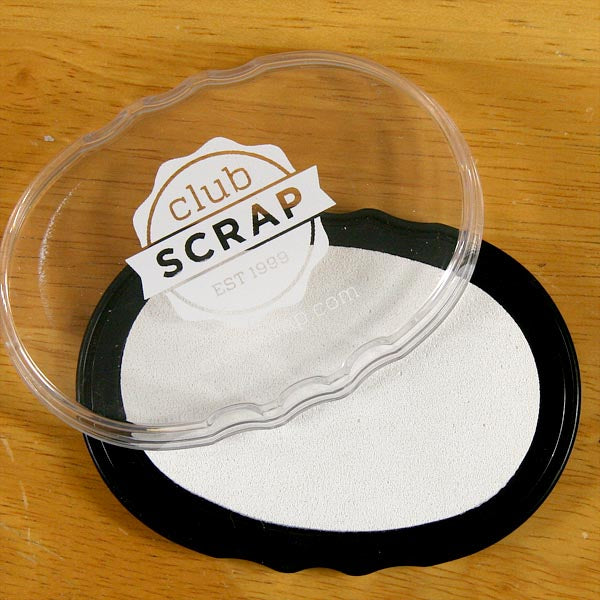
White Pigment Ink Pad
$7.20
Club Scrap's pigment craft ink offers an exceptional formula, providing for multi-surface versatility as well as remarkable detail when embossing. The bright white ink loaded into this nice 'n juicy pad will last a long time. Re-inkers also sold separately.… Read More
