
I set out to make the Homestead Club Stamp paper pack into cards, and was thrilled when I ended up with fifteen!
After a more careful inspection, we (Brenda) realized I'd accidentally used two extra sheets of 8.5x11 Green Plain. Rather than re-do the entire thing, we decided to add the extra paper to your kit. Phew! That was a close one!
This month, nearly all of the images came from the Collection UM sheet, which is included right in the kit!
Homestead Club Stamp Kit

We'll begin by trimming all of the papers required to make the cards.
1. Score the 8.5x11 Pumpkin Plain, Green Print, (2) Green Plains and (2) Brick Plains vertically at 4.25". Trim horizontally at 5.5". Fold each piece on the scoreline to make twelve card bases.

2. Trim each 8.5x11 Ivory Text Print vertically at 4.5 and 4". Cut each 4x11 horizontally at 5.75 and 5.25".

3. Trim one 8.5x11 Brown Plain and one 8.5x11 Green Print horizontally at 10.75 and 5.5". Trim the 5.25x8.5 horizontally at 8 and 4". Score and fold the 5.5x8.5 horizontally at 4.25".

4. Trim one 8.5x11 Ivory Plain horizontally at 10.5 and 5.5". Cut the 5x8.5 horizontally at 7.5 and 3.75". Score and fold the 5.5x8.5 horizontally at 4.25".

5. Trim one 8.5x11 Ivory Plain vertically at 4.75". Cut the 4.75x11 horizontally at 10.5, 7 and 3.5". Trim one 3.5x4.75 horizontally at 4.5 and 2.25". Cut the 3.75x11 horizontally at 10.25, 7.5, 5 and 2.5". Trim two 2.5x3.75 pieces horizontally at 3.25". Cut the remaining 2.5x3.75 piece horizontally at 2.5 and 1.25". Trim the 2.75x3.75 horizontally at 3.5 and 1.75".

Once the pieces are trimmed, the stamp images from the Collection UM will fit onto the panels as shown.

6. Trim one 8.5x11 Brown Plain horizontally at 9, 6.5, and 3.75". Cut the 3.75x8.5 horizontally at 7 and 5". Trim the 1.5x3.75 horizontally at 2.75". Cut the 2.75x8.5 horizontally at 7 and 3.5". Trim the 2.5x8.5 horizontally at 7.5 and 3.75". Cut the 2x8.5 horizontally at 7.25, 6 and 3".

7. Oh, my. Sorry about this one . . . Trim one 8.5x11 Pumpkin Plain vertically at 6.25". Cut the 6.25x11 horizontally at 9.75 and 8.25. Trim the 6.25x8.25 vertically at 5". Cut the 5x8.25 horizontally at 7.5 and 3.75". Trim the 1.25x8.25 horizontally at 6.25". Cut the 1.5x6.25 horizontally at 4.5 and 2.25". Trim the 1.25x6.25 horizontally at 4.25x2.25". Cut the 2.25x11 horizontally at 5.5".

A few of the pieces can be stamped with images from the Greeting UM as shown on the diagram below.

Now that you've got the most difficult part completed, it's time to organize that pile of pieces and make some cards!
CARDS 1 & 2
Stamp or emboss the UM collage image onto the text weight printed panels; tear and ink edges. If the jute ribbon is too wide, simply trim in half.

Insert the stamped or embossed panels into a ScorePal, plain side up. Score every half inch in each direction; ink the raised grid.

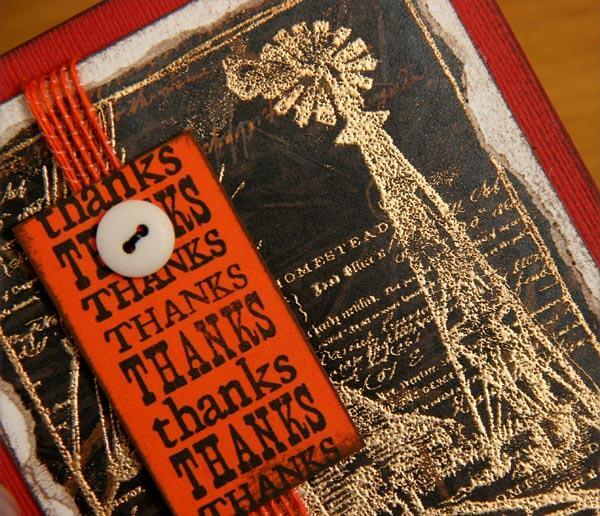
CARDS 3 & 4
Gold embossing powder worked well on the darker text weight panels.


CARDS 5 & 6
Distress the edges of the text weight printed panels and nest onto a card base; attach a stamped/nested panel, staple with jute and finish with a button.


CARDS 7 & 8
Stamp the collage image onto the Ivory panels with India Black ink and color with chalks, inks, copic markers or watercolors.


CARDS 9 & 10
Stamp the sentiment onto the Brown panel with White Pigment ink. Wrap the Green Print panel with jute.

TIP: Trim a 6" length of jute, stretch across the card panel and tape one end to the back; tie a small length of jute onto the 6" length and tape the other end to the back. This will reduce ribbon use and prevent extra bulk on the back of the card.


CARDS 11 & 12
The Green Print makes a beautiful card base. Stamp the 2.25x5.5 Pumpkin strip with the UM wheat and text images; use as an anchor for the matted sentiment.


CARDS 13 & 14
Create your own decorative panels. Stamp the Pumpkin panel with Earth ink; stencil the Brown panel with White Pigment ink. Stamp the barn image onto the Ivory panel and add watercolors.


To create contrast between the Brown matte and Brown panel, simply sponge edges with White Pigment ink.

CARD 15
Stamp and emboss the wagon wheel and sentiment onto the Brown panel with gold powder. Stamp the rocking chair over the sentiment with India Black ink.


It's time for you to rock 'n roll! Have fun with this one.
Tricia