Create gorgeous textured backgrounds with the Inky Stencil Stipple Mist technique.
![Inky Stencil Stipple Mist Technique #backgrounds #clubscrap #stipplemists #ink #tutorial #technique](https://cdn.shopify.com/s/files/1/0440/9602/8828/files/Inky-Stencil-Stipple-Mist-Technique-Challenge-11.jpg)
Inky Stencil Stipple Mist Tutorial
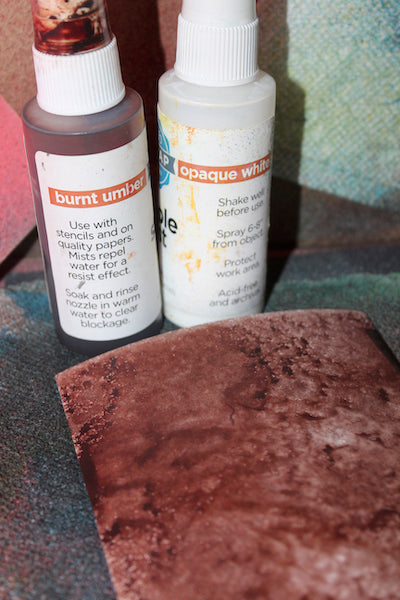
Create two panels by placing watercolor paper into a spray tray (aka: empty pizza box) and spritzing with water. Add two to three colors of Stipple Mists. Allow panels to dry completely before moving on to the next step. Tip: If you are impatient like me, a heat tool can speed up this process.
![#clubscrap #stencil #damask #technique #stipplemists](https://cdn.shopify.com/s/files/1/0440/9602/8828/files/Inky-Stencil-Stipple-Mist-Technique-Challenge-1.jpg)
Cover one panel with the Damask Filigree stencil.
![#clubscrap #stencil #damask #technique](https://cdn.shopify.com/s/files/1/0440/9602/8828/files/Inky-Stencil-Stipple-Mist-Technique-Challenge-2.jpg)
Apply White Pigment Ink. Be sure to use enough pressure to transfer ink through stencil onto paper.
![#clubscrap #stencil #damask #technique](https://cdn.shopify.com/s/files/1/0440/9602/8828/files/Inky-Stencil-Stipple-Mist-Technique-Challenge-3.jpg)
Continue inking the stencil until the panel is filled with the repeating pattern.
![#clubscrap #stencil #damask #technique](https://cdn.shopify.com/s/files/1/0440/9602/8828/files/Inky-Stencil-Stipple-Mist-Technique-Challenge-4.jpg)
The pressing of the ink pad onto the panel creates a subtle dappled effect that mimics the stipple-misted background.
![#clubscrap #stencil #damask #technique](https://cdn.shopify.com/s/files/1/0440/9602/8828/files/Inky-Stencil-Stipple-Mist-Technique-Challenge-5.jpg)
Lay the second panel onto your work surface. Invert the stencil and apply it ink side down onto the panel.
![#clubscrap #stencil #damask #technique](https://cdn.shopify.com/s/files/1/0440/9602/8828/files/Inky-Stencil-Stipple-Mist-Technique-Challenge-6.jpg)
Apply pressure to the stencil using a brayer or your
![#clubscrap #stencil #damask #technique](https://cdn.shopify.com/s/files/1/0440/9602/8828/files/Inky-Stencil-Stipple-Mist-Technique-Challenge-7.jpg)
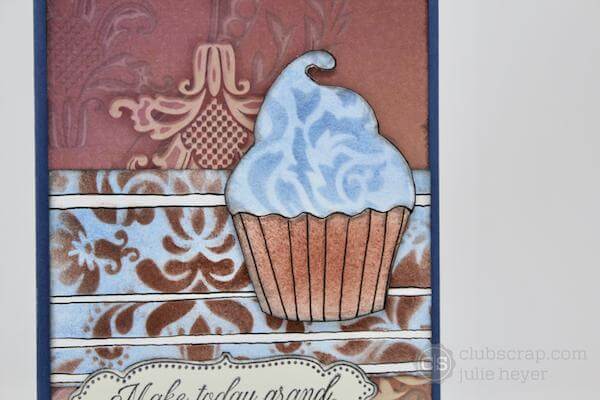
I just love the positive and negative images achieved with this fun technique!
![Inky Stencil Stipple Mist Technique #backgrounds #clubscrap #stipplemists #ink #tutorial #technique](https://cdn.shopify.com/s/files/1/0440/9602/8828/files/Inky-Stencil-Stipple-Mist-Technique-Challenge-9.jpg)
Pair the panels with coordinating papers, stamps, and embellishments to create beautiful cards. (I used elements from the Damask collection. )
![Inky Stencil Stipple Mist Technique #backgrounds #clubscrap #stipplemists #ink #tutorial #technique](https://cdn.shopify.com/s/files/1/0440/9602/8828/files/Inky-Stencil-Stipple-Mist-Technique-Challenge-15.jpg)
![Inky Stencil Stipple Mist Technique #backgrounds #clubscrap #stipplemists #ink #tutorial #technique](https://cdn.shopify.com/s/files/1/0440/9602/8828/files/Inky-Stencil-Stipple-Mist-Technique-Challenge-16.jpg)
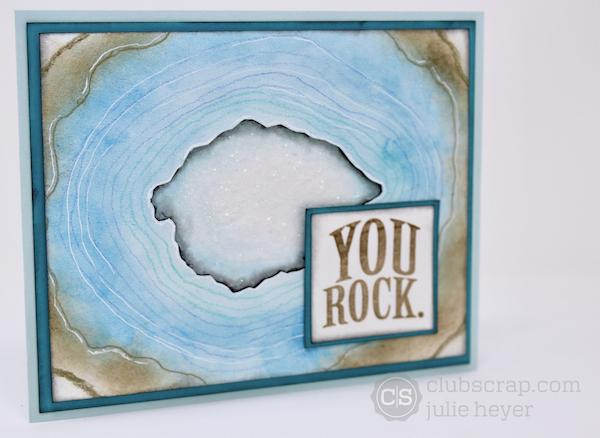
It is fun to experiment with other stencils in your stash. I created a thank you card with the Trattoria Grazie Stencil, cutaparts, and papers using this technique. Visit my Cape Cod Scrapper Blog for even more inspiration!
![Inky Stencil Stipple Mist Technique #backgrounds #clubscrap #stipplemists #ink #tutorial #technique](https://cdn.shopify.com/s/files/1/0440/9602/8828/files/Inky-Stencil-Stipple-Mist-Technique-Challenge-10.jpg)
Now it is your turn! Visit the Facebook Chat Group 06/19 Technique Challenge post to upload completed artwork in the comments section. Not a chat group member? Answer a few simple questions, and we will accept your request in no time!
Happy Crafting!
Julie