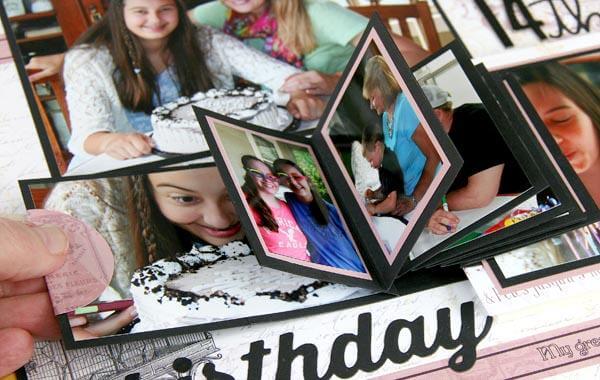
Expand the number of photos you can include in a layout with an interactive waterfall technique. It's beautiful with the Paris Flea Market collection! (And I can't believe my girl is 14!)
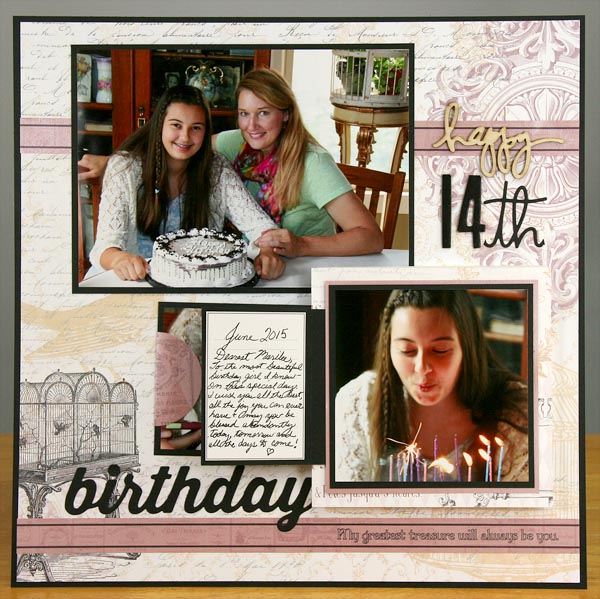
The page looks like any other layout when the mechanism is closed.

Waterfall Technique Tutorial
Follow the steps below to create a waterfall page:
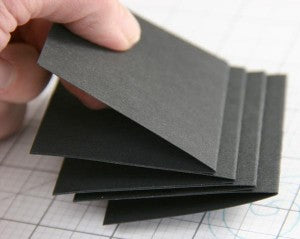
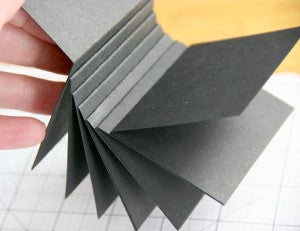
1. Cut seven 4.75x3.25" pieces of Black Plain. Score and fold each piece horizontally at 2.25". (Not in half.)

2. Adhere the back of one short flap to the back of one long flap with the non-folded edges aligned. Repeat to build the interactive mechanism.


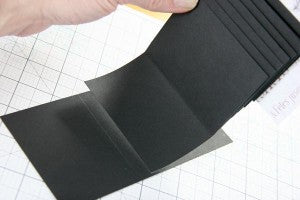
3. Adhere the back flap of the last page to a 5x5" White Print base. Align the folded edge of the flap with the left edge of the paper, and center from top to bottom.

4. Cut a 3.25x6.25" strip from Black Plain. Use a clear grid ruler to mark a light pencil mark 2.5" from the left edge.

5. Close all of the page flaps and adhere the outside of the first folded page to the marked spot on the strip, aligned from top to bottom. The strip will function as a pull tab.
6. Swing the pull tab around to the back, bringing it beneath the 5x5" White Print base.

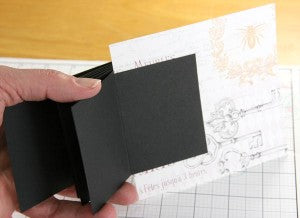
7. Flip the mechanism over and place foam tape onto the 5x5" White Print base in a "U"-shape to create space for the mechanism to work. More than two layers of foam tape may be required.


8. Attach the mechanism to a scrapbook page.

9. Decorate with cutaparts and photos.


Watch the waterfall page in action . . .
The most-viewed post of all time on my personal blog, Kay's Keepsakes, features this technique with Club Scrap's Lakes Papers. Check it out for more inspiration!
Shop the link below to purchase and download a card making version of this technique.

Slimline Waterfall Card Formula

$5.50
THIS IS A DIGITAL PRODUCT SENT VIA EMAIL In this virtual workshop, you'll learn to make a set of four slimline waterfall-style cards from five sheets of paper. So much more than a card sketch, our card formulas offer cutting… Read More