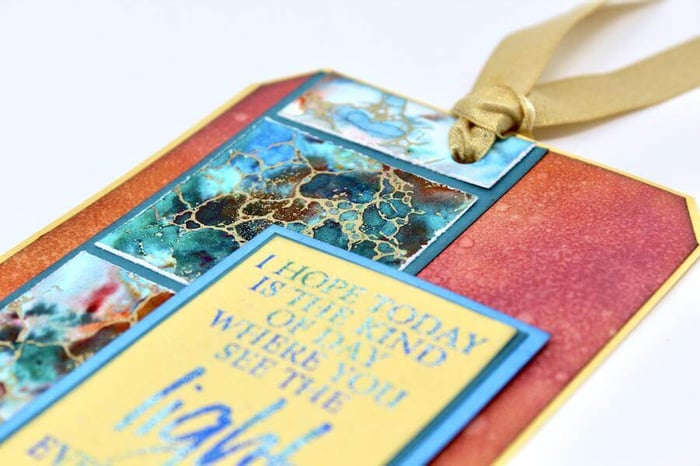

Create a vibrant background and fun embossed sentiment on a Turquoise jumbo tag.

Turquoise Jumbo Tag Tutorial
Color a jumbo tag with Candied Apple and Fired Brick Distress Oxides with an Ink Applicator Brush.

Mist and flick larger drops of water onto the inked tag. Remove excess water from the surface with a paper towel. I love how the ink reacts with the water to create the dappled effect.

Trim faux turquoise panels into squares. Visit the February Technique Challenge post for a detailed tutorial.

Fray the edges of the squares with a paper distressing tool. Add the squares to a strip of Dk. Teal paper and adhere onto the left side of the tag.

Stamp the sentiment onto a Gold panel with watermark ink. Sprinkle light blue powder over a portion of the sentiment. Dust the rest of the wet ink with a darker shade of blue and green powders. Heat set to melt.

Trim the sentiment panel and layer with Dk. Teal and Blue mats. Add a row of three red gems beneath the quote with Bookbinding Glue dispensed from a Needle-tipped Applicator.

Mat the entire tag onto a piece of Gold paper and thread gold ribbon through the hole in the tag.

Let's take another look at the completed tag.
Bigger is always better right? Especially when it comes to tags. Happy Crafting!
 Julie
Julie