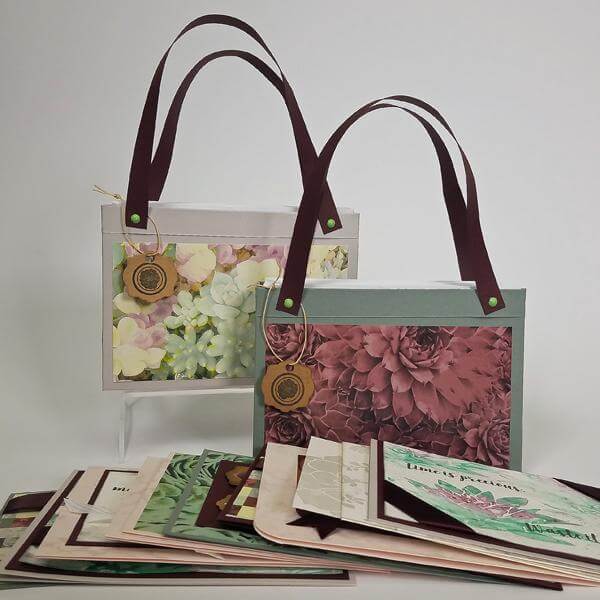

February's Succulents Club Stamp kit shipped today, and I'm thrilled by what we were able to accomplish with the twelve sheets of paper, stamps and embellishments in this collection.
First, we'll make eleven elegant cards.

And then we'll construct two adorable purses to hold those cards! (Seriously. All this out of twelve sheets of paper.)

Click on the link below to download the paper trimming and scoring instructions. February Club Stamp Instructions Let's take a peek at the card sets. Reference the images below for details on how to stamp and assemble the trimmed pieces.
CARDS 1 & 2

I finally discovered my favorite art medium for the large stamp images on the Jumbo UM sheet: watercolor crayons. Simply mist the stamp with plenty of water, apply colors directly to the stamp, re-mist, and stamp onto a card panel. Mist again without adding more color, and stamp a second or third time.

CARDS 3 & 4

The card on the left features the first watercolor stamped image, and the second card is the softer, second imprint. Define the edges of the petals on the softer image with hand drawn double lines.
CARDS 5 & 6

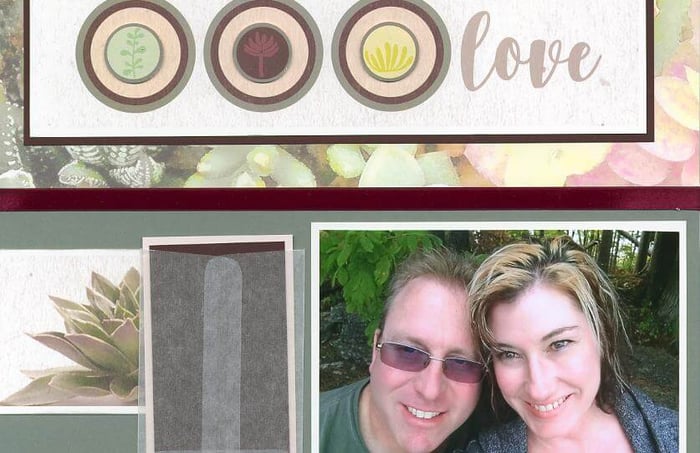
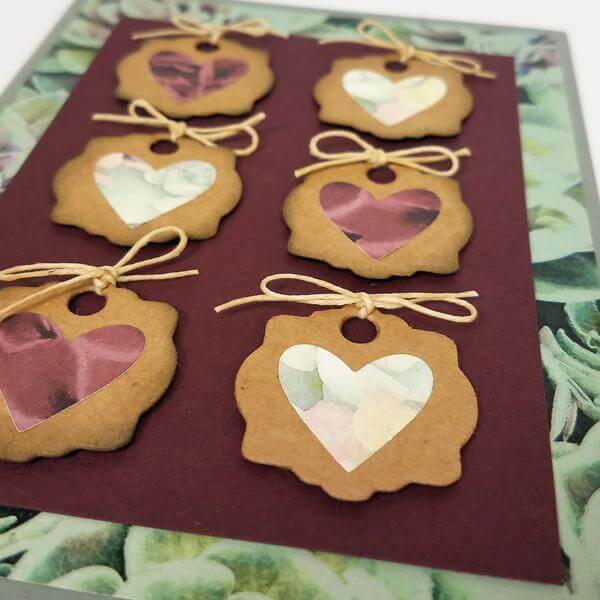
Die cut our punch heart shapes from small scraps of the Quad Print, and adhere to the kraft mini tags included in the kit. Top each tag with a waxed linen bow from your stash (if you have the patience), and layer onto a Wine card panel with foam adhesive.

I couldn't resist reaching for my UM Greeting stamps for this one. Stamp the "thanks" in India ink and add a line with a white pigment pen to each downstroke of the letters.

CARDS 7 & 8

I was down to just a few pieces of paper and decided to make two card bases from an 8.5x11 sheet of Ivory. Stamp the large hens and chicks image or the small succulents onto the card base with Ash ink. Add the sentiment to the 1.5x3.75" Ivory strip and round only the left edges with a 1/4" punch. Adhere flush with the right edge of the card.

CARDS 9 & 10

Stamp the UM pot with Jet Black ink. Color the succulent image with watercolor crayons and stamp into the pot. Add shading to the pot and a shadow behind it with a water brush.

CARD 11
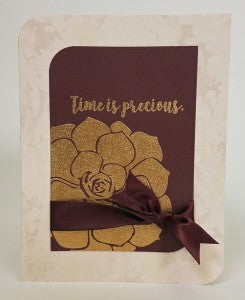
Load the stamp with pigment ink, stamp, cover with gold embossing powder and heat set. The embossing looked magical on the Wine paper!

If you like this set of cards, jump in and pick up the Succulents Club Stamp kit today! See you tomorrow for details on how to construct a gift purse from one 8.5x11 sheet of paper.

Happy card making!
Tricia