
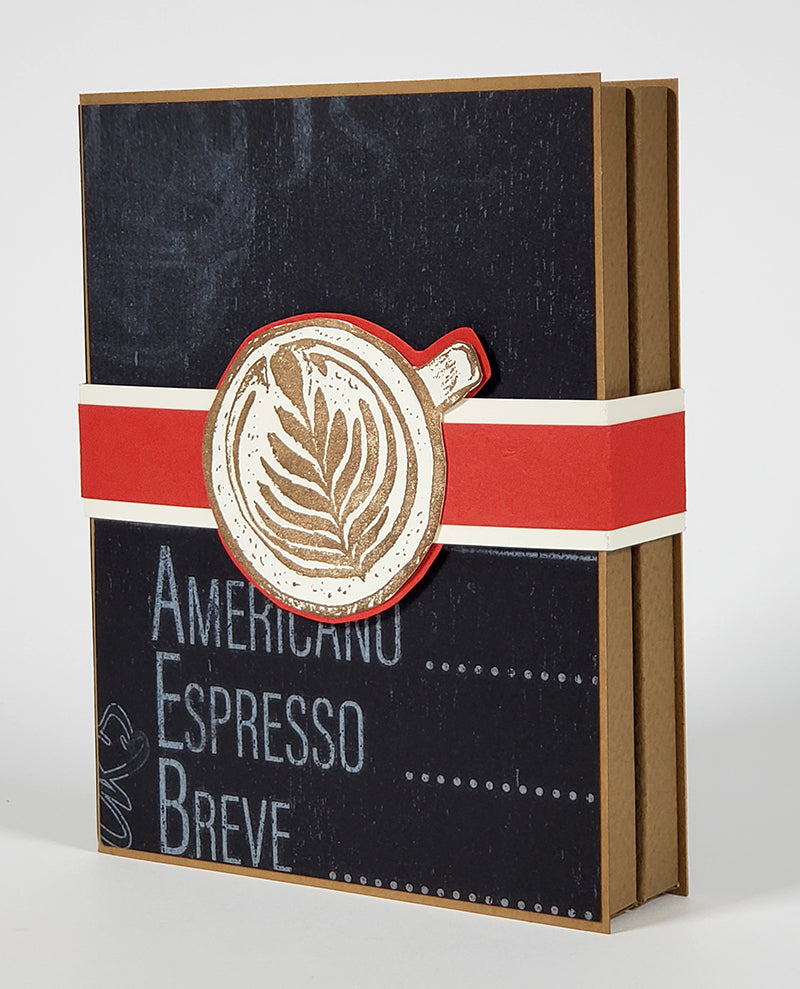
I had a great time making the Coffeehouse Notecard Carrier and filling it with cards stamped with this month's fun images!
I think the whole team here at CS® is pretty excited about this project. We keep making it! Perhaps because of the upcoming gift-giving season?
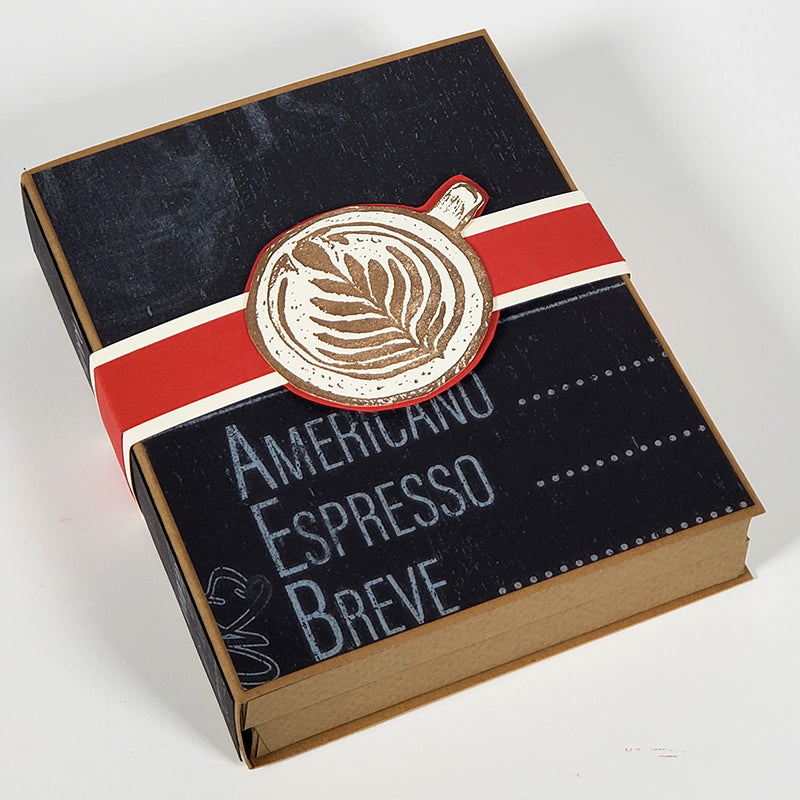
The structure of the carrier is made with our brand new color of Dark Kraft Folding Board. This is a completely uncoated material, and it cooperates very well with different types of adhesive. It also gives the carrier an extremely durable base. Like, if the recipient lets this thing roll around in their back seat for a few weeks after you give it to them, it will be fine.

The Notecard Carrier is a project available for immediate digital download and includes a video tutorial. The tutorial not only prepares papers for the folio, but also creates the framework for eight notecards, shown below.
Coffeehouse Stamped Cards
After stamping the "to go" coffee cup onto red paper with white pigment ink, and then onto white paper with black ink, trim the white lid and add to the trimmed red cup. Mat with a fussy-cut black panel and add to the Mocha mat with foam adhesive. Stamp and trim the "thanks a latte" and curve slightly between fingertips. Adhere with foam adhesive.


Use a MISTI to stamp the images, if possible. This will allow you to stamp as many times as necessary to achieve the depth of color desired. Shade the edges of the stamped panel with CS® Earth ink and an ink applicator brush.


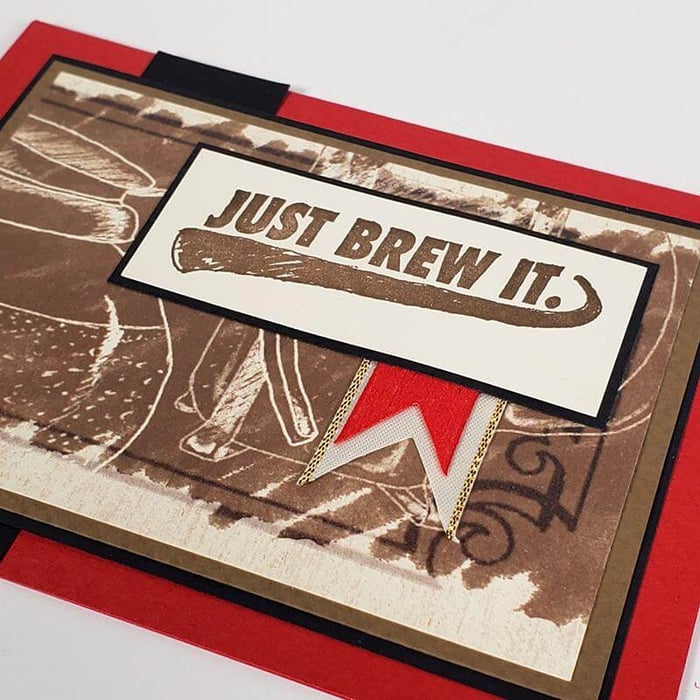
Stamp the banner image first, and then add your choice of several sentiments from the sheet into the banner with a contrasting ink color.


Stamp the banner and sentiment onto black paper with white pigment ink. Heat set the ink before fussy-cutting the banner.


The ivory printed panel naturally occurred when following the trimming instructions for the project. Simply stamp the sentiment into the upper left corner with India Black ink.


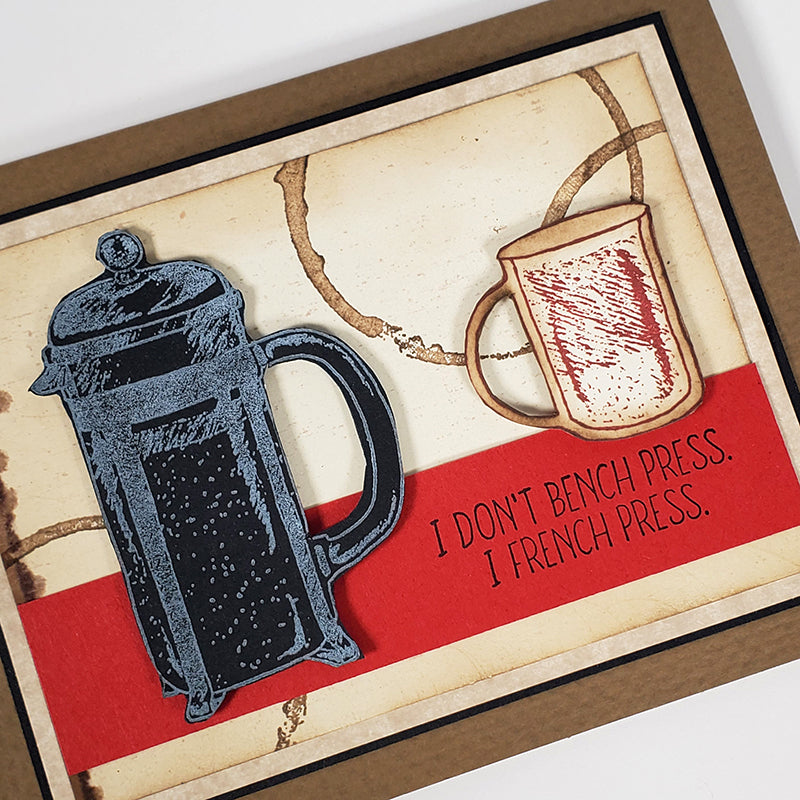
Stamp the french press onto black paper with white ink, and the cup onto ivory paper with red ink. Trim with scissors and a craft knife, and add to the card with foam adhesive.

Stamp the "thanks a latte" sentiment onto a Latte panel. Use a craft knife to cut slots for ribbon on the left and right edge of the image and slide the ribbon behind.

There you have it. Eight adorable stamped cards and a notecard carrier! How fun is that?
If you don't already own them, pick up your Coffeehouse stamps today!
Tricia