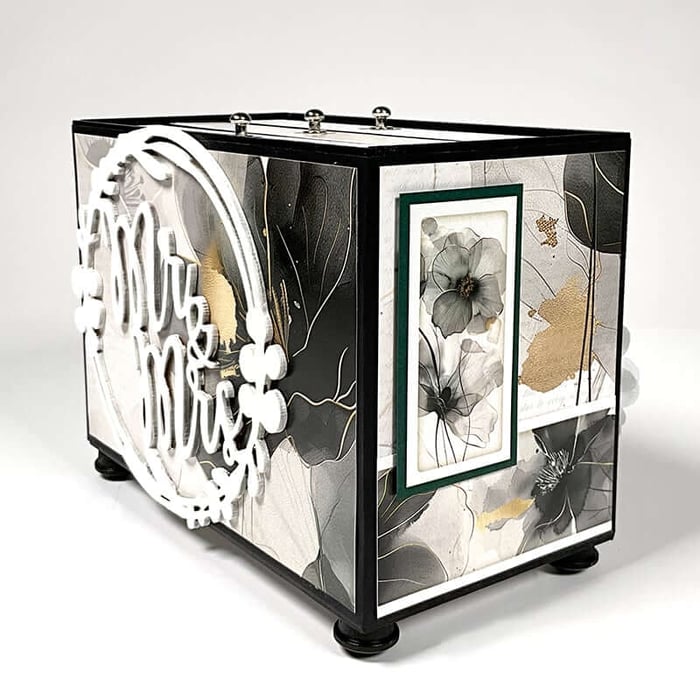
Tricia recently shared the Travel Memory Book she made featuring the Boughs of Joy Page Kit and the Kraft Components. Once I saw how beautifully it turned out, I was inspired to make one myself with October's new Autumn Glow collection.
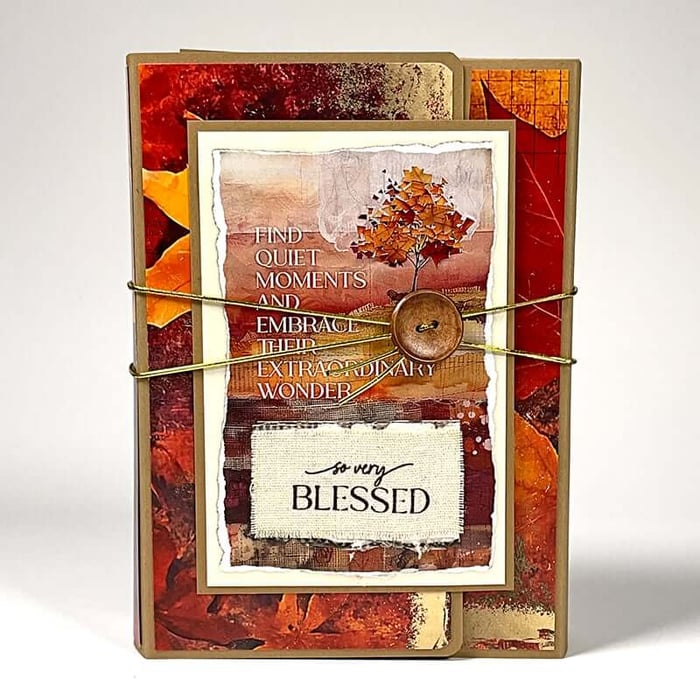
Autumn Glow Travel Memory Book
To get started, simply gather the supplies listed below to make your own book. You can always substitute the October Page Kit for another theme to suit any event or occasion.
Supplies List
To recreate this project, gather the following supplies and tools:
Travel Memory Book Components—Kraft
Autumn Glow Page Kit (or Page Kit of your choice)
CS® Bookbinding Glue
Needle-tipped Applicator
12” Paper Trimmer
3x14" Grid Ruler
Scor Pal 1/8s
Accordion Pocket File
Bone Folder
3 in 1 Corner Rounder
Envelope Punch Board* or Circle Punch*
Pencil
Scissors
Paper Assignments
Once you've downloaded the written instructions, utilize the paper substitutions below for each step of the instructions. (Or you can always do your own thing!)
- 1. Yellow
- Lt. Orange
- Plum
- Yellow
- Small Leaf Print
- Large Leaf Print
- Large Leaf Print
- Small Leaf Print
Book Assembly
This book is filled with a lot of interactive features, so make sure you follow along with the video tutorial. Tricia's step-by-step guidance, along with helpful tips, will ensure successful completion.
Embellish
Once you've completed assembly, it's time to decorate!
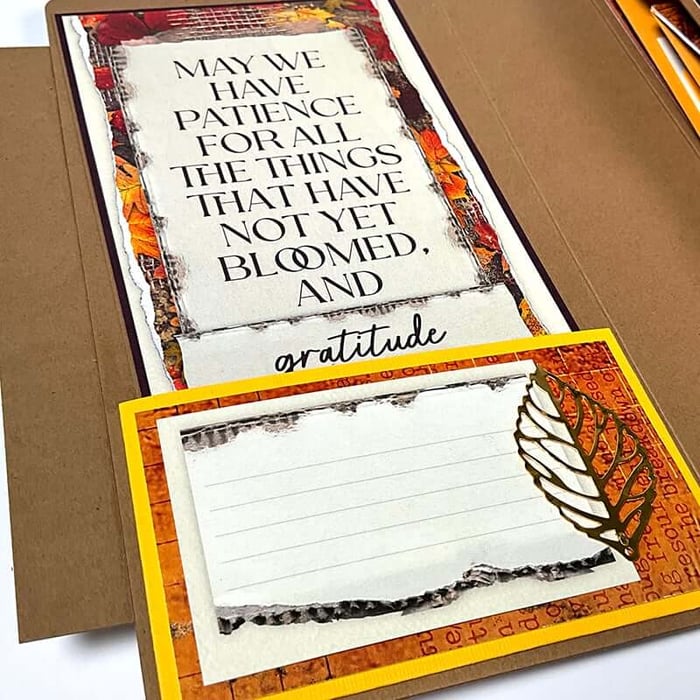
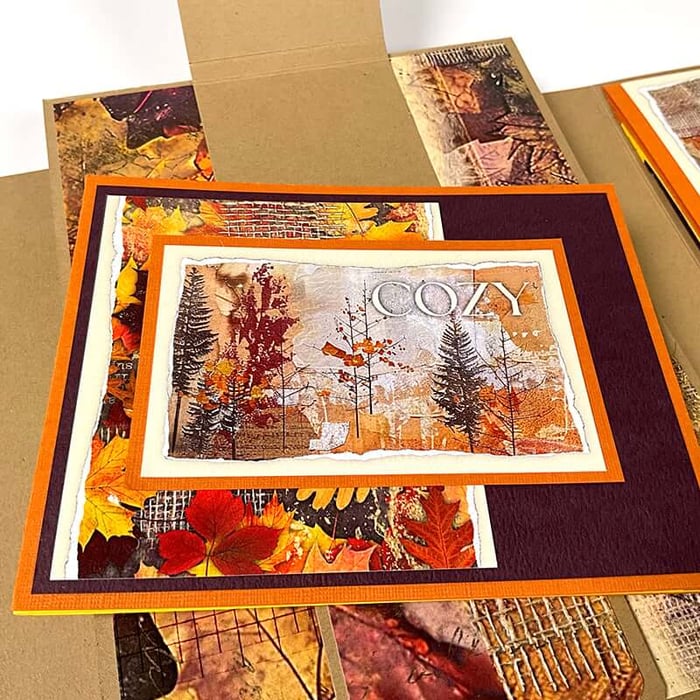
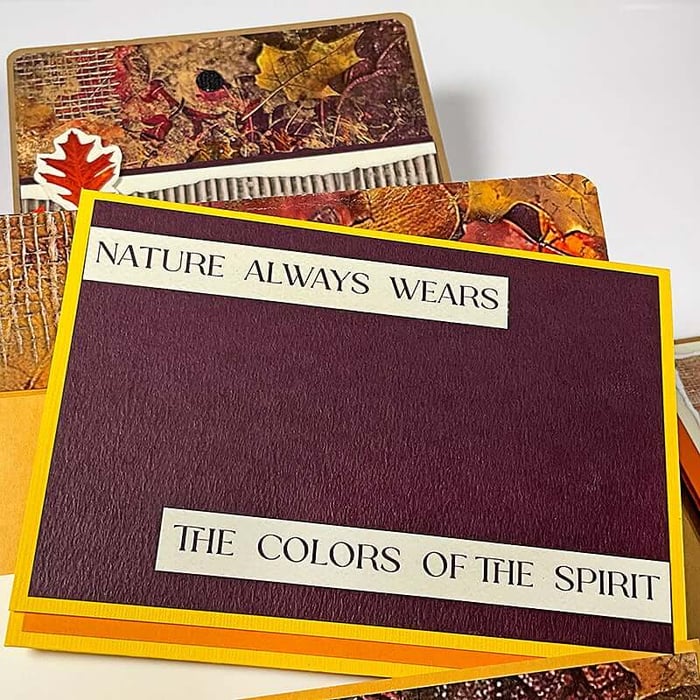
Nest the 4x6 journaling cutapart onto a 4.25x6.25" Kraft Folding Board (cut from scraps). Center onto the front of the book, adhering to the left flap only. I really liked the size and sentiment on the cutapart, but I had to resolve the journaling box issue.
I also wanted to feature the Drawstring Bags in some way, but I found them a bit lumpy for the book's interior. IDEA: Why not deconstruct the linen bag and trim the sentiment to cover the journaling lines?
Tip: Cut the fabric with a paper trimmer or scissors, then carefully fray the edges. Once you're satisfied with the "look", apply Bookbinding Glue to the fabric edges to prevent further fraying.

Remove the elastic button closure to reveal all the goodness inside.
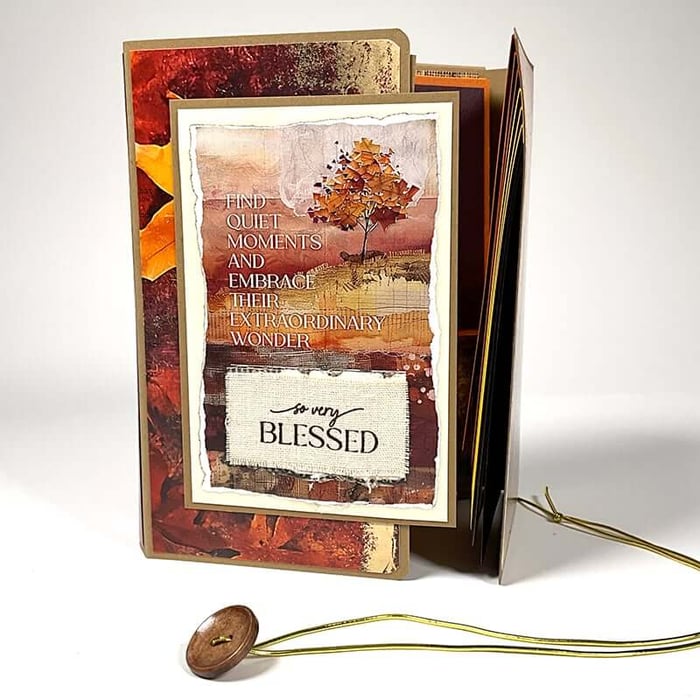
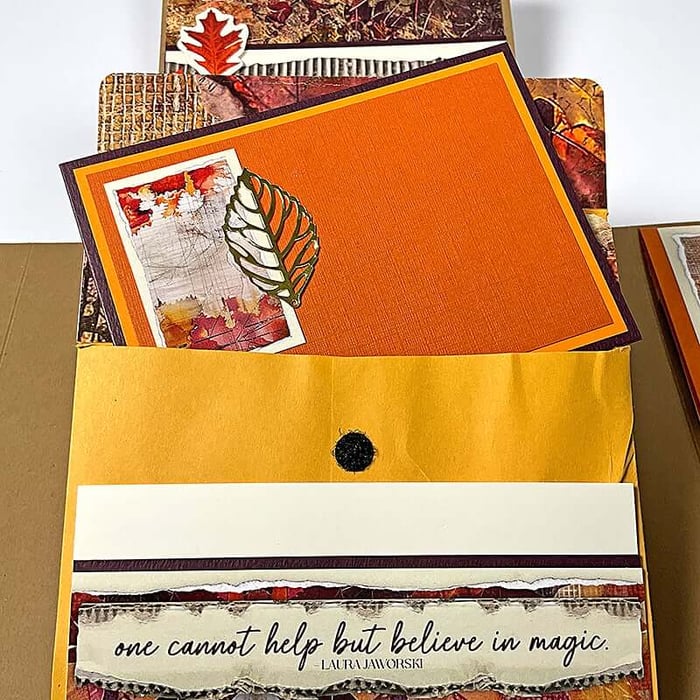
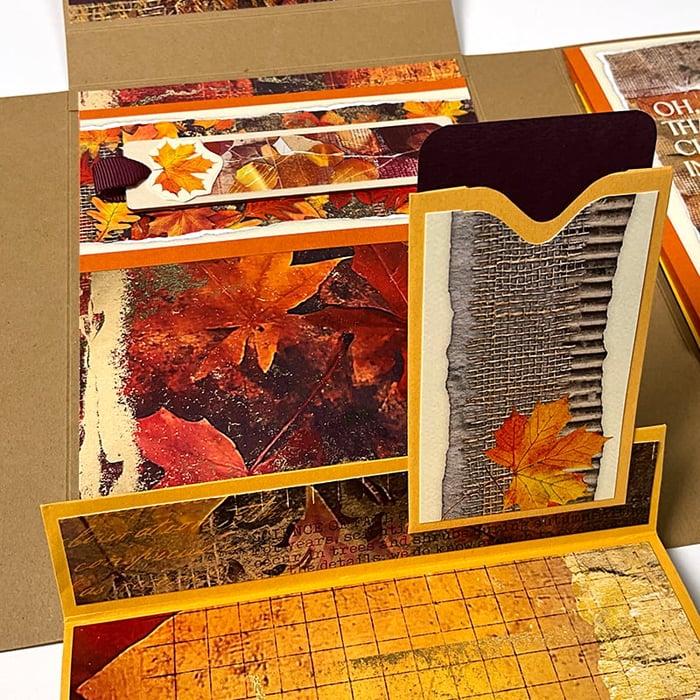
The interior of the book is divided into three sections.
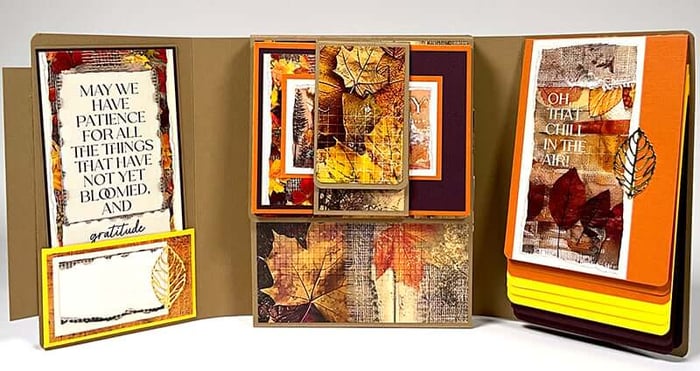
You'll construct a sweet pocket for the left inside cover. I trimmed the large sentiment cutapart strip to fit the height of the book and mat it with Plum. A journaling prompt and Leaf Charm are simple but charming (see what I did there?) embellishments for the pocket.
The right inside cover features waterfall "pages" designed to showcase vertical photos.
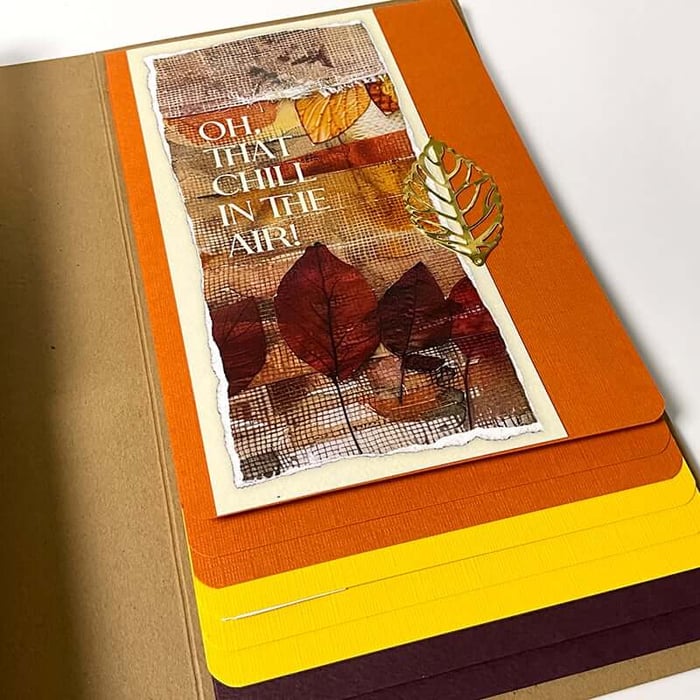
I couldn't resist adding an embellished coin envelope with a journaling prompt inside. I used the same 1" circle punch* to create the notch in the envelope and the pull tab on the cutapart. More of the linen from the deconstructed drawstring bag serves as a mat for the small leaf cutapart.
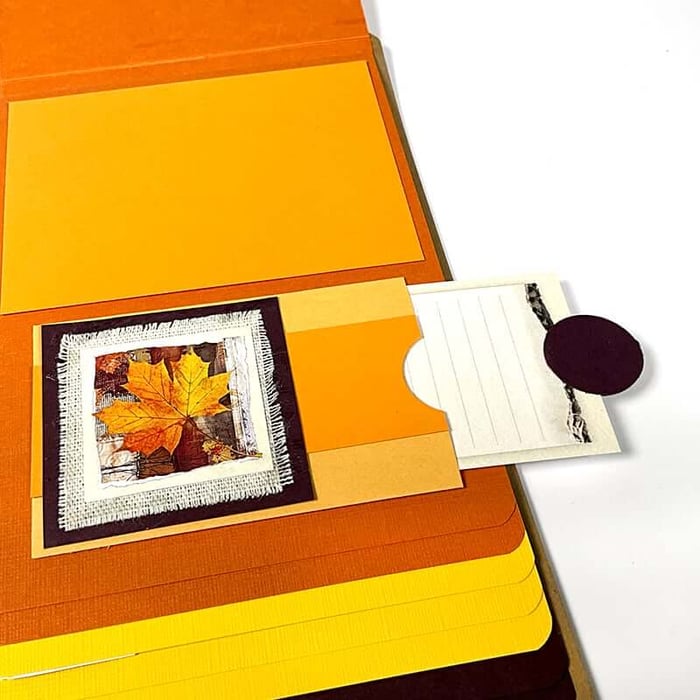
The center of the structure is home to several interactive features. The smaller, narrow flap stores a removable accordion booklet intended for horizontal photos.
Beneath that, another flap opens to reveal the altered manila envelopes. Each envelope is carefull scored and folded to create staggered pockets, with and without hook and loop closures.
Folded booklets tuck into each pocket. I had fun decorating each booklet with mats and cutaparts trimmed to fit each element.
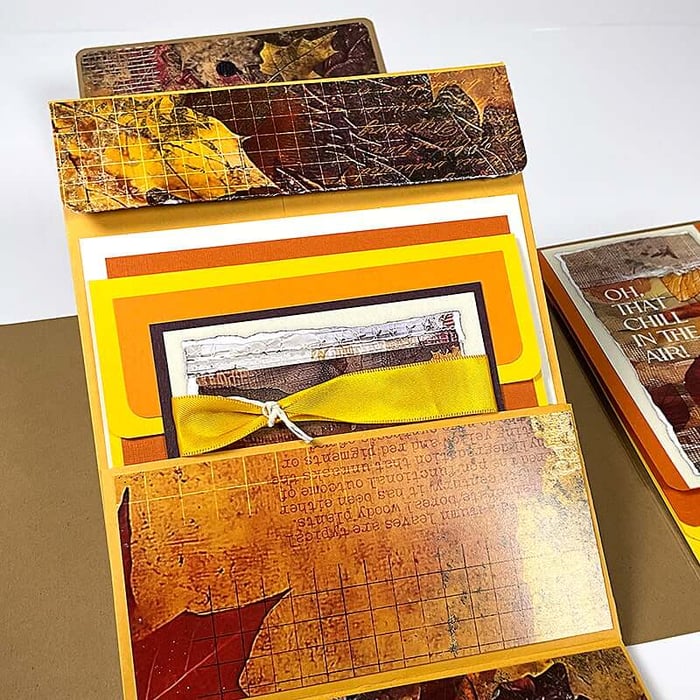
I totally scrap-lifted Tricia's "ribbon-tied-with-cord" embellishment from her Page Kit instructions.
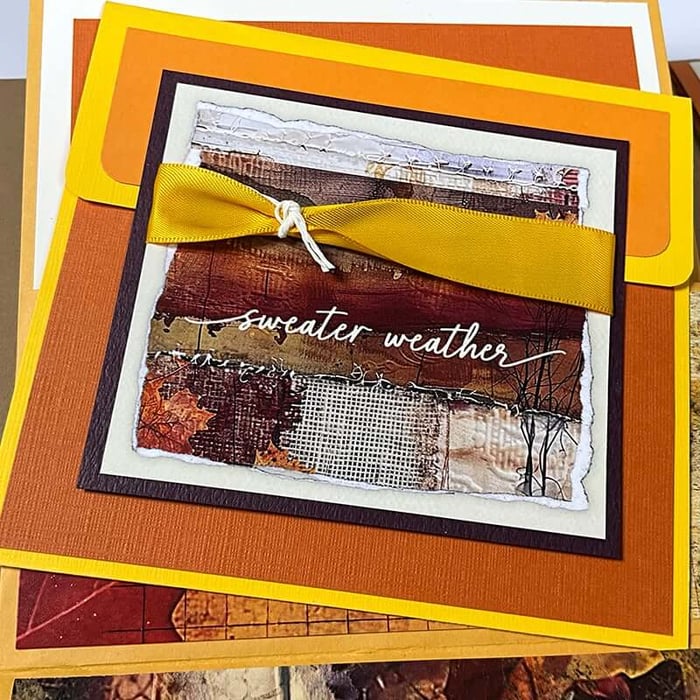
The final flap of the center section features the second coin envelope (notched using an envelope punch board*) with a card stock tag tucked inside.
*As an Amazon Associate, Club Scrap earns from qualifying purchases. This means we may earn a commission if you make a purchase through links on our site. Thank you for supporting us!

While constructing handmade books can be a bit challenging for some, Tricia's expert guidance makes it easier than ever to transform your favorite CS® Page Kit into a really impressive interactive keepsake.
Have you made a Travel Memory Book yet?
We invite you to share your finished artwork on our Facebook Chat Group. Not a member of the group yet? Simply answer a few questions and we'll get your request processed in no time!
Click the links below to purchase the supplies needed to create your own Interactive Album.
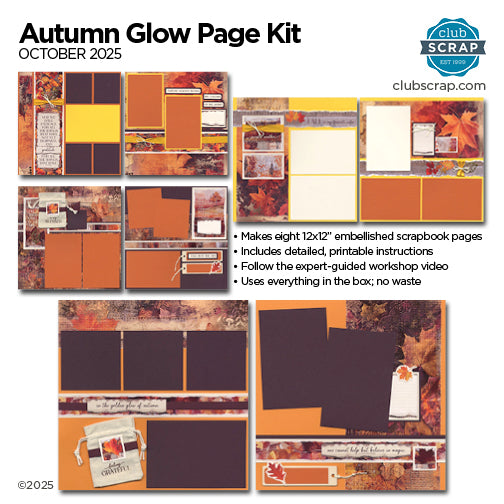
Autumn Glow Page Kit
$35.95
Kit includes all of the supplies needed to complete eight fully-embellished 12x12 scrapbook pages. Just add a trimmer, scissors and adhesive. Instructions download and video tutorial included. Includes: (4) 12x12 Prints: 2 ea. Large Leaf Print, Small Leaf Print(2) 12x12… Read More
Travel Memory Book Components - Kraft

$18.95
Includes: (3) 12x12 Kraft Folding Board(3) 6x9" Kraft Envelopes(2) 2.25x3.5 Kraft Coin Envelopes26" Gold Elastic CordWooden Button(5) Sets Hook and Loop Dots5-page Printed Instructions Document with link to Video Tutorial*Page Kit Not Included… Read More