
Read on to learn more assembly details about the Vintage Botany Deluxe layouts and Greetings to Go cards.

Vintage Botany Deluxe Layout Assembly Details
LAYOUTS 1 & 2

I adore the dandelion overlay stencil we've designed for this collection. It took a bit of effort to figure out a way to make the delicate tufts of the dandelion look the way we wanted, but it was worth it! Stencil with our superbly opaque White Pigment ink for a soft look.

LAYOUTS 3 & 4

We couldn't believe our good fortune when we stumbled upon these beautiful, printed wood postage stamp buttons. Jacqueline designed special homes for them on our printed cutaparts.


LAYOUTS 5 & 6

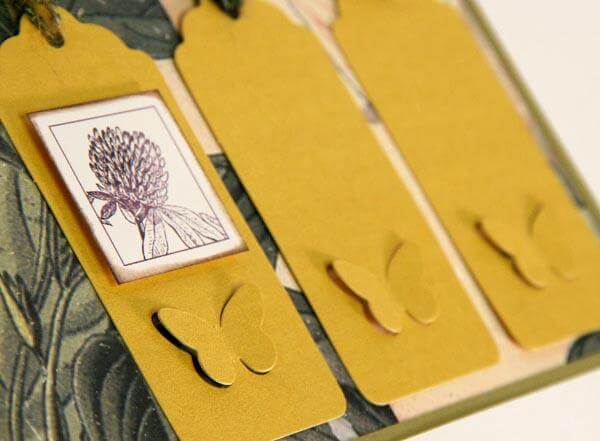
Add small pieces of foam adhesive behind each die cut butterfly on the tag to keep the dimension visible.

Cut a small slot into the edge of the cutaparts designed to fit within the narrow glassine bags. Alter the mini sticker tag with your favorite coordinating inks.

LAYOUTS 7 & 8

Before adding the lace to your layout, sit back and enjoy the extreme softness! To attach, simply run your favorite adhesive along the edge of the Ivory Print on the plain side of the paper. Press the paper down onto the strip of lace and tape the ends to the back to secure.

LAYOUTS 9 & 10

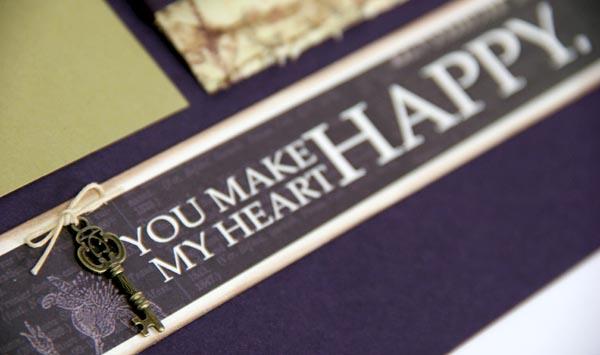
If you happen to have some ivory waxed linen thread on hand, use it to tie a small bow onto the top of the miniature brass key charm. Such a sweet addition!

Use a paper distressing tool to scrape the edges of the 8.5x11 Lt. Green Print. Then, rub a pad of CS® Earth ink across the edge of the paper to add to the vintage look.

LAYOUTS 11 & 12

Wrap the remaining length of lace around the distress-edged Lt. Green Print. Tie another waxed linen bow onto the top of a key charm and place within the oval on the printed cutapart.

Cut a 4" length from the brown taffeta ribbon, make a loop, and tape the ends onto the back of the double photo mat.

LAYOUTS 13 & 14

Simply tie a knot into the wide taffeta ribbon and wrap around a photo mat, securing the ends on the back with tape.

Cut a small rectangular slot into the cutapart with a craft knife, cutting mat and ruler, and loop the mini sticker tag through the slot. Stick the circular portion together.

Greetings to Go Card Assembly Details
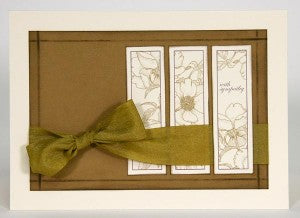
SET A

Score 1/2" from the four outside edges of the Brown panel to create a raised line. Shade the raised score line with Earth ink and a CS® Ink Applicator. The ScorPal was also used to create "boxes" on a second card panel in this set.
SET B

These adorable "matchbook" style cards look elegant with the addition of gold filigree swags to cover the staples securing the bottom flap of the card. Adhere the swag with our awesome bookbinding glue.

SET C
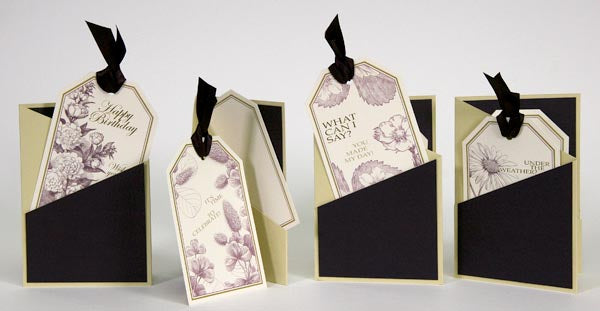
Score twice to create a tri-fold card and cleverly remove an angled portion to create a pocket on the front and a pocket inside! Slide a printed cutapart into each pocket.


The more time I spend with this collection, the more I love it. I hope you find the same to be true for you!
Happy creating!
Tricia