
Make a variety of crafty projects with super-versatile Packs of Panels, aka: POPs. POPs are available to coordinate with each monthly kit we release. You can purchase them any time online, however, due to the limited quantities available, the best way to guarantee you receive them is to add them to your monthly subscription.
On occasion, we have POPs available for special release collections. These handy packs are now available in the Gnome for Christmas and Shades of Winter Remix themes. I was inspired to put my thinking cap on and transform them into two nifty projects.
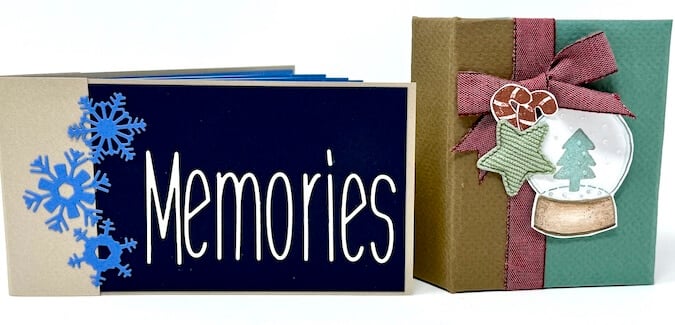
Gnome For Christmas Stitched Mini Book
Book Assembly
Cut a Club Scrap pizza box with a utility knife and cutting mat. Create three pieces in the following sizes:
(2) 3-1/4x4-1/4" Outside Covers
(1) 1x4-1/4" Spine

Remove two Green panels from the Gnome for Christmas POPs. Trim each to 3x6" for the outside front covers. Cut one Brown panel to 4x6" Brown to create the outside spine cover. Position the spine vertically between the two 3x6" Green panels on the work surface as shown below.

Find the center of the Brown Spine panel with a Grid Ruler. Apply Bookbinding Glue to the back of the cardboard spine. Center the board onto the spine cover 7/8" from the bottom edge. Glue into place.

Position one cover board 1/4" from the left side of the spine board, using the Grid Ruler as a guide.

Draw a vertical pencil line marking where the long edge of the Brown panel ends.

Add Bookbinding Glue to the area within the pencil line.

Adhere the cover board to the left side of Brown spine, remembering to leave a 1/4" gutter between the spine board and cover board. Repeat for the second cover board.
Flip the book over to the front. Brush glue onto the remaining exposed area on the cover board.

Place a Green outside cover flush against the Brown spine. Repeat for the second cover.

Miter the four outside corners about an 1/8" from the edge.

Brush glue onto each long flap and wrap them around the covers. Repeat with the short flaps, making sure to tuck in the corners.

Trim a Brown panel to 4" square to create the inside spine cover. Adhere with glue, making sure the edges align with the outside spine cover.

Trim two Green panels to 2x4" to create the inside covers of the book. Glue each into place.

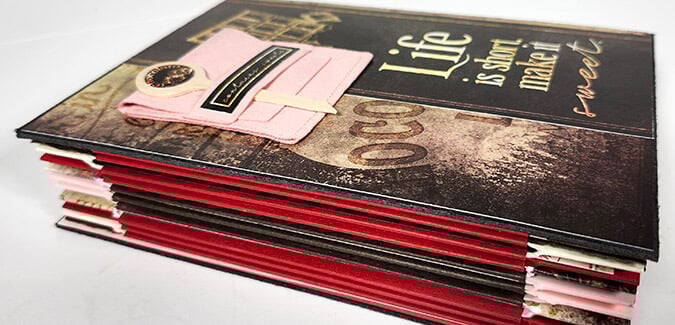
Gather four Ivory, Brown, Red, and Green Panels. Cut to 6x4" if necessary. Score each panel horizontally at 3". Fold each panel in half to create a total of 16 signatures.

Place each folded page into a Piercing Cradle. Transfer holes into the fold of each signature with an awl at 1/2, 1-1/4, 2-3/4, and 3-1/2". Tip: To save time and effort, create a piercing guide from scrap paper.

Stitch the signatures together with waxed cord using a long stitch. Tip: Visit Tricia's Stitched Book Video for a detailed tutorial.

After completing the stitching, trim away any excess cord. Apply bookbinding glue to the back of the last signature paper, tucking in the cord end.

Adhere the signature stack to the inside back cover, with an equal reveal on three sides.


Adhering the signature stack only to the back cover leaves the spine exposed to showcase the decorative stitched binding.
Finishing and Embellishing

Embellish the front cover with ribbon and a puffy star. Stamp and fussy cut images from the Gnome For Christmas stamps. Attach to the front cover with foam adhesive.
Shades of Winter Remix Zig Zag Book

Gather five Ivory and five Lt. Blue panels. Trim to 4x6" if necessary. Score each panel horizontally at 5-1/4".

Place one Lt. Blue panel onto your work surface with the bump of the score line facing up and the small scored area on the right. Apply Bookbinding Glue (dispensed from a Needle-tipped Applicator) to the back (with the indented score line) of an Ivory panel.

With the smaller scored area on the left, adhere the Ivory Panel to the Lt. Blue.

Choose a Lt. Blue panel and add glue to the back of the smaller scored area.

With the smaller scored area on the right, adhere to the Ivory panel.

Continue to add the remaining pages to form the zig zag shape, alternating colors.

Cut two 3-3/8x6-1/4" Champagne Metallic panels to create the book covers. Trim one Champagne Metallic to 3x3-3/8". Place the 3" wide panel into a ScorPal and score at 1-1/2 and 1-3/4". Cut two Dk. Blue panels to 3-1/8x 6". Center and adhere each Dk. Blue panel to the Champagne Metallic covers.

Add Bookbinding Glue to the right side of the scored area of the spine. Adhere the book cover, Dk. Blue side down, right next to the bump of the score line. Tip: Do not overlap the score line to ensure the book will open and close properly.

Repeat for the second cover.

Add glue to the narrow scored area of the last Lt. Blue signature.

With the glued area on the right side, adhere the signature stack to the back cover, with an 1/8" reveal on the right, top and bottom edges.


Embellish the front cover with die cut letters and snowflakes.

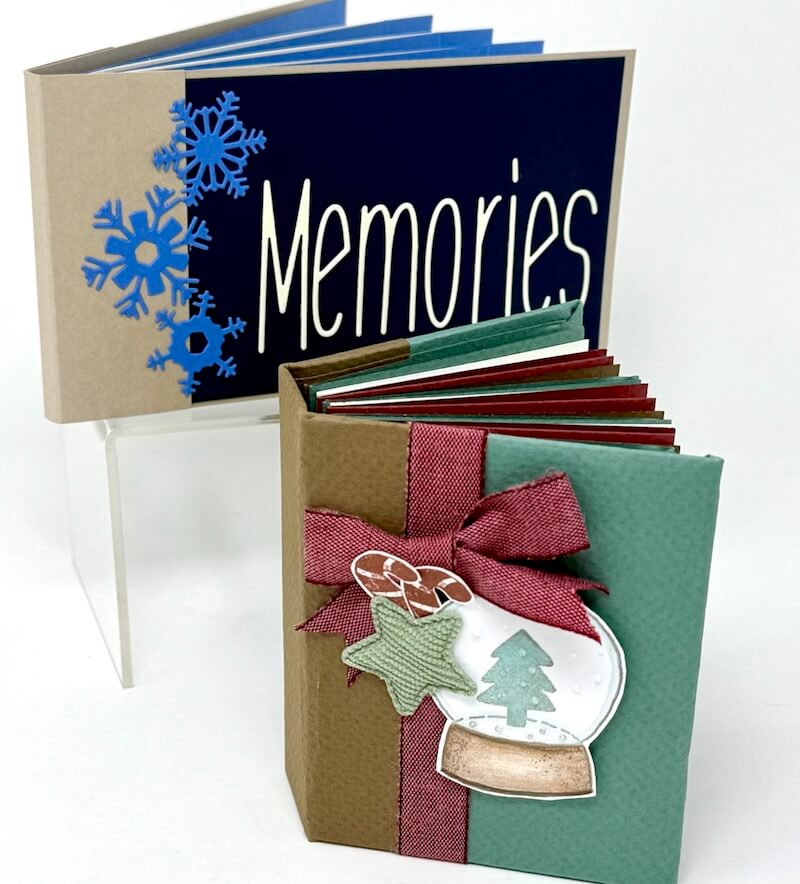
Let's take another look at the finished book.

I hope you will grab a set of these POPS and give these ideas a try. We love seeing what you make, so please share your crafty creations with us on our Club Scrap Chat Group on Facebook. Not a member of the group yet? Simply answer a few questions and we will get your request accepted in no time.

Stay tuned for more inspiration as we celebrate "12 Days of Holiday Gift Ideas" on the blog this month.
Happy holidays!