How gorgeous is the new Heartfelt Collection? I’m obsessed with the mixed‑media vibe featured in this new special release. It also served as a reminder that maaaybe I should finish using up last year’s Heartstrings collection before the Heartfelt Page Kit I ordered shows up! That's when I got the idea to create a heart garland.
Handmade Heart Garland
I love the look of handcrafted paper garlands draped across my mantel, so a Valentine’s version felt perfect for the upcoming holiday.
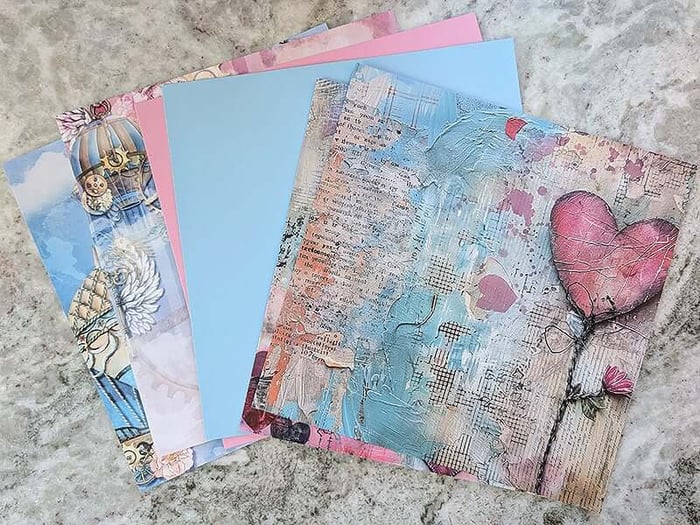
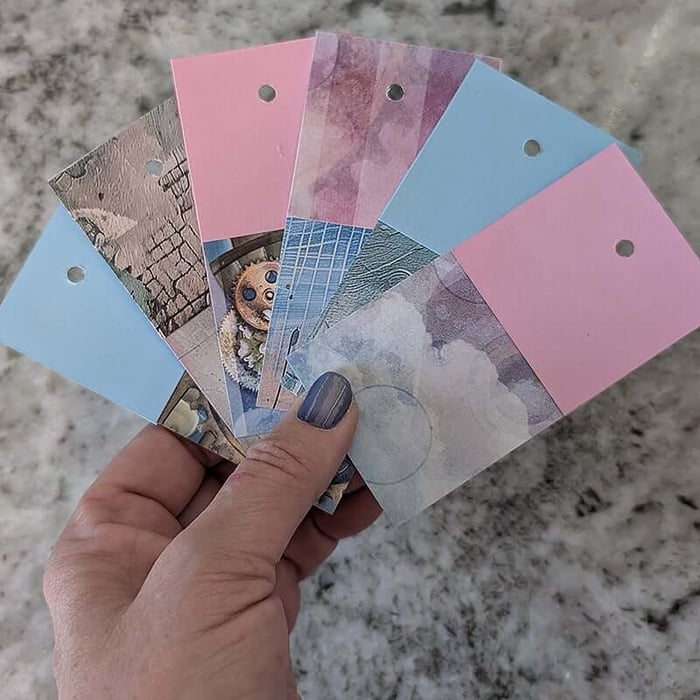
To create the garland, gather six coordinating sheets of paper: I used two prints from Heartstrings (2025 Special Release), plus two Prints and two Plains from the Take Flight Page Kit (02.24). The Take Flight color palette blends beautifully with the prints from the Heartstrings collection.
Trimming the Paper
Trim each of the six 12x12 papers into 2” wide strips, with the grain direction running from top to bottom (you’ll see why later).
Next, cut the 2x12 strips horizontally to yield the correct quantity of each size listed below:
- (10) 2x10”
- (10) 2x8”
- (10) 2x6”
- (10) 2x2"
- (5) 2x4"
You will have one 2x12" strip left over.
Garland Assembly
Place your strips in piles according to size.
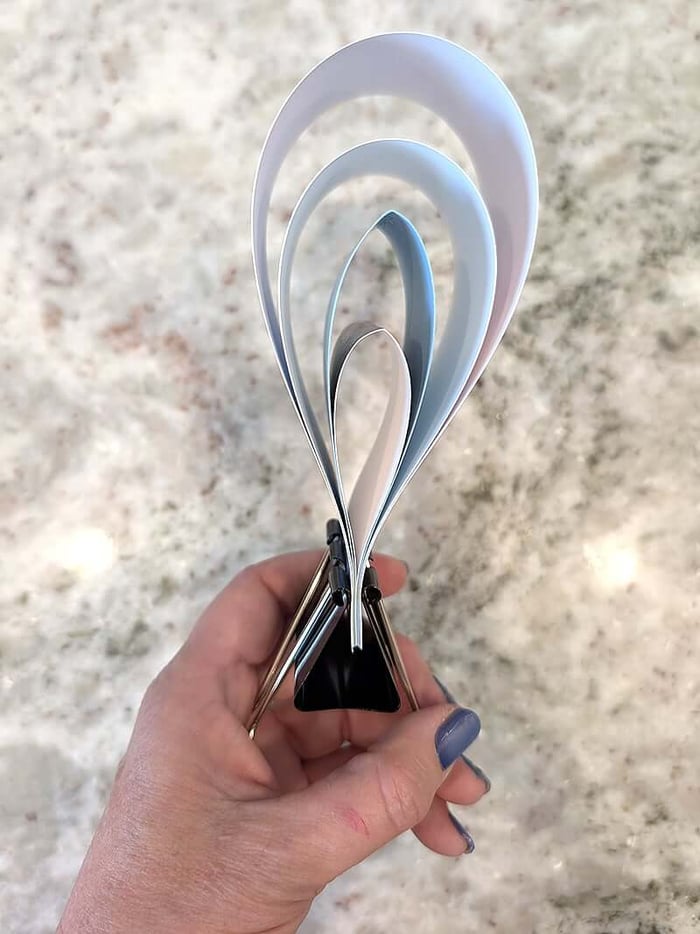
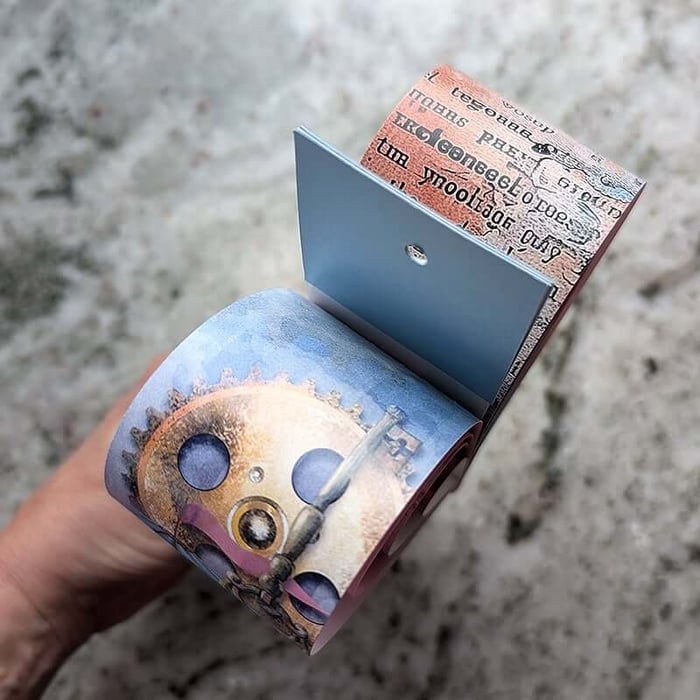
 Start with the smallest strip (6"). Apply a small amount of Bookbinding Glue to one inside edge, carefully bend the paper to adhere the two inside ends together to form a tear drop shape. Hold them in place until they’re fully adhered (a binder clip is helpful with this).
Apply glue to one inside edge of an 8" strip and attach it to the bottom edge of your first tear drop. Bend the paper and glue the inside edge to the opposite side of the tear drop.
Repeat the process with the 8” and 10” strips to create one large teardrop.
Note: This is why paper grain is important during the trimming process. Notice how the blue paper below has harsh edges instead of forming a nice loop.
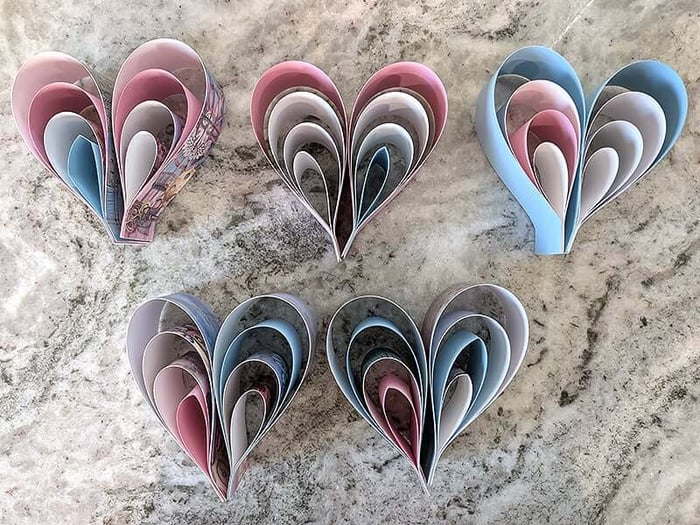
Repeat the process to create a total of ten tear drops.
Next, combine two completed tear drops and glue the inside ends together. Hold in place with a binder clip until the glue sets.

Continue the teardrop pairing process until you've created five hearts.
Hanging the Garland
Glue a 2" square to the top of both the front and back of each 4" strip; punch a hole through all three layers to create a strong hanger. Repeat for all five hearts.
Apply glue to both sides of the lower half the hanger and slide it in between the two large heart loops.
Repeat for all five hearts. Thread twine or ribbon through the each hole to create a length of garland.
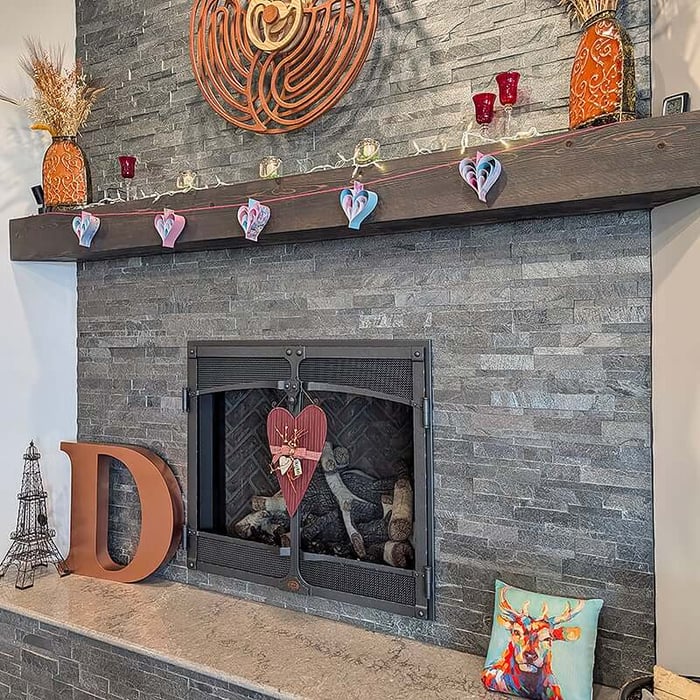
And that’s it — your heart garland is ready to shine! Hang it on a mantel, doorway, or anywhere that needs a little extra February festive charm.
I hope you enjoyed this project and that you'll give it a try for yourself. If you do, we’d love to see how it turns out and invite you to share it on the Club Scrap Chat group on Facebook.
Consider creating your heart garland with the supplies below:
Heartfelt Page Kit

$35.95
Kit includes all of the supplies needed to complete eight fully-embellished 12x12 scrapbook pages. Just add a trimmer, scissors and adhesive. Instructions download and video tutorial included. Includes: (4) 12x12 Prints: 2 ea. Blue Print, Music Print(3) 12x12 Dk. Gray… Read More