
With the holiday season quickly approaching, I always try to create a few gifts that are handmade for family and friends. Since the Silver Birch Ranch Scrapbooking Retreat occurs each November, it's the perfect opportunity for me to make gifts for the holidays. These Notecard Carriers each store eight 4.25x5.5" cards, perfect for gifting—just add envelopes!
While ideal for Christmas, I also like to have a few Notecard Carriers at the ready for impromptu gifts throughout the year.
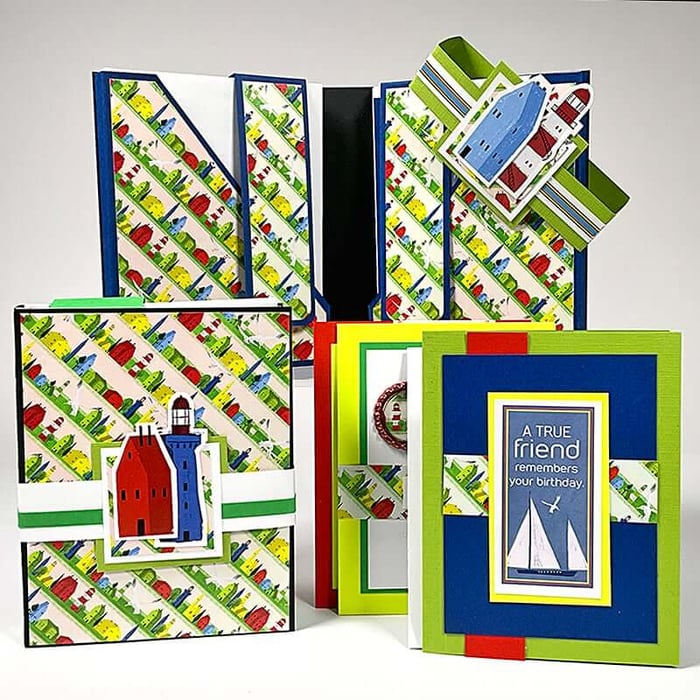
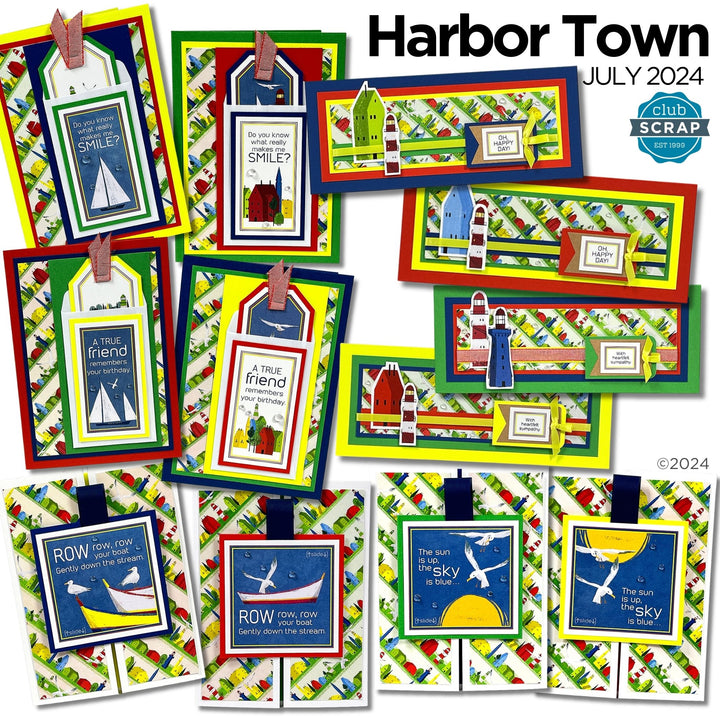
Harbor Town Notecard Carriers and Cards
The project instructions require seven 12x12 papers. Since the Harbor Town Card Kit includes twelve sheets of paper, I simply added two sheets of coordinating paper to my supply list to create two notecard carriers and 16 cards from a single kit. I just love "twofers", don't you?

Getting Started
Begin with the purchase and download of the printable project instructions. If you'd like to duplicate my cards, gather the following supplies:
Harbor Town Card Kit
(2) 12x12 Lime Plain (Beachcomber 05.25)
Black Folding Board
(4) Hook & Loop Dots
(12) A2 Envelopes (four of this size are already included in the Card Kit)
 Once you've gathered your supplies, divide the available paper into two piles of seven sheets each. Follow the cutting and assembly instructions twice in order to make two carriers and 16 cards.
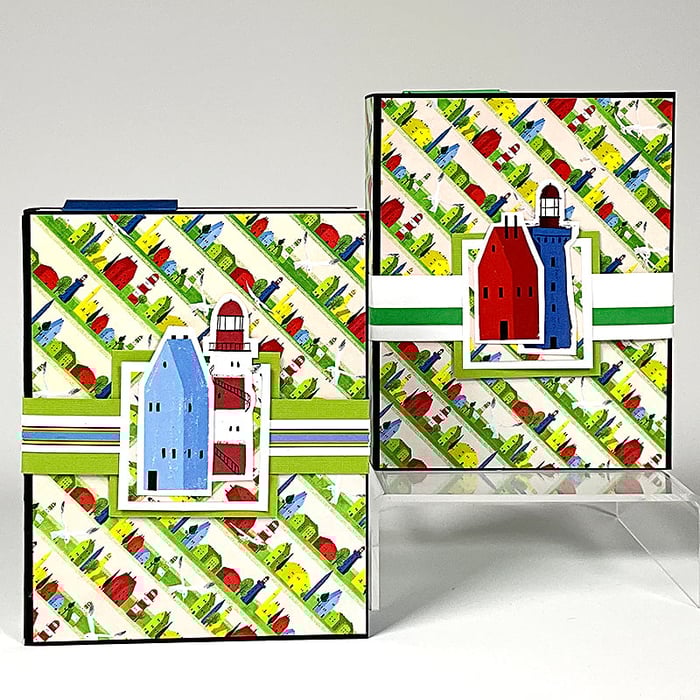
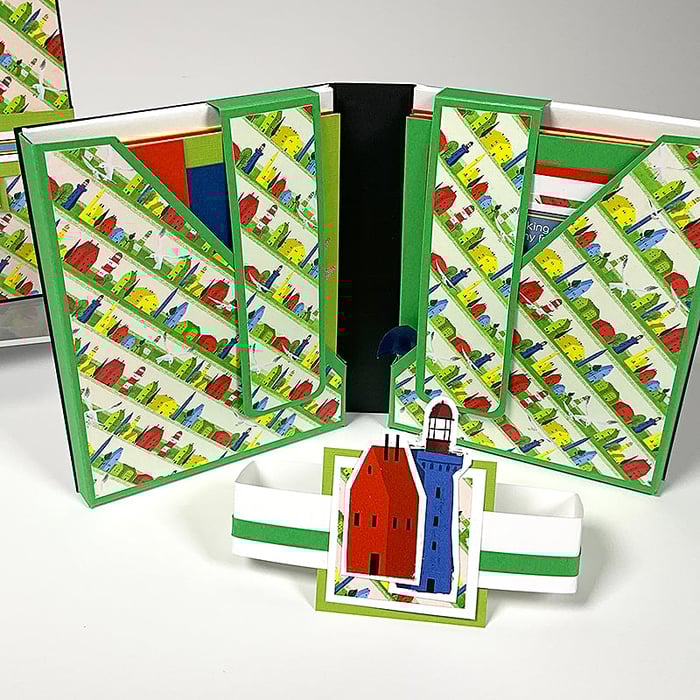
Blue Notecard Carrier
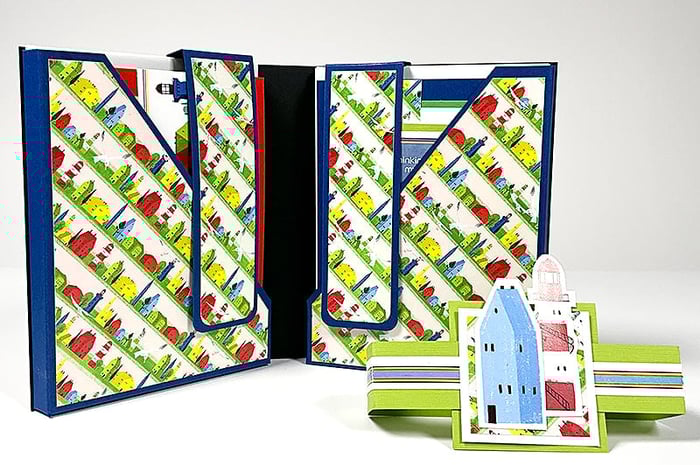
The trimming instructions provide the elements to create two folio structures, as well as enough card bases, panels and strips to make eight greeting cards. The card kit also includes printed cutaparts, ribbons and other embellishments.
The outside of both carriers features the fun Harbor Town Card Print, however, the inside of each features folio pockets of a different color.
To replicate the carrier with blue pockets, utilize the following paper assignments:
- (2) Blue
- Black Folding Board
- Card Print
- Beachcomber Lime
- White, Yellow, Red
Remove the belly band and open the folio to reveal two pockets with tabbed closures inside. The pockets each hold four A2 cards with envelopes.
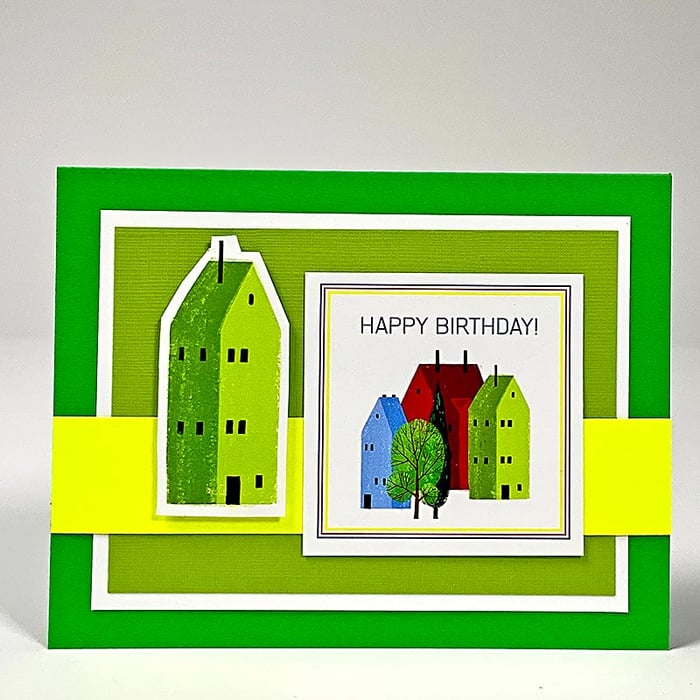
A pair of nesting squares seals the seam of the belly band. Embellish with fussy-cut house and lighthouse cutaparts.
Let's take a closer look at the cards inside:
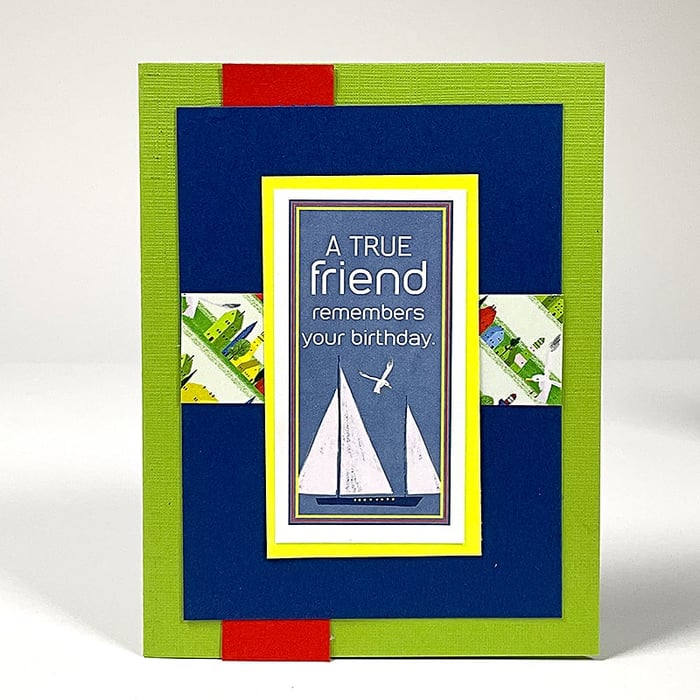
Tie Blue ribbon around the nesting panels.
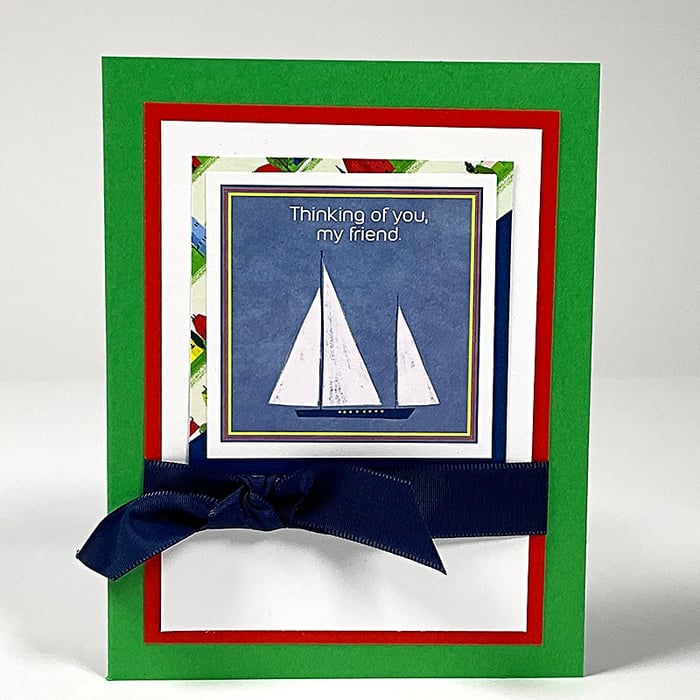
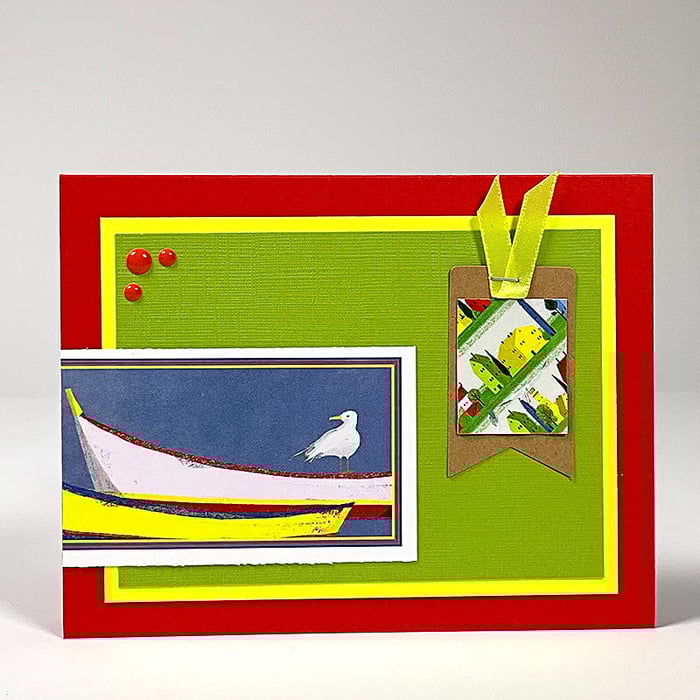
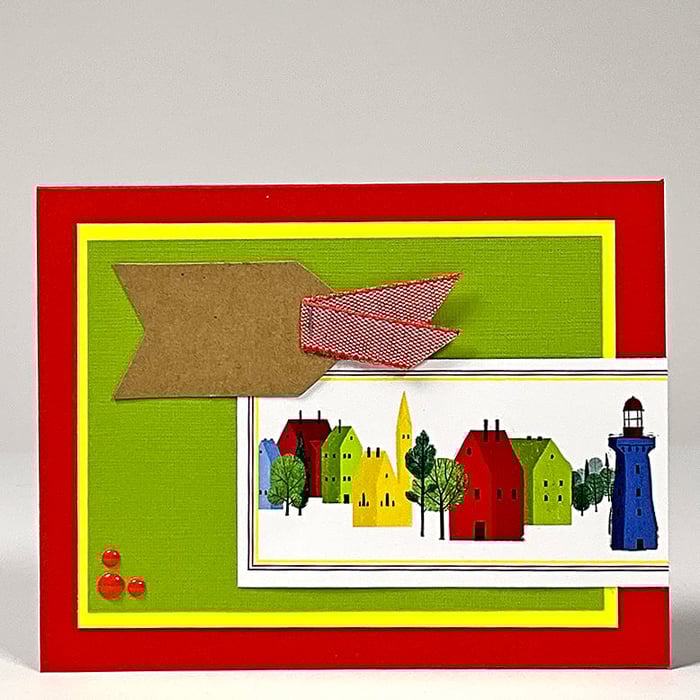
Accent the card with a Nautical Tag stapled with Yellow ribbon. Add trio of Red Harbor Town Enamel Dots (included in the Page Kit, but also available separately.)
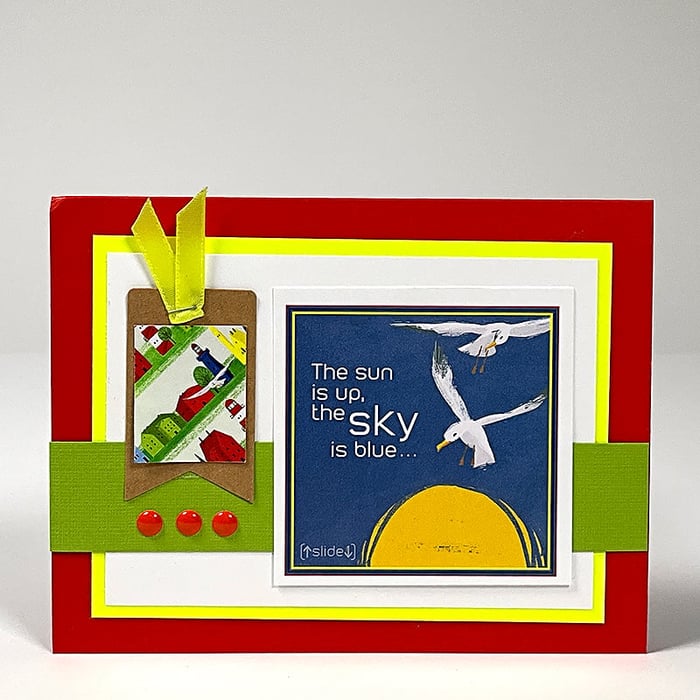
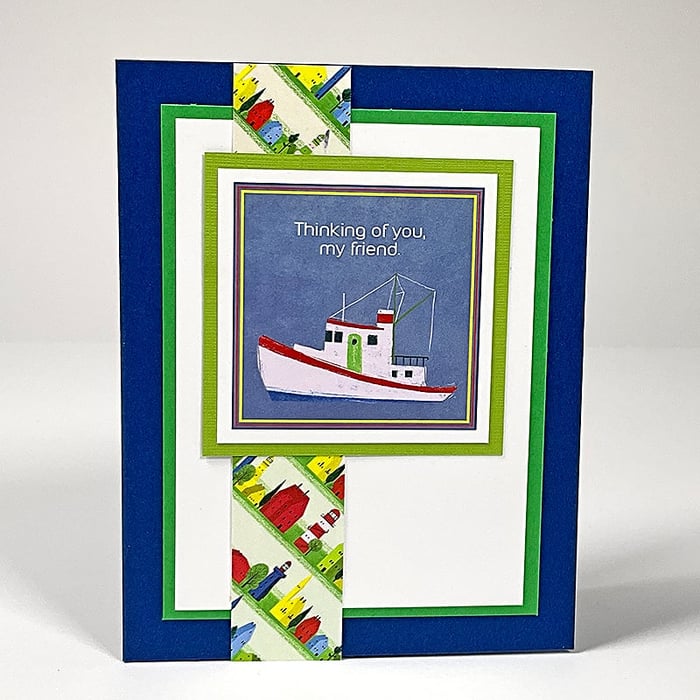
Two 1/4" scraps are rescued as an accent for the layered panels.
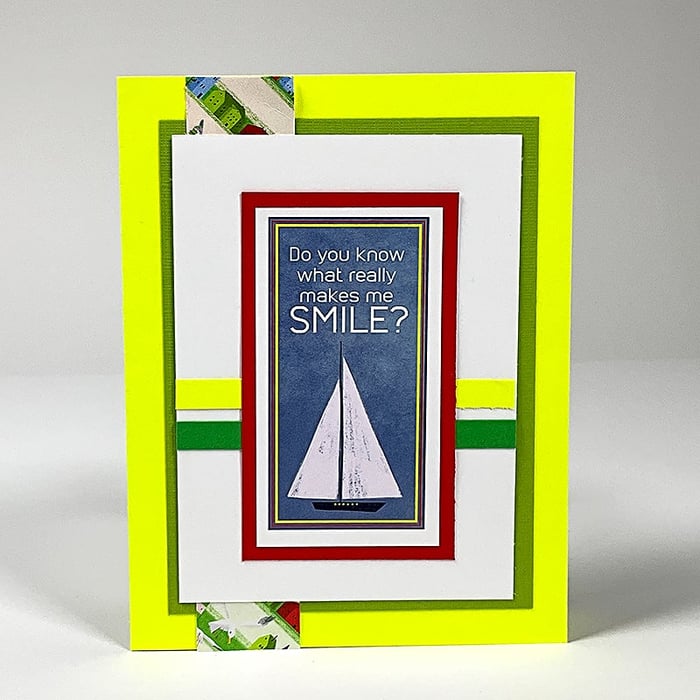
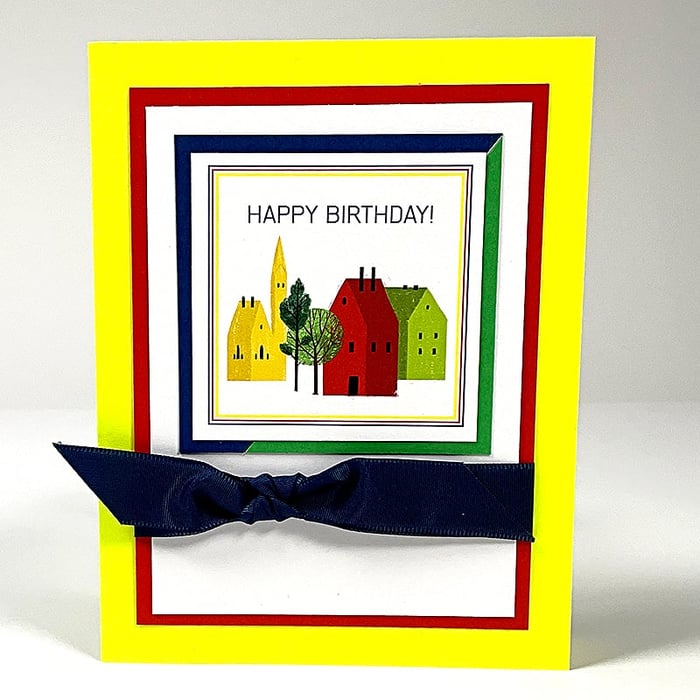
Staple the Red Woven ribbon onto Nautical Tag; add the cutapart sentiment and a trio of Enamel Dots. 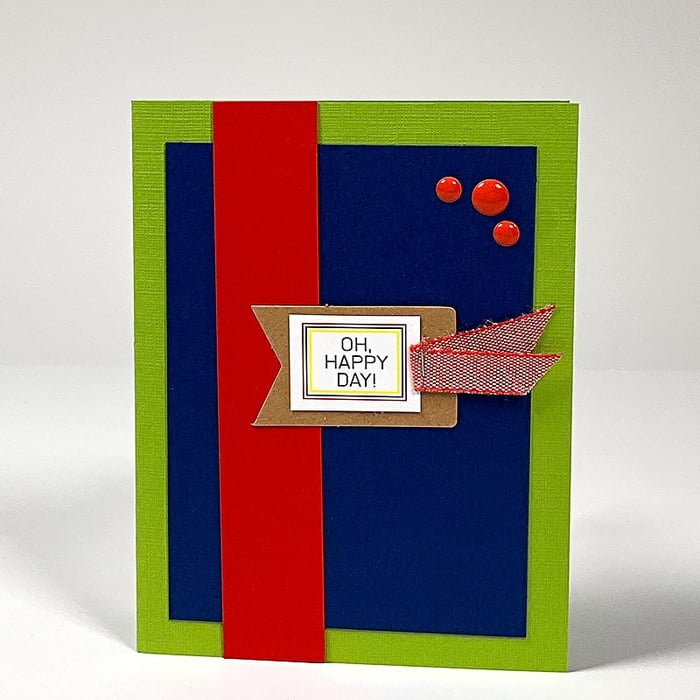 Make the most of your cutaparts by trimming them down into individual elements. The cutapart featured on the card below was too wide to fit the A2 card, so I divided it into two sections, with the artwork on the front of the card and the sentiment portion inside. Aligning the cut edge flush with the edge of the card makes it look more intentional.
Since some of the card panels are white, I needed colored panels to contrast the white background on the cutaparts. As I was running out of large enough colored panels, i had a sudden moment of creativity: I pieced together two angled scraps with tape (left over from trimming the folio pockets), and cut them to size as a single square nesting panel. Fun, right?!?
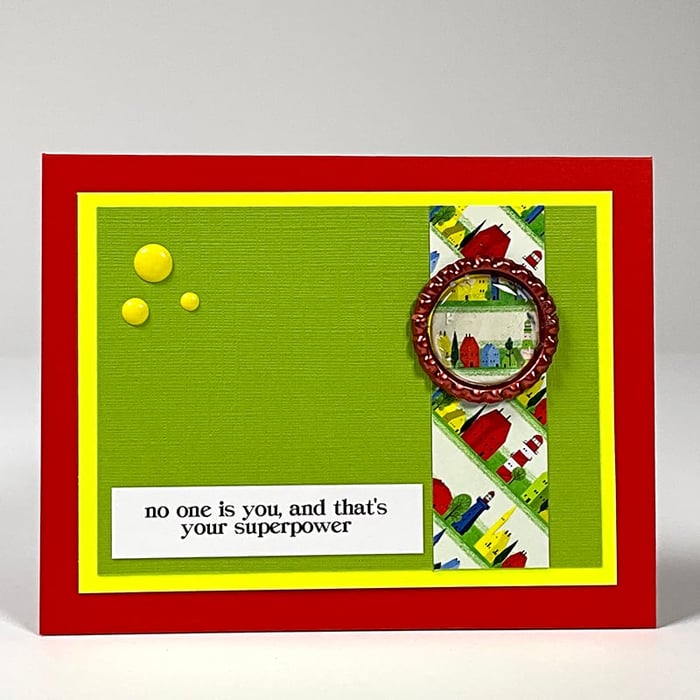
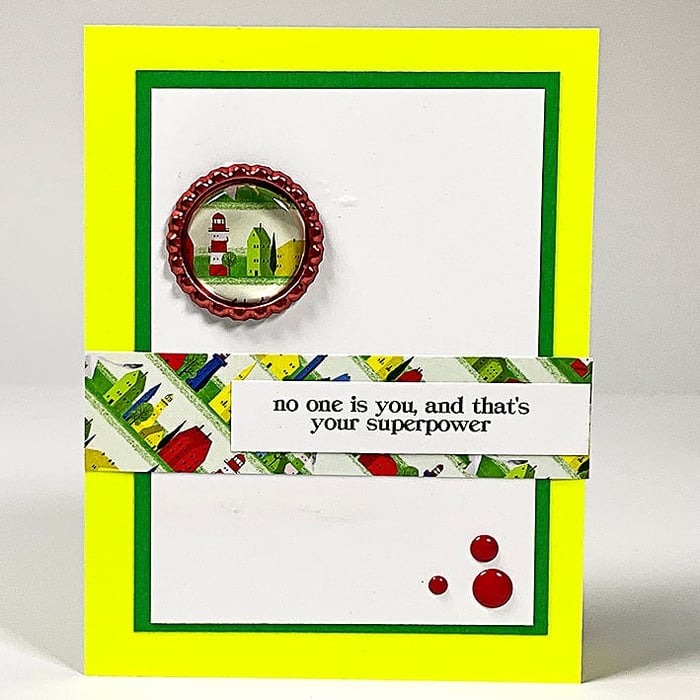
Because I was making 16 cards instead of the 12 a card kit normally produces, I ran short of sentiments for two of the cards. To solve the issue, add stamped sentiments or a sentiment from the Kit No. 301 Word Art Strip. I added more Enamel Dots and a Harbor Town Bottle Cap topped with an Epoxy Sticker.
Green Notecard Carrier
Going through the instructions again with a second set of papers creates another notecard carrier and eight more cards.
Utilize the following paper assignments for the second Notecard Carrier:
- (2) Green Plain
- Black Folding Board Folio (left over from the initial trimming process above)
- Card Print
- White
- Beachcomber Lime, Yellow, Red
Here's a detailed look at the eight cards inside:


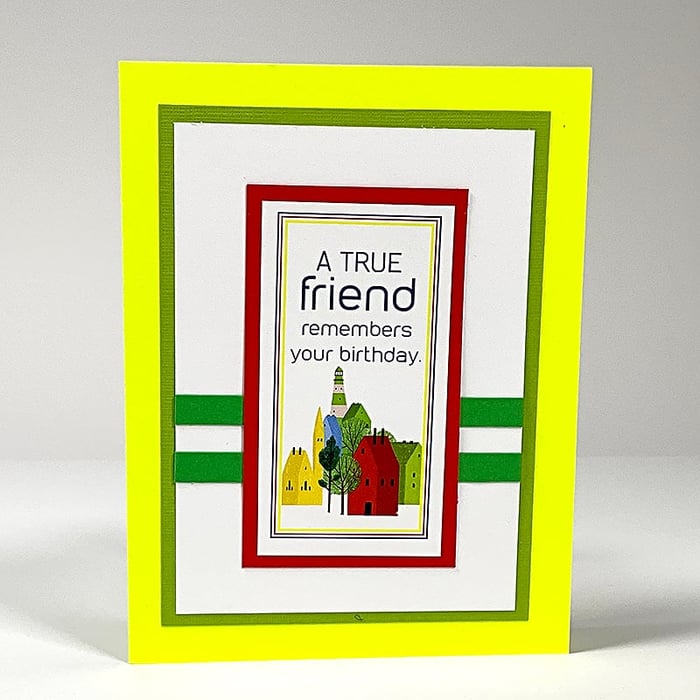
Trim the 7" sentiment cutapart to divide the artwork from the greeting. Adhere the artwork to the front of the card, flush with the right edge of the card. (The sentiment is used inside.)
Most of the cards are very simple in design, making completing the entire project quick and easy.

Add a fussy-cut house with foam adhesive for visual dimension.
The final card features a sentiment from the Word Art Strip, a Bottle Cap with Epoxy Sticker, and Enamel Dots.
I love having a few projects like these at the ready - they make awesome Christmas presents. You could also bring one to the next gathering as a thank you for the host, or surprise your child's teacher with a beautiful, and useful, handmade gift.
Ready to make some Notecard Carriers? Shop the supplies at the handy links below:
Harbor Town Card Kit
$16.95
$27.95
An all-inclusive pack requiring no additional stamping supplies* to complete twelve greeting cards. Instructions download and video tutorial included. *If you’re more inclined to create your own artwork, all pre-printed Cutaparts can be flipped over to the plain side for… Read More
Notecard Carrier Project Online Class

$11.05
THIS IS A DIGITAL PRODUCT SENT VIA EMAIL Transform any page kit into a clever notecard carrier designed to hold eight 4.25x5.5" greeting cards. The formula requires seven 12x12 papers, a mix of prints and plains, one 12x12 folding board,… Read More