Create gorgeous cards with the Impressed Stamps. Pair these intricate images with the deep rich hues of the papers from the collection.
Impressed Stamps
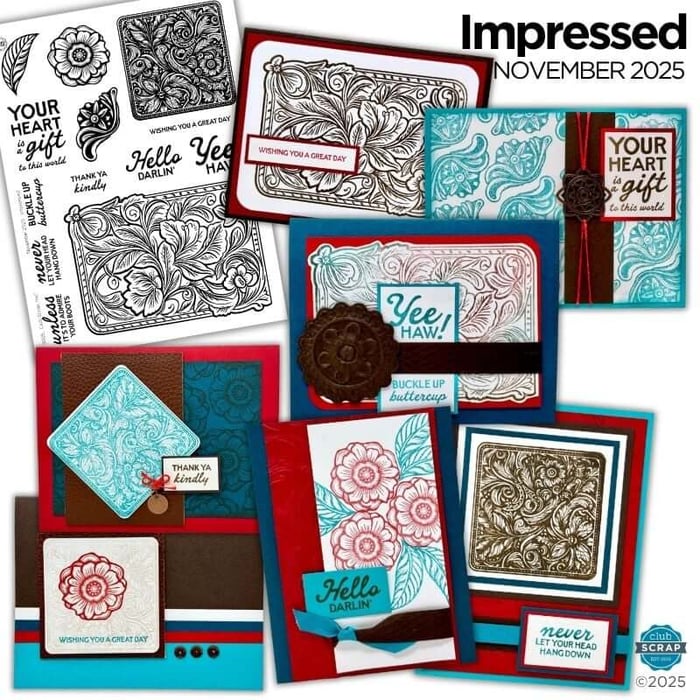
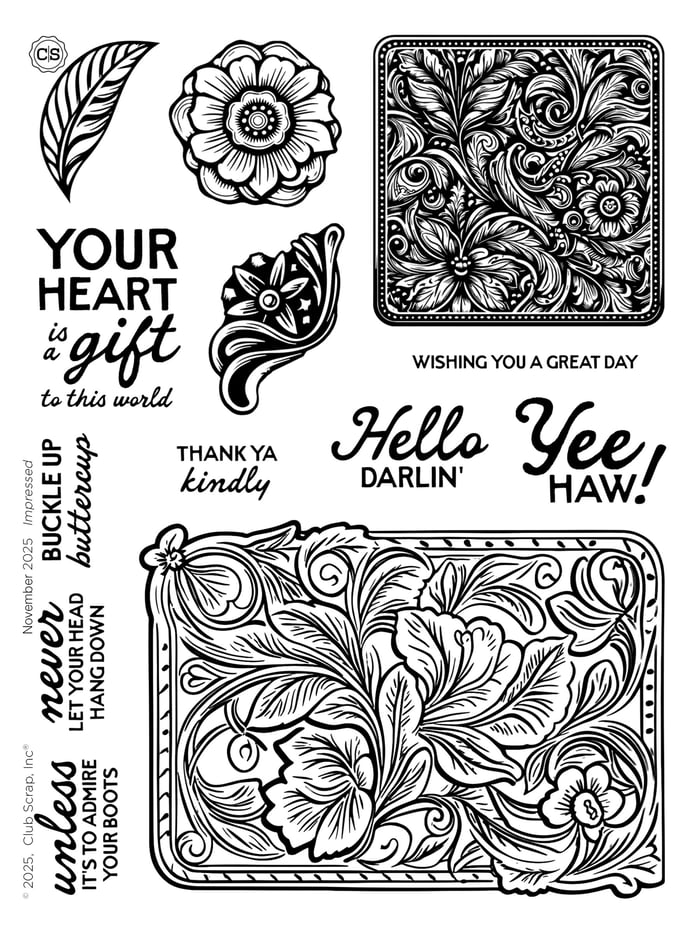
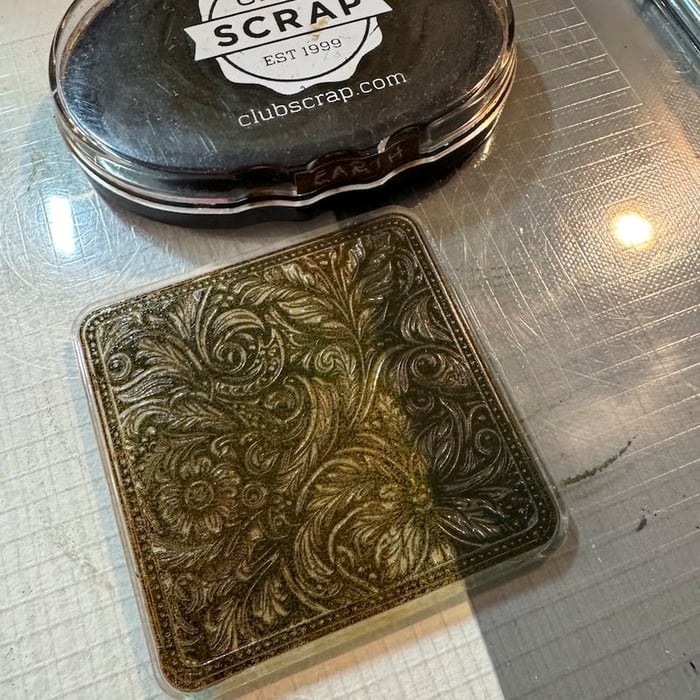
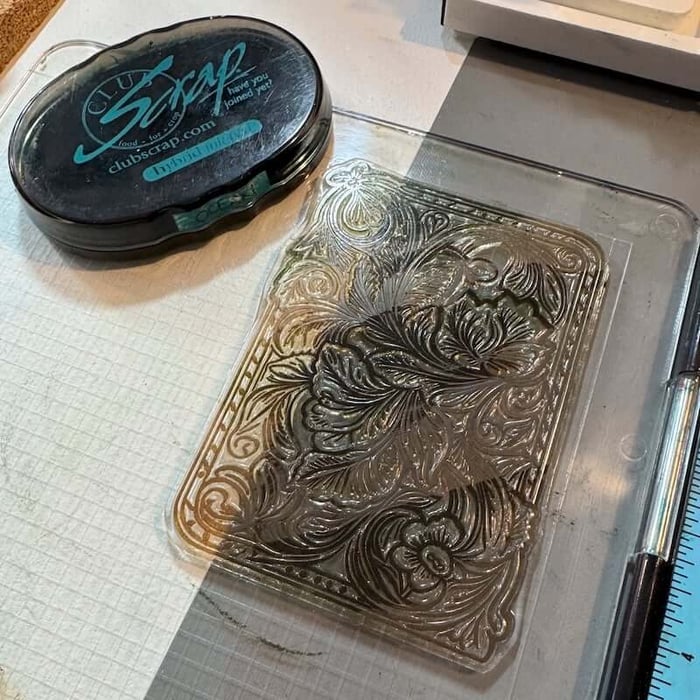
Looking for ink colors to complement the November color palette? We recommend pairing the Impressed Stamps with Earth, Red, and Ocean, CS® Hybrid ink.
Greeting Cards Featuring Impressed Stamps
The finished size of each card below is 4.25x5.5", unless otherwise noted.
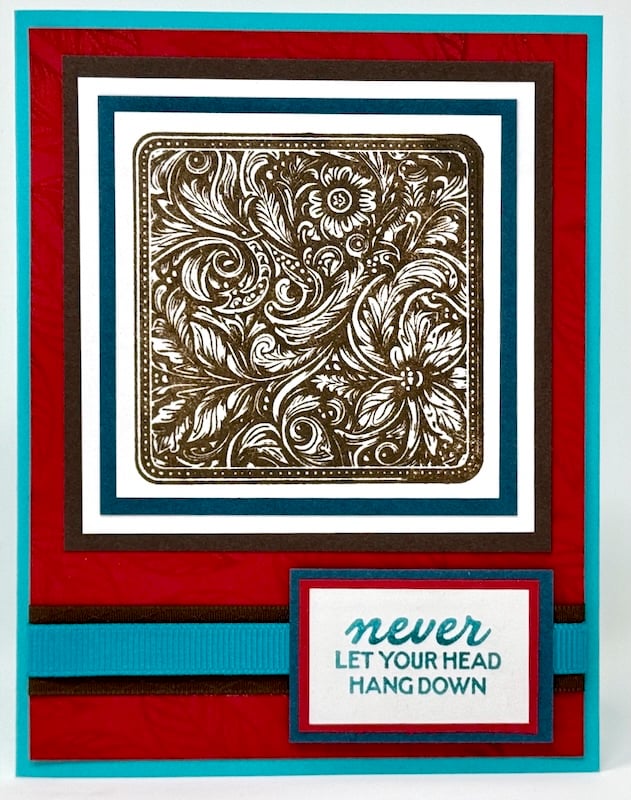
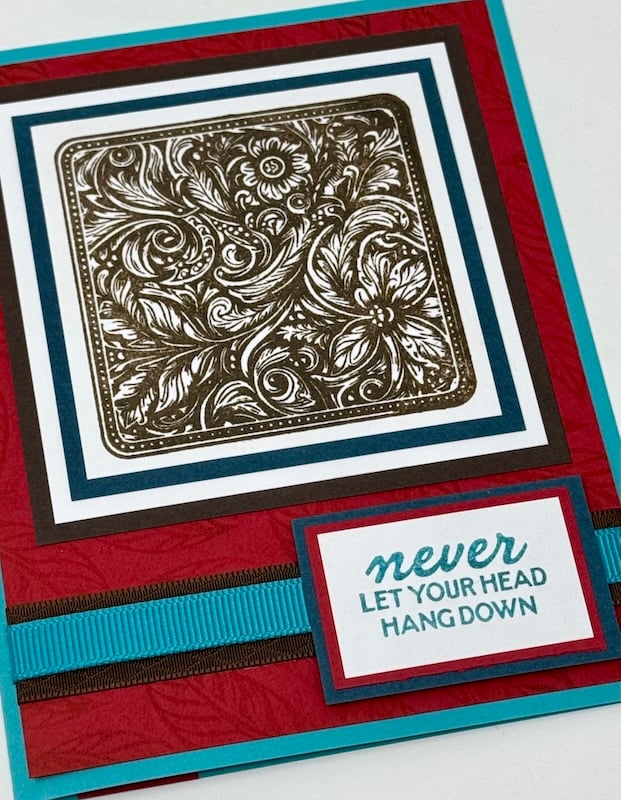
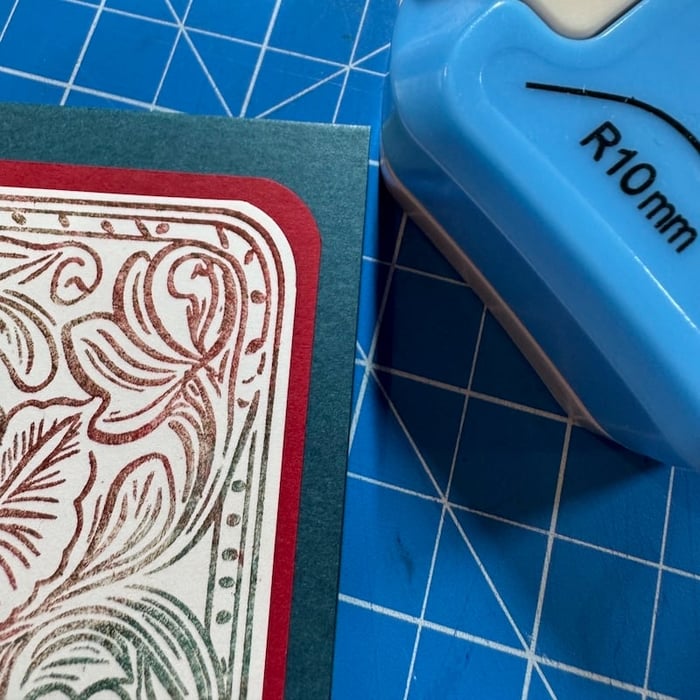
Card 1
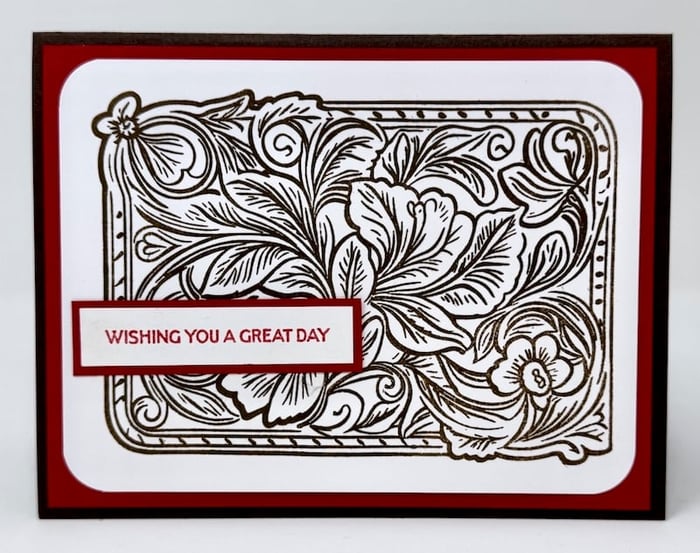
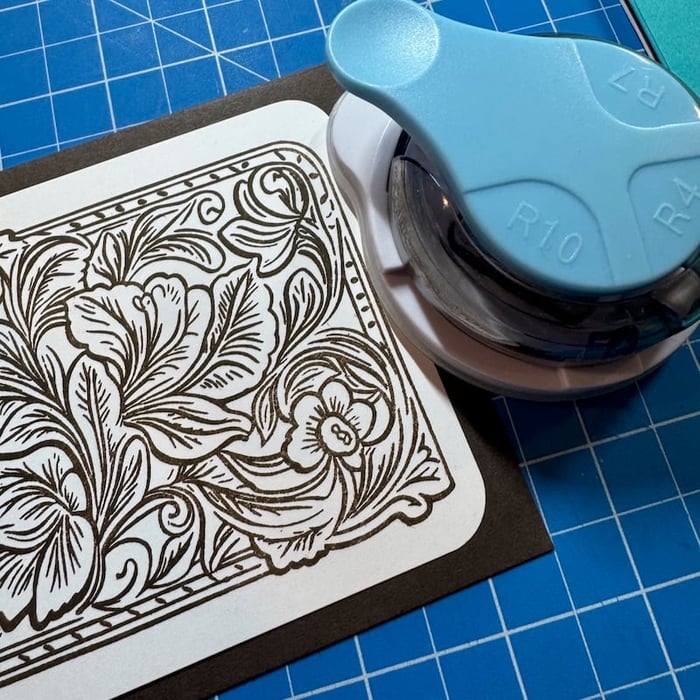
Add the large scroll image to a 3.75x5" White panel with Earth Ink.

Round the corners with the 10mm side of the 3 in 1 corner punch.
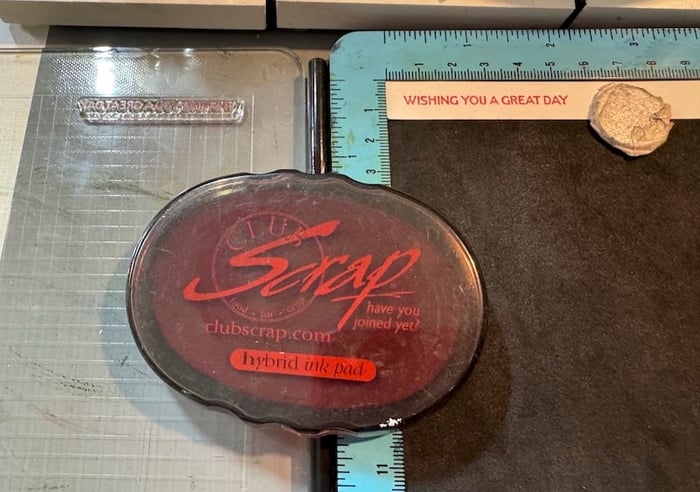
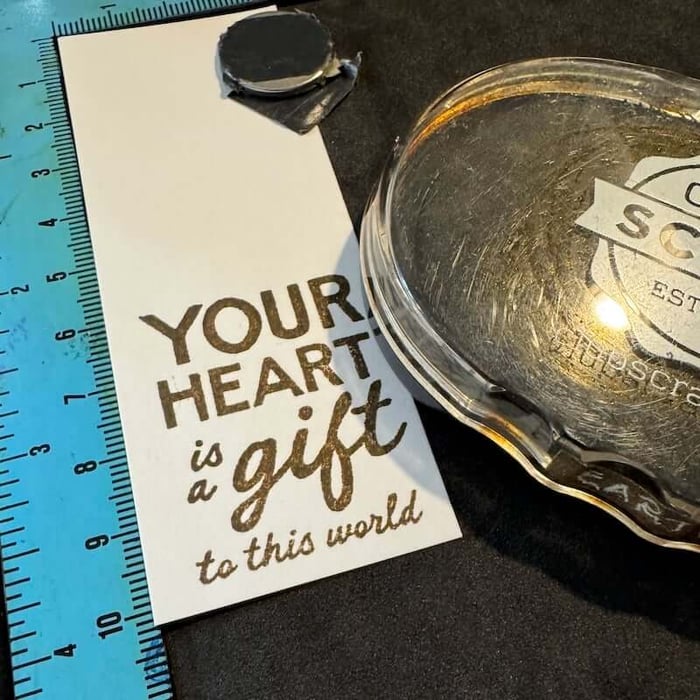
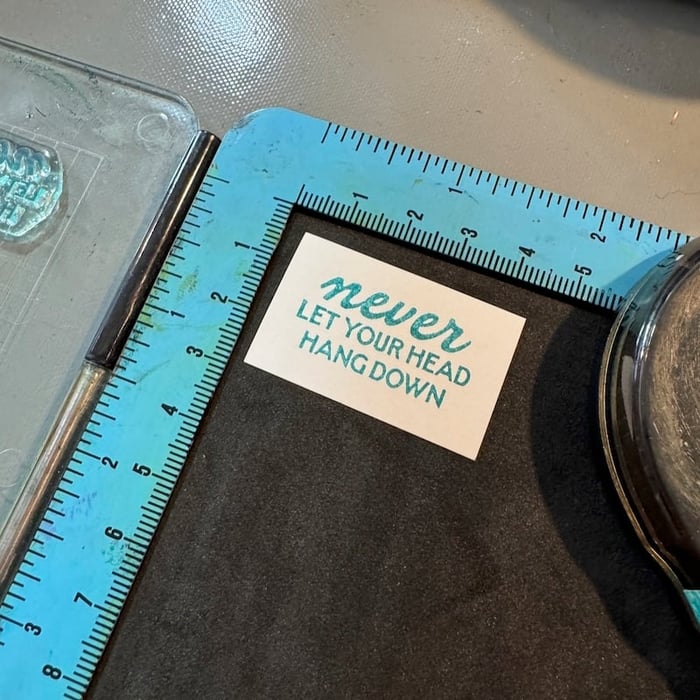
Stamp the sentiment onto a .5" White strip with Red Ink.
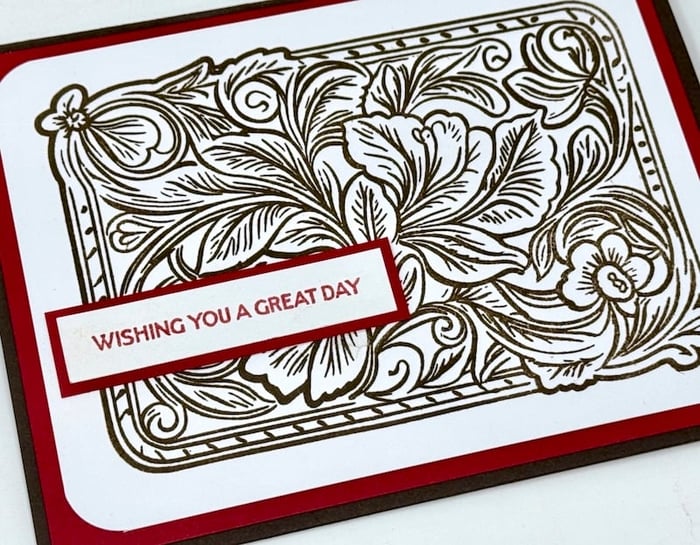
Trim the sentiment strip and adhere to a slightly larger Red mat. (I used Bookbinding Glue dispensed from a Needle-tipped Applicator.)

Adhere the sentiment to the stamped panel to complete the card.
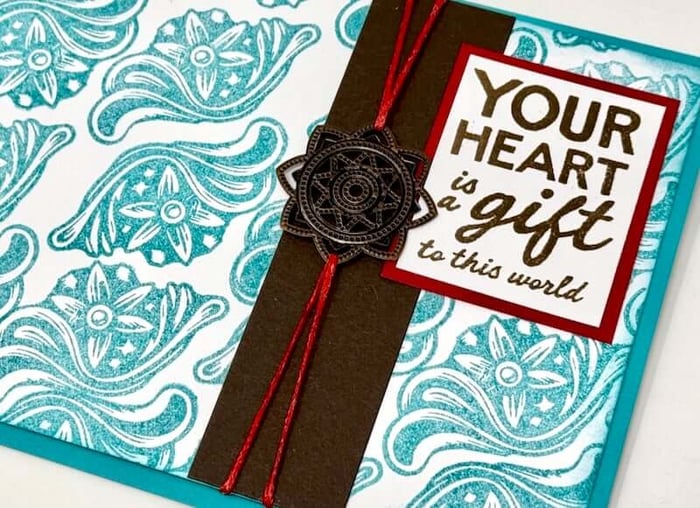
Card 2
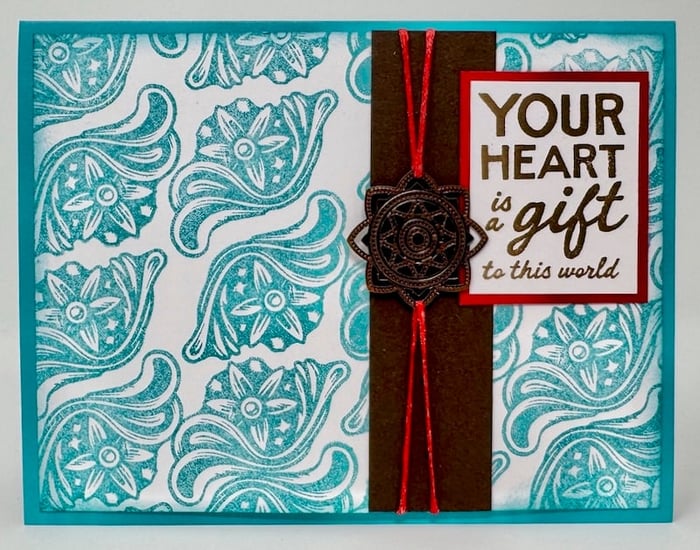
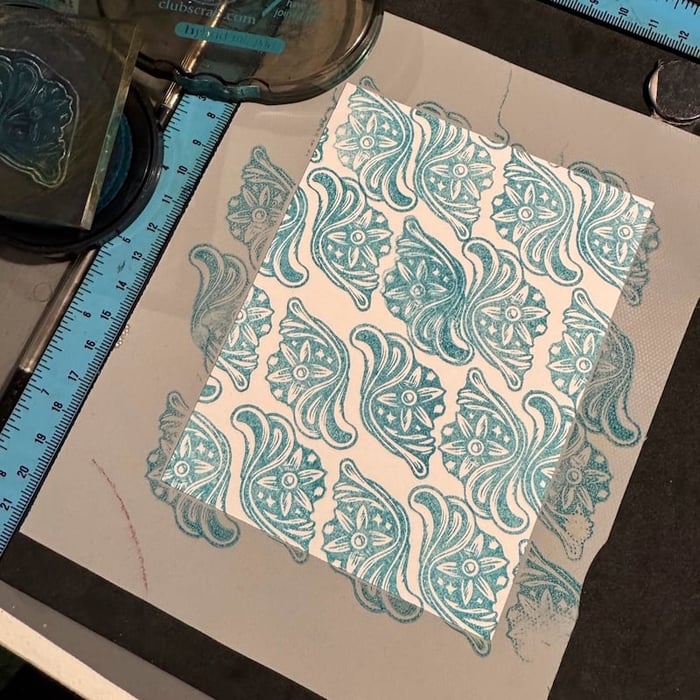
Add the small swirl images to a 4x5.25" White panel with Ocean Ink. Allow the stamped images to "fall" off the edges to create a realistic all-over print.
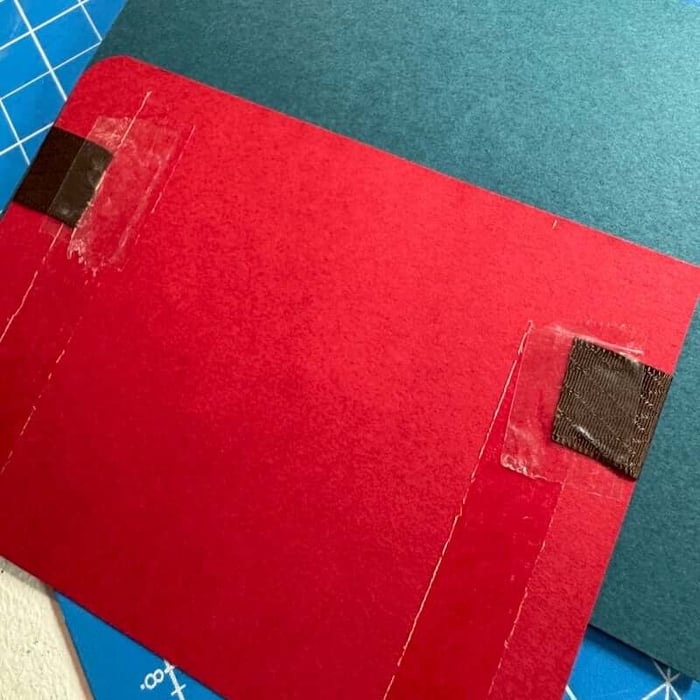
Trim a 1x5.25" Brown strip and adhere to the stamped panel vertically as shown.
 Thread two 5" lengths of red waxed linen thread through each side of the copper medallion.
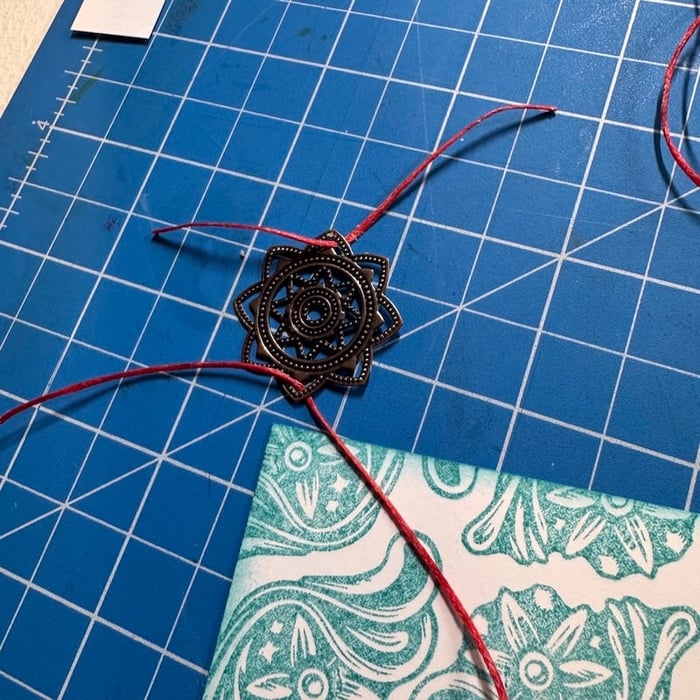
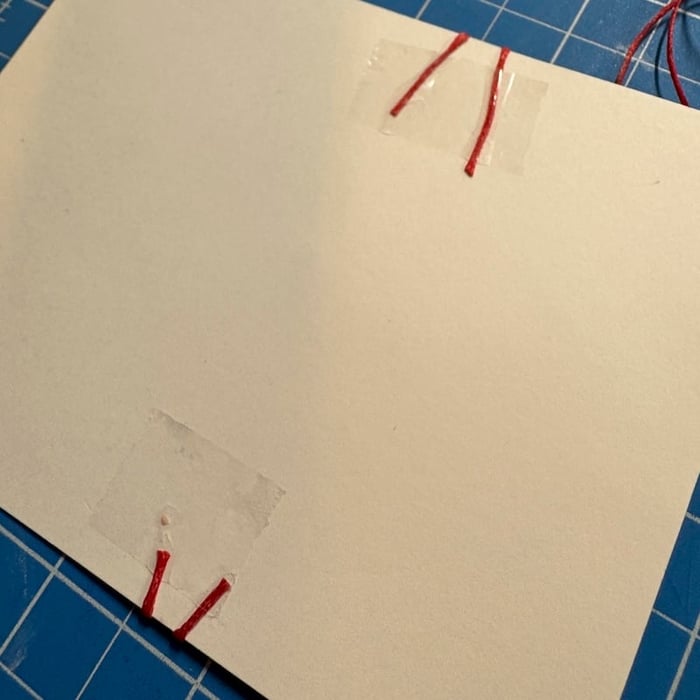
Position the medallion over the brown strip, wrapping the ends of the thread around the back of the panel. Secure with clear tape.
Stamp the sentiment onto a White panel with Earth Ink.
Trim the sentiment and adhere to a Red mat. Adhere the layered sentiment in the upper right corner of the stamped panel, tucking the edge beneath the copper medallion.
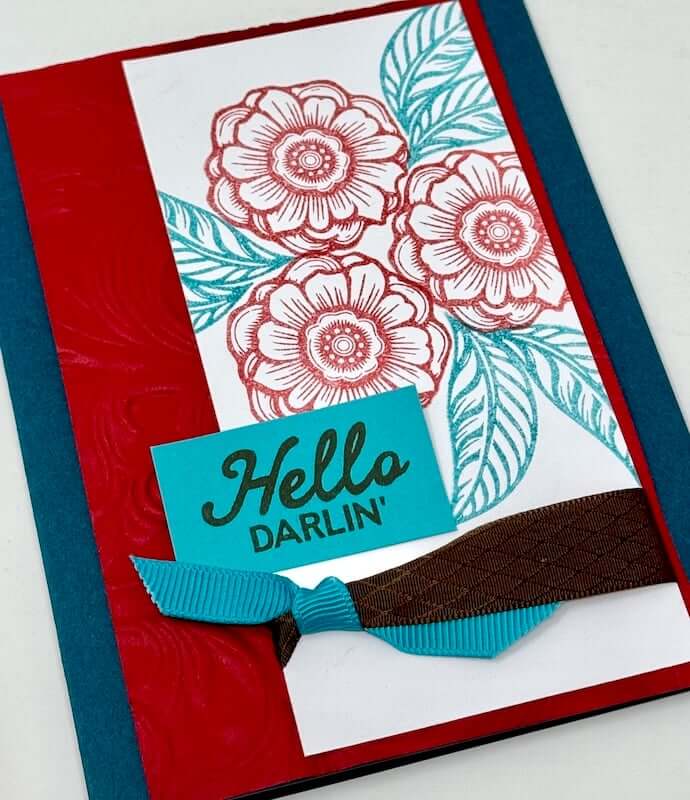
Card 3

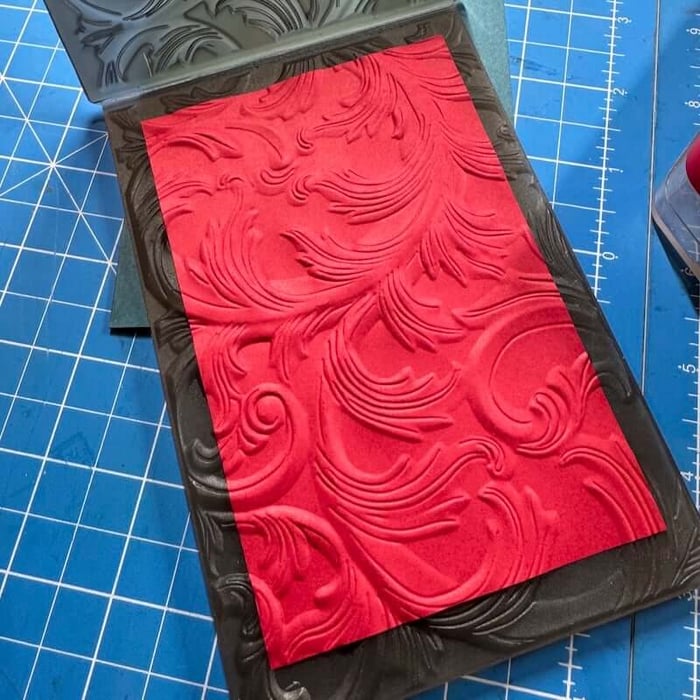
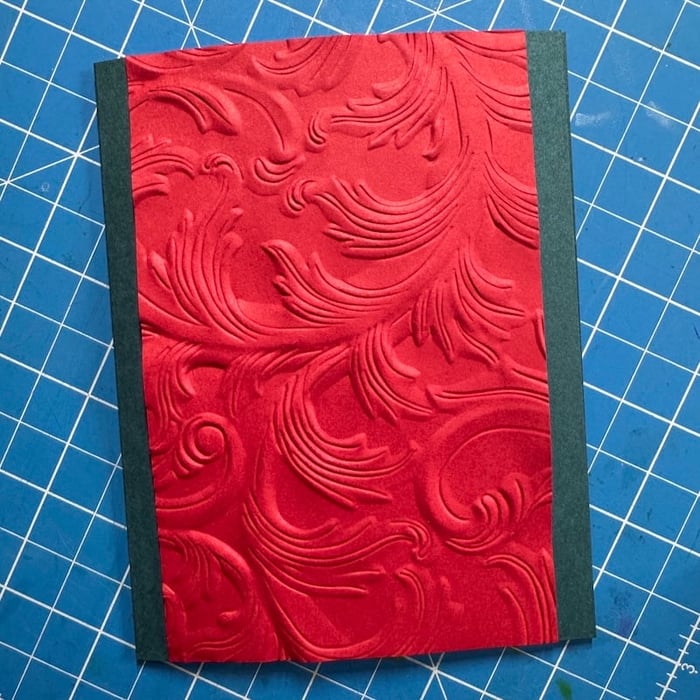
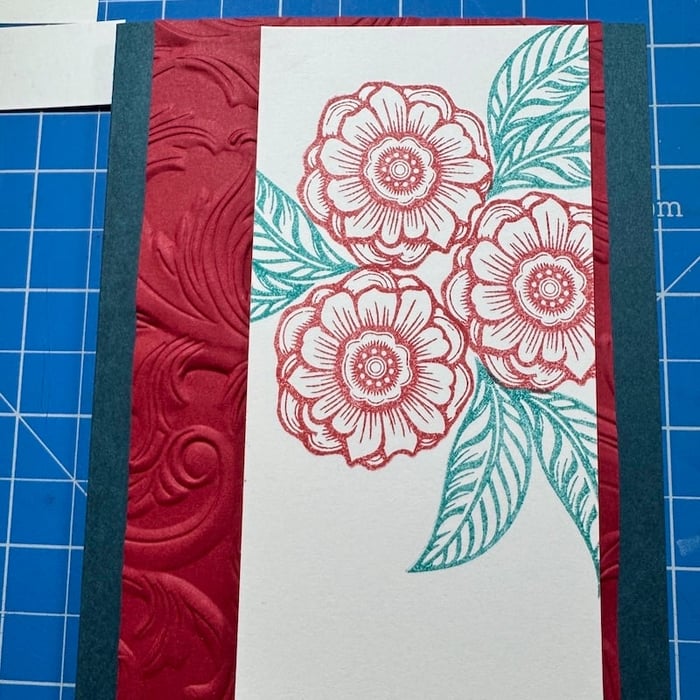
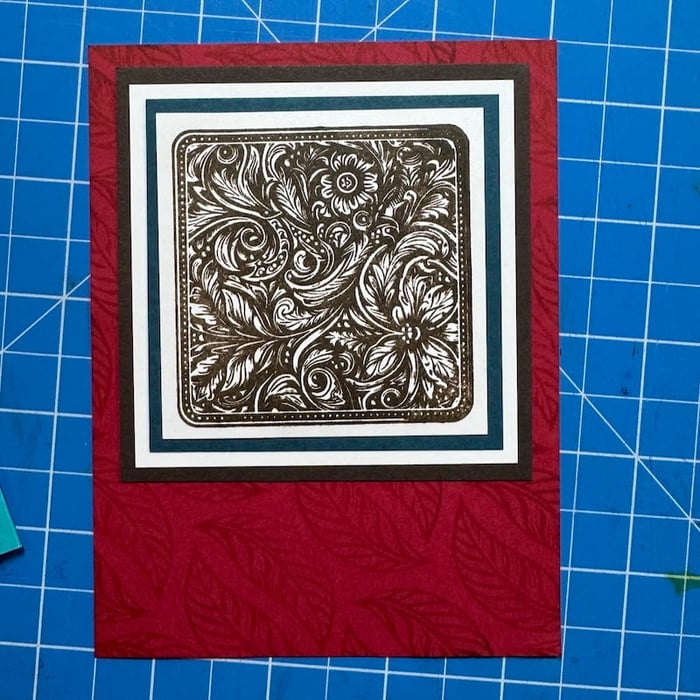
Add texture to a 3.5x5.5" Red panel with a 3D embossing folder*.
Center the embossed panel on a folded Teal card base and adhere.
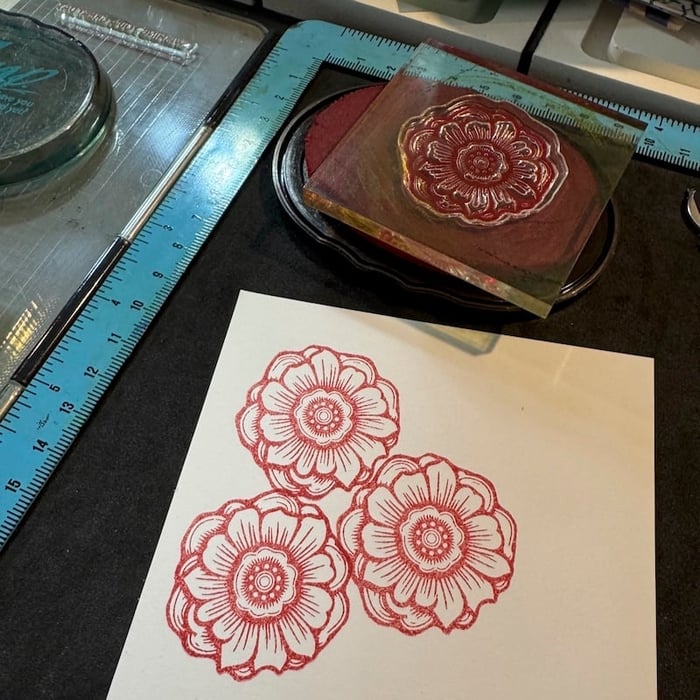
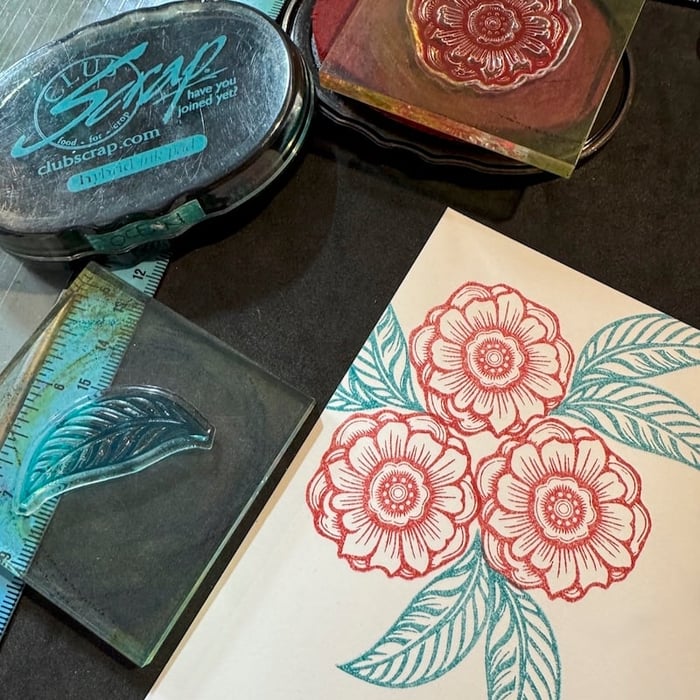
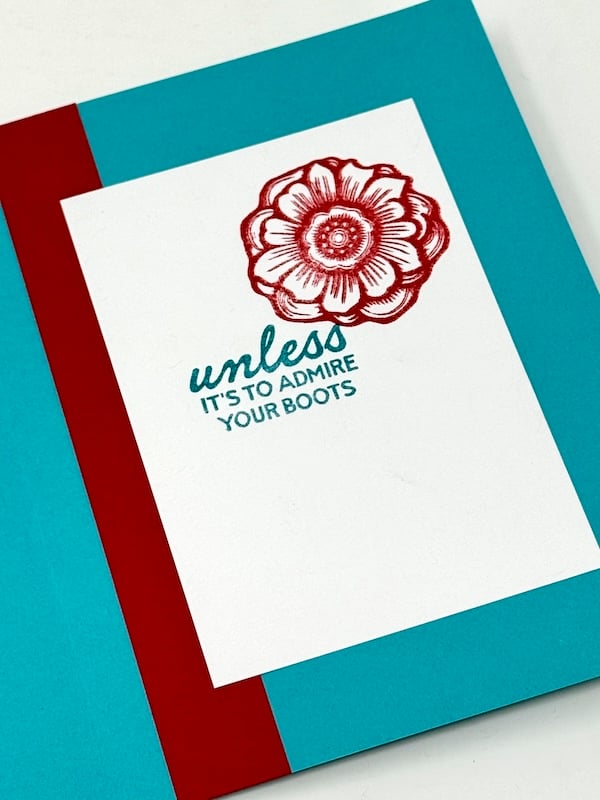
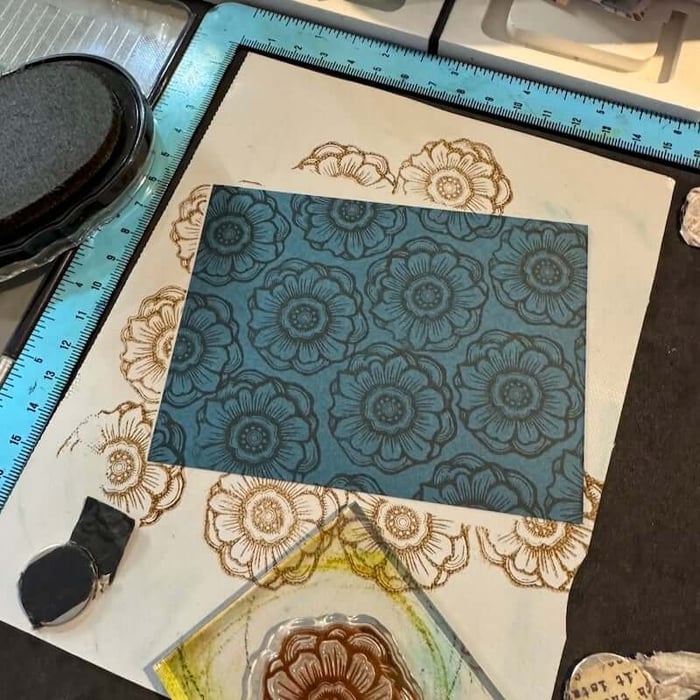
Add three flower images to a White panel in Red Ink.
Add leaf images next to the flowers with Ocean Ink.
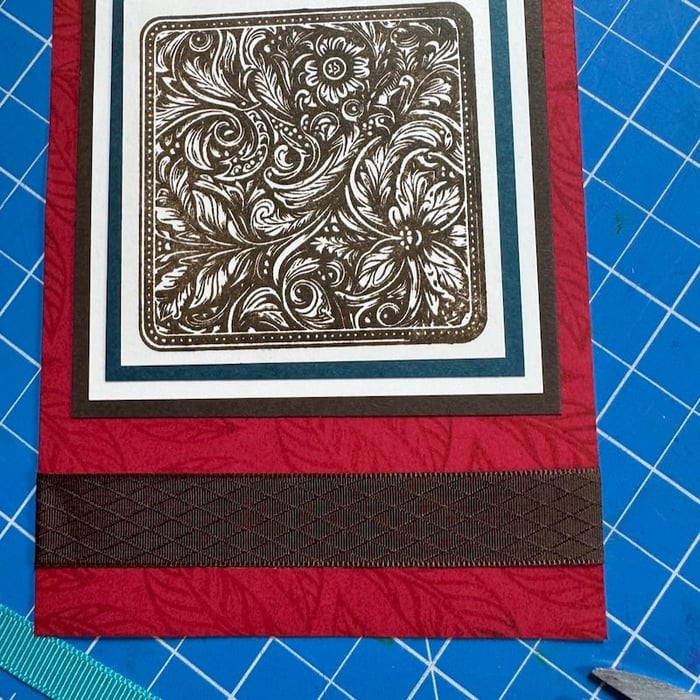
Trim the stamped White panel to 2.75x5.25".
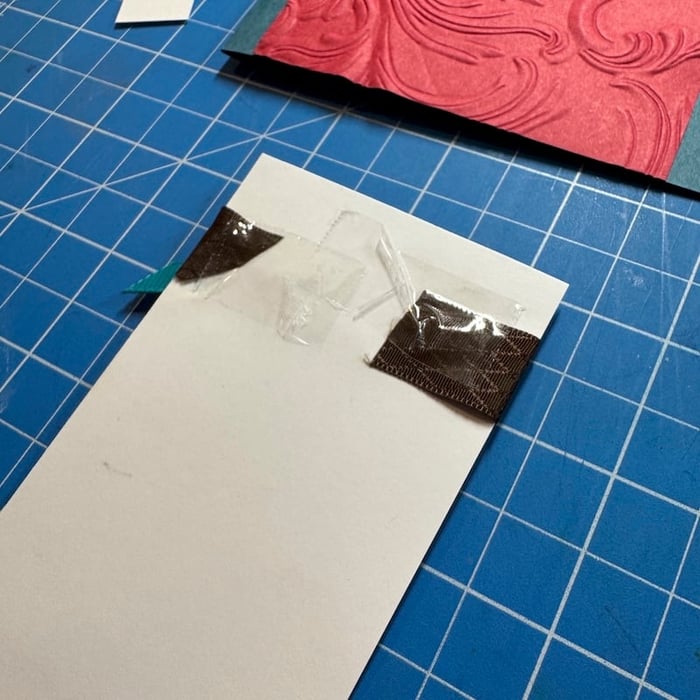
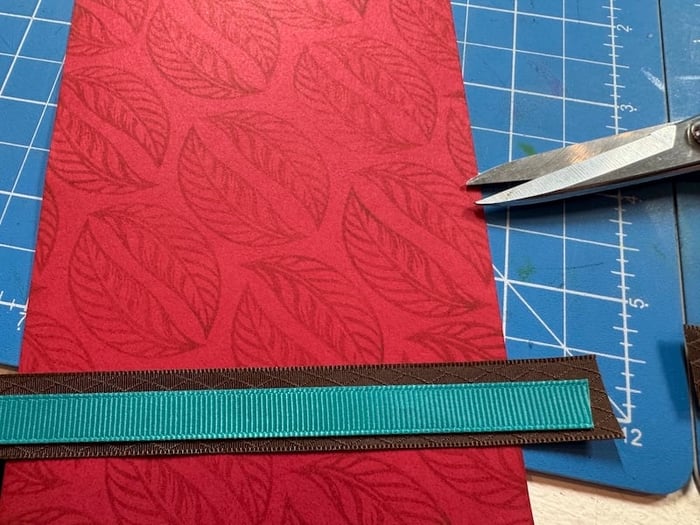
Cut a length of brown ribbon one inch wider than the White panel with fabric scissors*.
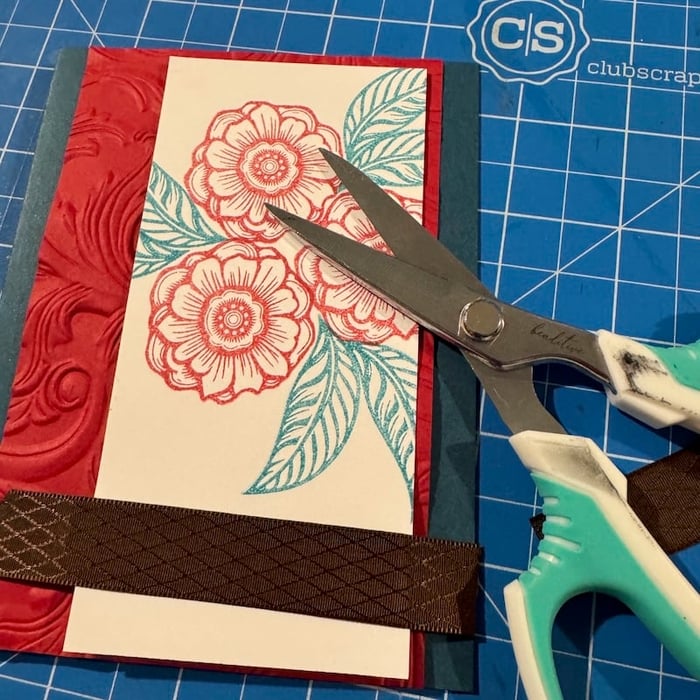
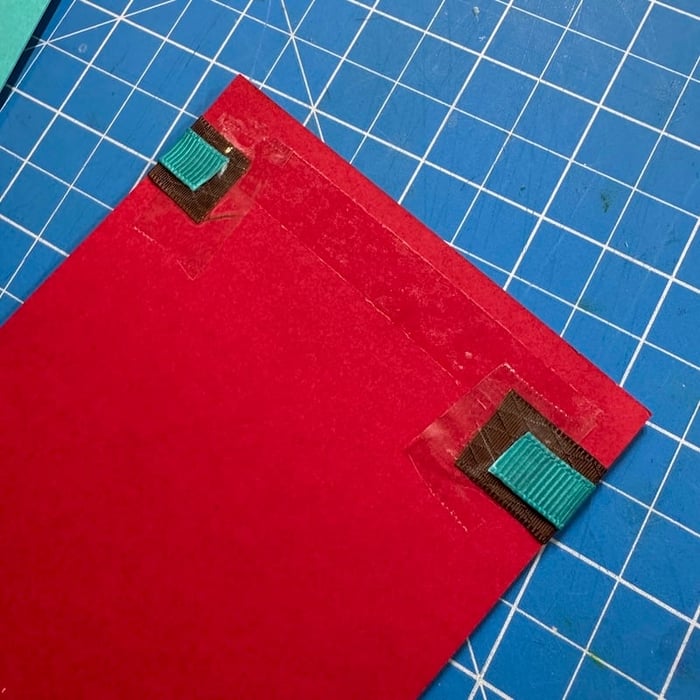
Tie a small piece of aqua ribbon into a knot around the brown ribbon.
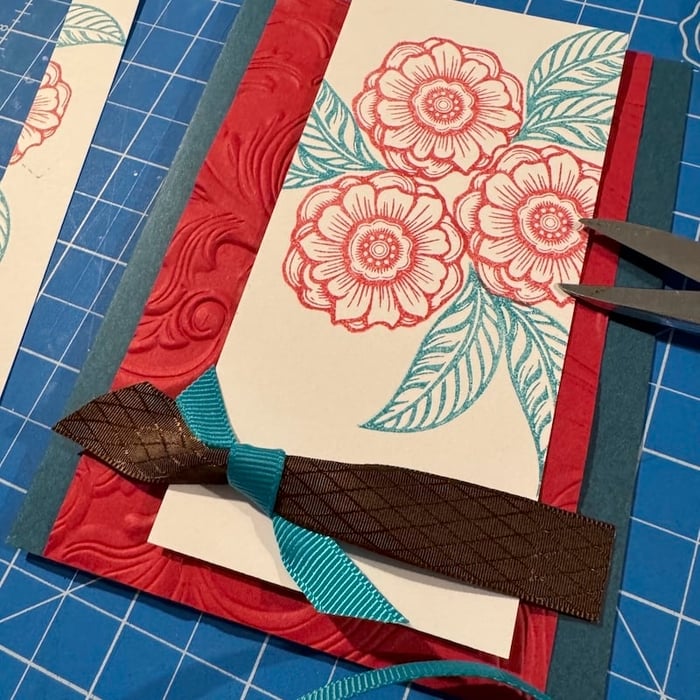
Wrap the ends of the brown ribbon around the back of the White panel and secure with clear tape.
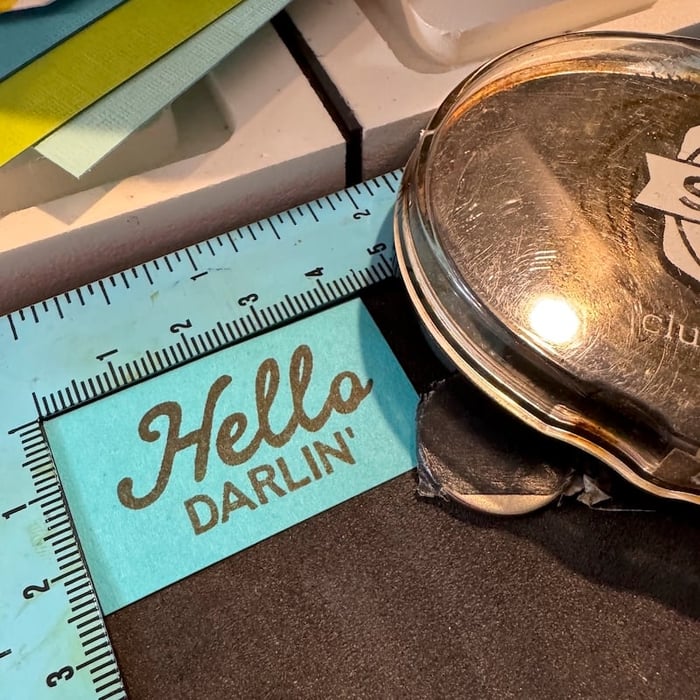
Stamp a sentiment onto a small Aqua panel with Earth Ink.
Adhere the panel to the right side of the embossed Red panel. Add the sentiment above the ribbons to complete the card.
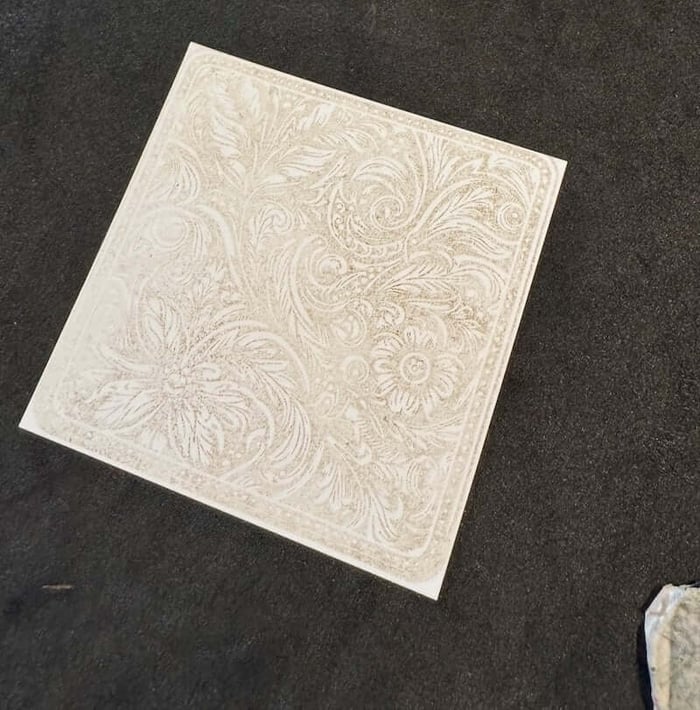
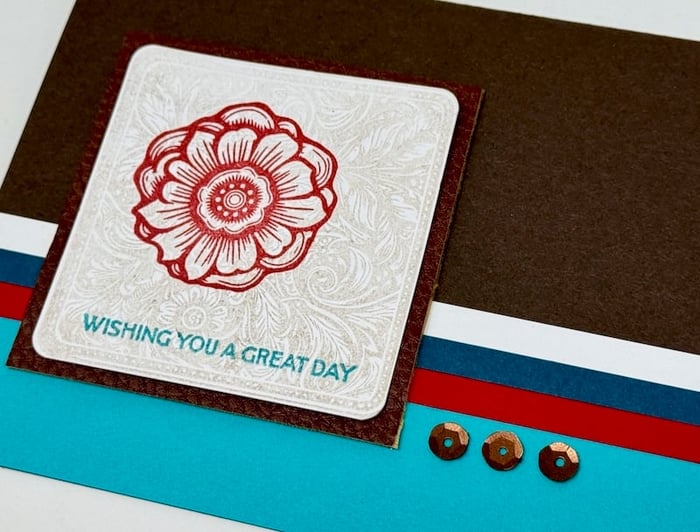
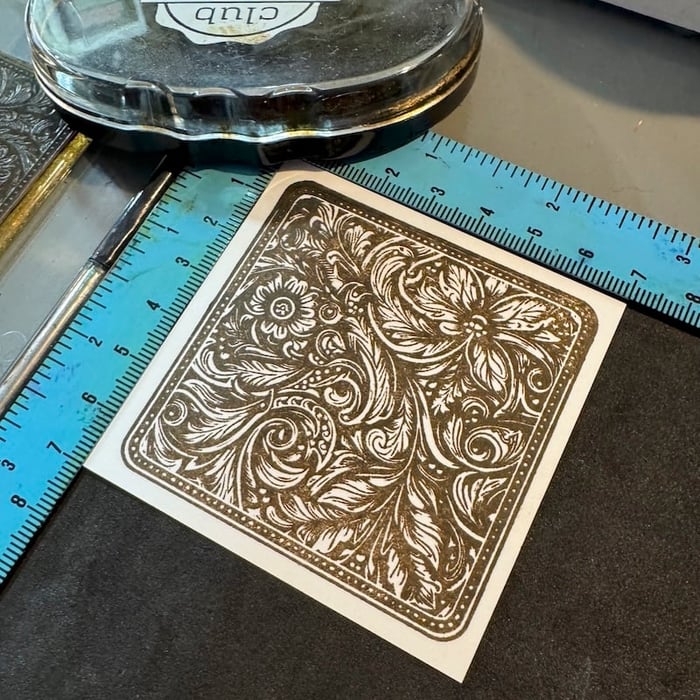
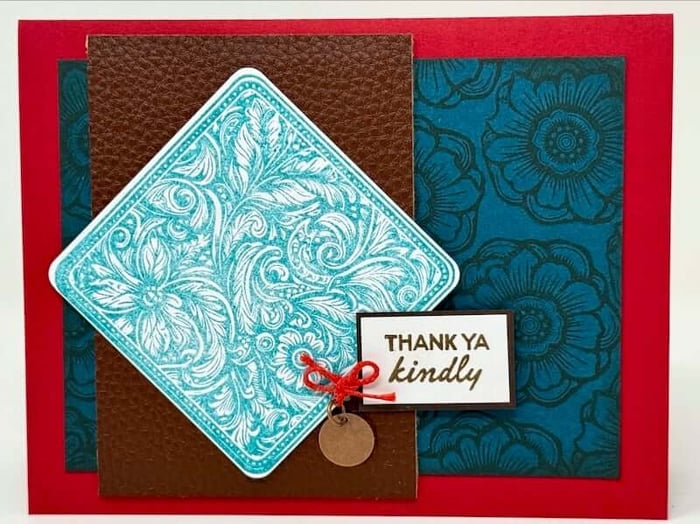
Card 4
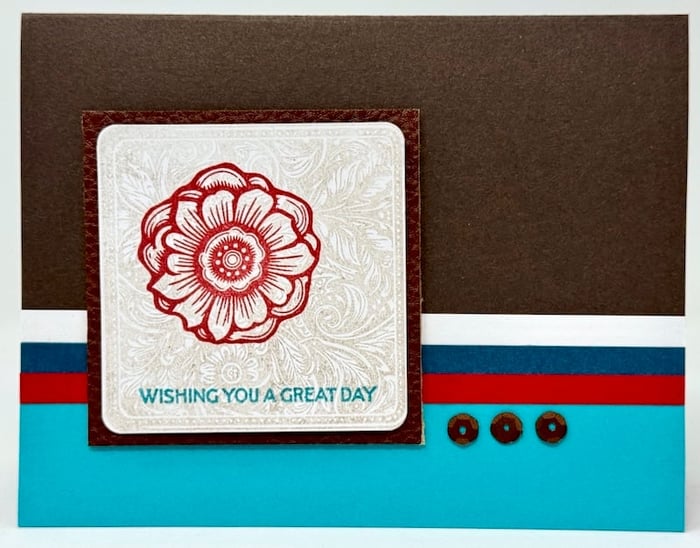
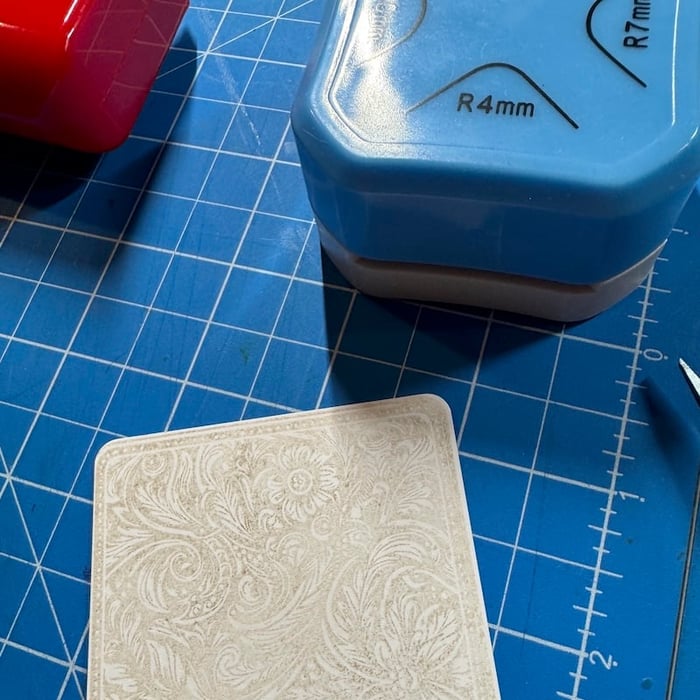
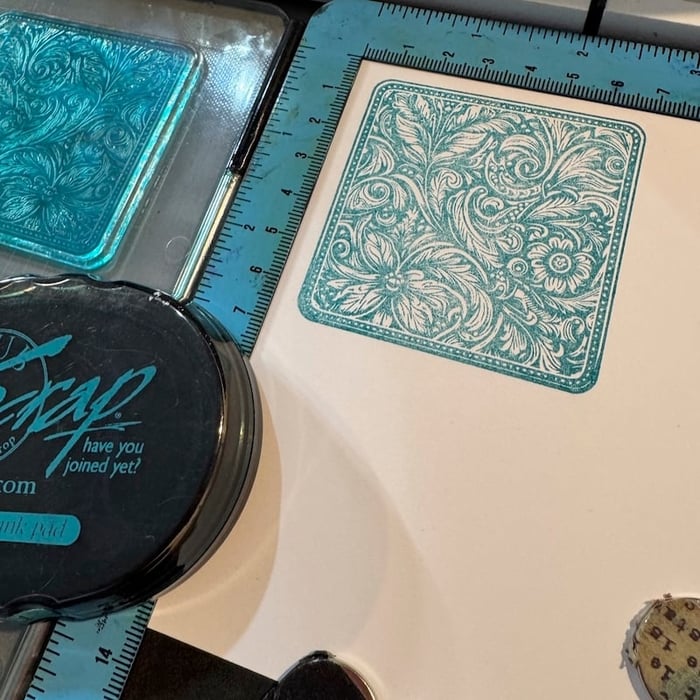
Mount the square image onto the lid of a stamp positioner; apply Earth Ink.
Close the lid to transfer the square image onto a scrap piece of copy paper.
This first impression will remove some of the ink from the stamp. Open the lid of the platform and remove the scrap paper...
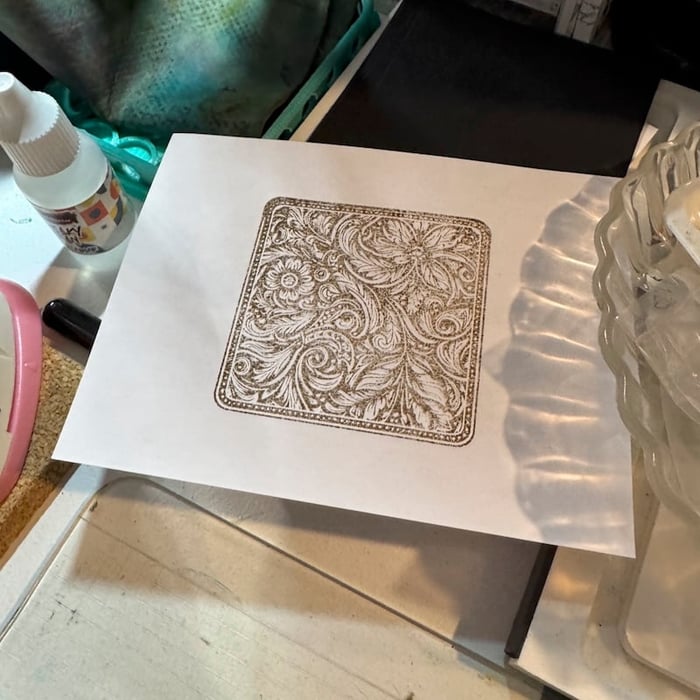
...and stamp the image a second time onto a 2.5" white square panel (without re-inking the stamp).
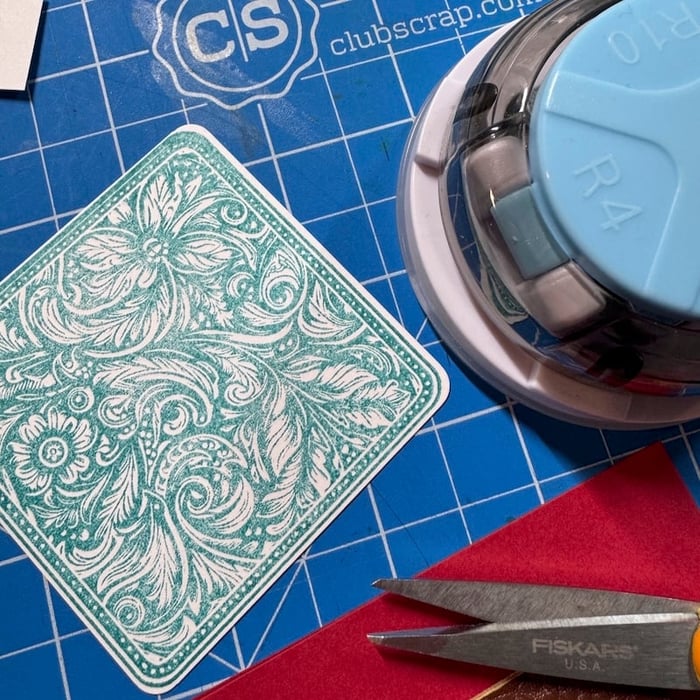
Round the corners of the square with the 4mm side of the punch.
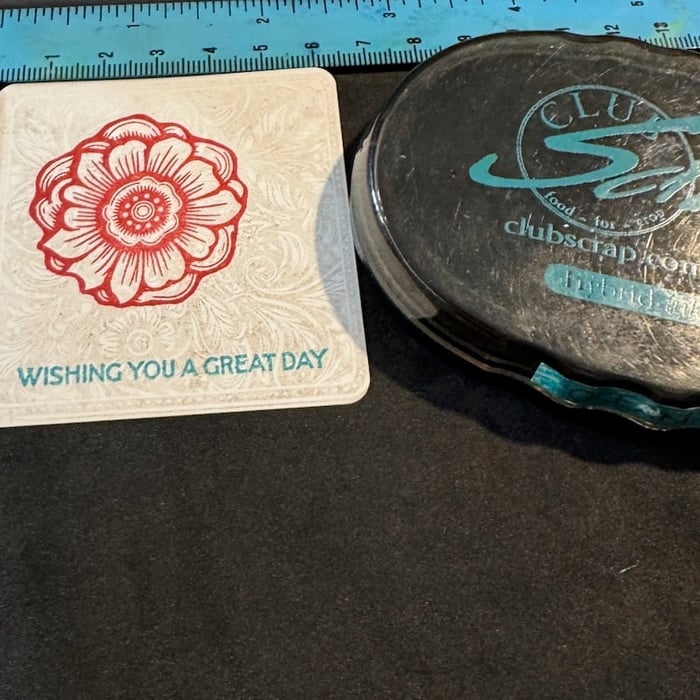
Stamp a flower image onto the square with Red Ink. Add the sentiment below with Ocean Ink.
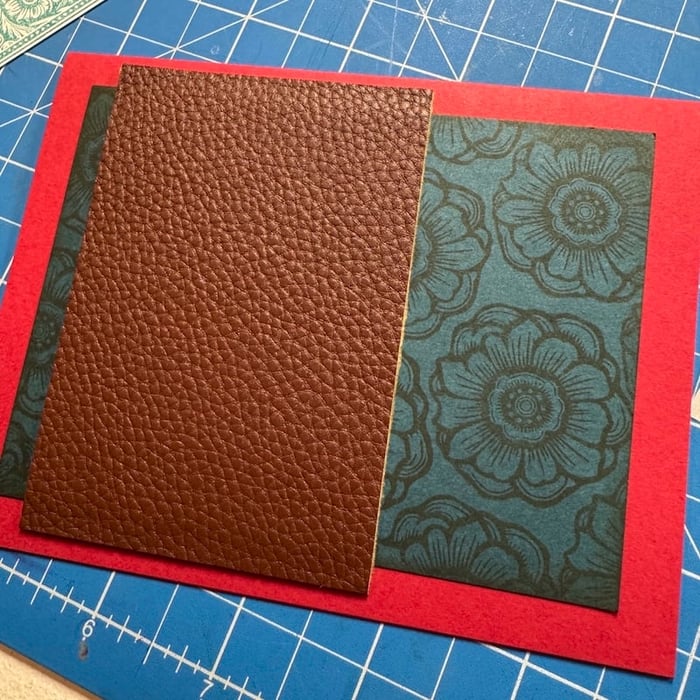
Trim a 2.75" Faux Leather square mat for the stamped panel.
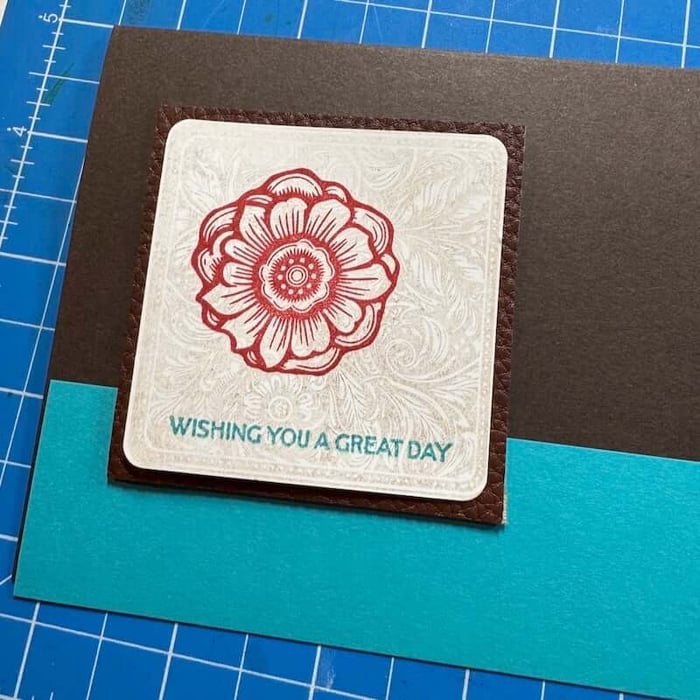
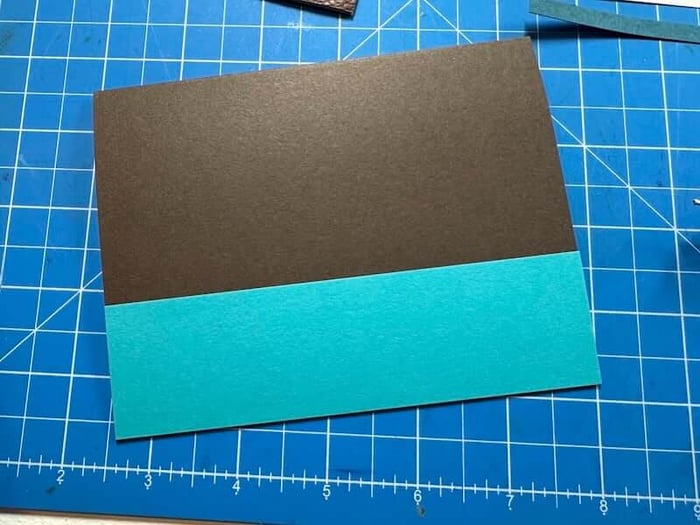
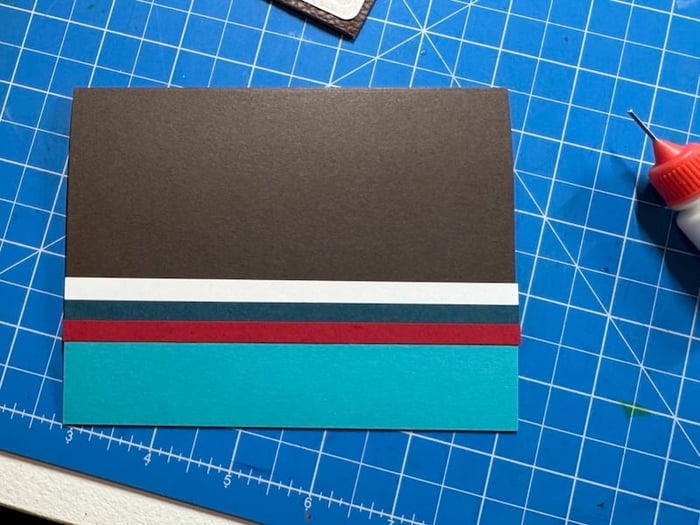
Adhere a 1.5x5.5" Aqua strip to the bottom of a folded Brown card base as shown.
 Add .25" strips in Red, Teal and White above the Aqua strip with Bookbinding Glue dispensed from a Needle-tipped Applicator.
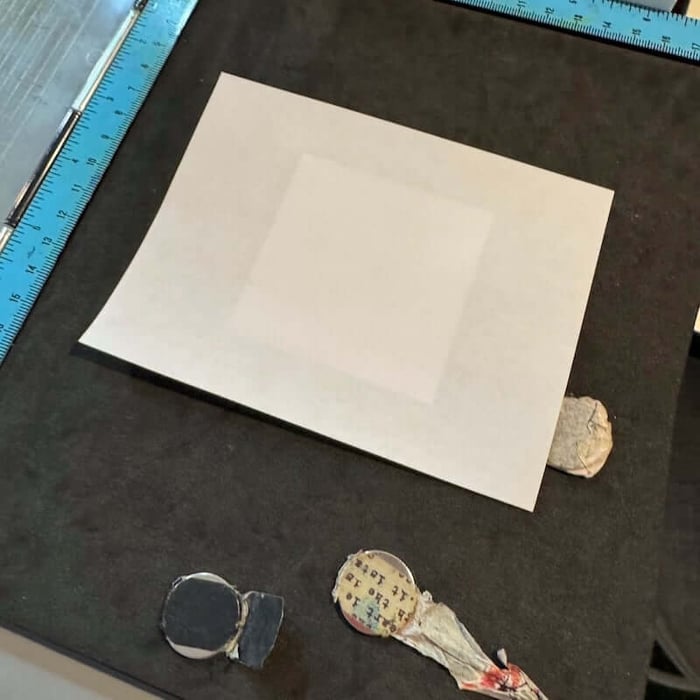
Remove the backing from the Faux Leather panel and adhere over the strips on the card front. Add three dots of Bookbinding Glue under the skinny strips using a 2x8" grid ruler to ensure perfect spacing.
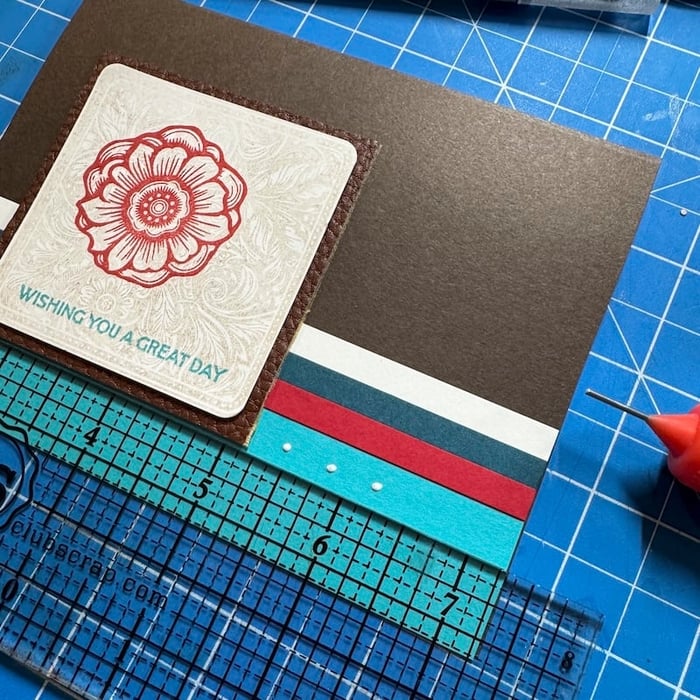
Place copper sequins from your stash over the glue to complete the card.
Card 5
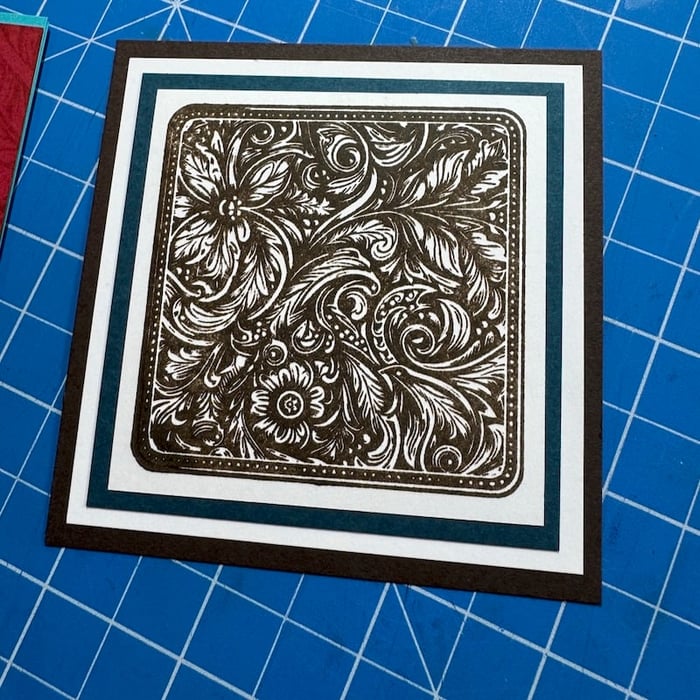
Stamp the square image onto a 2.75x2.75" White panel in Earth Ink.
Nest the stamped panel with Teal, White and Brown mats.
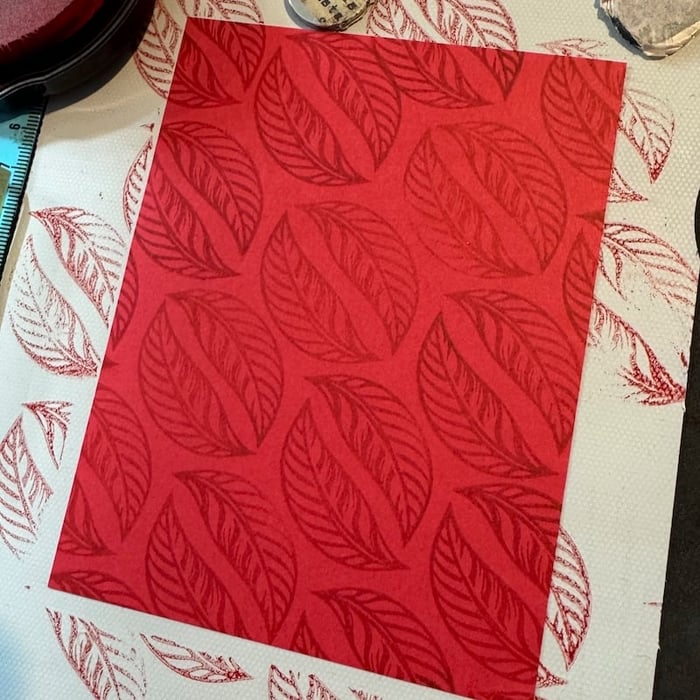
Add the leaf images to a 4x5.25" Red panel with Red Ink. Allow the stamped images to "fall" off the edges to create a realistic all-over print.
Trim brown and aqua ribbons slightly wider than the stamped Red panel.
Center the nested squares at the top of the stamped panel.
Wrap the brown ribbon around the bottom of the panel and secure to the back with clear tape.
Center the aqua ribbon over the brown and wrap around to the back of the panel. Secure in place with clear tape.
Stamp a sentiment on a White panel in Ocean Ink.
Nest the sentiment panel onto Red and Teal mats. Adhere over the ribbons on the bottom of the card.
Stamp the flower onto a white inner panel with Red Ink. Stamp the sentiment with Ocean Ink. Adhere to the inside of the folded Aqua base anchored with a 1x5.5" Red strip to complete the card.
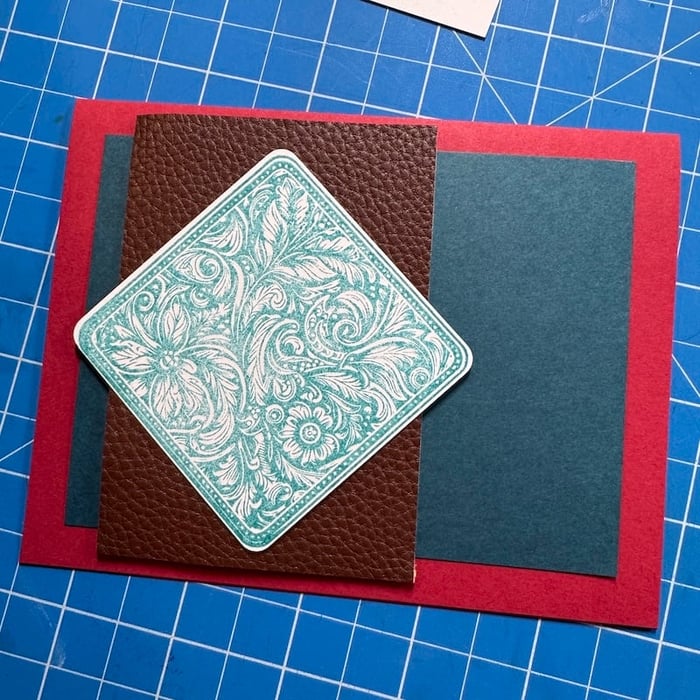
Card 6
Stamp the square image onto a White panel with Ocean Ink.
Trim the image to 2.5" square and round the corners with a punch.
Add flower images to a 3.5x4.75" Red panel with Earth Ink. Allow the stamped images to "fall" off the edges to create a realistic all-over print.
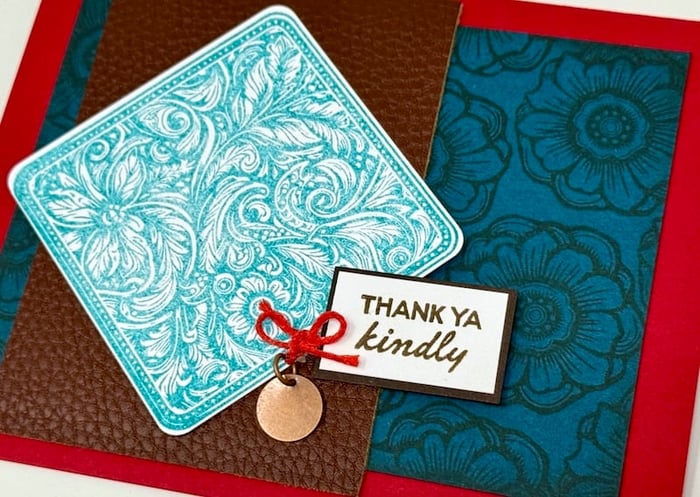
Adhere the stamped panel to a folded Red card base. Remove the backing from a 2.5x4" Faux Leather panel and adhere over the Teal paper as shown.
Rotate the stamped square 45 degrees and adhere to the Faux Leather panel.
Stamp the sentiment onto a White panel with Earth Ink.
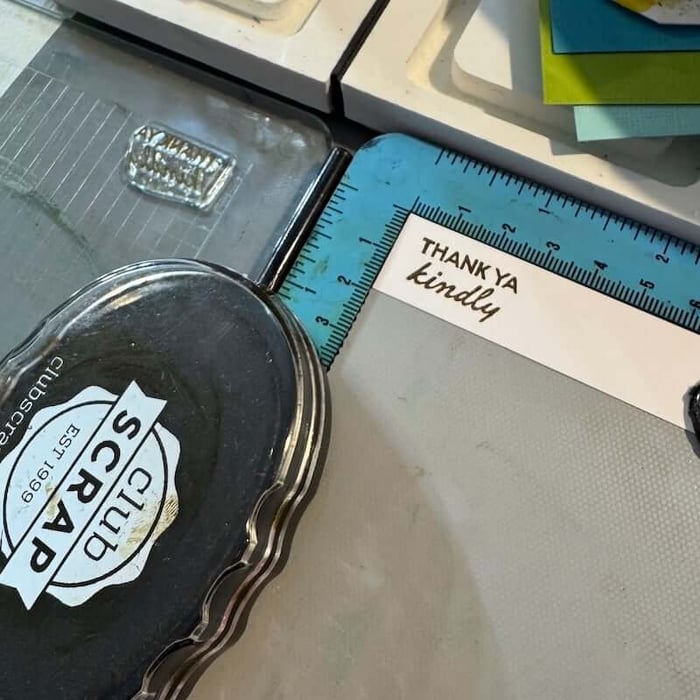
Trim the sentiment and mat with Brown. Add a Foam Adhesive Circle to the back and remove the backing.
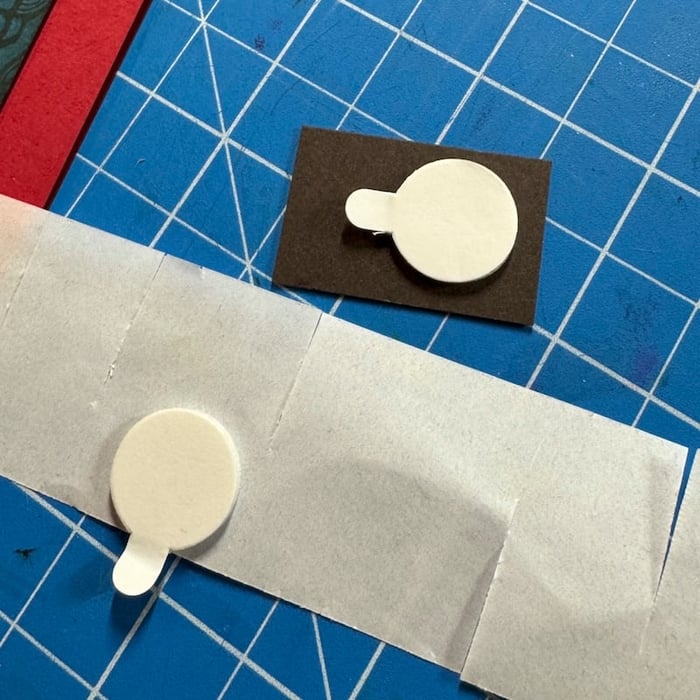
Adhere the sentiment to the bottom right of the Faux Leather panel. Add a length of red waxed linen thread to a Round Copper Blank; tie into a bow. Adhere next to the sentiment to complete the card.
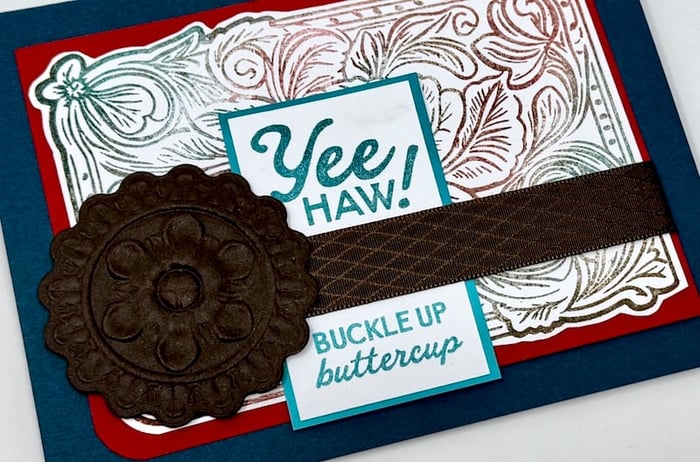
Card 7
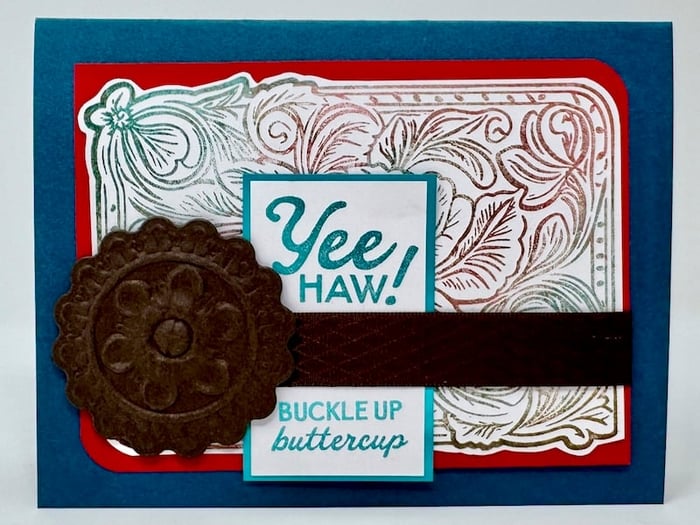
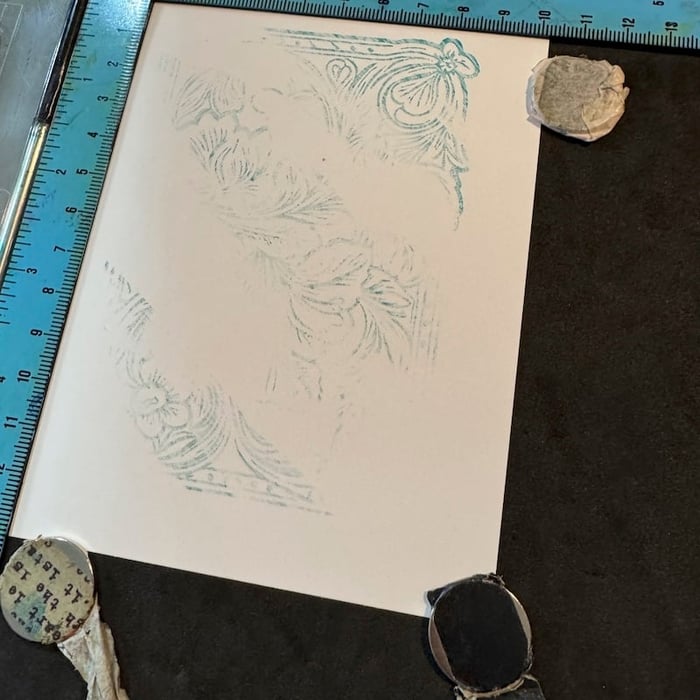
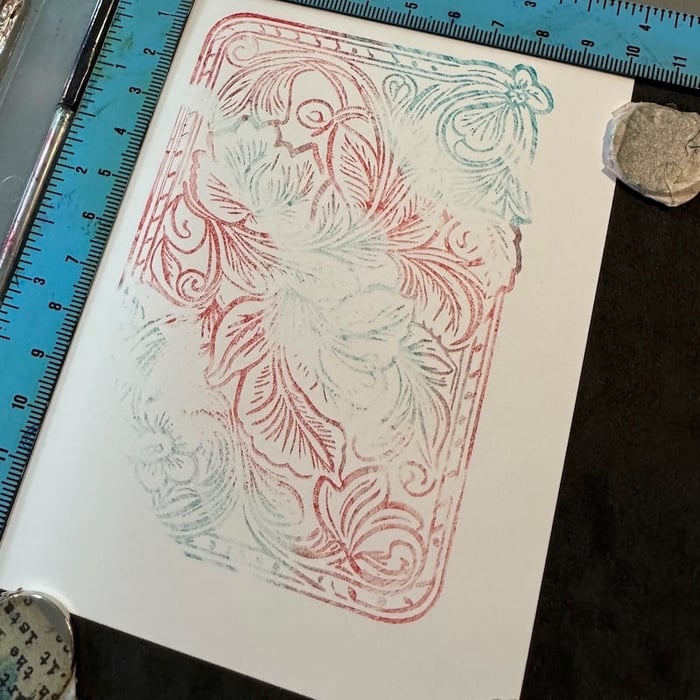
Place a White panel into a stamping platform. Center the large swirl stamp onto the panel and pick it up with the lid. Tap Ocean Ink onto select areas of the stamp as shown.
Close the lid to transfer the partial image to the white panel.
Open the lid and repeat the process with Red Ink. Make sure to add Red ink to areas of the image free of the Ocean Ink (from the first impression).
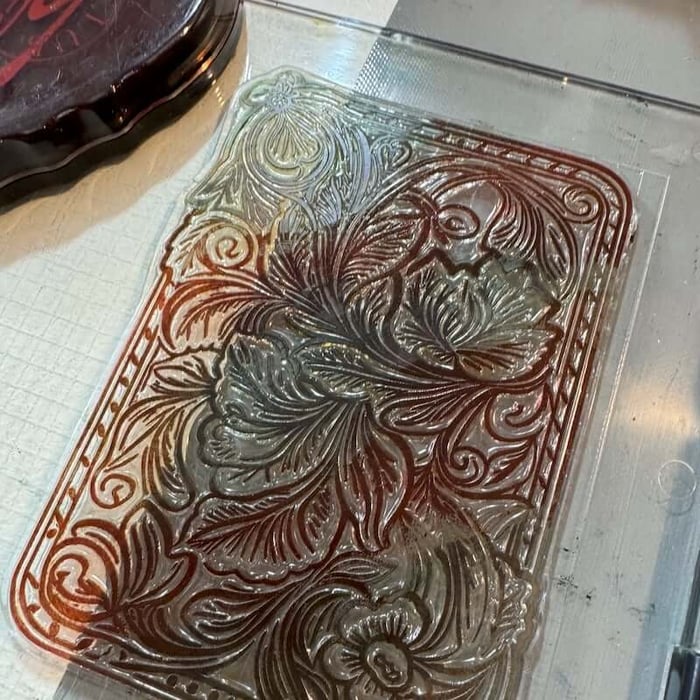
Close the lid to transfer the second ink color.
Repeat the entire process again with Earth Ink.
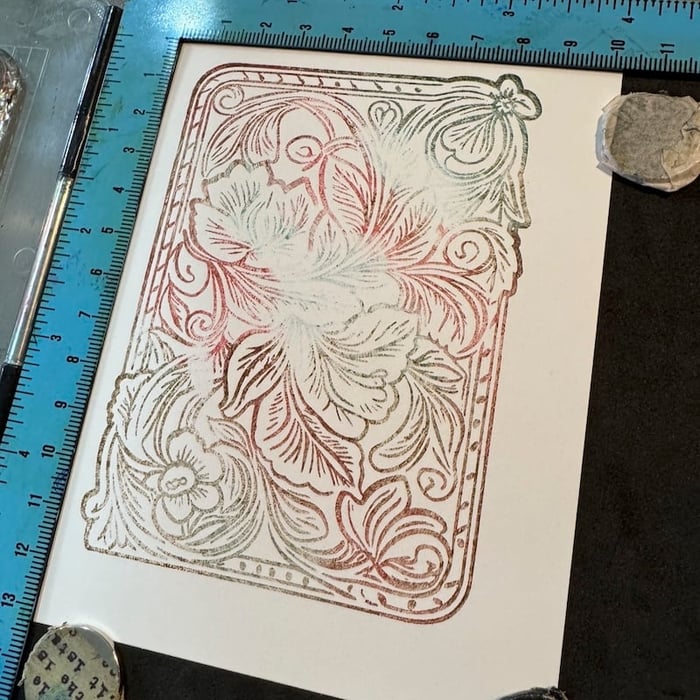
Add any additional ink colors as needed to obtain the desired level of color saturation.
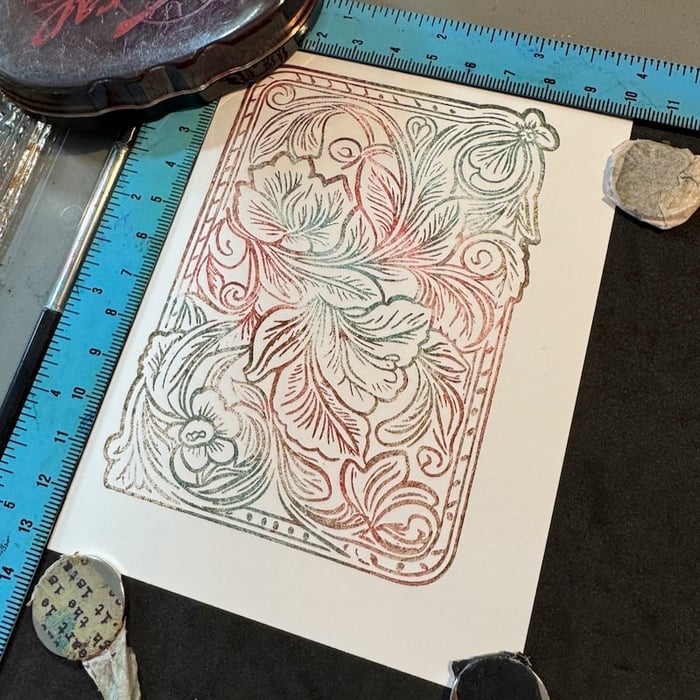
Fussy cut the image with scissors.
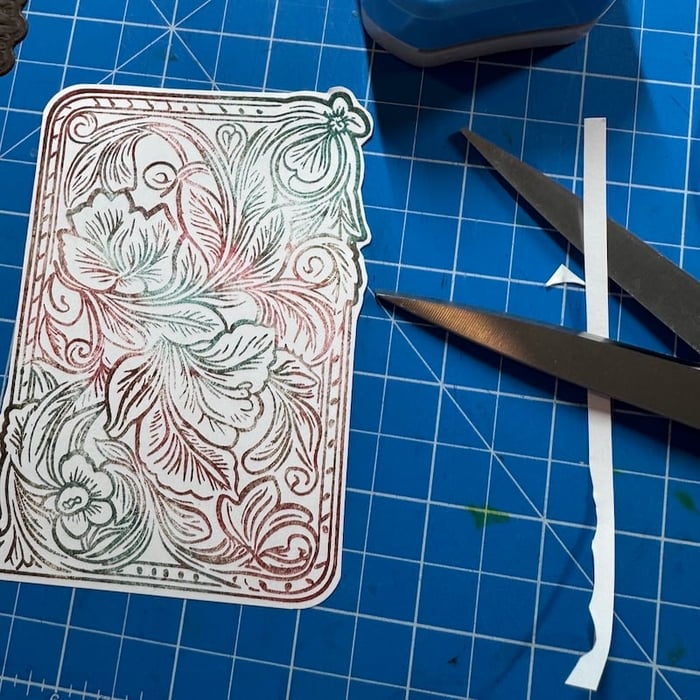
Nest onto a Red panel; round the opposite corners to match up with the fussy-cut image.
Wrap a 7" length of brown ribbon around the layered panels and secure to the back with clear tape.
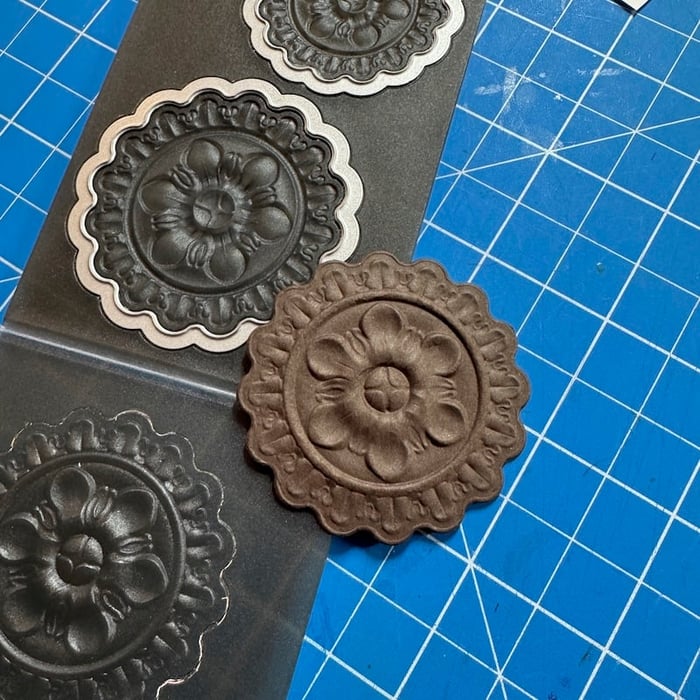
Adhere the panel to the front of a folded Teal card base. Die cut and emboss a medallion shape with Brown paper. This nifty folder does both at the same time! (Find a similar design here*.)
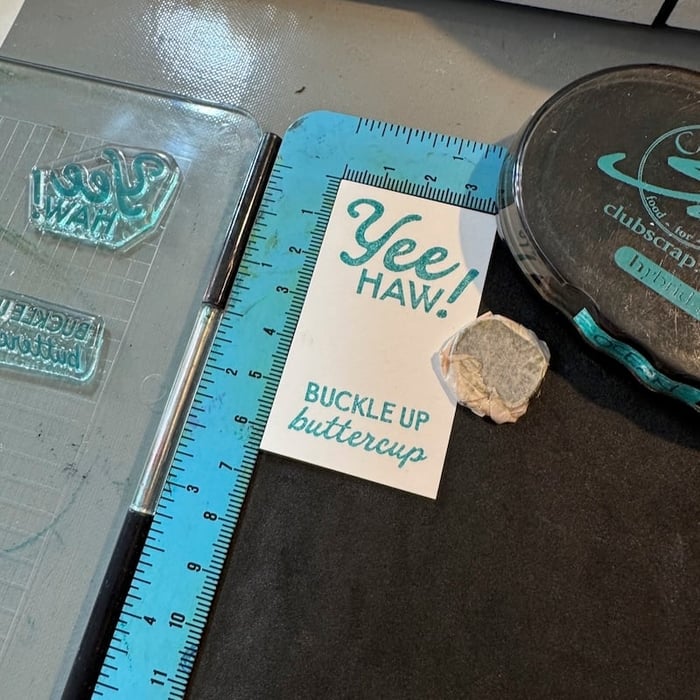
Stamp the sentiment onto a White panel in Ocean Ink as shown.
Mat the panel with Aqua paper. Tuck the sentiment underneath the ribbon. Note how the ribbon fits perfectly in the space between the two sentiments.
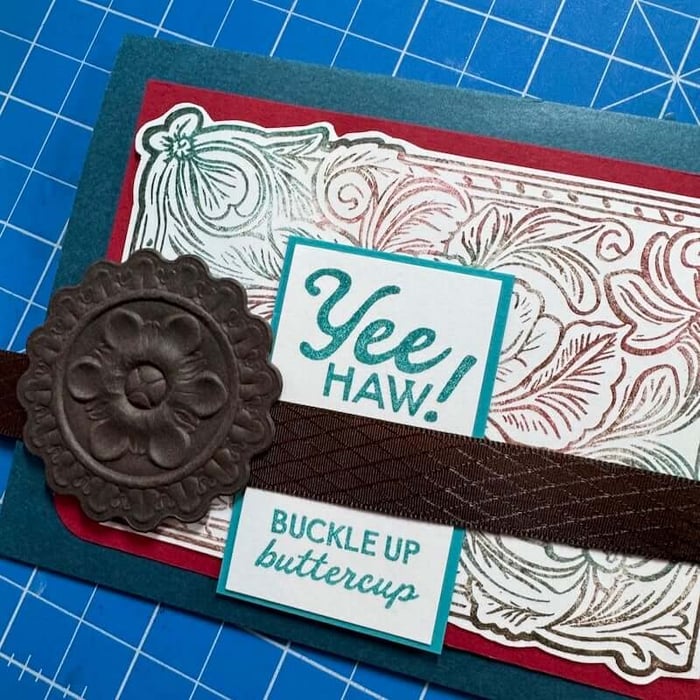
Add Foam Adhesive Circles to the back of the 3D medallion.
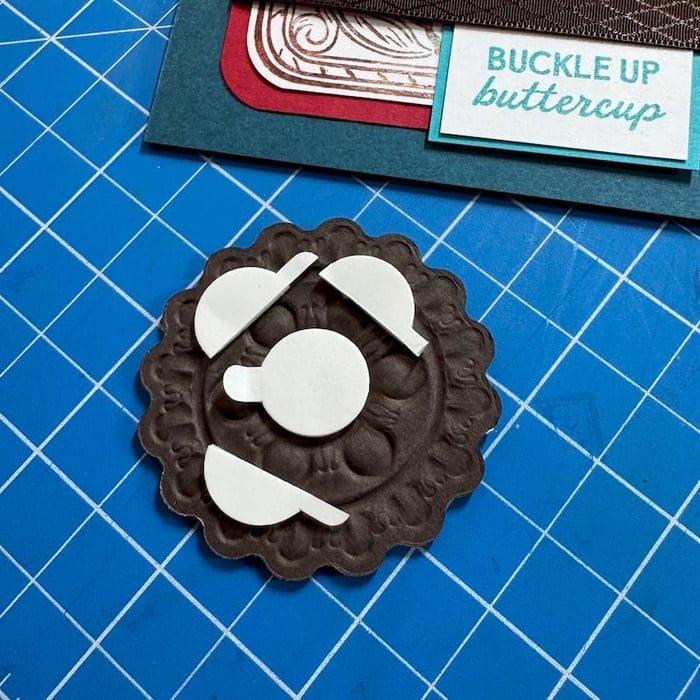
Remove the backing and adhere to the left of the sentiment to complete the card.
*As an Amazon Associate, Club Scrap earns from qualifying purchases. This means we may earn a commission if you make a purchase through links on our site. Thank you for supporting us!

The Impressed Stamps are simply stunning and a perfect way to celebrate any occasion. We'd love to see how you're using the Impressed Stamps, too!
We invite you to share your finished artwork on our Facebook Chat Group. Not a member of the group yet? Simply answer a few questions and we'll get your request processed in no time!

Happy stamping! Shop the links below to purchase the supplies needed to recreate my cards.
Impressed Stamps

$12.51
$19.25
Our premium clear photopolymer stamps are ready to use; no prep is required. The stamp sheet measures 6x8" and includes individual images and phrases. Deeply etched for high-quality impressionsClear substrate for easy positioning and accurate stampingNon-yellowing and durableApply ink; stamp… Read More
Impressed 12x12 Plain Paper

$1.39
12x12" premium plain scrapbook papers, sold individually, by the sheet.… Read More
CS Hybrid Ink Pads

$6.35
Exclusively Club Scrap®, this hybrid craft ink combines the most exceptional ingredients of both pigments and dyes for a fine, crisp, fast-drying image! Don't forget to stock up on the coordinating re-inkers. Each ink pad sold separately. Please select the… Read More