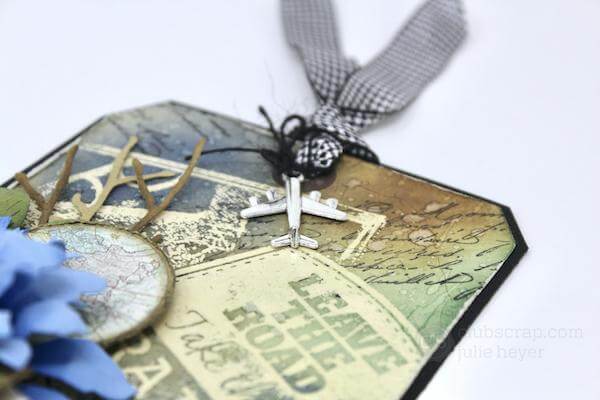

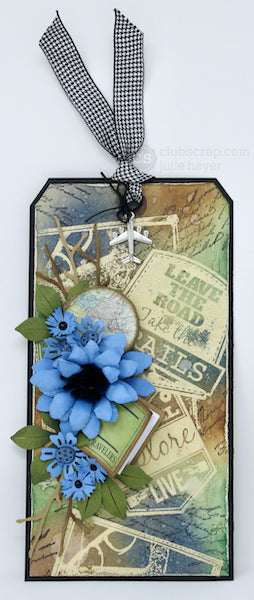
Create a jumbo Expeditions Tag with an emboss resist background paired with lots of fun embellishments!
Expeditions Tag Tutorial
Gather a jumbo tag featured in the Forest Floor page kit and a variety of Expeditions rubber Stamps.

Stamp two sentiment badges onto post note papers.


Fussy cut with scissors.


Add the first image to the jumbo tag with Versamark or embossing ink.


Cover the first image with its coordinating mask and stamp the second image with embossing ink.


Repeat the steps with the large collage image.


Remove the masks and cover the images with clear embossing powder.


Melt the powder with a heat tool.

Gather a variety of Distress and Oxide Inks and apply over the embossed areas with Ink Applicator Brushes.


Once colors have been applied, wipe with a clean damp cloth to remove any ink residue from the embossed surfaces.


Spray a generous amount of water into the palm of your hand. Flick water droplets onto the tag. Note: Distress Inks are highly reactive with water. Set the tag aside to dry completely before moving onto the next step.


Rough up the edges with a paper distressing tool.


Add Distress Black Soot ink to a Paris Flea Market script stamp.


Stamp repeatedly over the embossed tag.


Remove any wet ink off of the embossed images with a dry cloth.


Tag Assembly
Apply adhesive to the back of the tag and adhere to a piece of Black 12x12" paper, leaving an 1/8" border along one long and one short side.


Trim the Black paper with a craft knife and grid ruler leaving a 1/8" reveal around the perimeter of the tag.


Make a hole with a paper punch using the existing tag as a guide.


Add a length of houndstooth ribbon through the hole and attach the plane charm with a piece of black fiber tied in a bow.


Fold a 1-1/4x2-1/2" Brown paper in half hamburger style and add the Expeditions Travel Sticker to the front cover.


Fold three pieces of 1-3/8x2.25" printer paper and staple into the book along the spine with a mini stapler tool.


Create a cluster of die cut flowers, twigs and leaves from the Expeditions Photo Mats.


Let's tour the finished tag!


Let your creativity soar. Happy crafting!
Julie