
When deciding on today's project, I was once again inspired by a photo I saw on Pinterest:
 http://www.pinterest.com/pin/169659110938330865/
I immediately had an idea using the Constellations collection.
Well, the idea was a good one . . . in my head at least. In real life it was a bit more of a struggle to execute. Due to the level of frustration that ensued, I almost titled this blog post "Simple Things Made Complicated" by Karen Wyngaard. I'm sure you can relate.
Instead of an actual lampshade, I envisioned a lighted wall-hanging of sorts, one that could act as a night light in the main hallway of our home. After quite a bit of trial and error, I ended up with something I'm fairly pleased with. Hindsight being 20/20, there are probably a number of things I could have done differently.
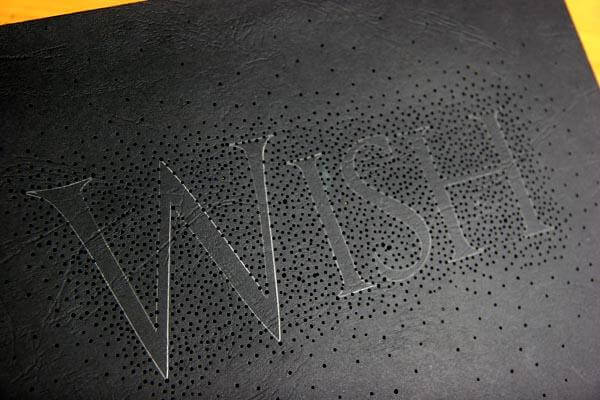
Here's the finished product:

To create the pierced paper panel, grab your Constellations Stencil, and trace the word "WISH" lightly with pencil onto Black Plain.

Using a paper piercing tool (or pin) and cork board, pierce holes into the black paper. Start close to the pencil lines, and work out from there. The piercings nearest the letters should be as concentrated as possible to highlight the word. As you work outward you can leave more space between the holes for a "night-sky" effect.
To test your work, hold it up to a light source until you're satisfied with the results. Once your pierced paper panel is complete (say THAT ten times fast), you can use it to:
Sorry for the blurry photo!

To duplicate my project, create a custom frame using book board and bookbinding glue. You can make it any size you like. The finished size of my box is 8.5x11", as that was the size of the black paper I used for the front panel. (The frame is 3/4" deep to accommodate the twinkle lights.) Once the construction of the frame is completed (be sure to leave an opening for the cord), paint with black acrylic. Let dry. Before adding the pierced front panel, place a string of white twinkle lights inside the frame. Pierce holes in book board base and add twist ties to secure the cord. (I used a 50-light strand.) Here's the back of frame showing how twist ties secure the cord inside the frame.

Finally, after the lights are secured inside, glue the front panel in place. Plug in and enjoy!

Of course, after the project was finished, my mind was racing with ways I could still possibly improve upon this project, but that will have to wait for another day. I hope I've inspired you to try something a little different with your Constellations collection. I'd love to hear your ideas!