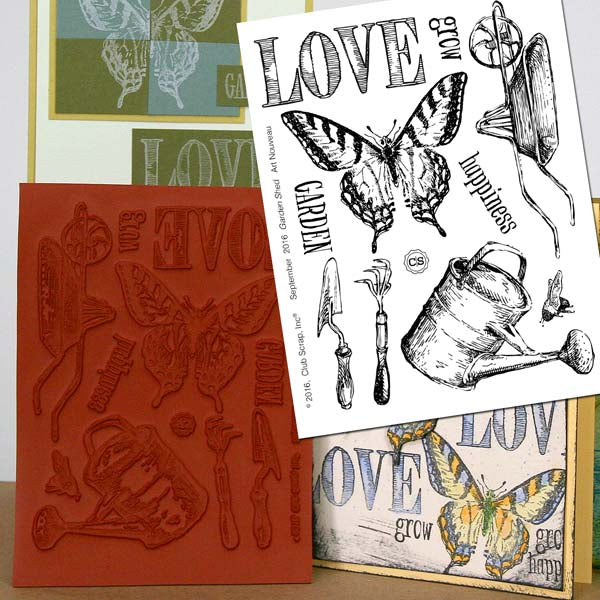
Each month we create three beautiful sheets of unmounted stamps to coordinate with the theme. I cultivated a set of cards featuring each stamp sheet in the
Garden Shed collection. Check 'em out!
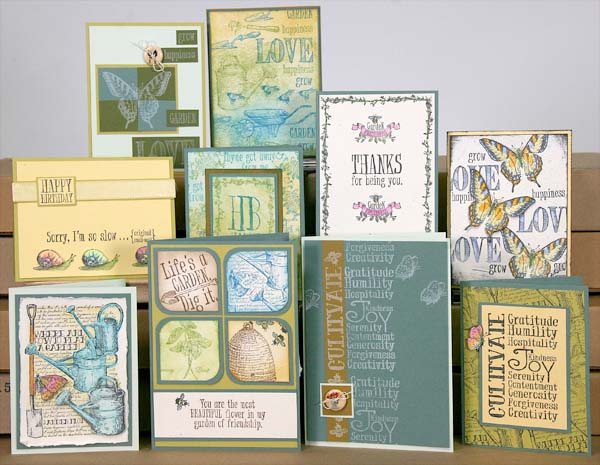
Read on to learn more details about each card . . .
JUMBO UM
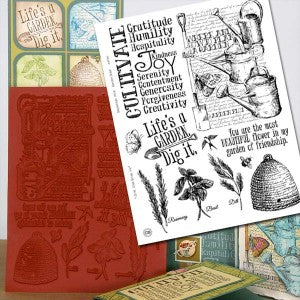
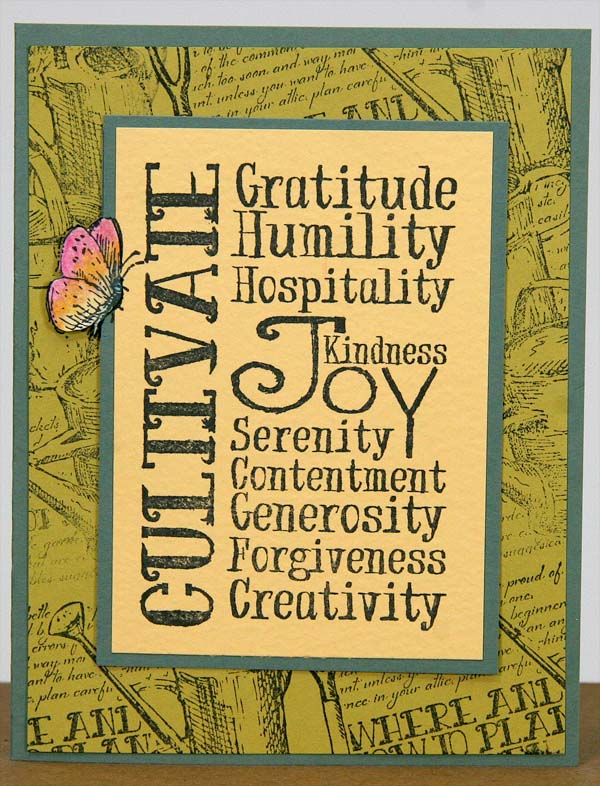
CARD #1
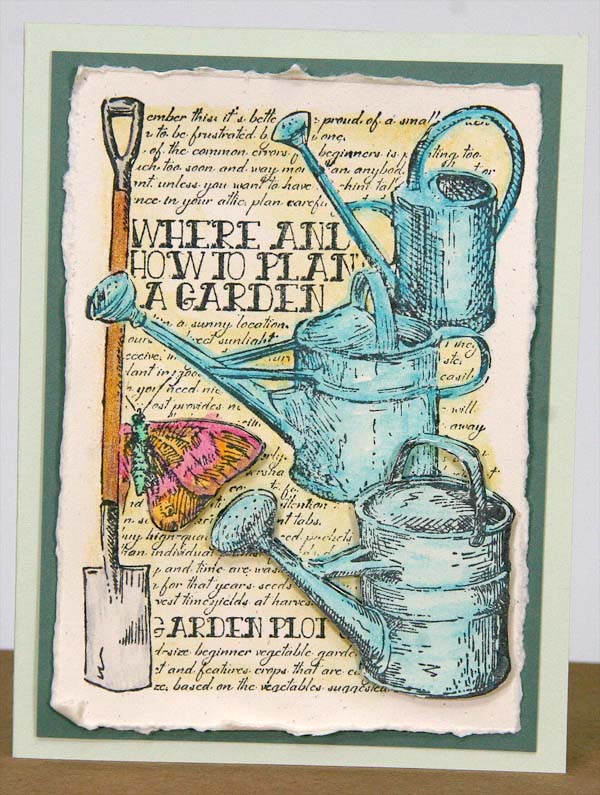
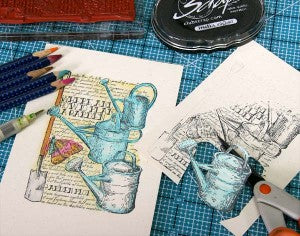
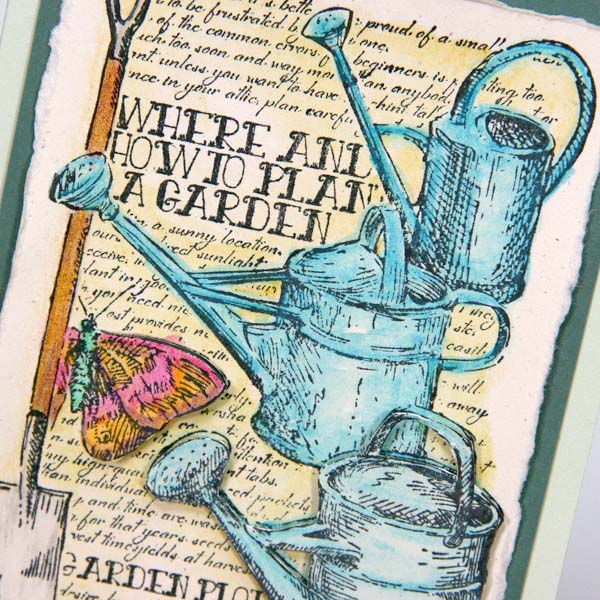
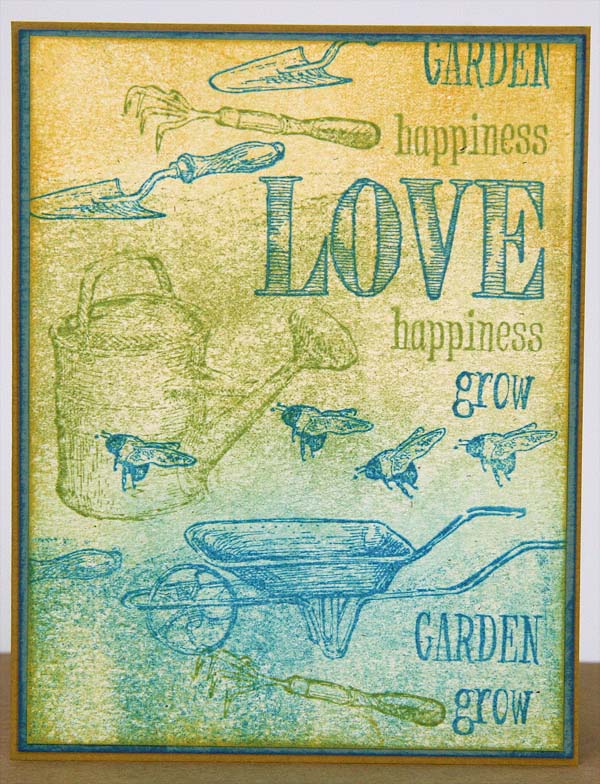
Stamp the large collage image with India
Black ink and add watercolors.
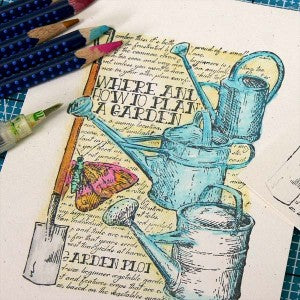
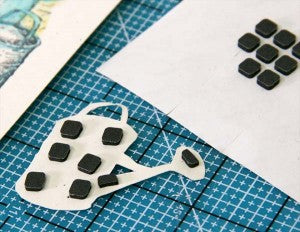
Stamp the image a second time and cut out the largest watering can in the foreground. Color the watering can.
Adhere the watering can onto the can on the art panel with foam adhesive.
Tear the outside edges of the panel with the help of a CS®
Grid Ruler.

Cut along the edge of the butterfly wing with a craft knife.
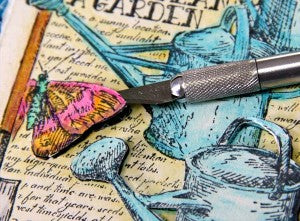
Add foam adhesive to the back of the wing.
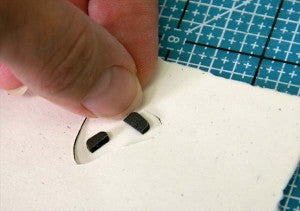
Nest the art panel onto a Teal mat and White card base.
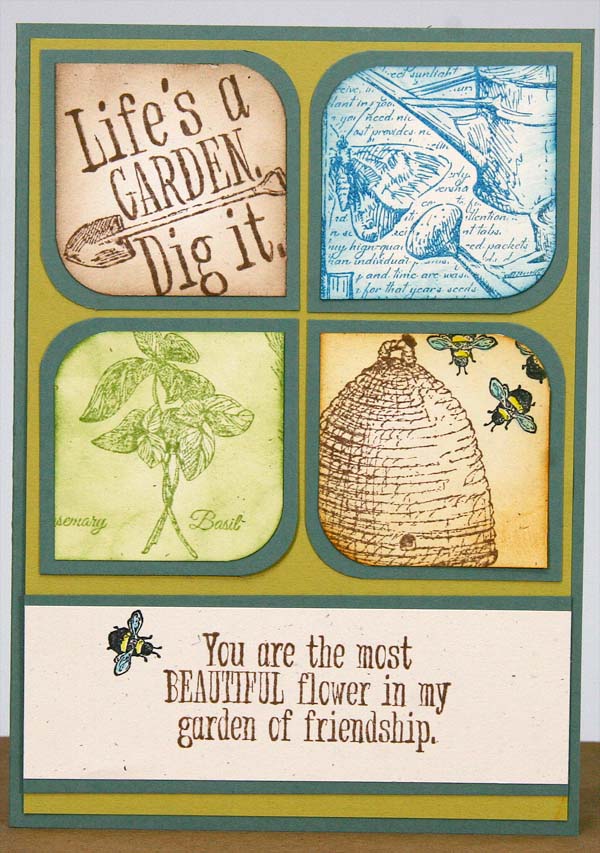
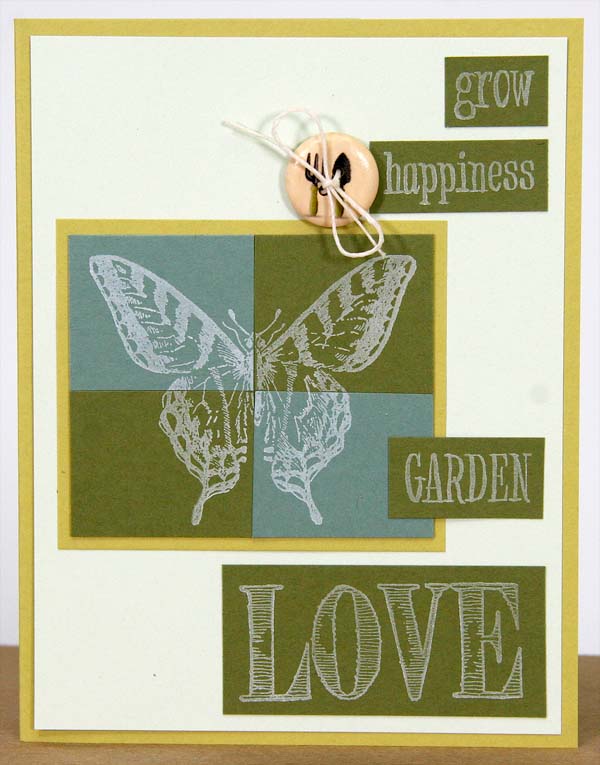
CARD #2
Stamp a set of four squares with images in Earth, Leaf and Lagoon
inks. Round two corners of each image with a Corner Chomper on the half inch setting. Repeat corner rounding on corresponding Teal mats and nest onto a Citron panel and Teal card base. Finish with a stamped sentiment on the bottom of the card.
CARD #3
Stamp the large UM collage image onto a Citron panel at an angle to create a background pattern. Accent the word collage with a butterfly stamped on White. Attach the butterfly with foam adhesive
circles.
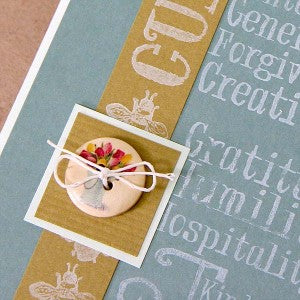
CARD #4

The Deluxe Kit includes a package of adorable
Wood Buttons. Sew a button onto an Olive square with waxed linen thread and tie into a bow. Stamp onto the Teal panel and Olive strip with Club Scrap's White
Pigment ink.
 ART NOUVEAU
 UM
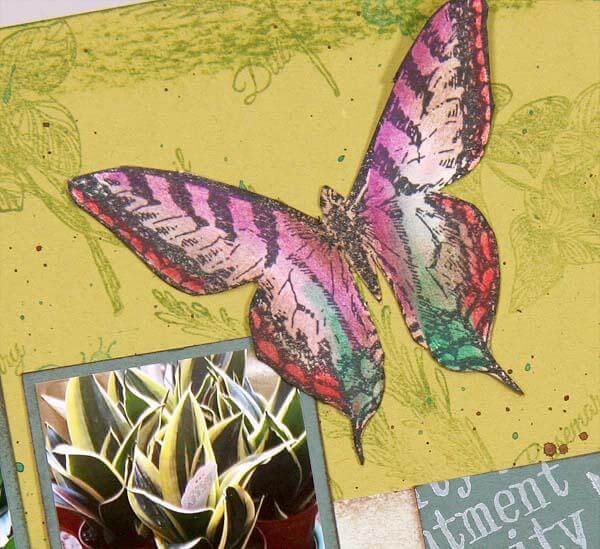
CARD #1

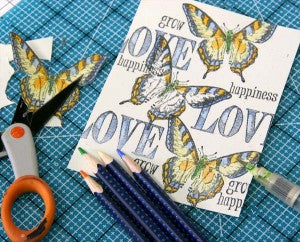
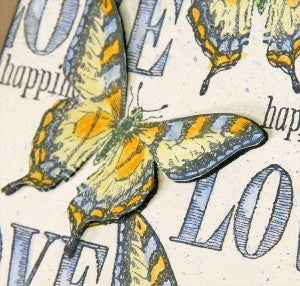
Stamp three butterflies onto a White art panel with India Black ink Stamp a fourth butterfly onto a separate sheet.
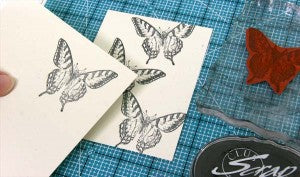
Add a stamped sentiment onto the panel Don't worry about overstamping the center butterfly.
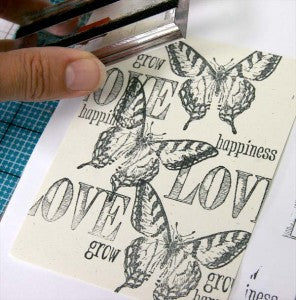
Color the artwork and trim the separate butterfly with a detail scissors.
Apply foam adhesive to the wings and CS®
Bookbinding Glue to the body of the butterfly.
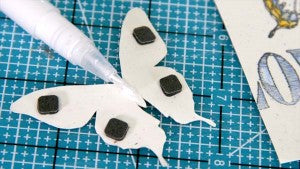
Layer the butterfly onto the art panel to hide the over-stamped areas.
CARD #2
Apply Topaz, Leaf and Ocean
inks onto the card base with a brayer, then stamp images with the same color of ink.
CARD #3
Piece together two Teal and two green rectangles on a Butter mat. Stamp the butterfly image onto the center of the rectangles with
White pigment ink.
 GREETING
 UM
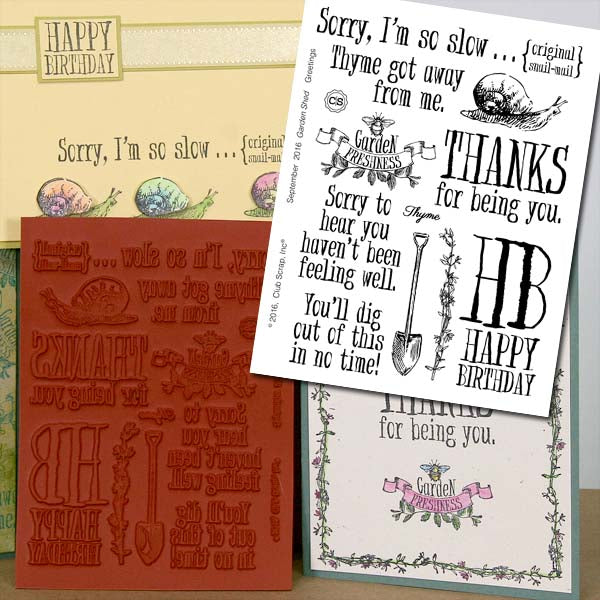
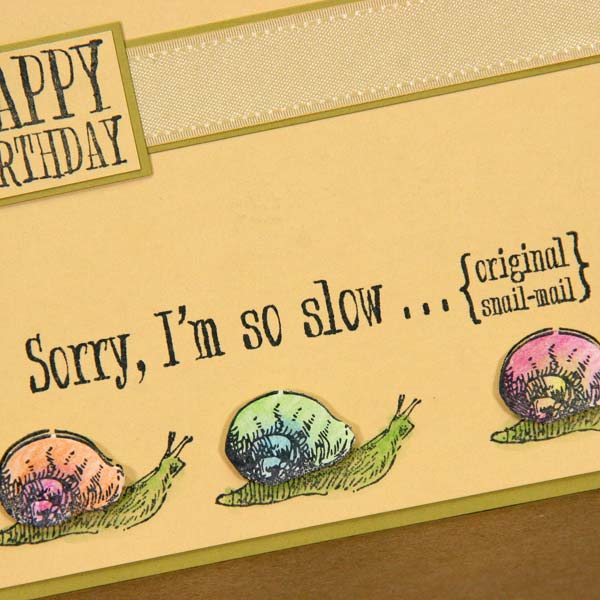
CARD #1
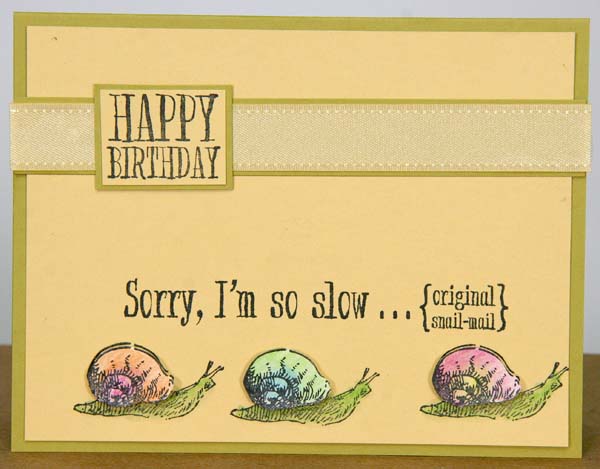
Stamp the snail three times onto the Butter art panel and three more times onto a separate sheet of White. Color the shells, trim with a detail scissors, and adhere to the panel with foam adhesive
circles.
CARD #2
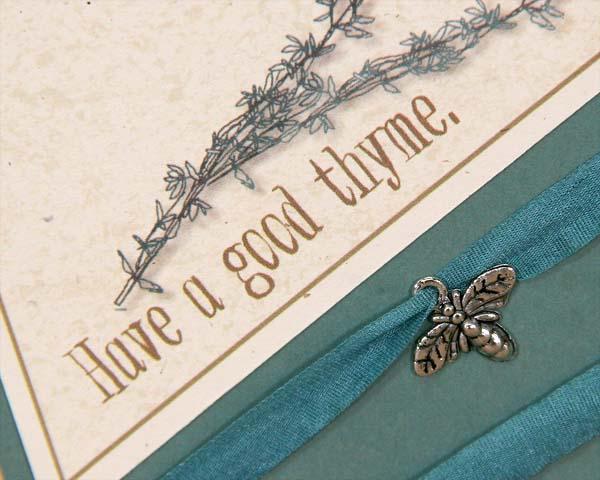
Use the thyme image to create a cute border around the stamped sentiment.
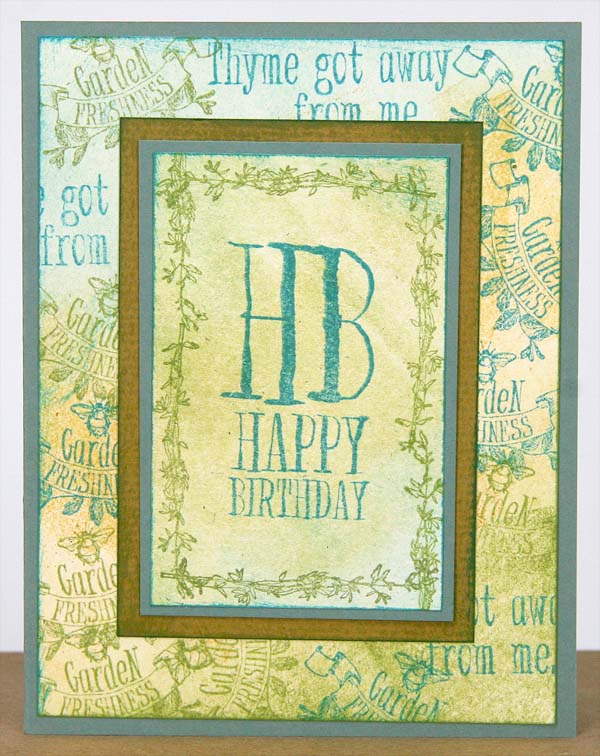
CARD #3
The "Garden Freshness" image makes an adorable accent above and below the sentiment stamped into the center of the card. Use the image to create custom labels for your homemade canned produce and jellies!

Whether your hands get dirty or inky, have fun playing in the
Garden Shed!
Kay