
The Hello Sunshine stamps are just what the doctor ordered. I don't know about you, but I'll take all the sunshine I can get.
To get things rolling, I always begin by creating a few simple card samples to experiment with the stamps and showcase their versatility. Nothing fancy . . . I just grab a POP (Pack of Panels), some larger sheets of paper for the card bases, coordinating CS® inks, and a MISTI. Then I stare at the images for a while and see what happens. (It's a very scientific process.)

Hello Sunshine Stamps
Card 1

I love to do foreground/background combinations with just one image. Here, stamp the sun image repeatedly onto a Lt. Yellow panel with Tangerine ink, being sure to stamp off the edges. Clean the stamp and add the image to an Orange panel with White ink. Add the sentiment with black ink.
For great results, stamp the focal images with the help of a stamp positioning tool such as a MISTI, which allows you to repeat stamping in the same spot as many times as necessary.

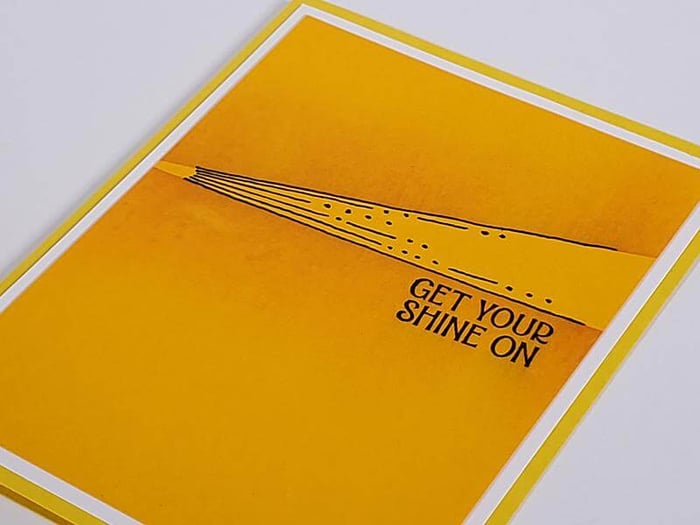
Card 2
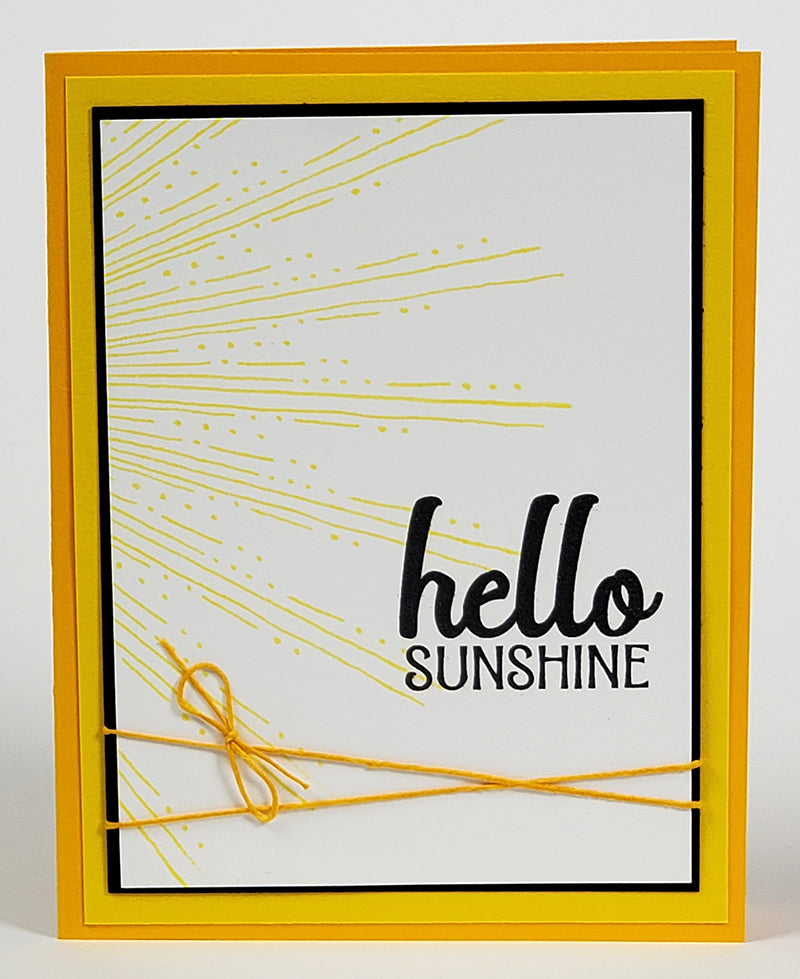
The single "ray" of sunshine stamp makes a gorgeous sunburst on this simple card. Start by stamping the image horizontally, near the upper center of the panel with yellow ink, allowing the edge of the sunbeam to extend past the left edge of the card. Then, stamp above and below the original image, re-inking each time. The clear stamp allows you to achieve precise alignment for great results!
Finish the card with a sentiment. Wrap the bottom edge of the panel with waxed linen thread and mat several times with POPs.

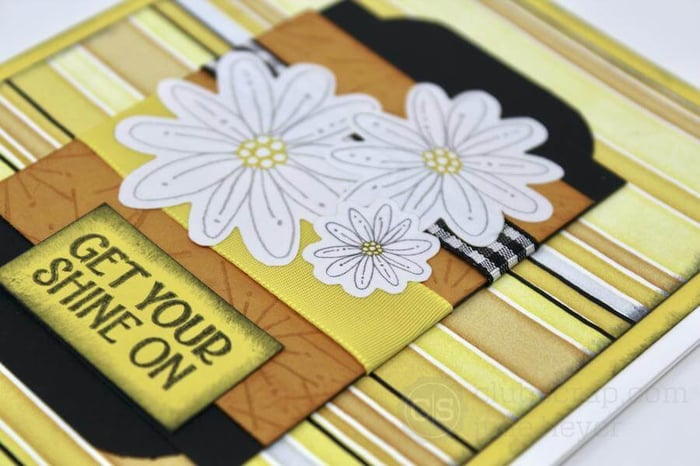
Card 3
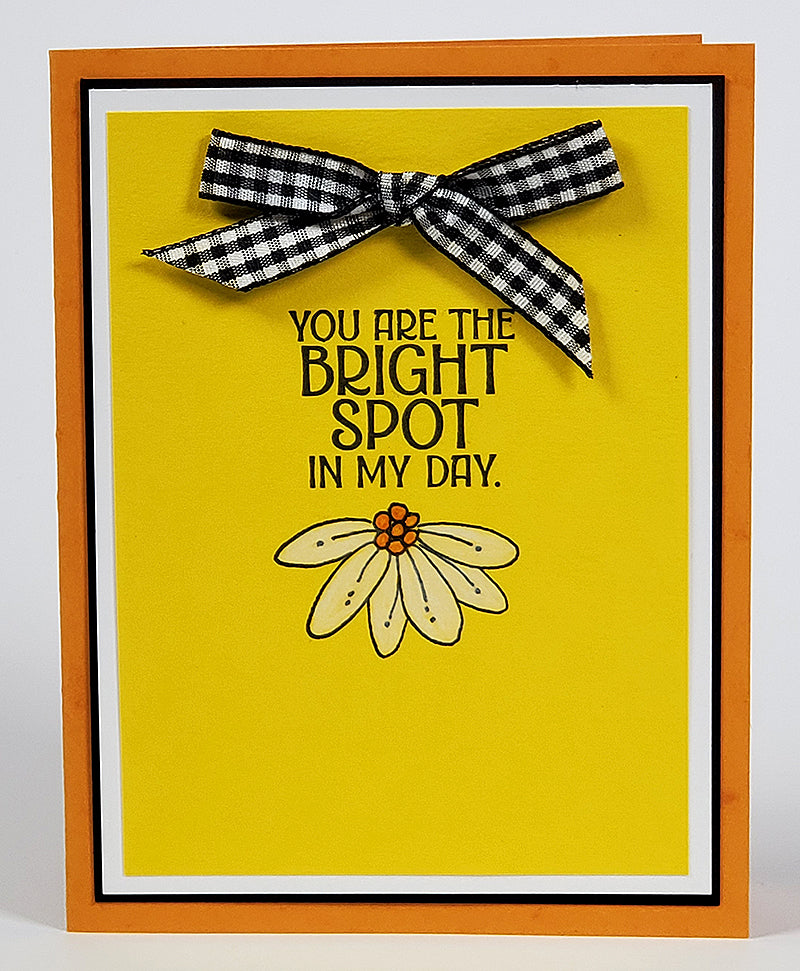
Stamp the sentiment and daisy onto the Lt. Yellow panel with black ink. Color in the daisy with white and orange colored pencils. Nest the panel onto additional layers and adhere to an Orange folded card base.
Create a sweet bow from the gingham ribbon and add to the card with your Glue Lines or your favorite adhesive.

Card 4

Having the POPs on hand allows me to easily create multiple mats for each card. Vary the reveal of the layers to add interest, and always measure before cutting for a professional-looking finishing touch. In a case like this, I work backwards from the size of the card base, and alternate between a 1/16" and 1/8" reveal. Keep a pencil and scrap paper on hand for calculating the mat sizes.
For a low profile embellishment, wrap a wide piece of ribbon around the upper left corner of the card panel and tape the ends on the back to secure.

Card 5

I love the "glow" on this card! Stamp the ray onto a Dk. Yellow panel with black ink and allow it to dry completely. Mask the top edge of the stamped image with a piece of scrap paper and apply Tangerine ink over the mask with a sponge or ink applicator brush. For best results, always "land" on the mask and brush outward. Repeat for the bottom edge of the image.

Card 6
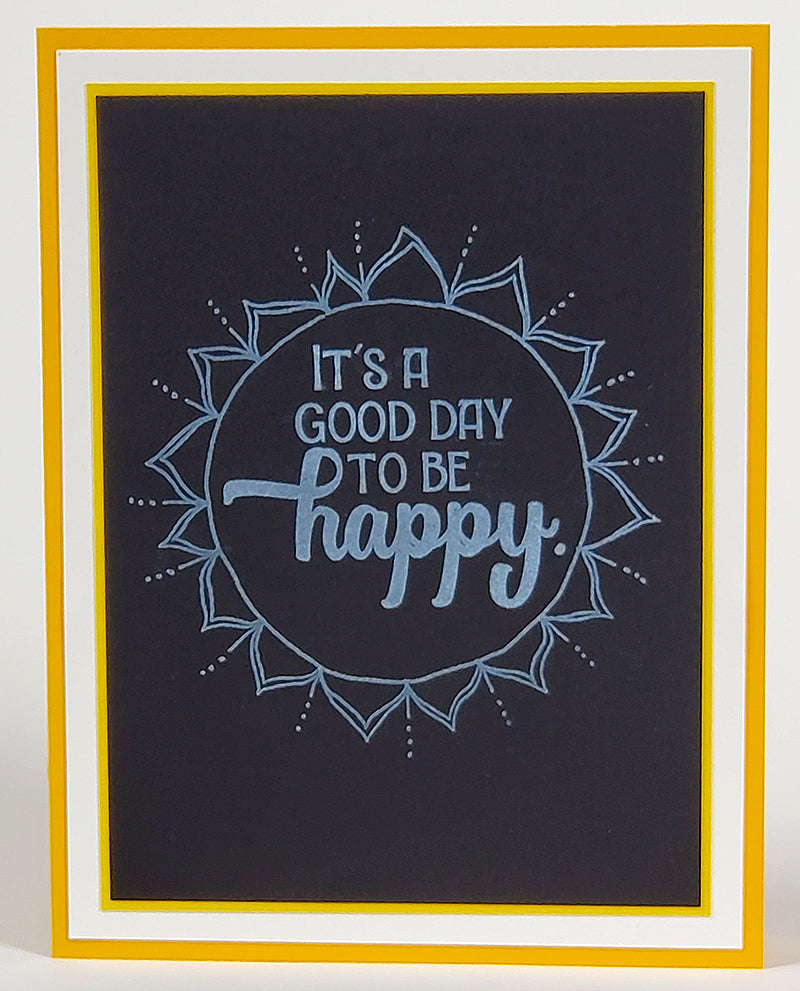
This sentiment was designed to fit within the sun. It looks fabulous when simply stamped onto the Hello, Sunshine rich black paper stock with white ink.

Card 7
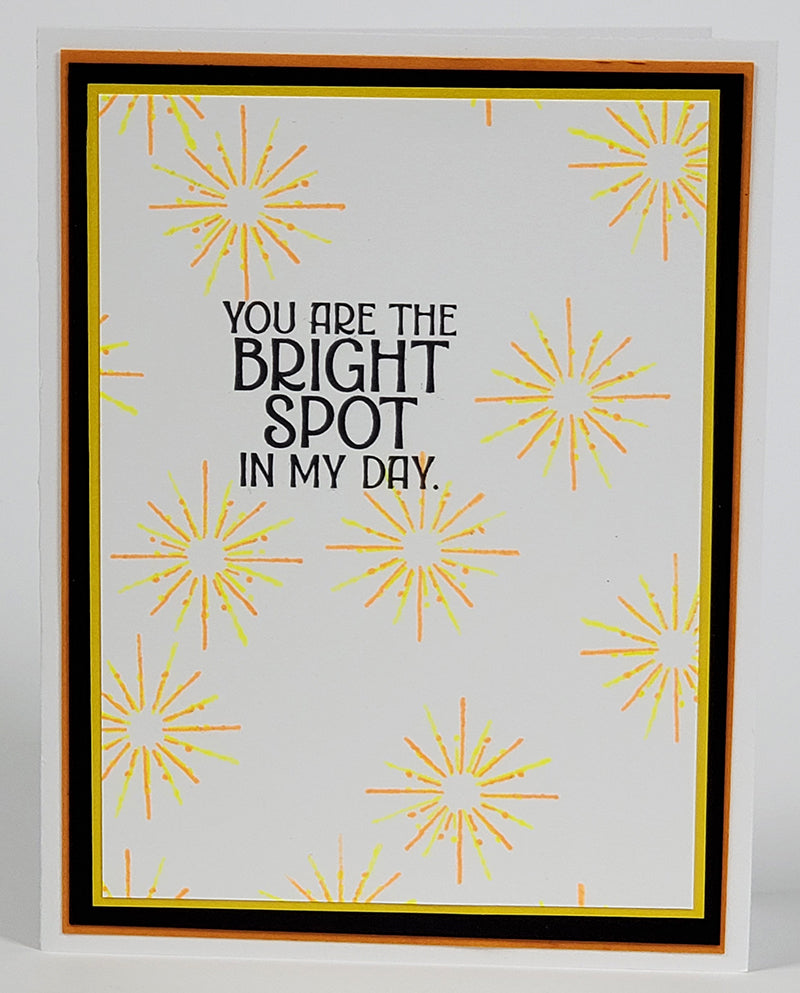
Do you happen to have a few CS Neon ink pads in your stash? If so, grab the neon orange and neon yellow. Stamp the sunburst image randomly onto a white panel with yellow, and then stamp again with orange, carefully rotating the image, as shown.

Card 8

Stamp the sun image onto a white panel with Yellow and Tangerine ink. Stamp the "smile" sentiment within one sun with black ink. Nest the panel with additional colors and adhere to a white folded card base. When completely finished with the card, carefully add Nuvo Drops (Tonic Studios) to each sun. Place the card where your "co-workers" won't walk by and touch it out of curiosity before it's dry.

I hope these tips help inspire you to make a few Hello, Sunshine cards of your own! If you don't have the stamps, it's not too late to add them to your next shipment. Be mindful that due to the popularity of this collection, quantities are limited.
Best wishes for your day, whether it involves staying home and getting inky fingers, or being on the front lines in many essential capacities. Thank you for letting us serve you during these uncertain times.
Tricia