
Happy 2022 everyone! I love that we have a tradition of releasing a bright, happy and colorful collection each January. Winters in Wisconsin can be long, so it's fun to have something cheerful to work on. The What's Up, Buttercup? theme fits the bill perfectly.
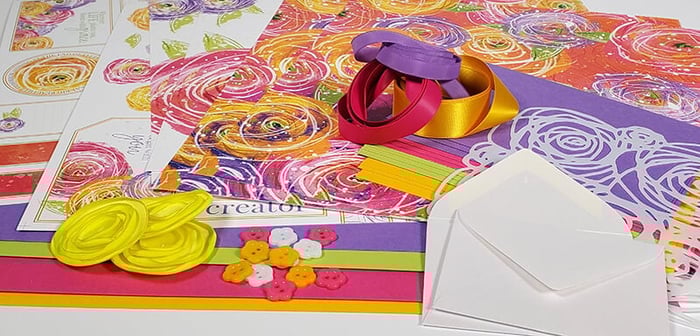
What's Up, Buttercup? Page Kit
Let's take a closer look at each two-page spread - before and after photos and journaling. I'll also share any tweaks or minor deviations I made to Tricia's original layout samples to better accommodate my photos.
Layout 1 & 2

Optional: Add a subtle floral touch with the Floral Masking stencil and Yellow hybrid ink. The ink applicator brush makes it quick and easy. (Or, skip it if you're lazy and/or forgetful, like me.)

After scanning my finished layouts, I went back and added journaling and a few more embellishments. A fussy-cut flower dresses up the empty green mini mat on the left page.

In lieu of two smaller horizontal photos, crop a vertical photo to span the entire space.

Who says a mat has to appear behind the entire photo? Crop a photo to fit the open space in the lower right corner of the layout - positioning it with a 1/8th reveal at the top and left of the photo. Tricky!

Layout 3 & 4

The White Floral print is so much fun, it's a shame to cover up those blossoms! Use a craft knife to carefully cut around the printed flowers at the top of the left page. Tuck a horizontal photo mat under the trimmed areas.
Be sure to avoid adding adhesive where the trimmed flowers overlap the mat so you can easily add the photo later.

To embellish the envelope insert, center a fussy-cut a flower (from the cutparts) on top to act as a pull tab. Use a pencil and grid ruler to lightly draw journaling guidelines to keep your handwriting from going "downhill".

Layout 5 & 6
Dress up the top and bottom edges of the left page with more stenciling - this time using Fuchsia ink. Use scissors or a die to remove the circular sentiment from the cutaparts. Add a gorgeous double-bow to the right side of the layout.

Because I had so many photos for this spread, I skipped the double-bow to allow room for two additional photos.

Trim mats from coordinating papers included the Pack of Panels.

Layout 7 & 8

Don't have a photo to fit the small pink mat? Trim plain white to the appropriate size. Stamp layered flower image in Fuchsia ink. Add sentiment using India ink.

After adding cutapart flowers to the layouts above, I had one yellow posy left and I couldn't let it go to waste. Instead I covered the stamped flower with the cutapart using foam adhesive circles.

Finally, dress up the envelope insert using Fuchsia ink and the floral masking stencil. Add a plain white panel with pencil lines for journaling. Top with a cutapart flower.

I love how happy and pretty this collection is! Don't let the "floral" theme limit you. As you can see, my photos from three different occasions work beautifully on these layouts: An Acapella concert, a brewery tour, and a hibachi dinner.
Happy scrapping!
CS Hybrid Ink Pads

$6.35
Exclusively Club Scrap®, this hybrid craft ink combines the most exceptional ingredients of both pigments and dyes for a fine, crisp, fast-drying image! Don't forget to stock up on the coordinating re-inkers. Each ink pad sold separately. Please select the… Read More