
They say necessity is the mother of invention. A friend recently browsed my card stash and fell in love with the few remaining Let It Bee cards I had on hand. Her family keeps bees, so I was happy to share them with her. She asked about getting more, but unfortunately, we only have one bee-related product currently available in our online store, and it's a project kit.

I hate to disappoint, so I took a closer look at the contents Pint-size Pocket Portfolio kit. After looking carefully at the Cutaparts, I realized I could transform them into cards with just a few additional supplies.
Ten Bee Cards - Prep
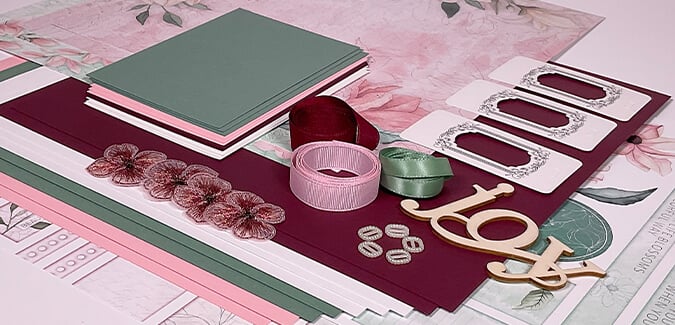
To replicate the bee cards below, gather the following:
Pint-size Pocket Portfolio kit
(4) 12x12 Plains (to coordinate with the Cutapart artwork)
Expo Make 'n Take Card Formula
While examining the artwork on the Pint-size Pocket Portfolio Cutaparts, I estimated I could make at least ten cards. (You could probably make twelve cards by adding stamped sentiments, but I wanted to create cards that didn't require any stamping.)
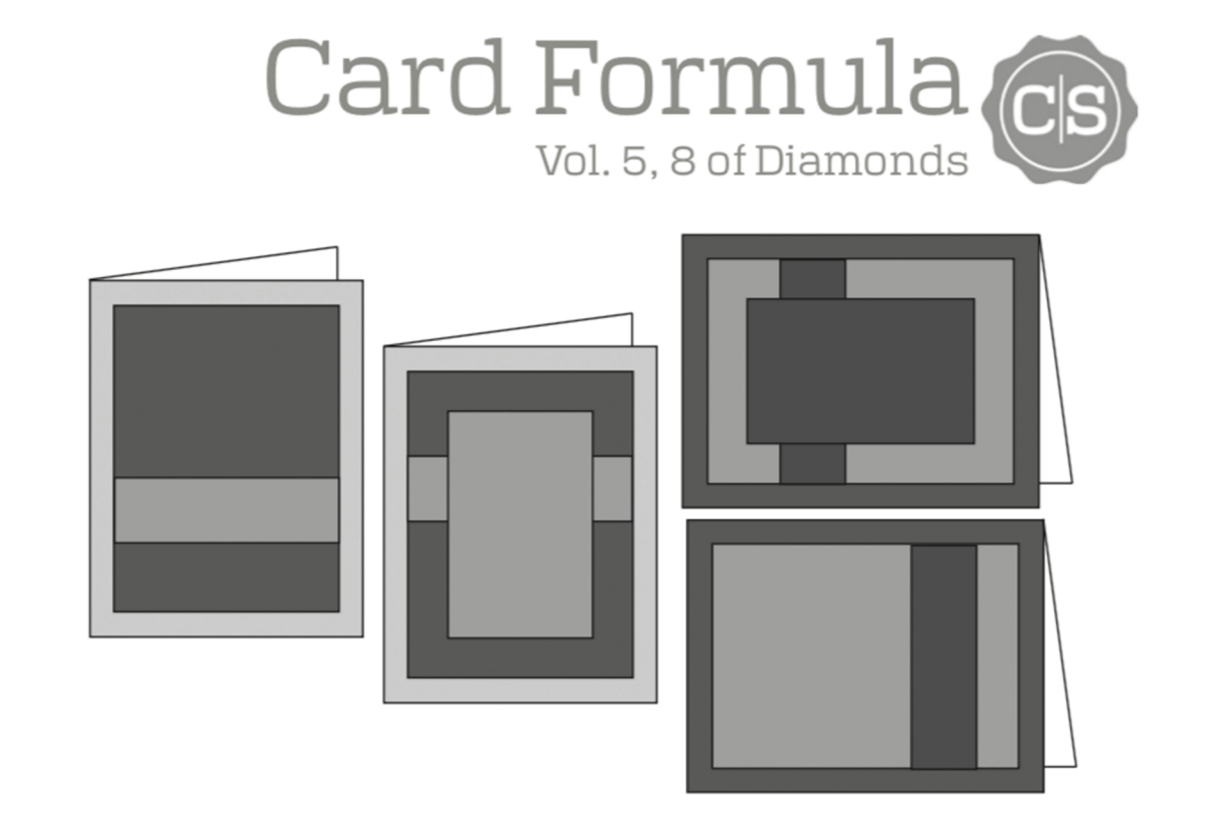
The Expo Make 'n Take Formula is designed to yield two 4.25x5.5" cards per 12x12 sheet. Obviously, you need a minimum of two papers to alternate the colors during assembly. However, after the initial two sheets, you can add as many plains (or prints) as desired to make additional cards.
Trim Papers
- Follow the card formula instructions to trim a total of five 12x12 papers - the Gold from the project kit, plus four coordinating plains. (The 2.25x3.5" panels were not used on the cards. However, I did trim the Brown panel to create .75x3.5" nesting strips for three cards.)
- Cut the 8.25x11.75" Handmade paper (included in the kit) into four card panels. (Trim vertically at 8 and 4. Cut each 4x12 at 10.5 and 5.25".)
- Trim the Cutaparts into 17 individual pieces.
Card Assembly
- Sort the cut papers into ten card bases, each topped with a panel and anchoring strip. Add a handmade paper panel to four of the cards.
- Dry fit Cutapart artwork onto each card front. (The "blank" panels decorate the inside of two cards. Or add stamped sentiments to create two additional cards as mentioned above.)
- Follow the project instructions to create three "buttons" from the 3x5.5" black folding board. Tie a length of black elastic cord through the holes of each button. (Trim the remaining folding board into two 2.25x2.25" mats for the square Cutaparts.)
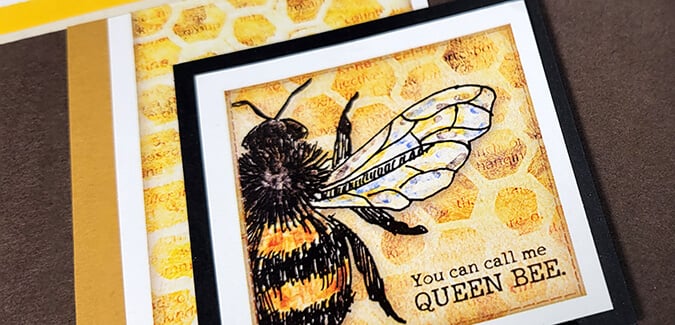
Finished Bee Cards

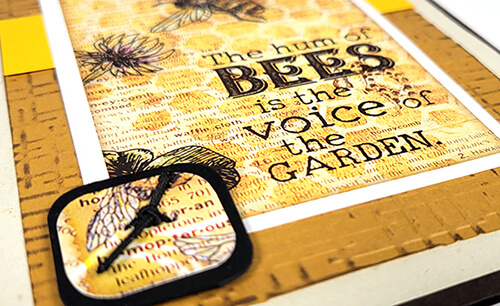
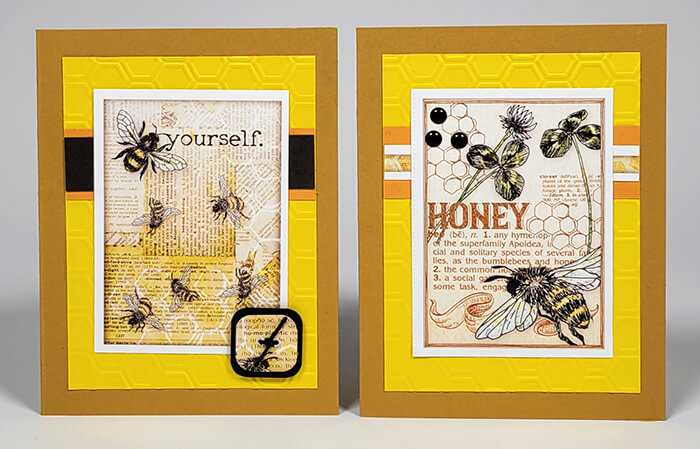
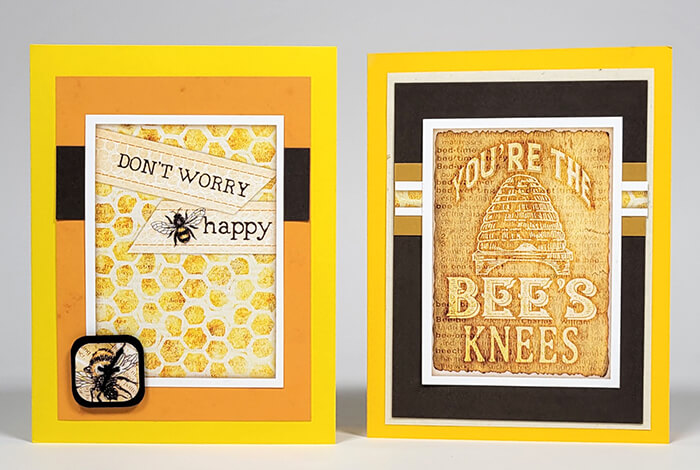
Create visual interest on the 3.5x4.75" panels with embossing folders. Apply Earth ink to the raised areas.
Adhere a DIY button with foam adhesive.
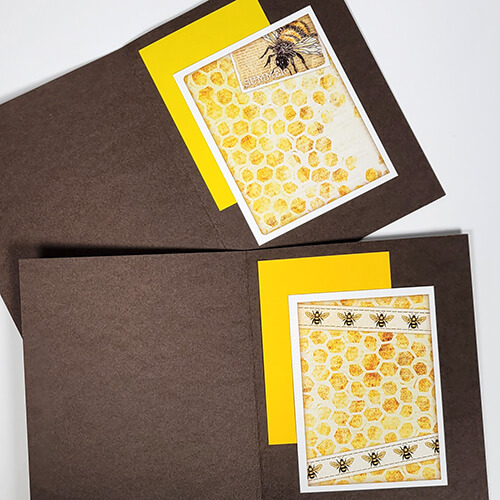
Create a "liner" for the brown cards with a 2.25x3.5" panel and "blank" Cutapart.
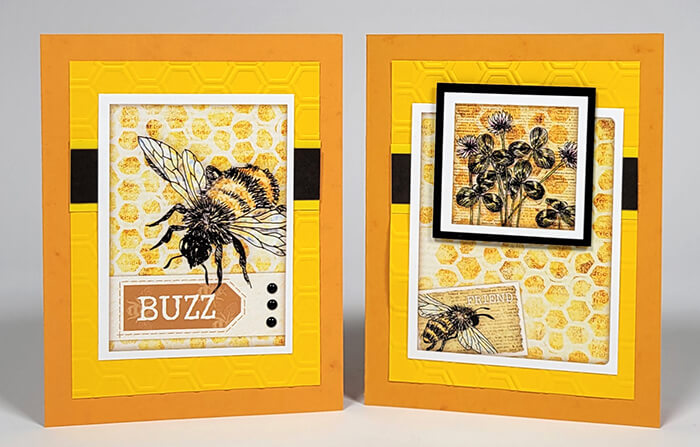
A honeycomb embossing folder adds texture to the card panel. Nest a .75x3.5" Brown onto the yellow anchor strip. Three enamel dot stickers accent the "buzz" Cutapart. Mat the square Cutapart with a 2.25x2.25" black folding board, attach with foam adhesive.
Trim the border strip Cutapart at 10.5, 7, and 3.5", center onto an anchoring strip, and adhere with Bookbinding Glue in a needle-tipped applicator.
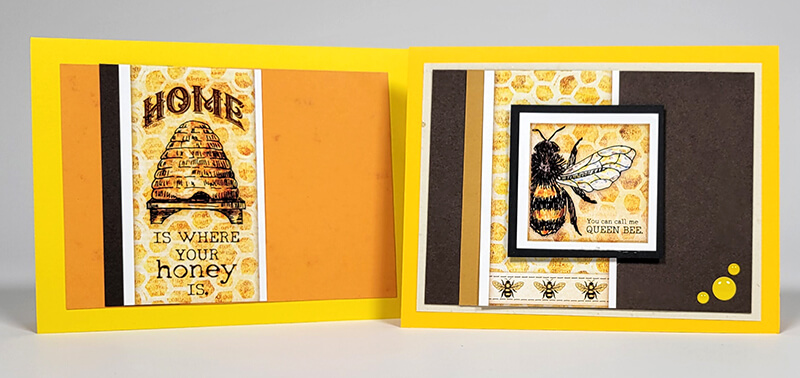
Trim the two narrow Cutaparts to 3.5", carefully removing the word "PULL". Layer with an anchoring strip, and adhere to the card panel. Mat the "queen bee" Cutapart with black folding board, and attach with foam adhesive. Accent with self-adhesive enamel dots.
Let It Bee is one of our most oft-requested themes to remix. Until that happens, I hope this repurposing idea inspires you to make some bee-utiful cards of your own!