
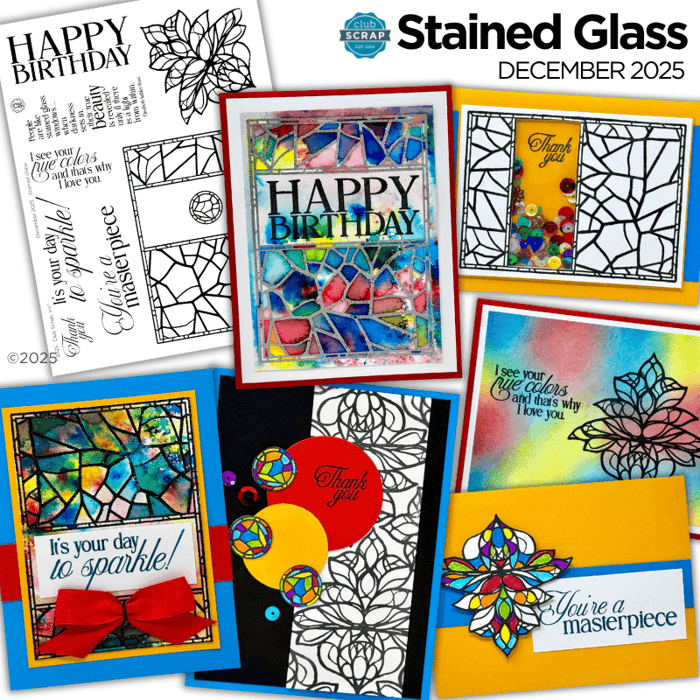
Create gorgeous cards with Stained Glass Stamps. Pair these detailed images with the jewel-tone hues of the papers from the collection.
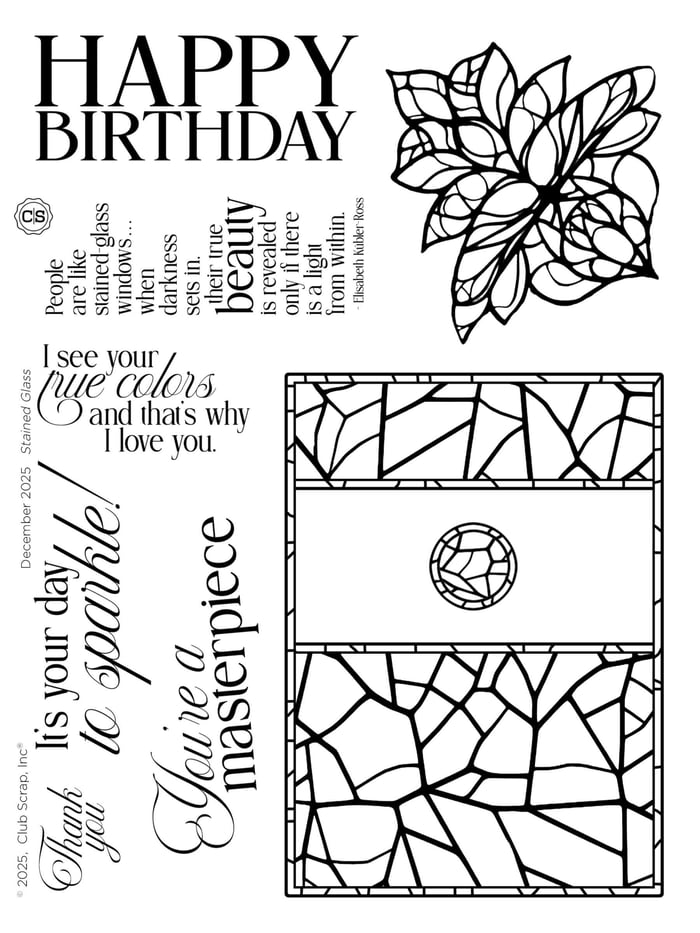
Stained Glass Stamps
Looking for ink colors to complement the November color palette? We recommend India Black ink, along with Yellow, Red, and Lagoon, CS® Hybrid ink.
Greeting Cards Featuring Stained Glass Stamps
The finished size of each card below is 4.25x5.5", unless otherwise noted.
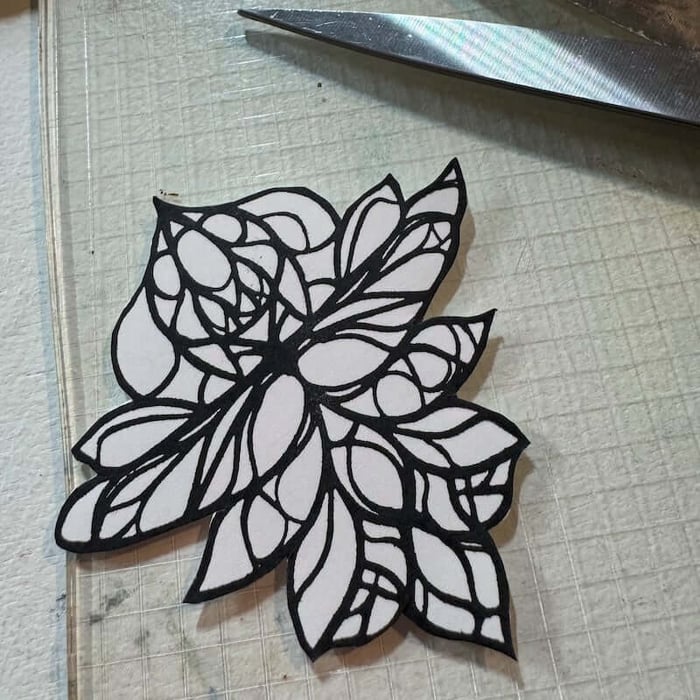
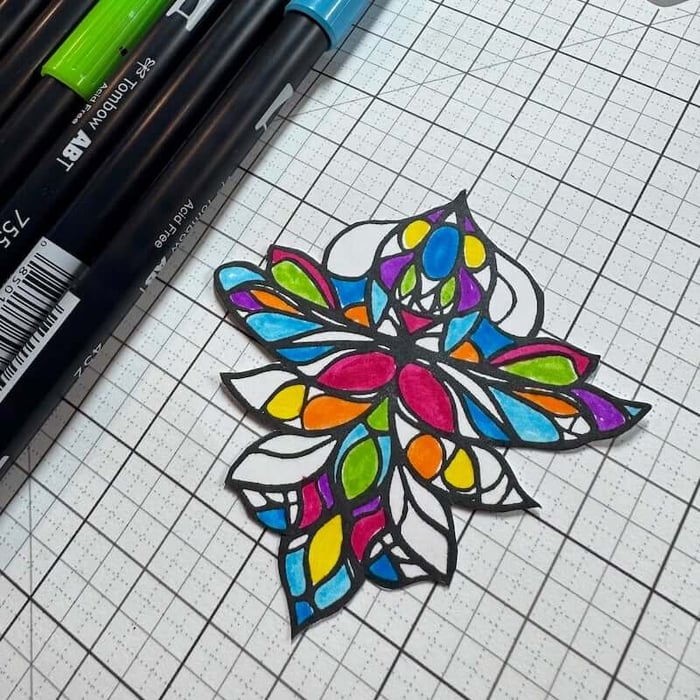
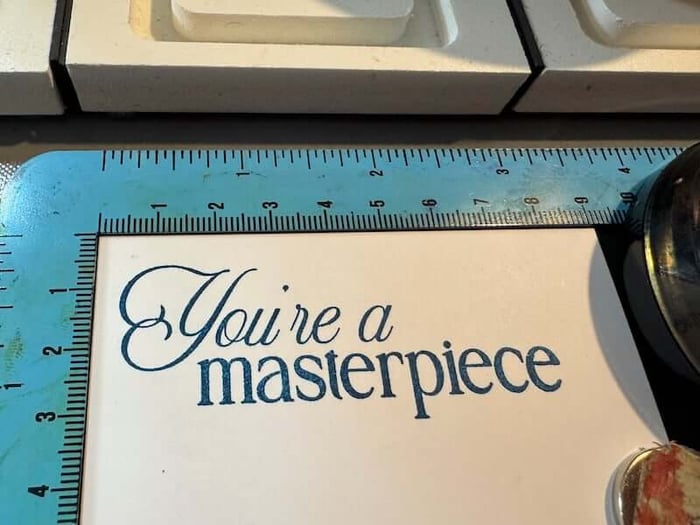
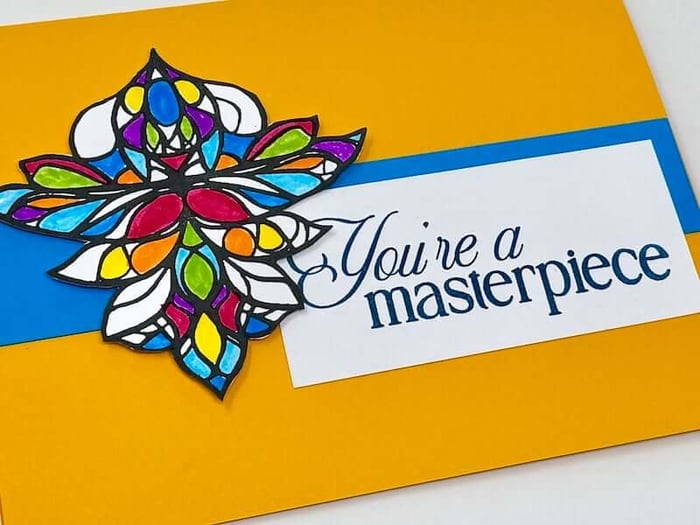
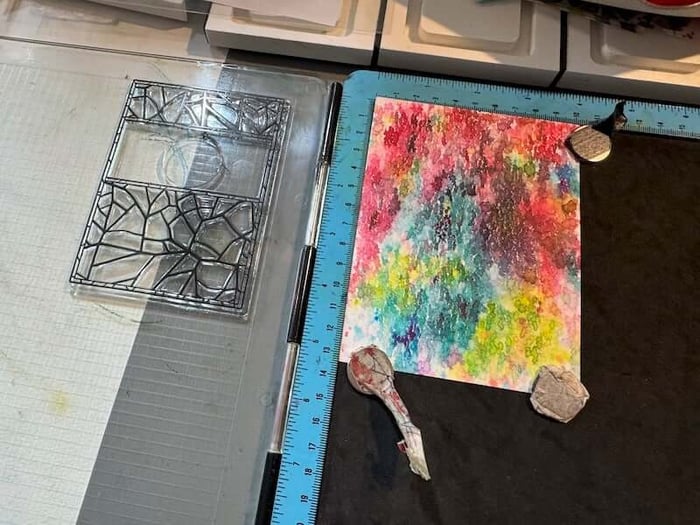
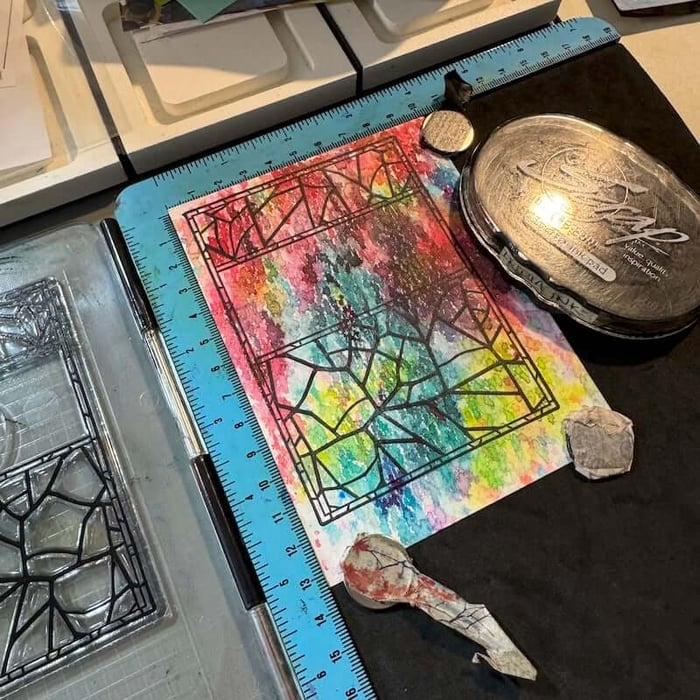
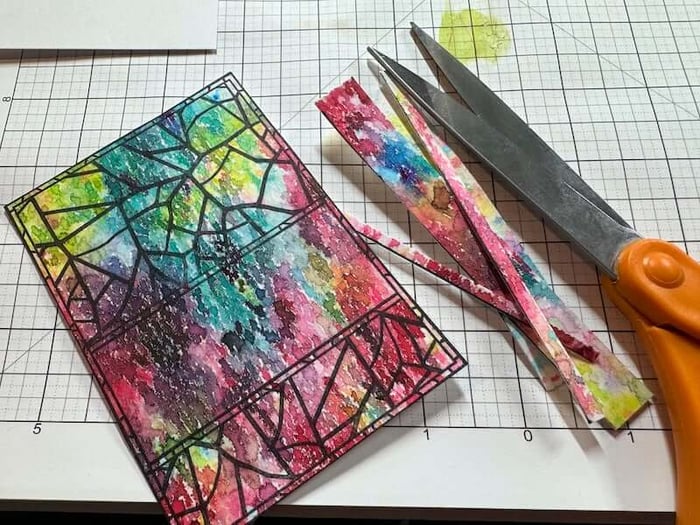
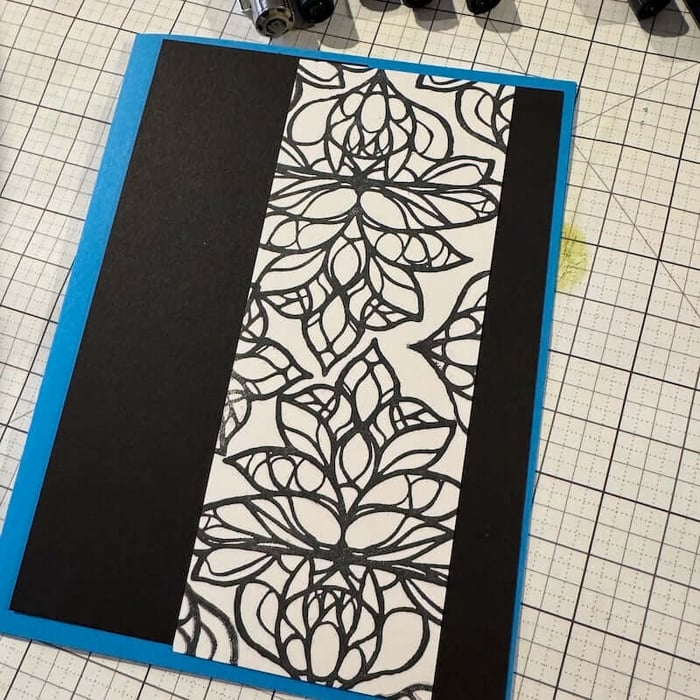
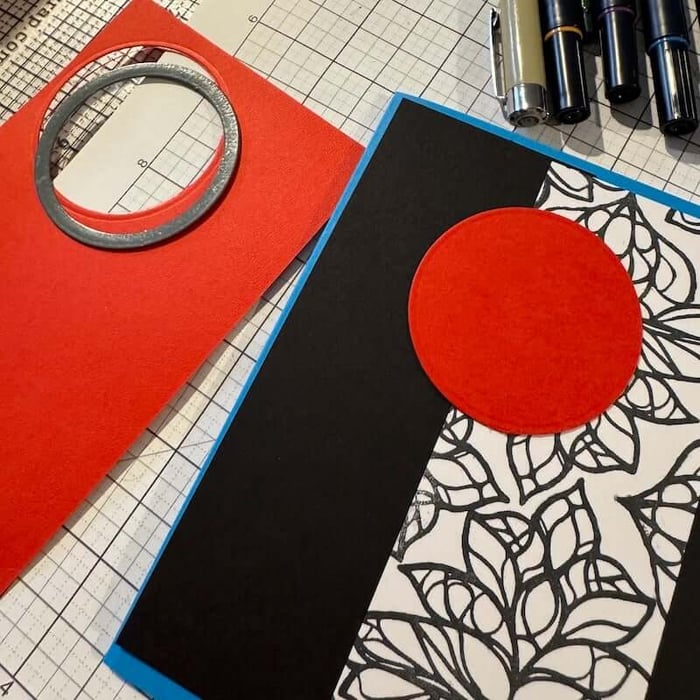
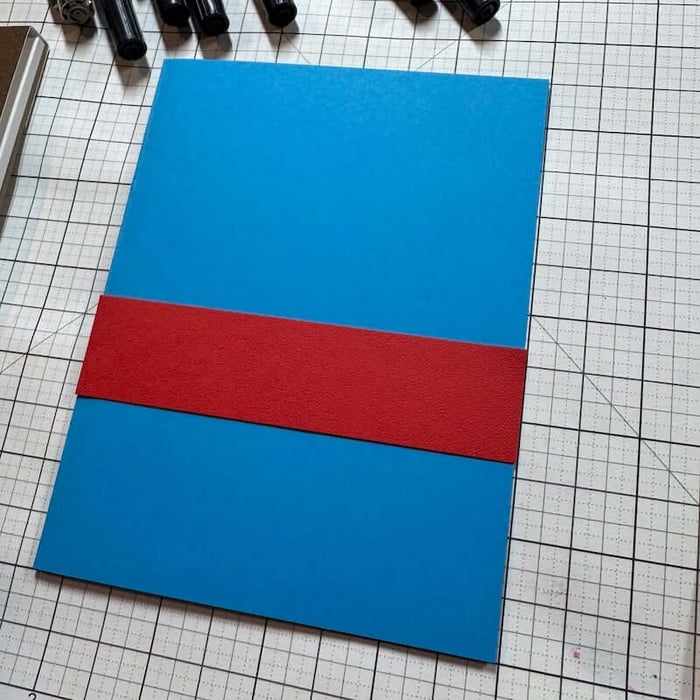
Card 1

Add the image to a White panel with India Ink.
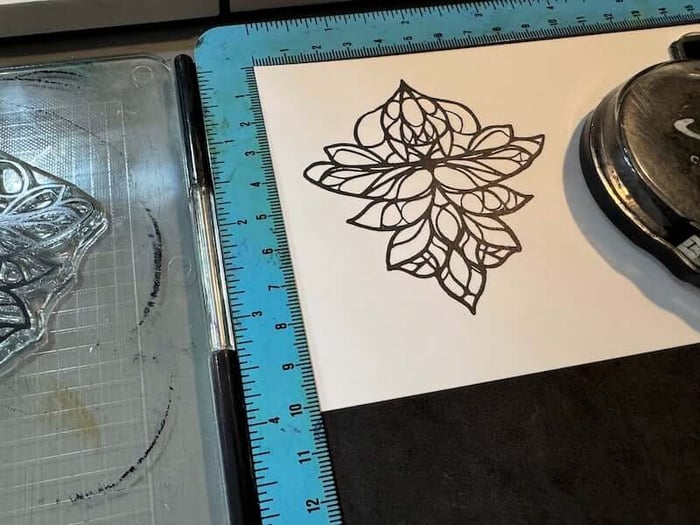
Fussy cut the image with scissors.
Color it with Tombow markers* in a variety of jewel-toned colors.
Stamp the sentiment onto a White panel with Lagoon Ink.
Position a 1x5-1/2" Blue strip onto a folded Yellow card base with a grid ruler.

Add Foam Adhesive Circles to the back of the fussy cut image.
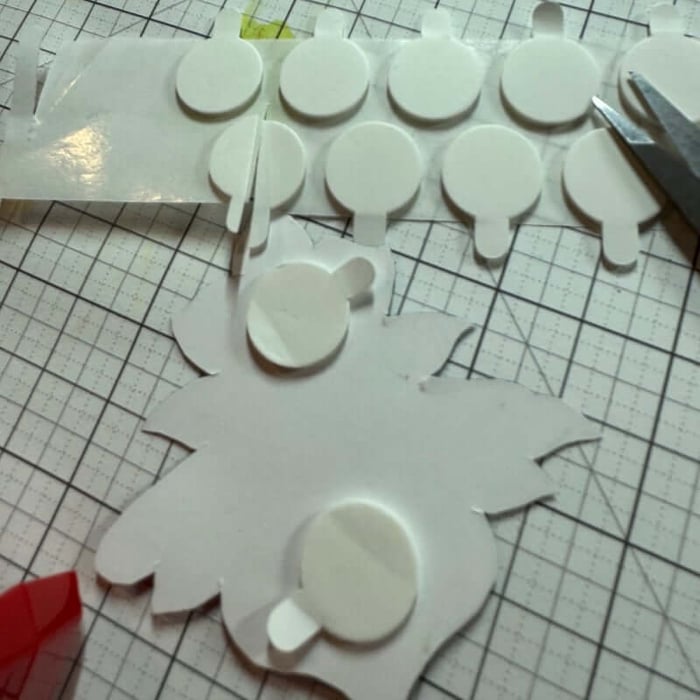
Remove the backing from the circles to reveal the adhesive.
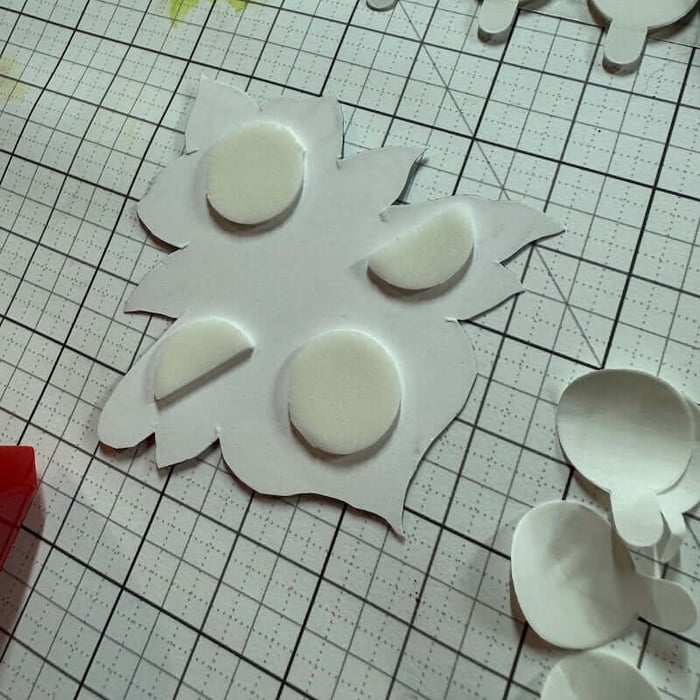
Adhere the image and the sentiment over the Blue strip to complete the card.
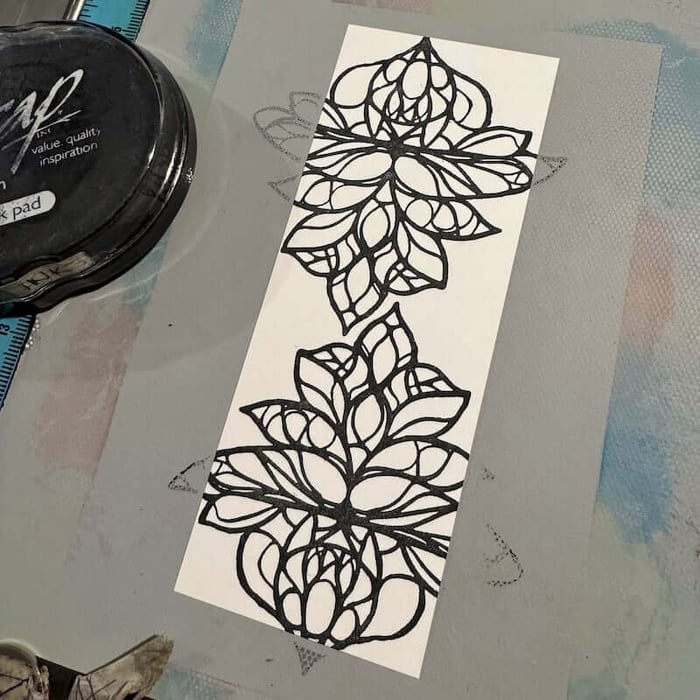
Card 2
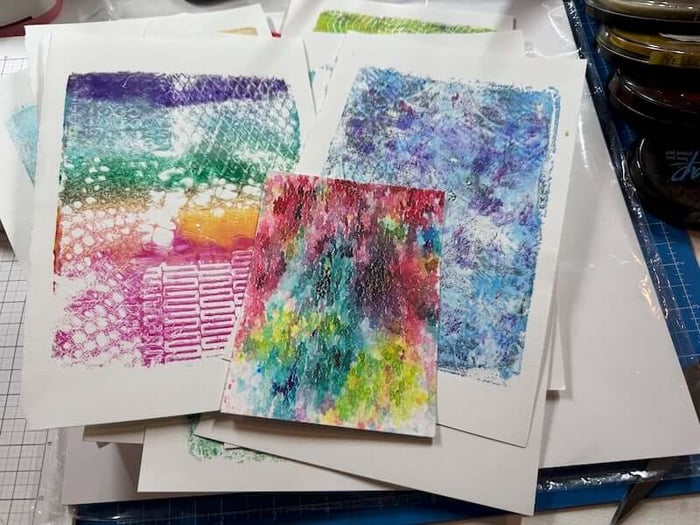
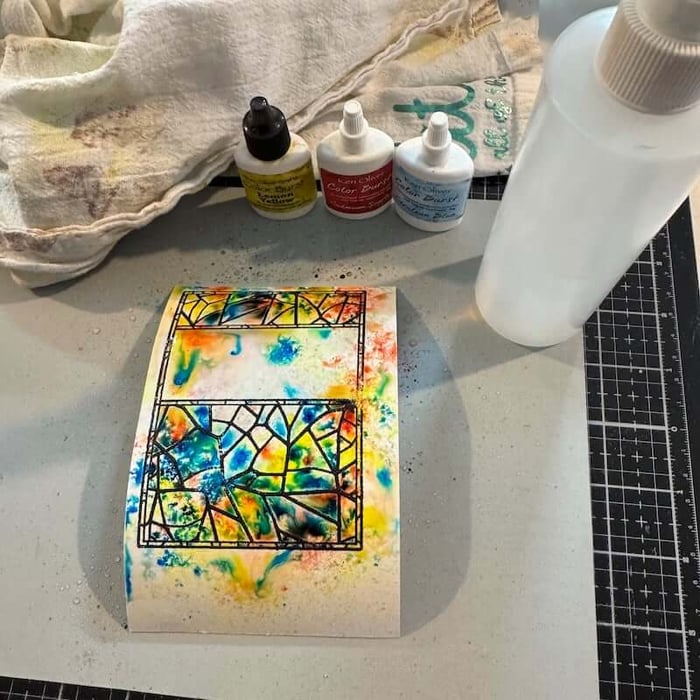
Gather an "art orphan" from your stash. I chose a colorful Color Burst background.
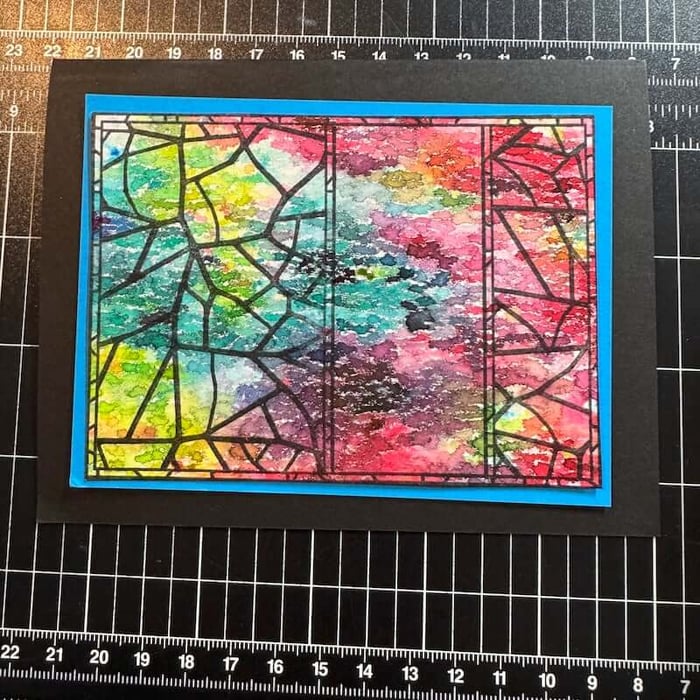
Stamp the stained glass window image onto the colored background panel with India Ink.
 Crop the image with scissors or a paper trimmer.
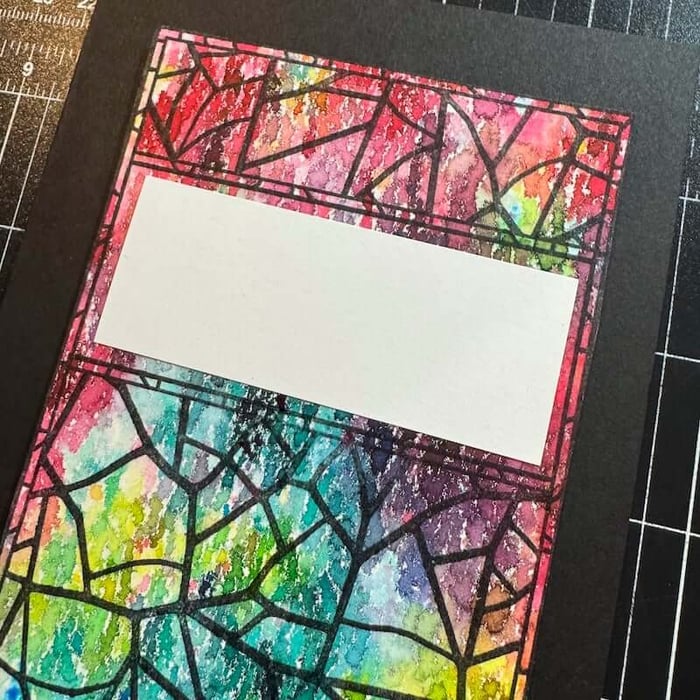
Measure the empty space (designed to fit a sentiment) with a grid ruler.
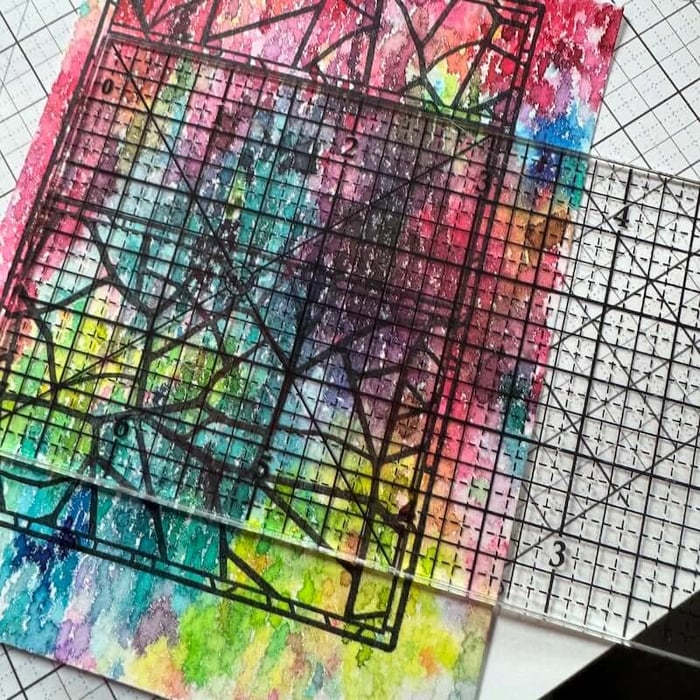
Once the dimensions are determined, trim a piece of White paper (1-1/8x2-7/8") slightly smaller than the space.
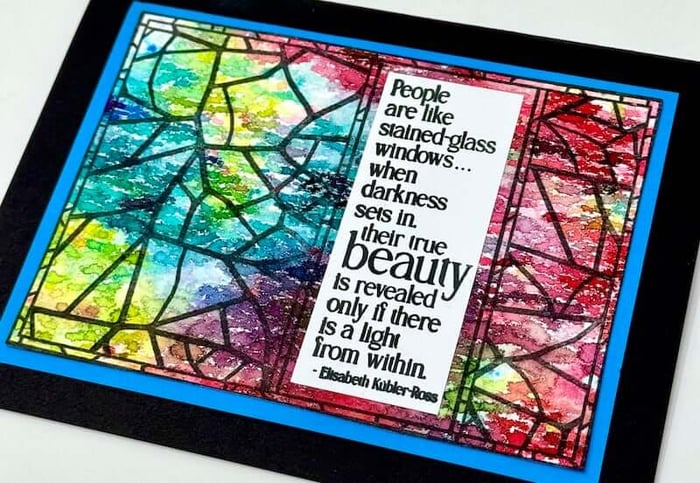
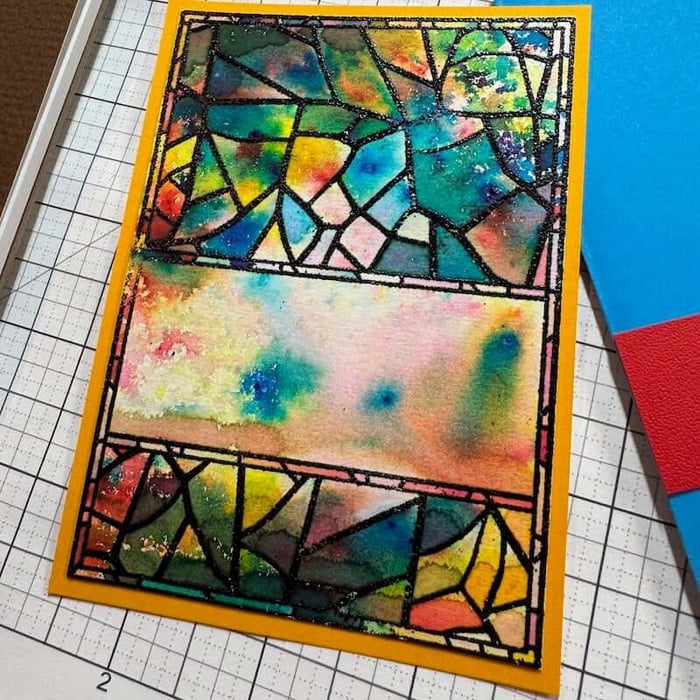
Nest the stamped panel onto a 3-3/4x5" Blue mat; center onto a Black card base.
Add the sentiment to the small White panel with India Ink. Adhere the panel within the open space to complete the card.
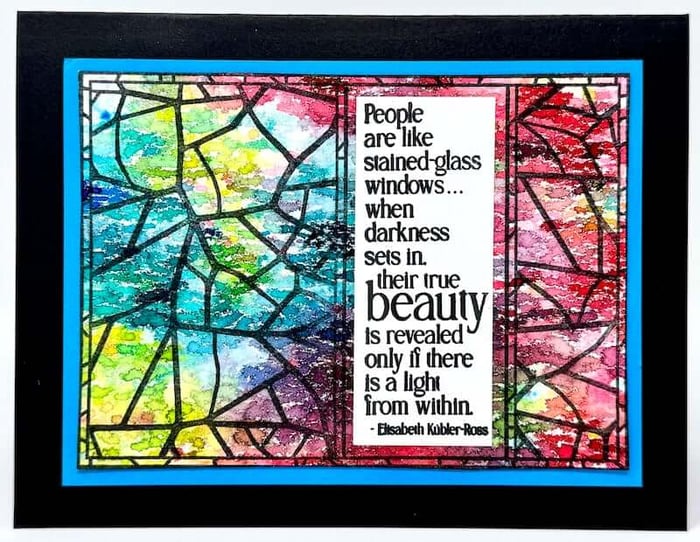
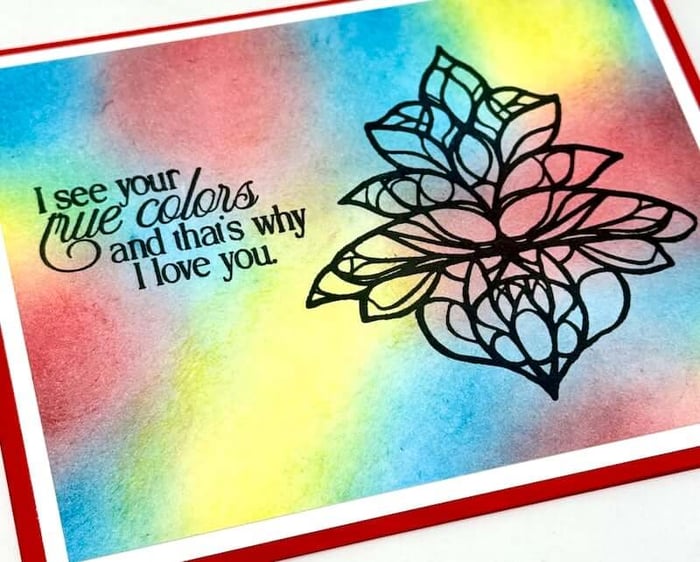
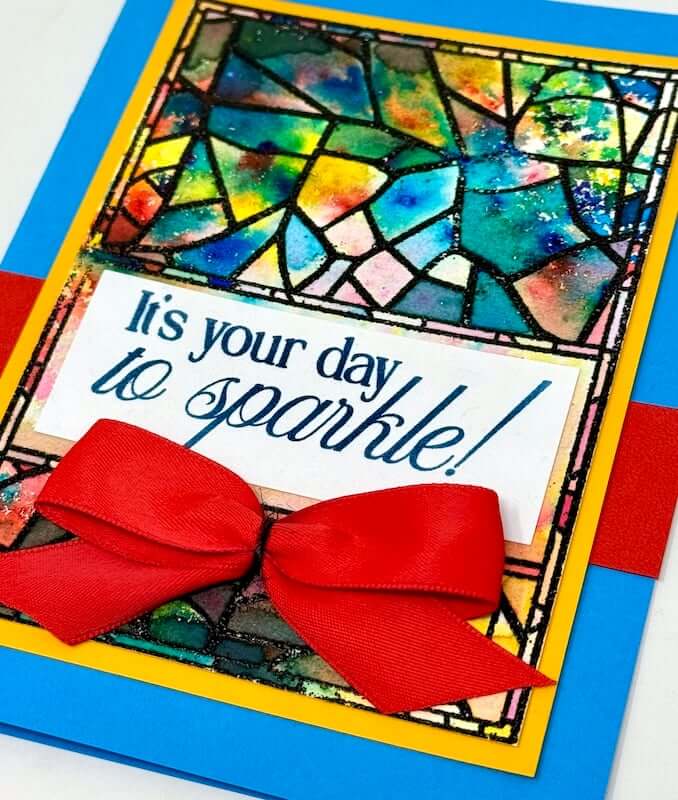
Card 3

Apply Lagoon, Red, and Yellow Hybrid Inks with Ink Applicator Brush onto a 3-3/4x5" White panel.
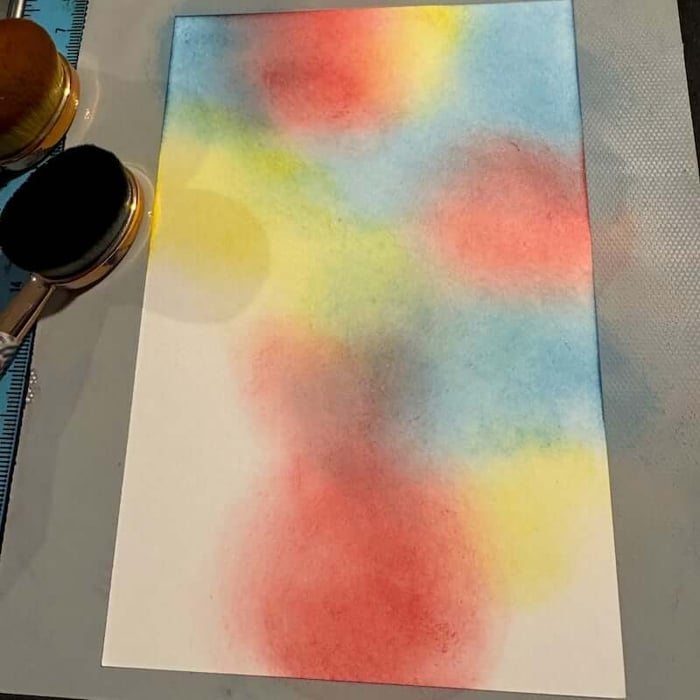
Continue to add and blend the colors until the panel is completely covered.

Stamp the image and sentiment with India Ink.
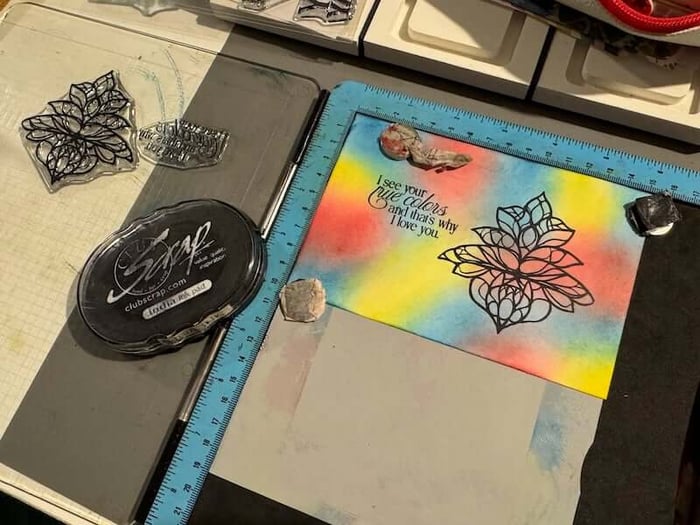
Adhere the panel to a 4x5-1/4" White mat and center onto a Red card base.
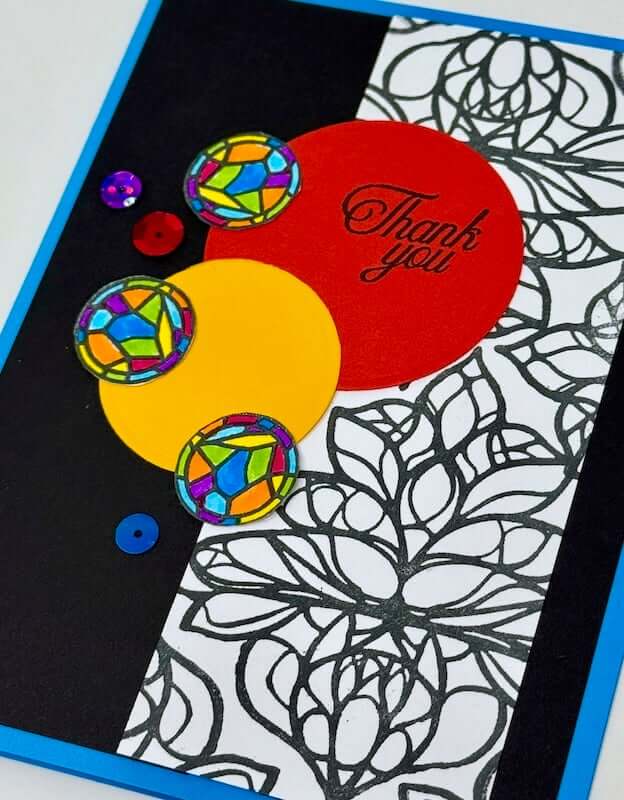
Card 4
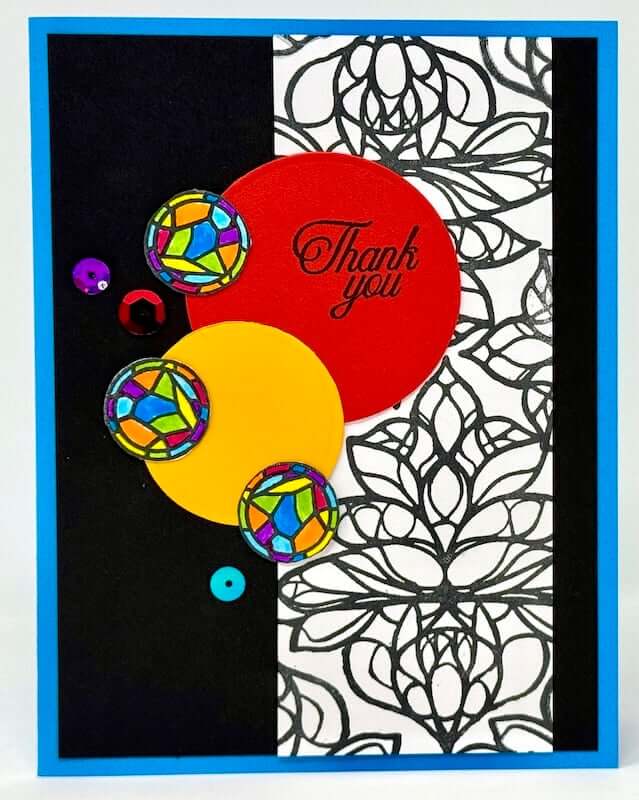
Stamp the images onto a narrow White panel with India Ink.
Continue to add images until the panel is covered. Allow the stamped images to "fall" off the edges to create a realistic all-over print.
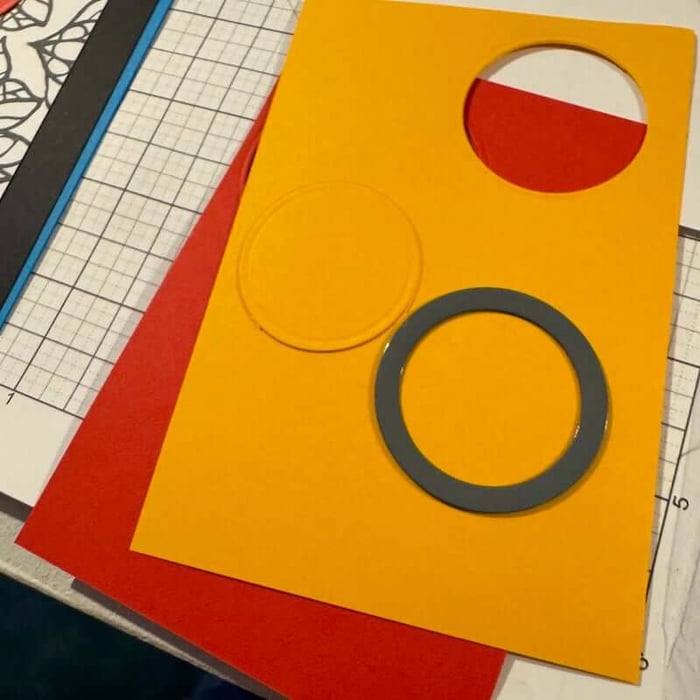
Die cut a 2" circle* from Red paper.
Stamp a sentiment in the top right portion of the circle with India Ink.

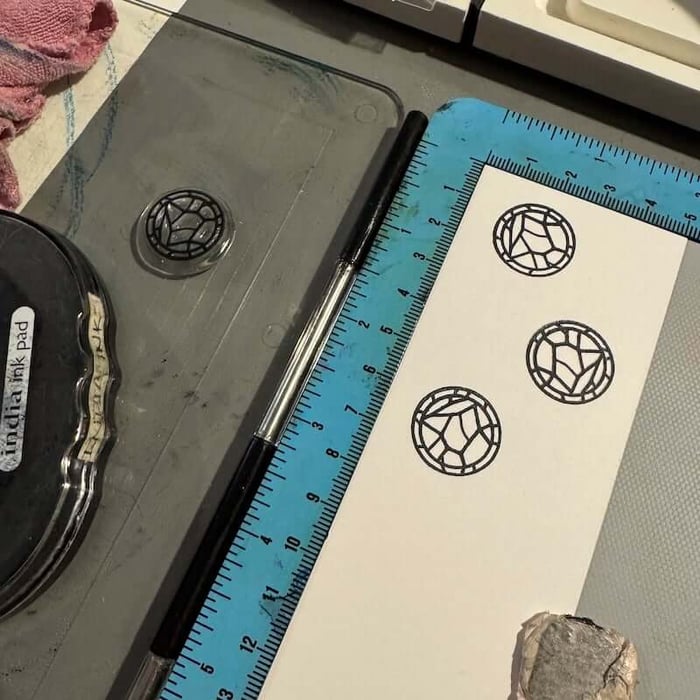
Stamp three small circle images onto a White scrap with India Ink.
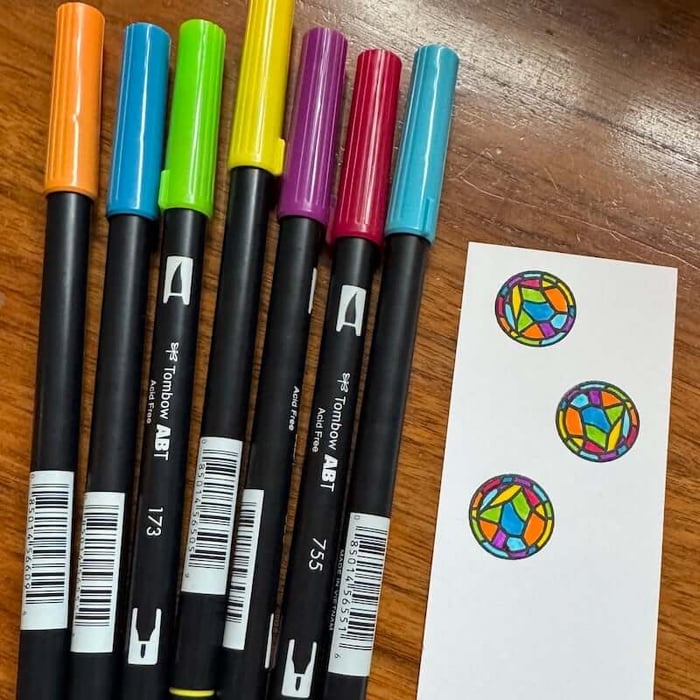
Color the images with Tombow markers*.
Remove colored artwork with scissors or a die or circle punch.
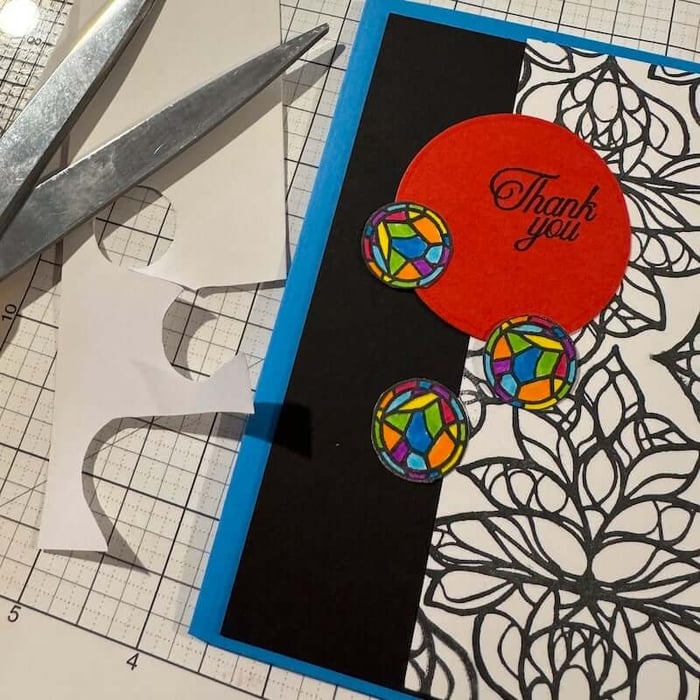
Die cut a 1-1/2" circle from Yellow paper.
Adhere all the circles as shown over the print panel. Add sequins next to the circles with Bookbinding Glue dispensed from a Needle-tipped Applicator to complete the card.
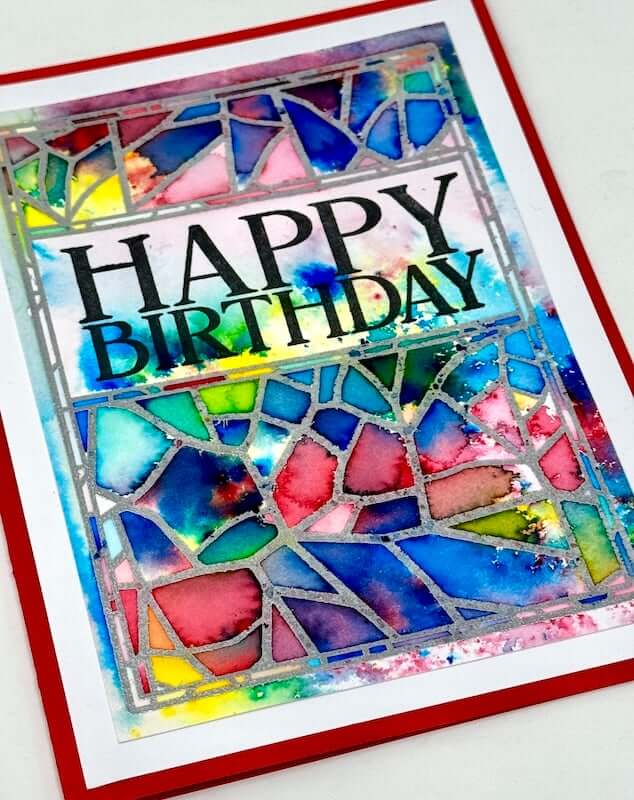
Card 5

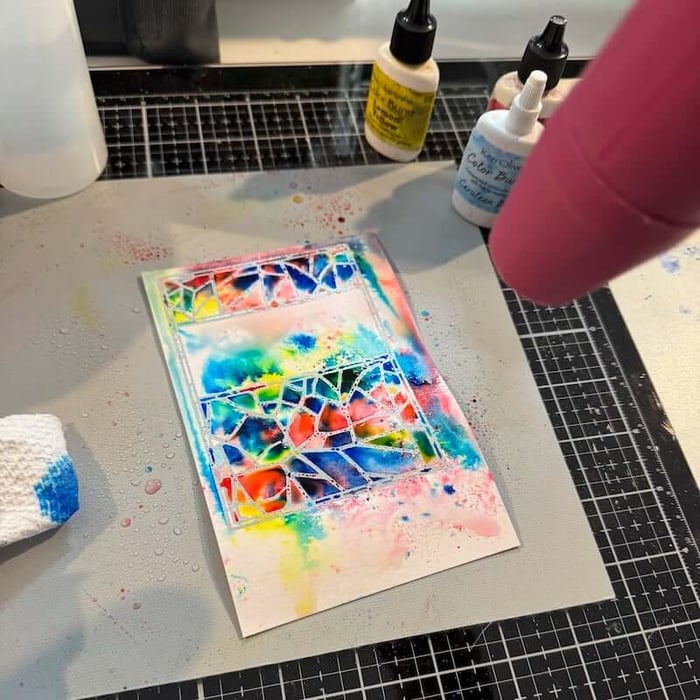
Gather a piece of Mixed Media paper* and dust with an anti-static Powder Tool*.
Stamp the large rectangle image onto the panel with Watermark Ink.

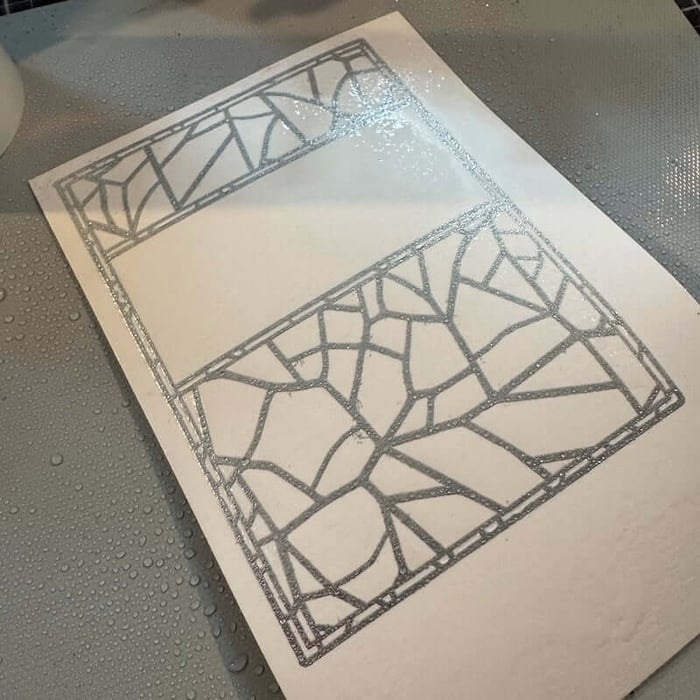
Sprinkle silver embossing powder over the image and tap the edges to remove any excess powder.
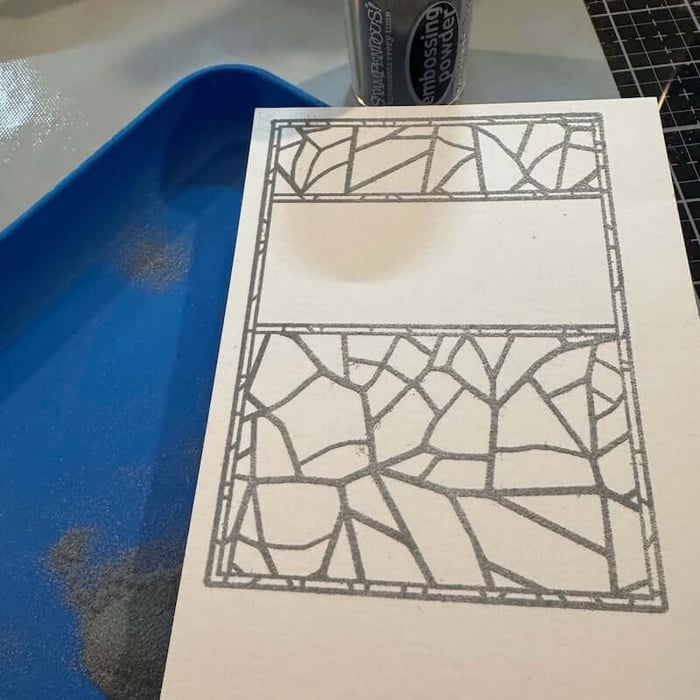
Heat set to melt the powder.
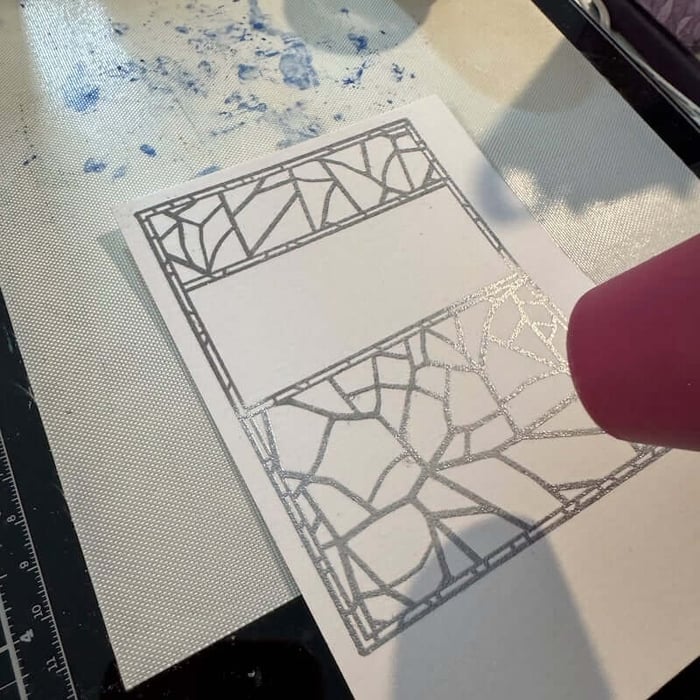
Spritz the panel with water.
Sprinkle Color Burst powders over the wet paper until the desired coverage is achieved. Add more water and powder as needed.
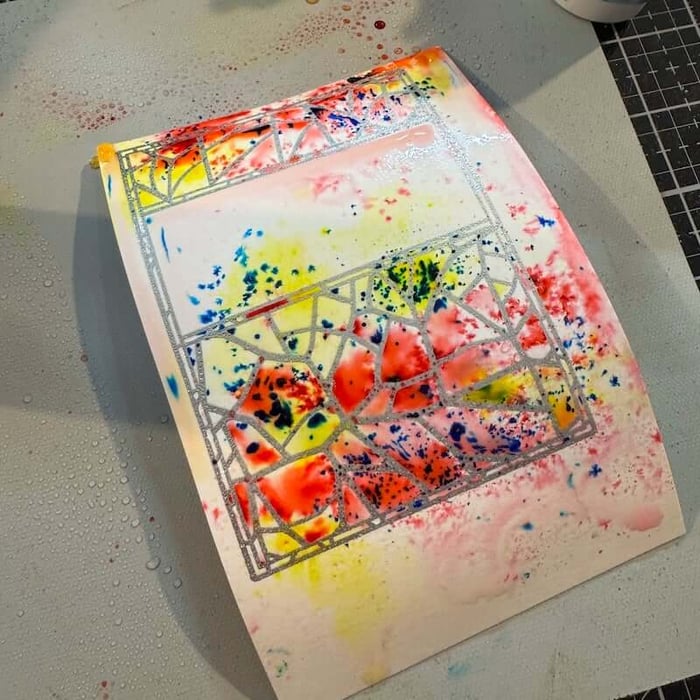
Remove any excess color that pools in the embossed areas with a paper towel.
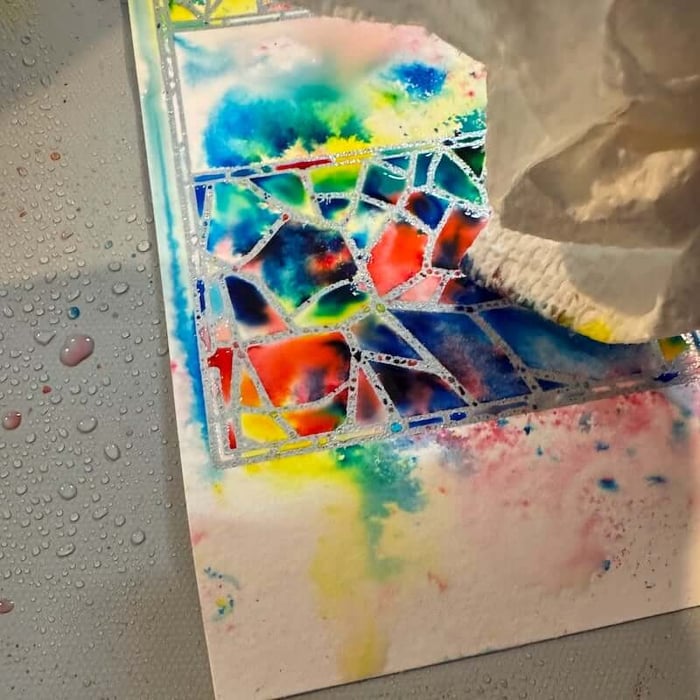
Heat set the image to speed the drying time. NOTE: Keep the tool away from the paper to avoid remelting the embossed areas. Allow the panel to dry completely before moving on to the next step.
Trim the panel leaving an 1/8" reveal around the perimeter of the stamped image. Place the embossed panel into a stamping platform. Position the clear Happy Birthday sentiment within the open space.
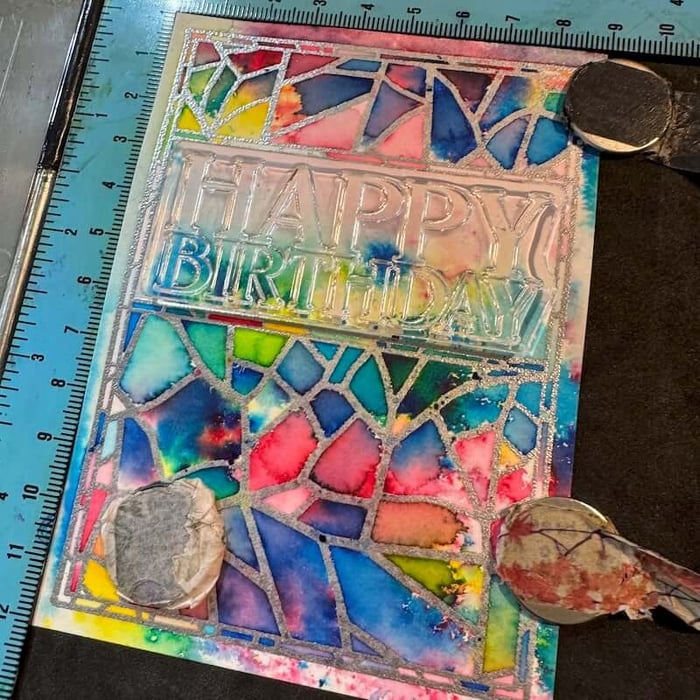
Pick up the stamp with the lid of the stamping platform.
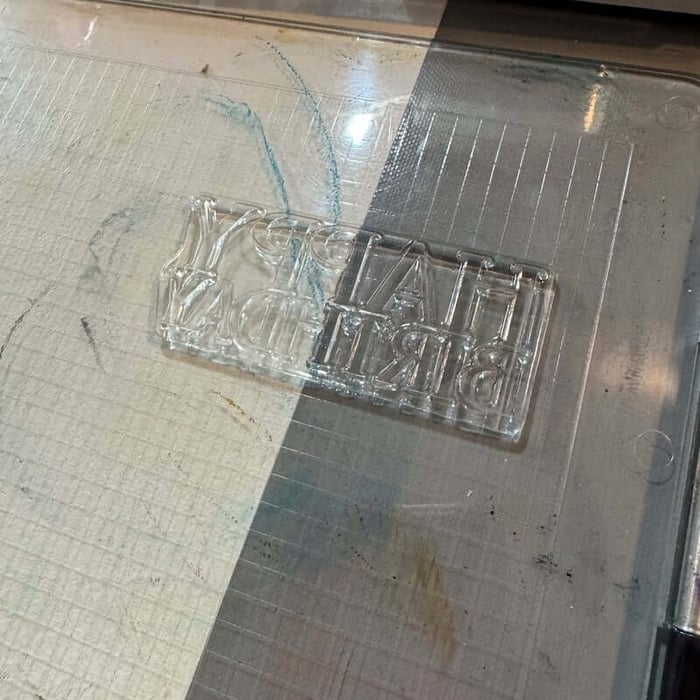
Apply India Ink and close the lid to transfer the sentiment to the panel. (Repeat as needed to achieve a crisp impression.)

Center the panel onto a 4x5-1/4" White mat and center onto a Red base to finish the card.
Card 6

Repeat the heat embossing and Color Burst background technique found in Card 5, but substitute the silver embossing powder with black EP.
Dry the panel completely. Crop the image with scissors or a paper trimmer. Nest the panel onto a Yellow mat.
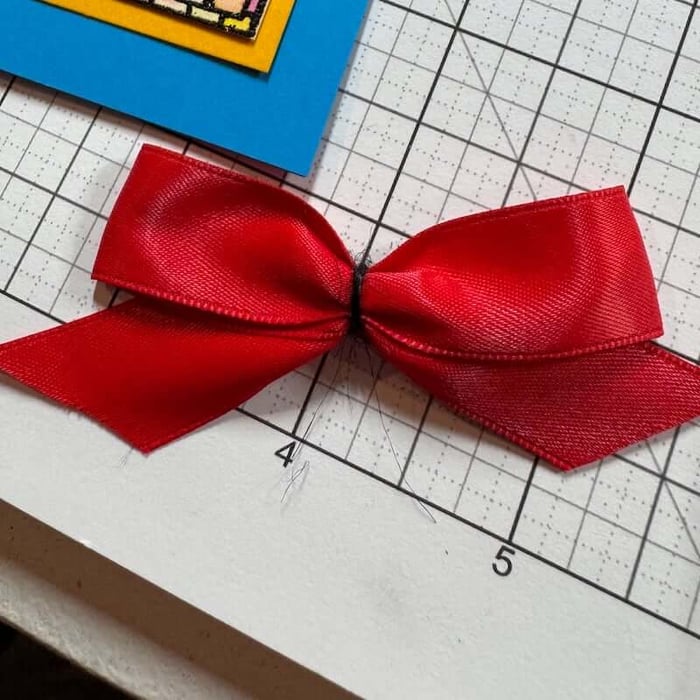
Loop the ends of red satin ribbon and tie a piece of black jute around the middle to create a bow.
Adhere a 1x4-1/4" Red strip on a Blue folded card base.
Center the layered panel over the card base. Stamp the sentiment onto a 1-1/8x2-7/8" White panel with Lagoon Ink; center it within the open space on the stamped panel. Adhere the bow beneath the sentiment to complete the card.
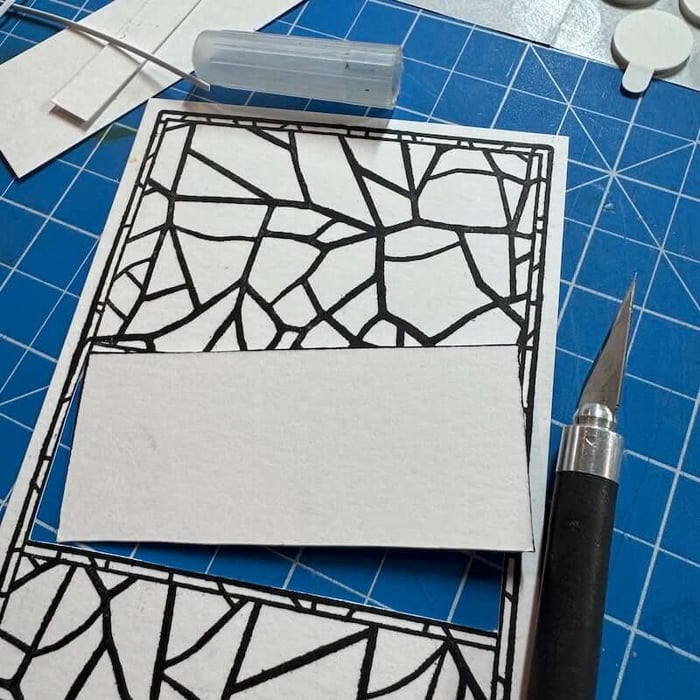
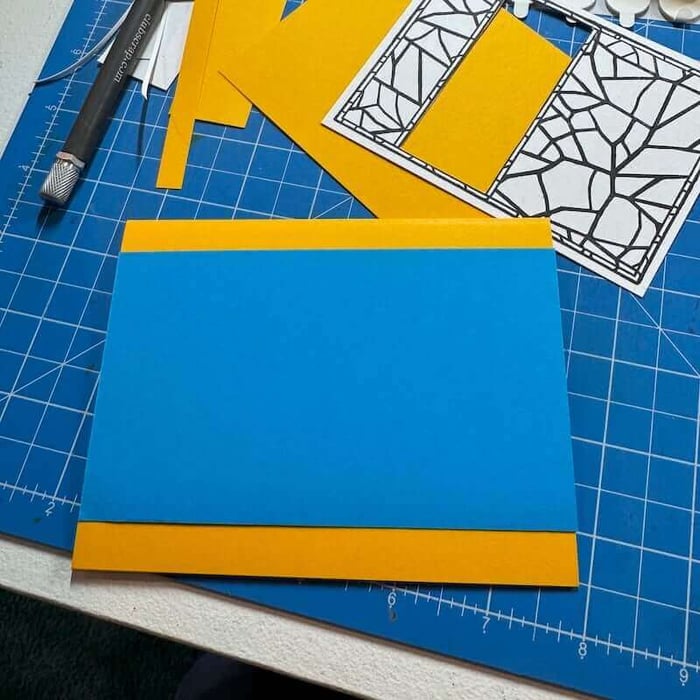
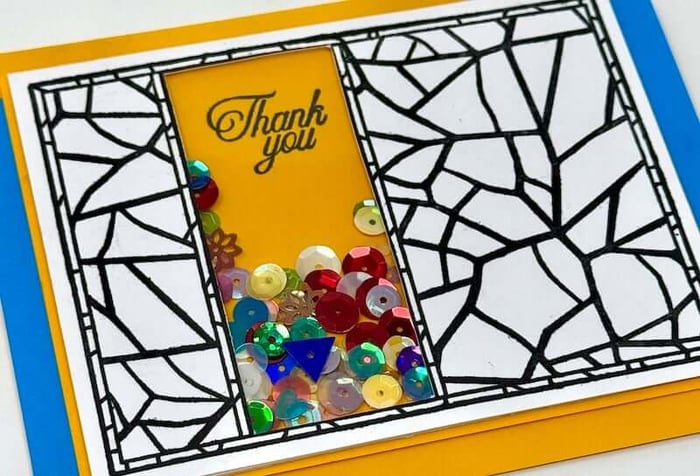
Card 7
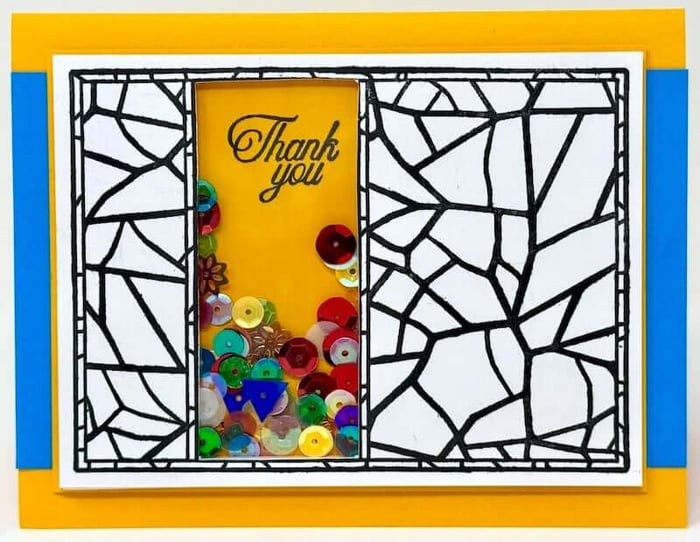
Stamp the large rectangle image onto White paper with India Ink.
Trim the panel to 3-1/2x4-3/4" leaving an 1/8" reveal around the perimeter of the stamped image. Carefully remove the open area from the image with a craft knife and cutting mat.
Flip the panel overk and run a small bead of glue around the opening with Bookbinding Glue dispensed from a Needle-tipped Applicator.

Trim a small piece of clear acetate and position over the opening.
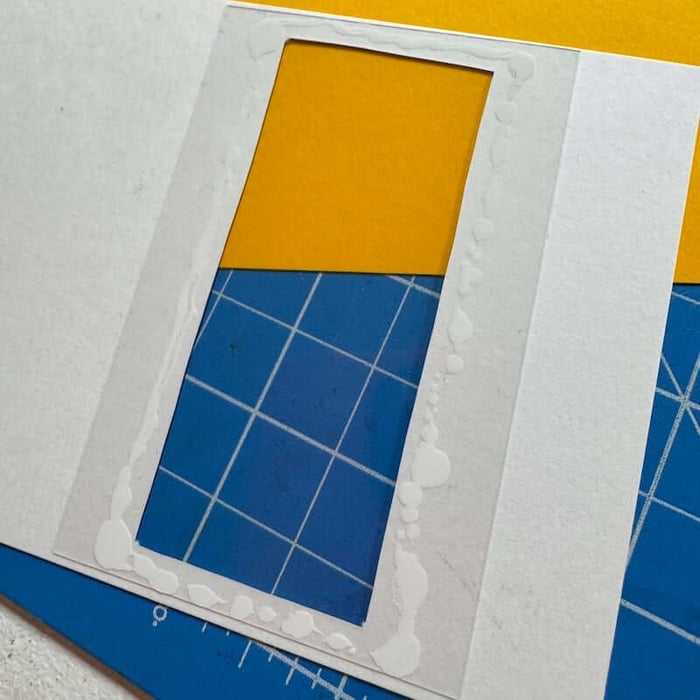
Gather a 3-3/4x5" Yellow panel and position under the stamped panel making note of where the window opening appears.
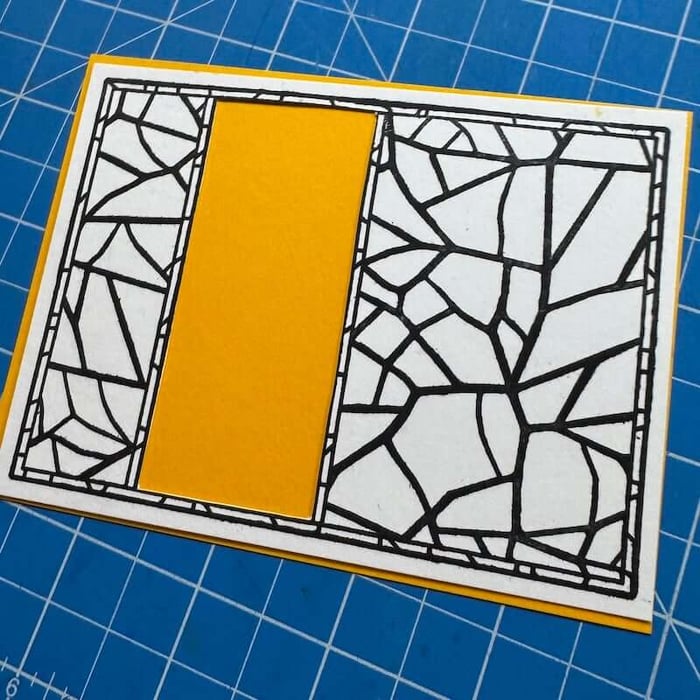
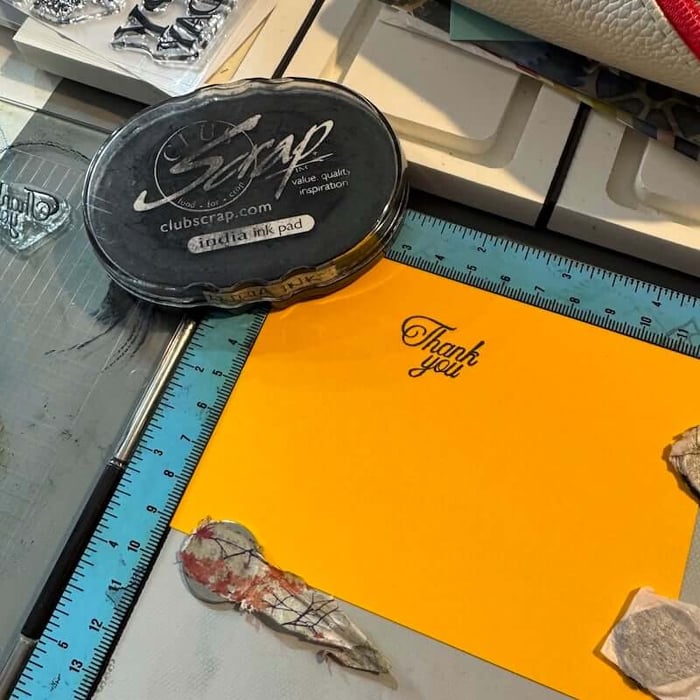
Stamp the Thank you sentiment with India Ink at the marked position on the Yellow panel.
Adhere a 3x5-1/2" Blue panel across the front of a folded Yellow card base centered from top to bottom.
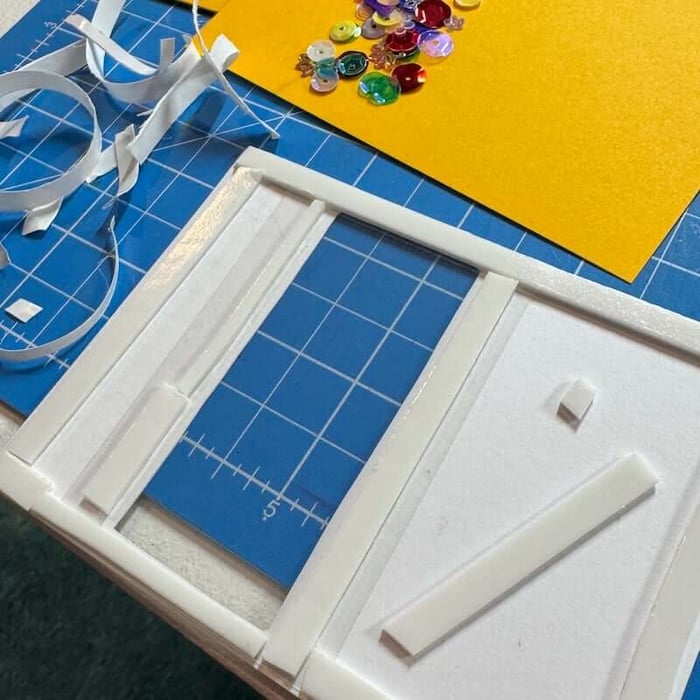
Add strips of foam adhesive around the window and on the back of the panel as shown.

Remove the backing from the foam strips.
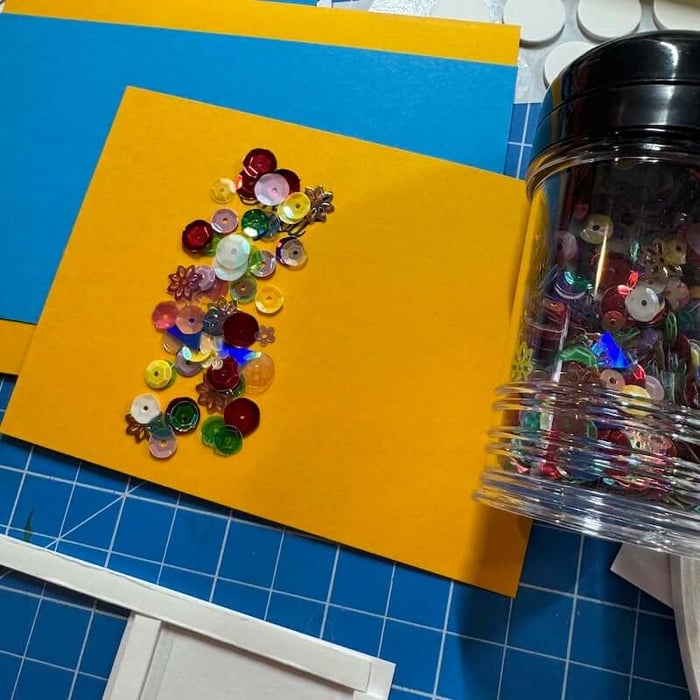
Add a small pile of multi-colored sequins from your stash on the Yellow sentiment panel as shown.
Carefully center the stamped panel over the Yellow panel and press to ensure proper adhesion.
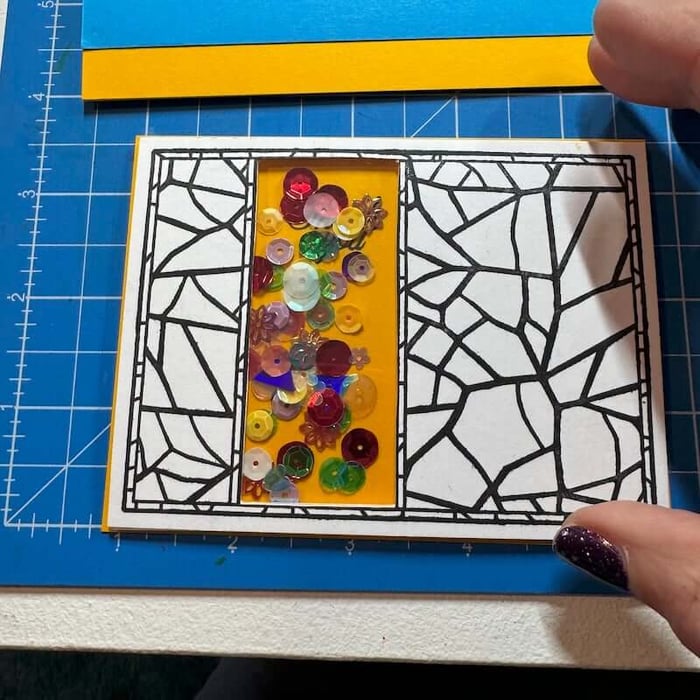
Center and adhere the shaker panels over the Blue paper to complete the card.
*As an Amazon Associate, Club Scrap earns from qualifying purchases. This means we may earn a commission if you make a purchase through links on our site. Thank you for supporting us!

Don't you just love these colorful cards? We'd love to see how you're using the Stained Glass Stamps, too!
We invite you to share your finished artwork on our Facebook Chat Group. Not a member of the group yet? Simply answer a few questions and we'll get your request processed in no time!

Happy stamping! Shop the links below to purchase the supplies needed to recreate my cards.
CS Hybrid Ink Pads

$6.35
Exclusively Club Scrap®, this hybrid craft ink combines the most exceptional ingredients of both pigments and dyes for a fine, crisp, fast-drying image! Don't forget to stock up on the coordinating re-inkers. Each ink pad sold separately. Please select the… Read More