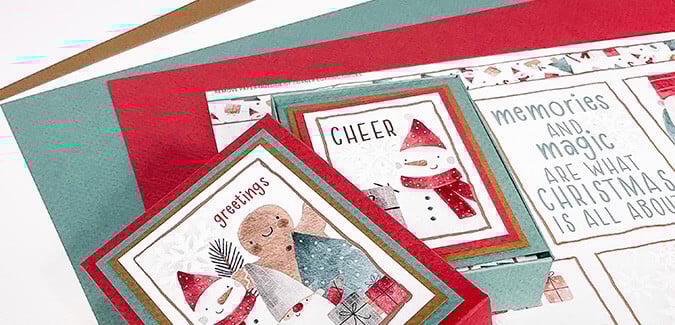

Create an adorable set of cards with Gnome for Christmas Stamps.
Gnome for Christmas Stamps

*The finished size of each card below is 4.25x5.5", unless otherwise noted.
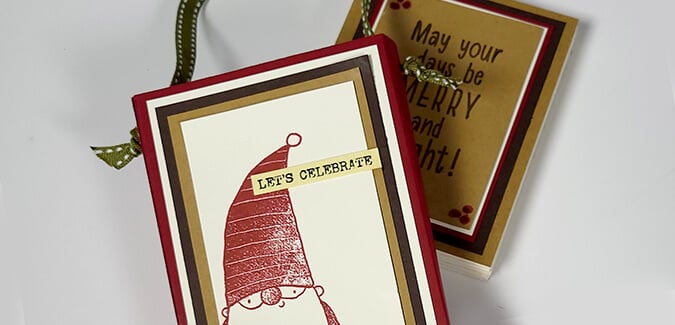
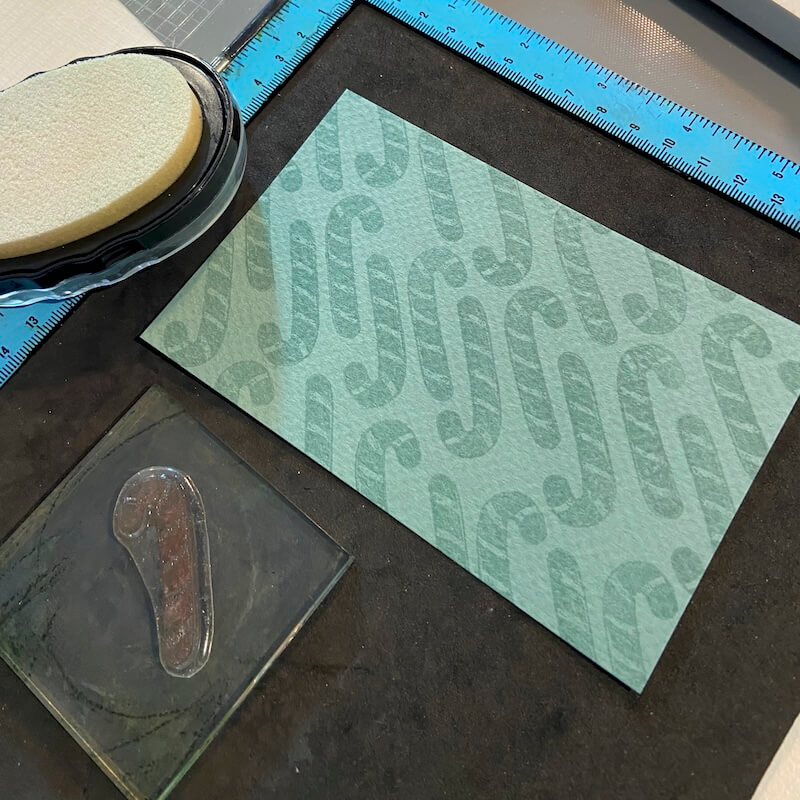
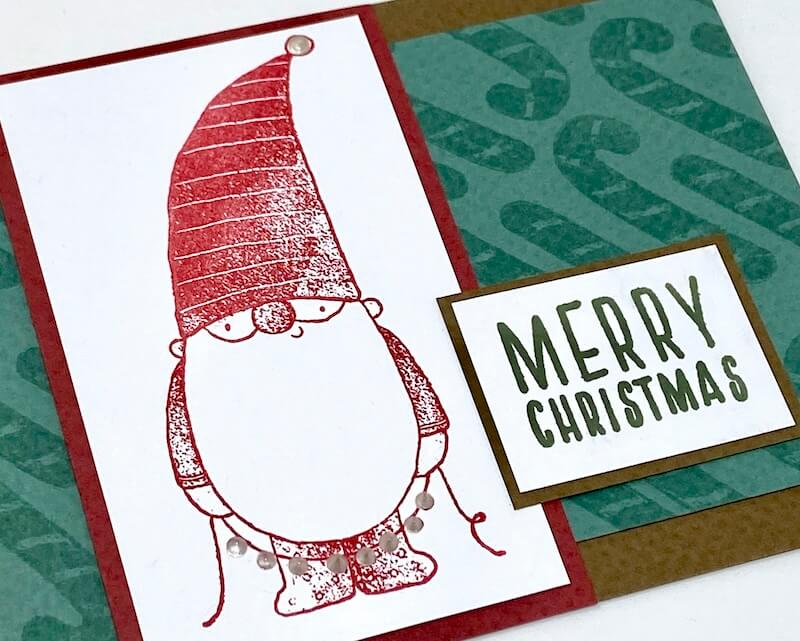
Card 1
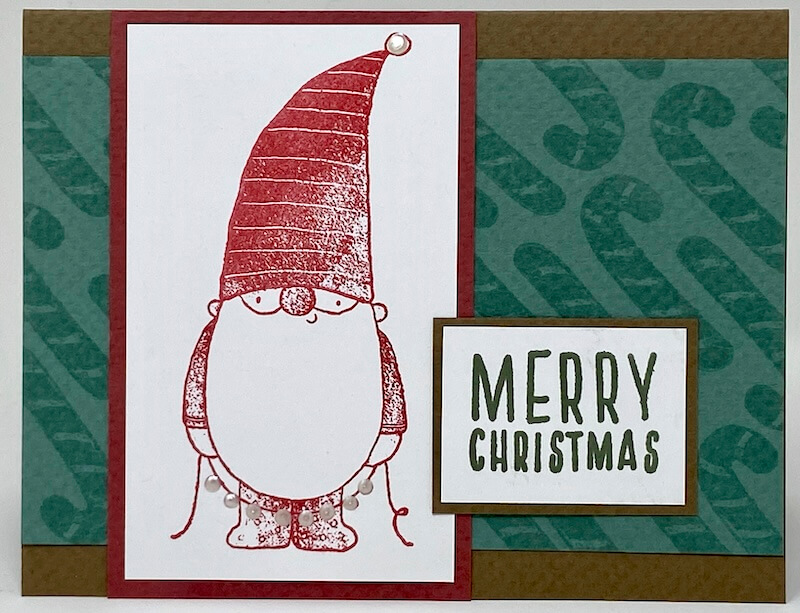
Stamp the candy canes onto a Green panel with Watermark Ink.
Add the gnome to a white panel in Red Ink. Squeeze tiny dots of liquid pearls/dimensional medium over the string lights and the pom-pom on the gnome's hat. Allow to dry. Stamp the sentiment in Spruce Ink onto a small white panel. Mat the gnome and sentiments and adhere to the folded card base to complete the card.
Card 2
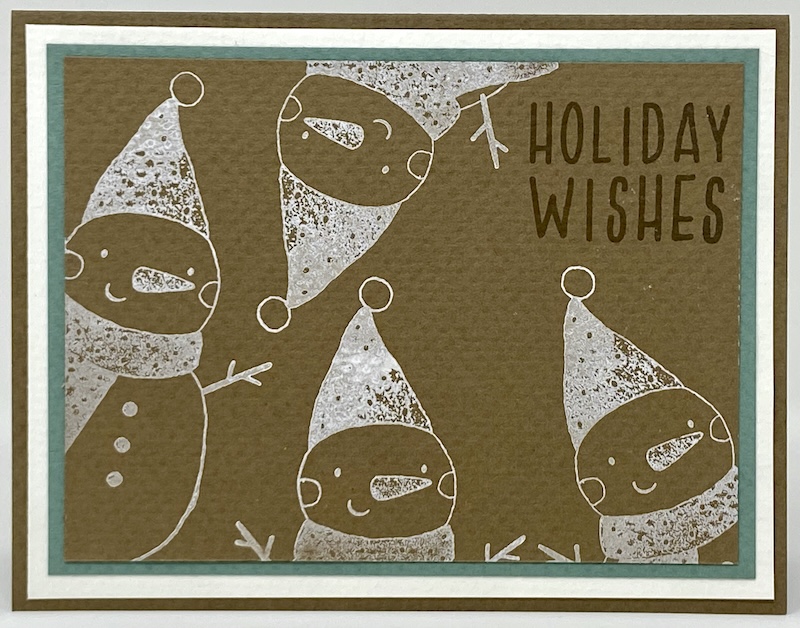
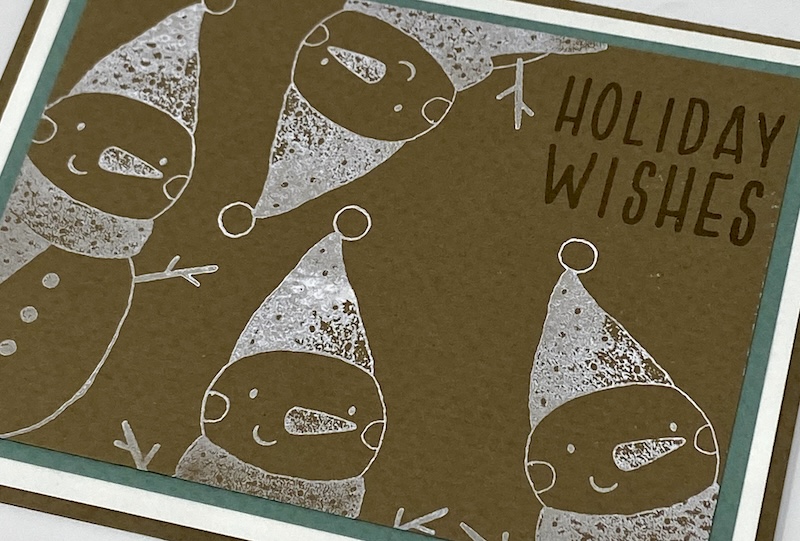
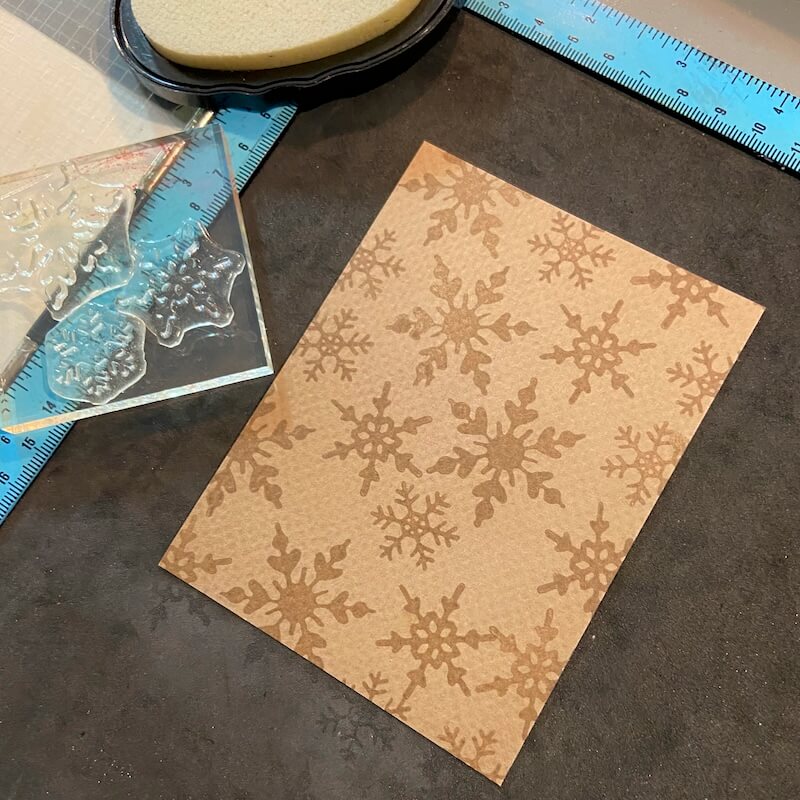
Stamp the snowman image repeatedly onto a Brown panel with White Pigment ink.
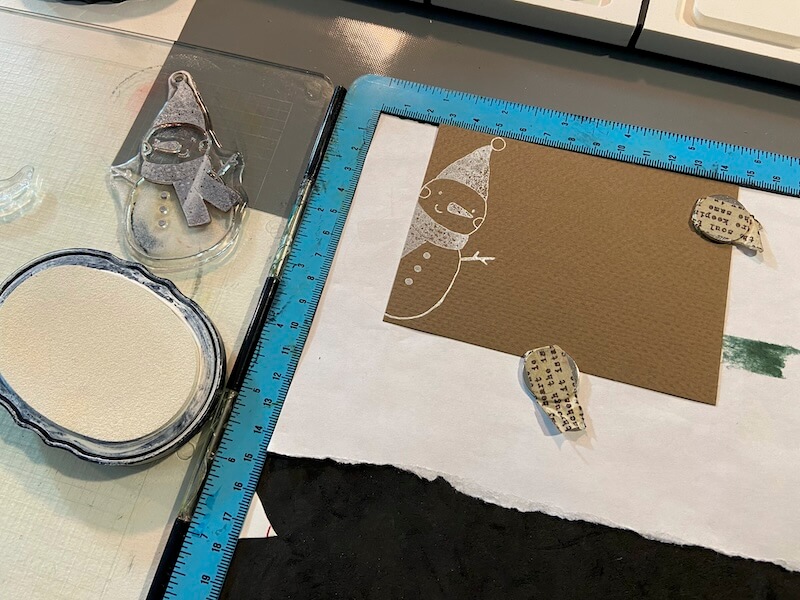
Complete the card with a stamped sentiment.
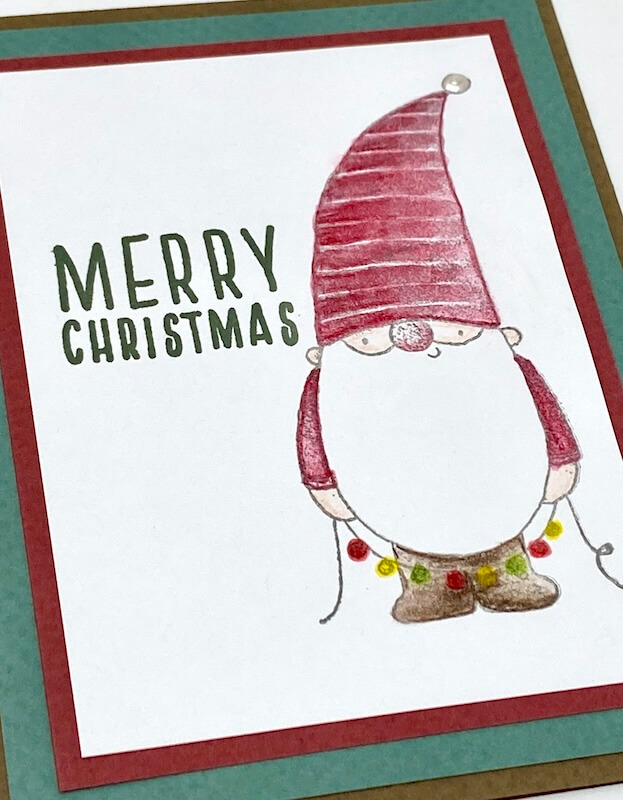
Card 3

Stamp the gnome in the bottom right corner of a white panel with Ash Ink.
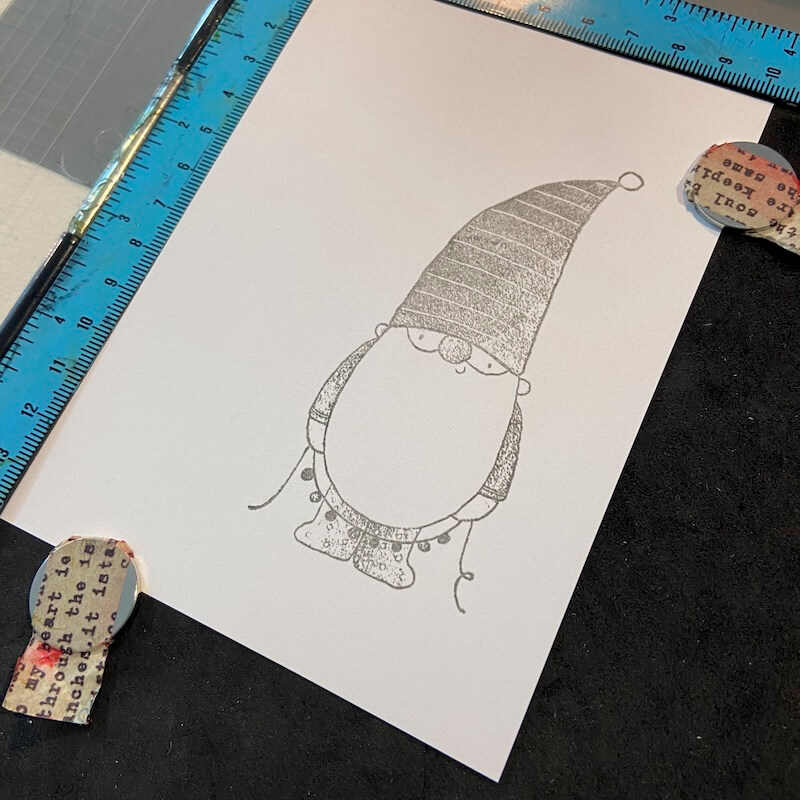
Add red, peach, and pink watercolor pencil over the hat, arms and face of the gnome as shown.
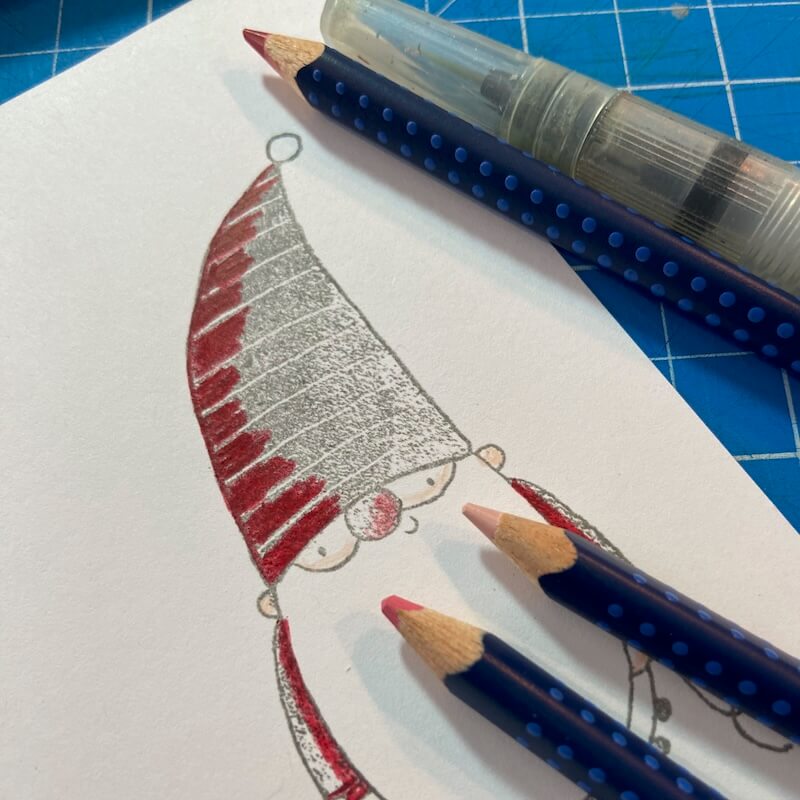
Color the shaded areas on the boots with brown pencil.

Add red, green and yellow to the light bulbs.

Blend the colors with a water brush.
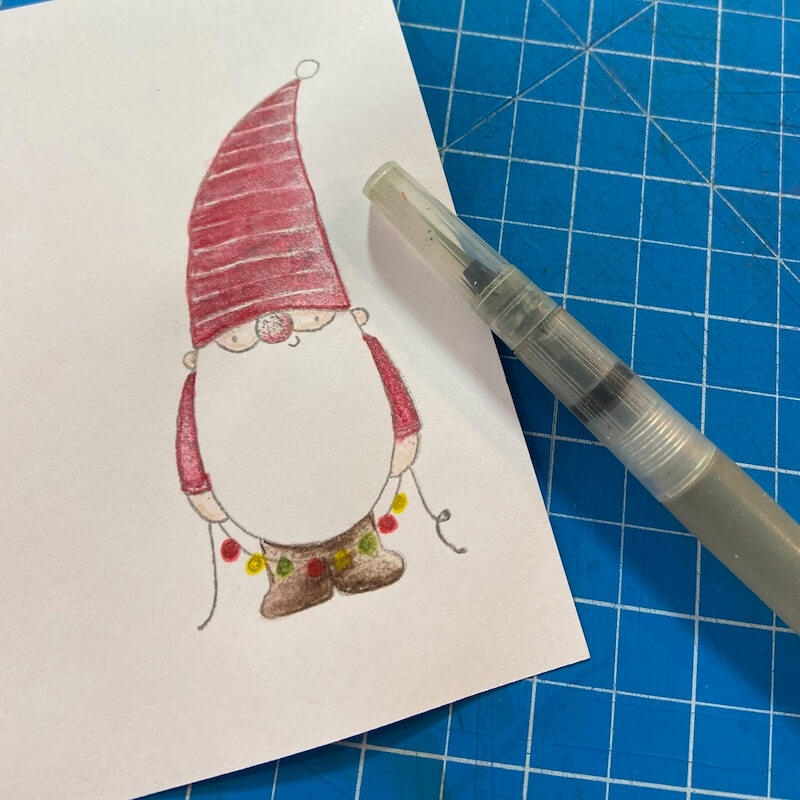
Add a liquid pearl dot to the pom-pom. Stamp the sentiment in Spruce Ink to complete the card.
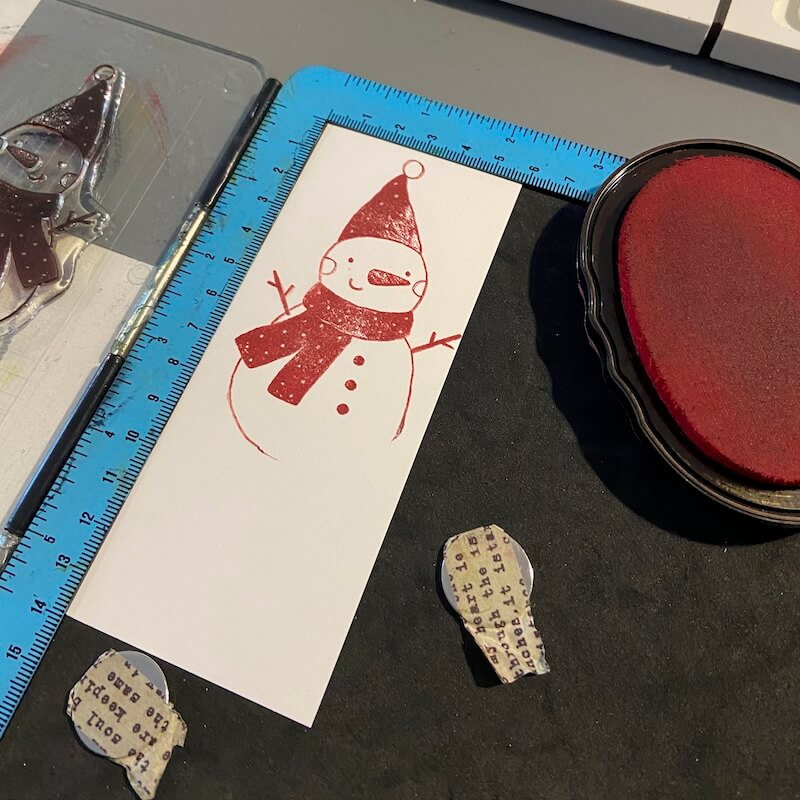
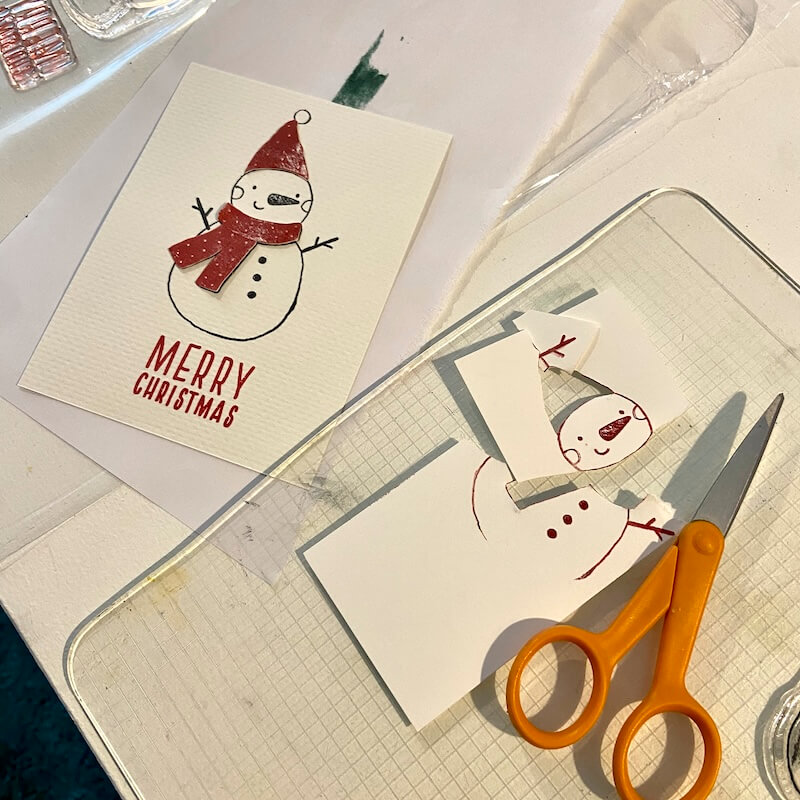
Card 4

Stamp the snowman onto an Ivory panel with India Ink. Add the sentiment (centered below the snowman image) in Red Ink.
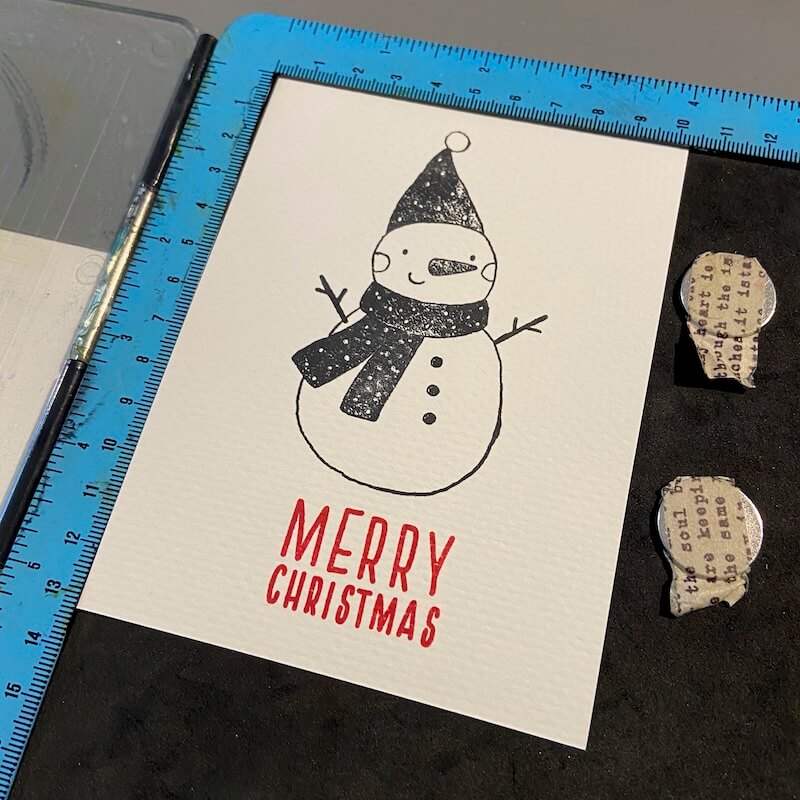
Stamp a second snowman on a separate scrap panel with Red Ink.
Fussy cut the hat and scarf with scissors.
Adhere the red scarf and hat over the snowman image with Bookbinding Glue dispensed from a Needle-tipped Applicator.
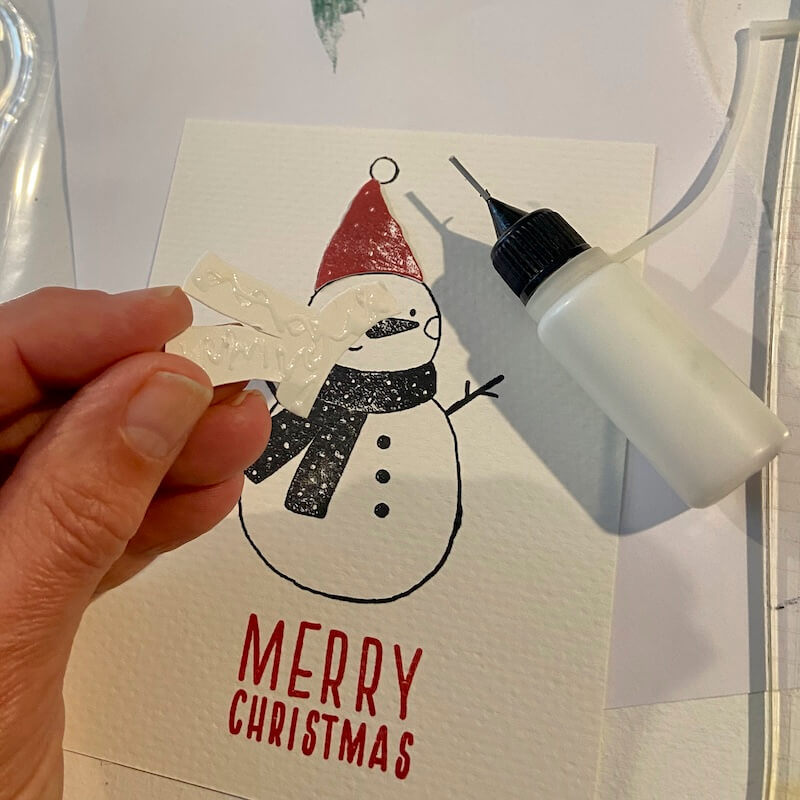
Add liquid pearls to the pom-pom and cheeks to complete the card.

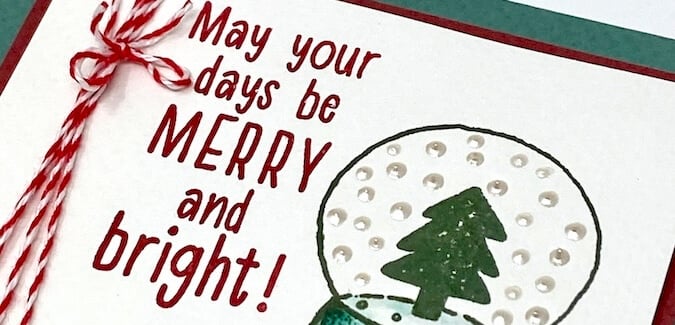
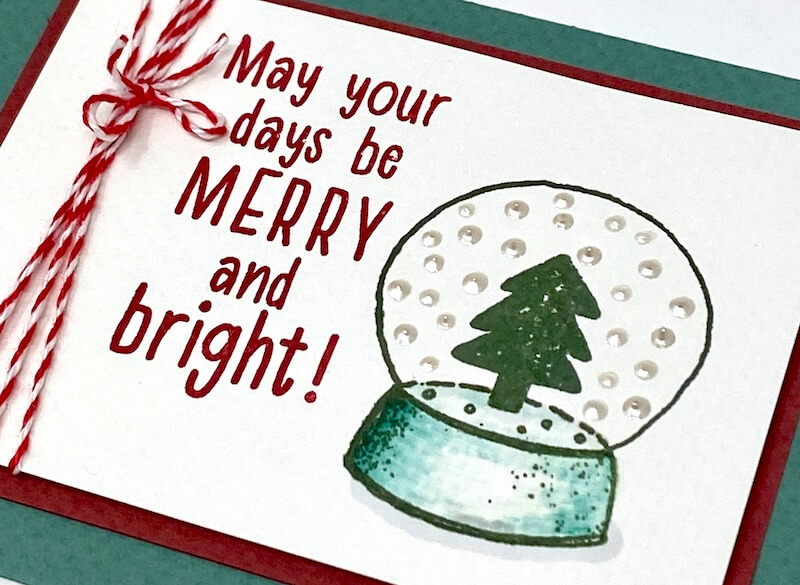
Card 5

Stamp the snow globe (Spruce) and sentiment (Red) onto a White panel. Add liquid pearl dots inside the globe and allow to dry.
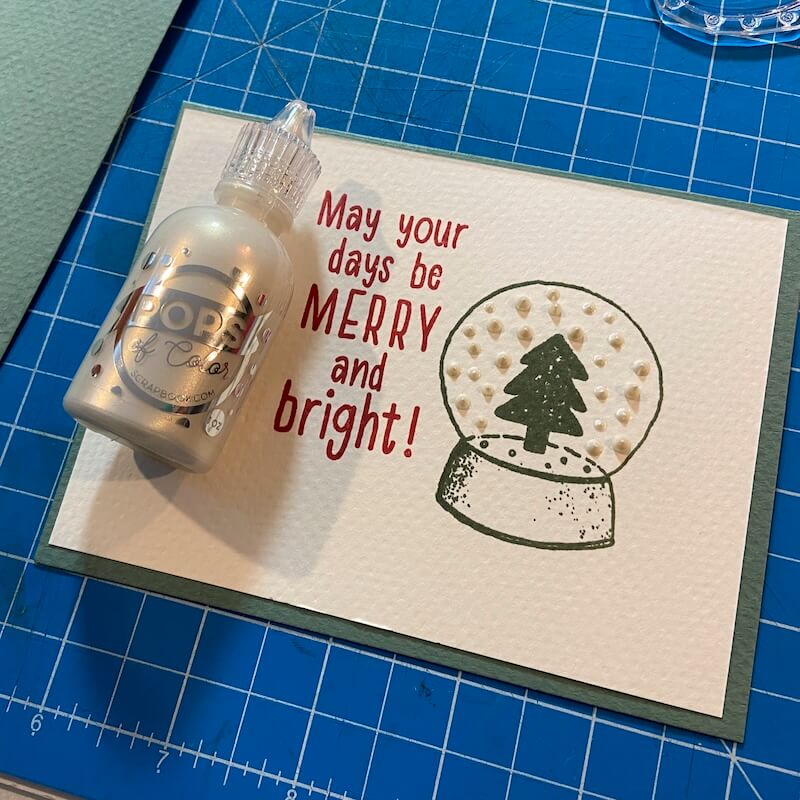
Select alcohol markers to coordinate with the paper colors. Apply to the base of the snow globe and blend for desired effect.

Wrap red and white baker's twine around the stamped panel several times. Add a bow and layer onto the finished card with a Rose mat.
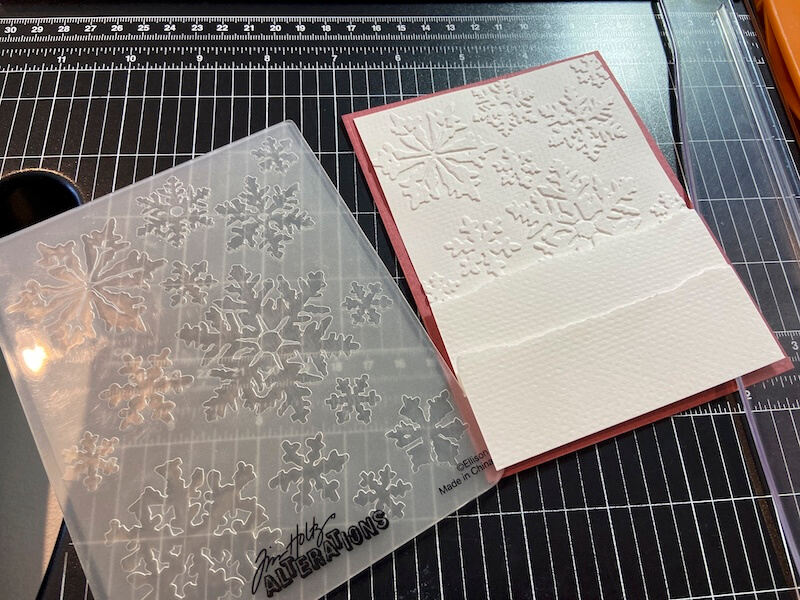
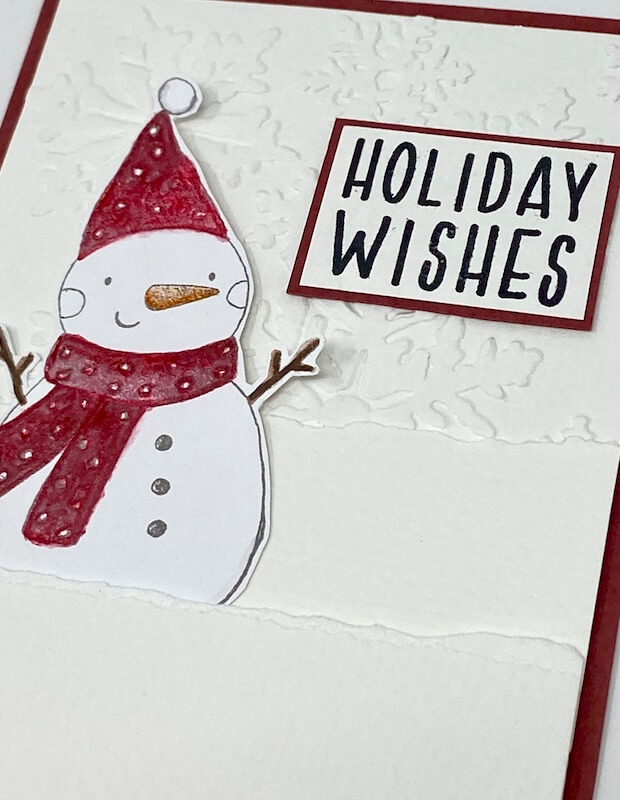
Card 6
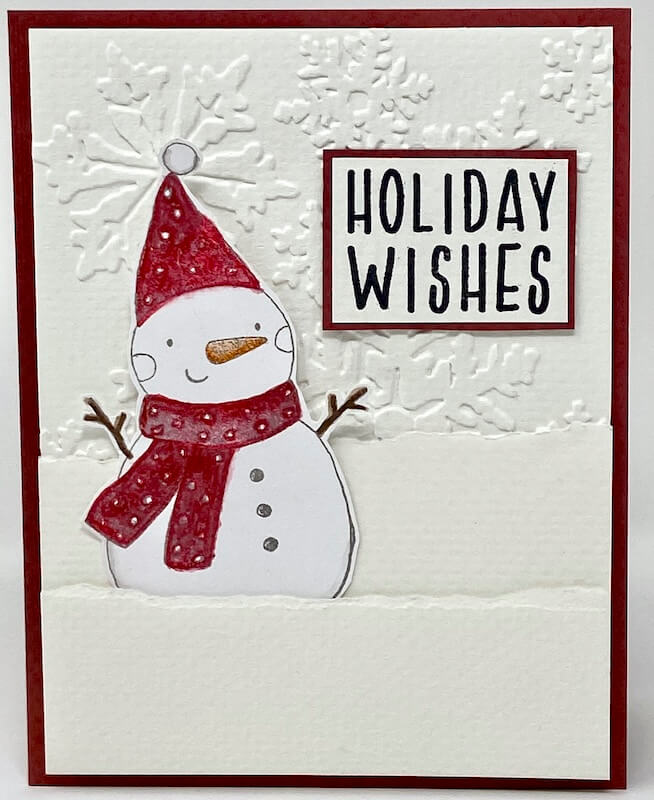
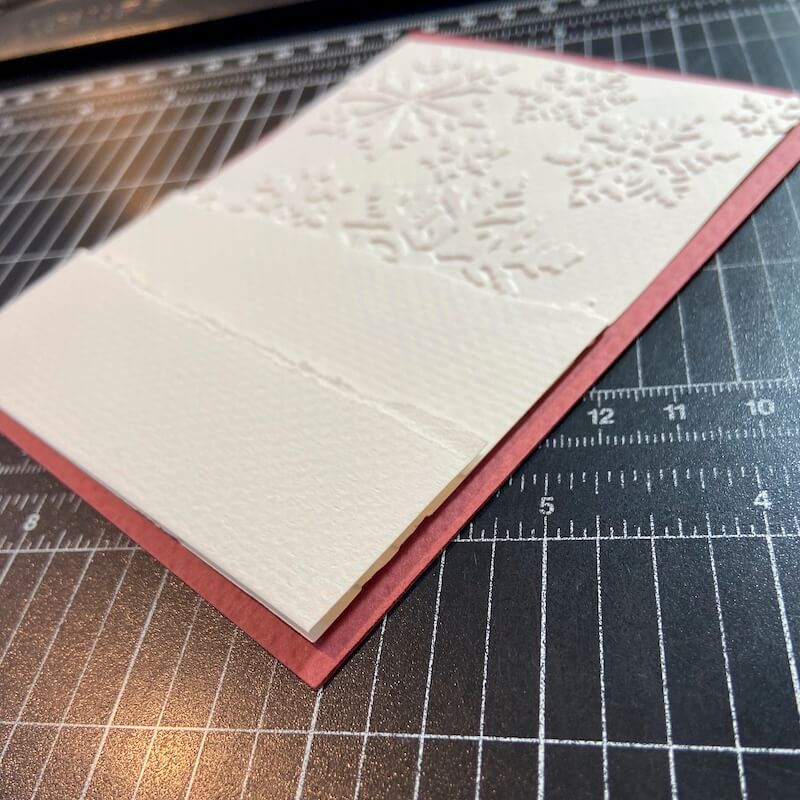
Add texture to an Ivory panel with a snowflake embossing folder. Tear two strips of Ivory paper as shown.
Adhere the first torn strip to the embossed background with Bookbinding Glue.
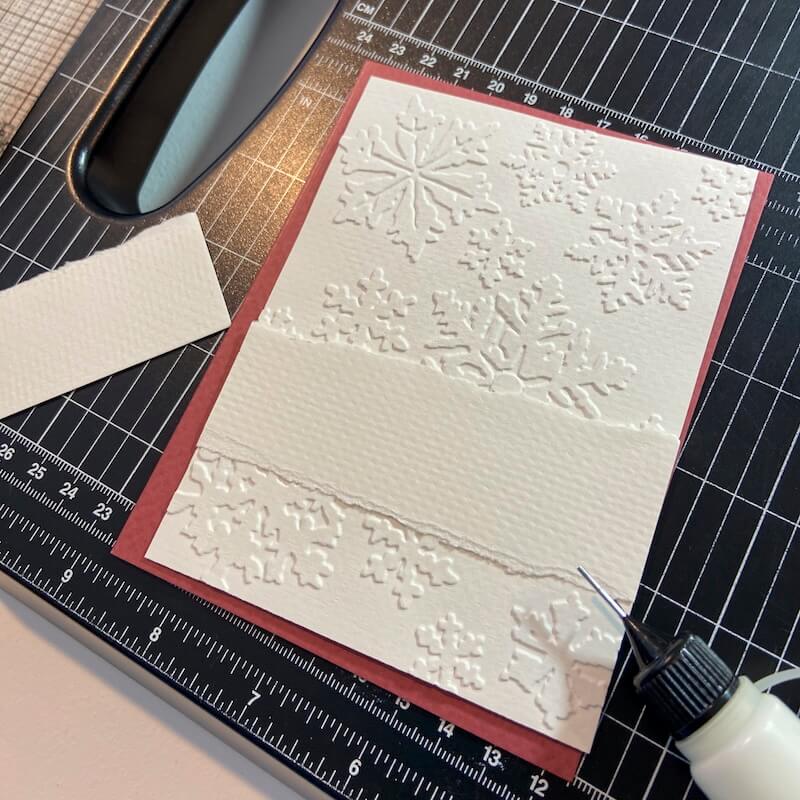
Add foam adhesive to the back of the bottom strip.
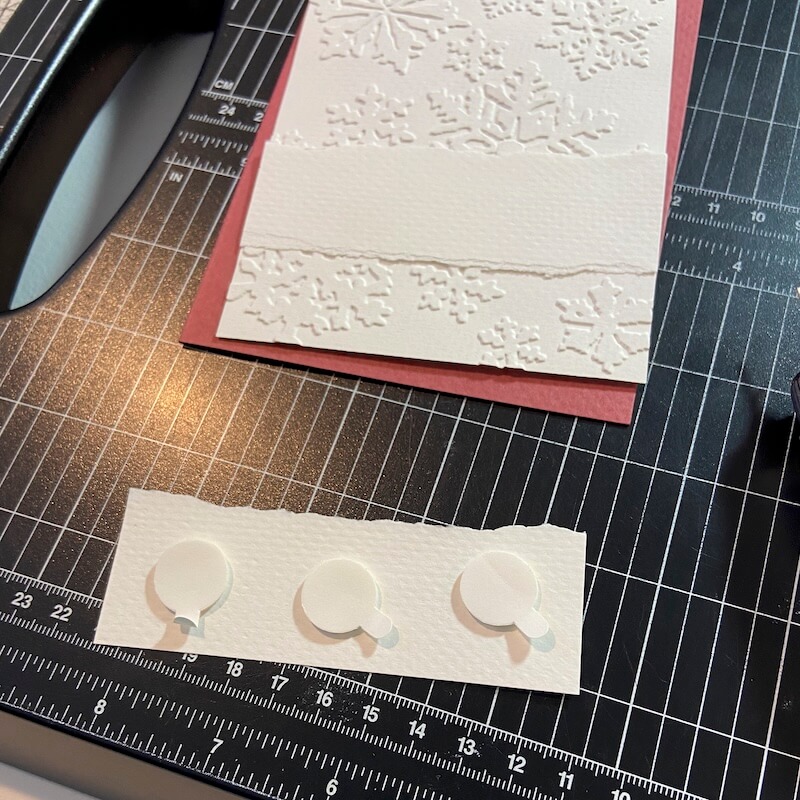
Remove the backing and layer over the top strip.
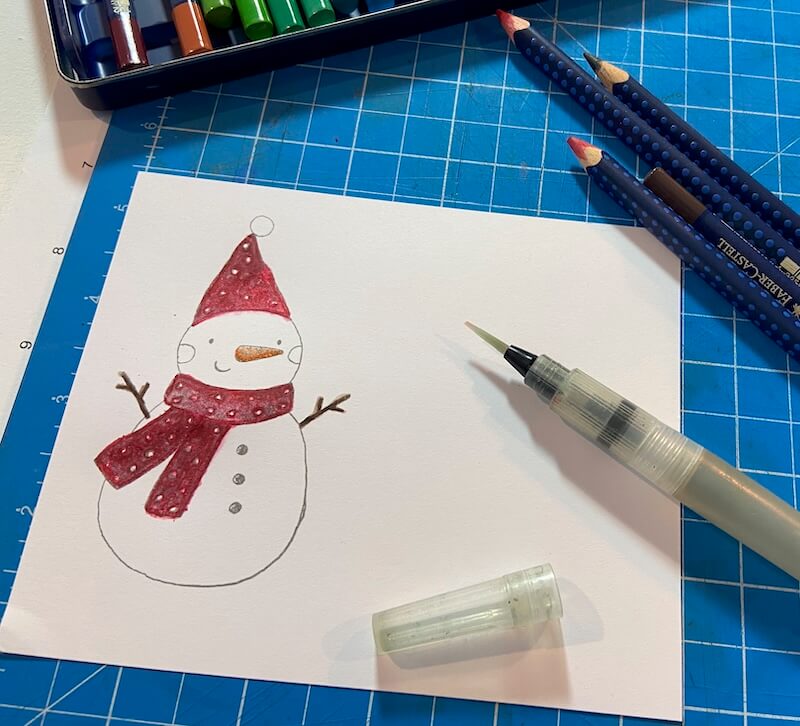
Stamp the snowman image onto a white panel with Ash Ink. Color the image with watercolor pencils, blending with a water brush.
Fussy cut the snowman with scissors.

Adhere the snowman with glue, tucking him behind the second torn strip.
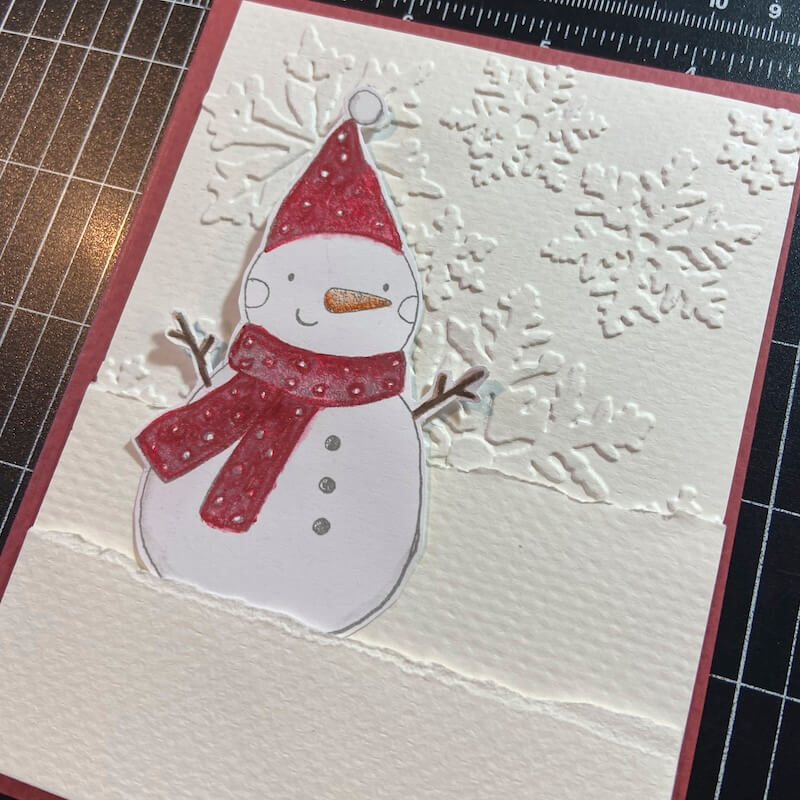
Add a matted stamped sentiment.
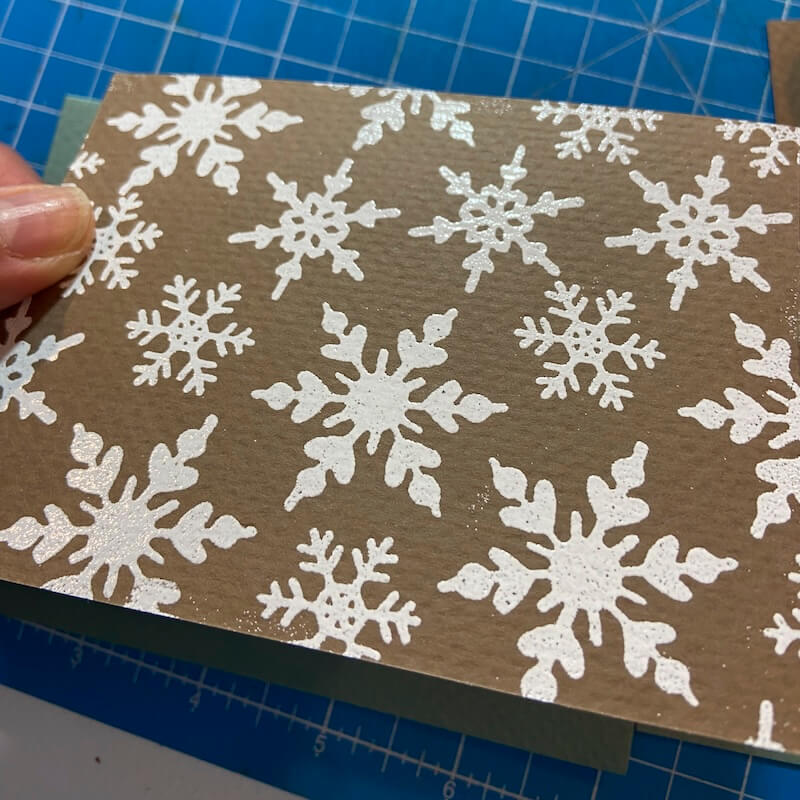
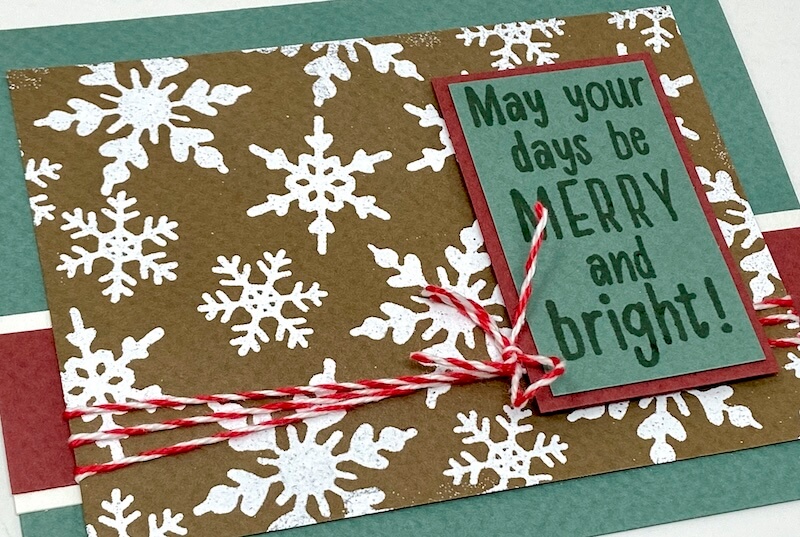
Card 7

Dust a Brown panel with an anti static powder tool. Stamp the snowflakes randomly over the panel with Watermark Ink.
Sprinkle the wet ink with white embossing powder and heat set to melt.
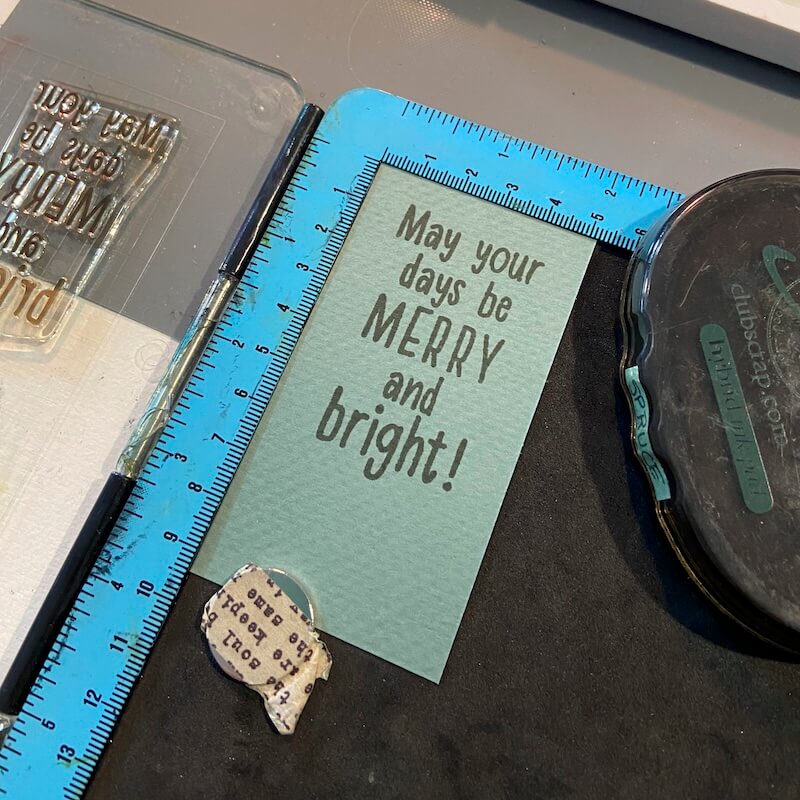
Stamp the sentiment onto a Green panel with Spruce Ink.
Add baker's twine tied in a bow beneath the matted sentiment to complete the card.
Have you made your holiday cards with this fun stamp set yet? If so, we would love for you to share your creations with us on our Club Scrap Chat Group on Facebook. Not a member of the group? Simply answer a few questions and we will accept your request in no time.
Happy holiday stamping!
CS Hybrid Ink Pads

$6.35
Exclusively Club Scrap®, this hybrid craft ink combines the most exceptional ingredients of both pigments and dyes for a fine, crisp, fast-drying image! Don't forget to stock up on the coordinating re-inkers. Each ink pad sold separately. Please select the… Read More