
I didn't realize 3x3" greeting cards were "a thing" until I was cruising Pinterest one day and found this video tutorial by Beth Beard. I thought the project would be adorable in our Celebrate papers!
Gather up your supplies (all papers from the Celebrate collection), and let's get started!
7.25x8" Blue Plain1.75x3 Silver Sparkle
(2) 1.75x3-5/8" Silver Sparkle
3x3.75 Silver Sparkle
12x12 Orange Plain (trimmed into eight 3x6" strips)
(8) 2.75x2.75" Black Plains
(8) 2-5/8x2-5/8" Lite White Prints
(8) 5.25x5.25" Lite White Prints (for envelopes)
Greetings UM
Silver Twist Tie
Banner Stickers
Envelope Punch Board
Heavy Duty Adhesive
Score Board and Bone Folder
Scissors
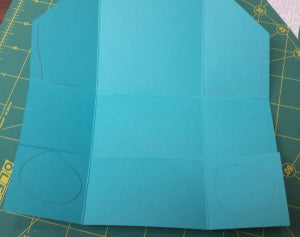
1. Score the 7.25x8" Blue Plain horizontally at 2 and 4". Score vertically at 2 and 5.25".
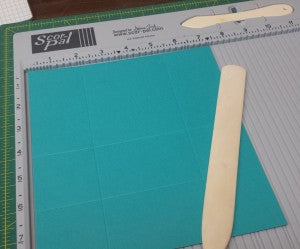
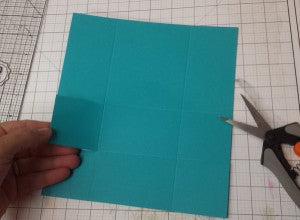
2. With the paper positioned vertically, trim along the scorelines from the left and right edges with scissors, stopping at the intersecting score.
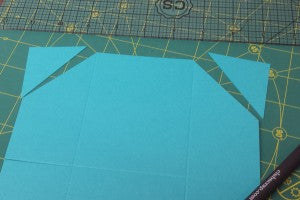
3. Position the paper vertically with the 2 and 4" score lines at the bottom. Measure and mark 2" down from the top along the left and right edges of the paper. Cut at an angle from the score lines to the 2" marks to remove two triangles.
4. Measure and mark 1-7/8" down from the top edge of one 1.75x3-5/8" Silver Sparkle paper. Cut at an angle from the opposing corner to the marked spot. For the second piece, make the same angled cut in the opposite direction.

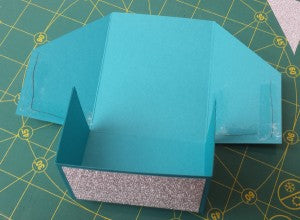
5. Adhere the Silver Sparkle panels to the box, fold along all score lines and form the box. Determine and mark all contact points that will require adhesive with a pencil.
6. Apply adhesive to all contact points and complete the box.
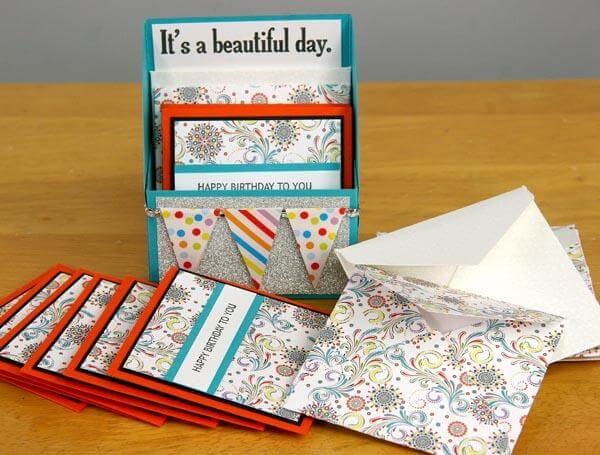
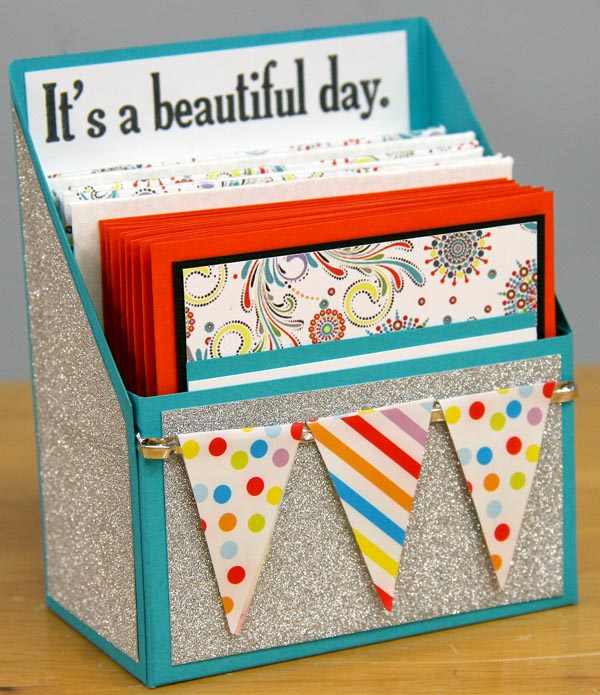
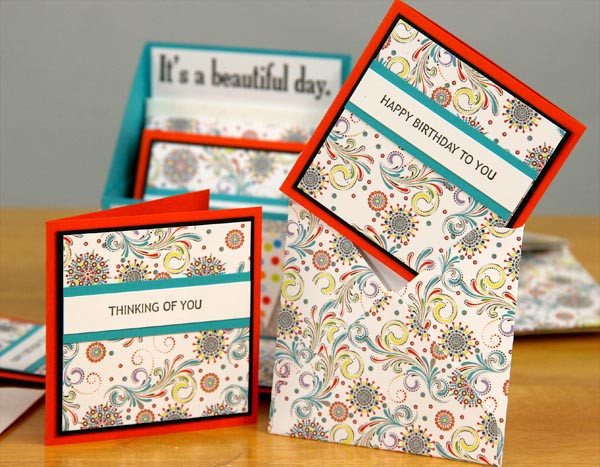
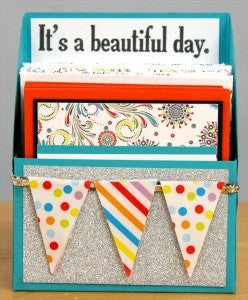
7. Use an Envelope Punch Board to make eight 3-1/8x3-1/8" envelopes from the 5.25" squares. Assemble eight 3x3" cards. The adorable stamped sentiments are from the Greeting UM.
8. Insert the cards and envelopes into the box. If desired, create a panel for the inner back wall of the box and embellish. (I stamped the "It's a Beautiful Day" sentiment from the Cantina Jumbo UM sheet.) Use the banner stickers and twist tie to make an embellishment for the front of the box.
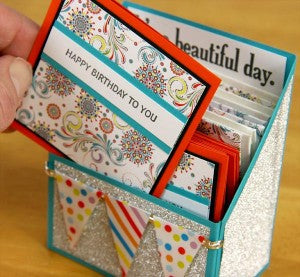
What a perfect hostess gift! Make an extra one for yourself, and you'll always be ready to add a gorgeous card to a gift for any occasion.

Have a beautiful day!
Tricia