
We've had countless requests over the years for a theme like this, and we couldn't be happier with how the Happy Camper pages turned out. The rugged color palette and whimsical images provide the perfect backdrop for any outdoorsy adventure.

The goodies include a buffalo plaid stencil, adorable corduroy wrapped buttons, charms, printed die cuts, and a generous portion of ribbon.
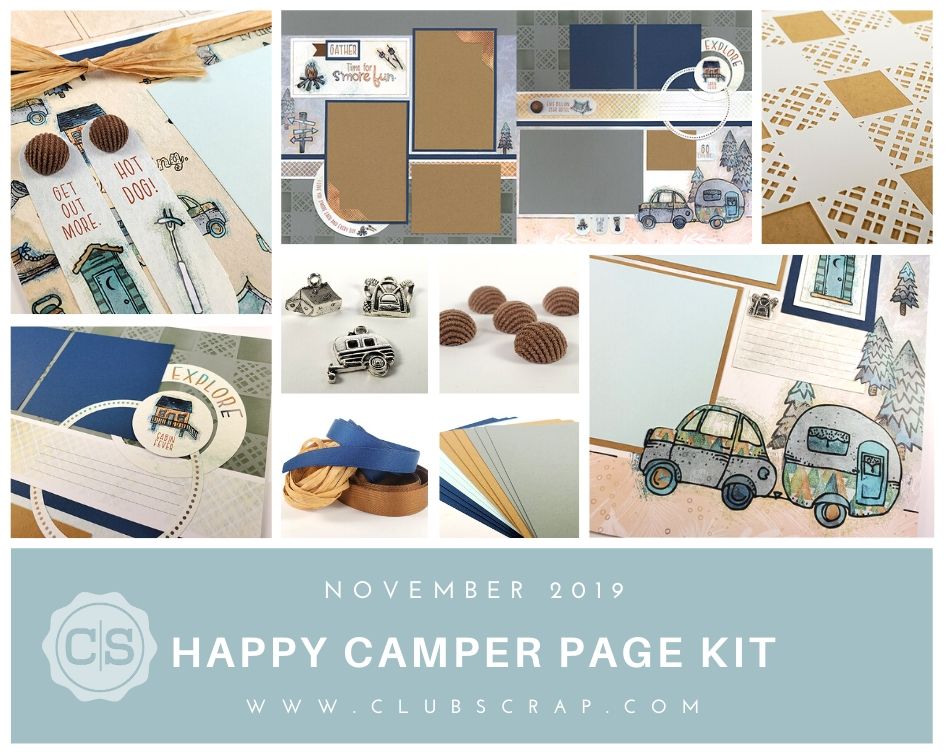
As always, the kit comes with a video tutorial full of tips on how to incorporate the sheet of die cuts and other embellishments. If you feel confident in your paper trimming skills, skip ahead to the assembly tips. Check out this quick preview . . .
Next, here's a closer look at some of the details about the Happy Camper pages you'll complete if you choose to follow the instructions.
Layouts 1 & 2
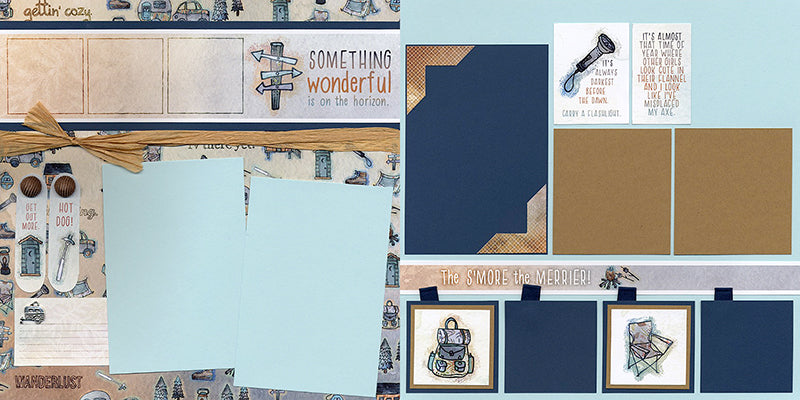
If you're willing to take just a wee bit of time, unravel a piece of raffia long enough to wrap around the page. Tape the ends to the back and then tie on a small bow. Rustic and adorable! Next, top the die cuts with two corduroy buttons.

Layouts 3 & 4
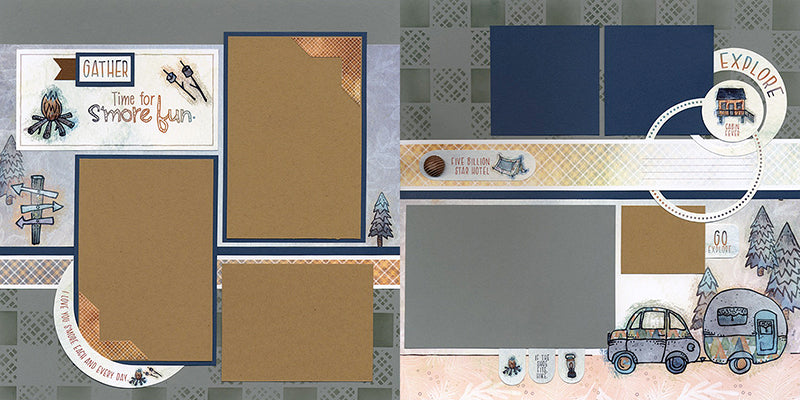
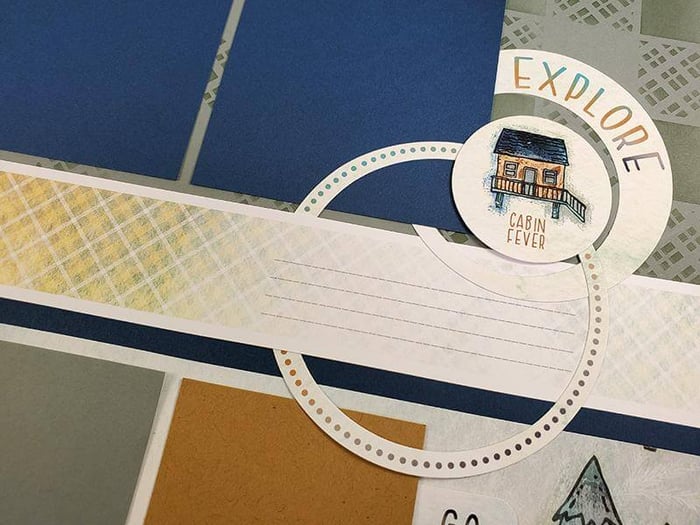
Decorate the bottom half of the left page and the top half of the right page with the Buffalo Plaid Stencil and Spruce ink. It adds so much and takes only minutes. Embellish the upper right corner with a set of three circular die cuts. Slide the largest circle right onto the border strip prior to adhering.

Layouts 5 & 6
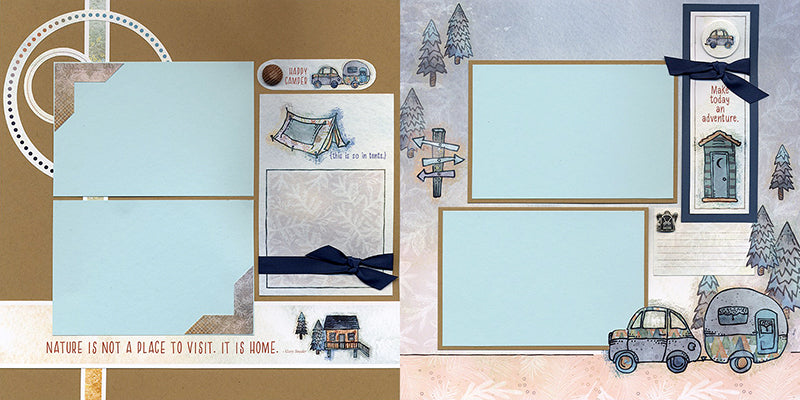
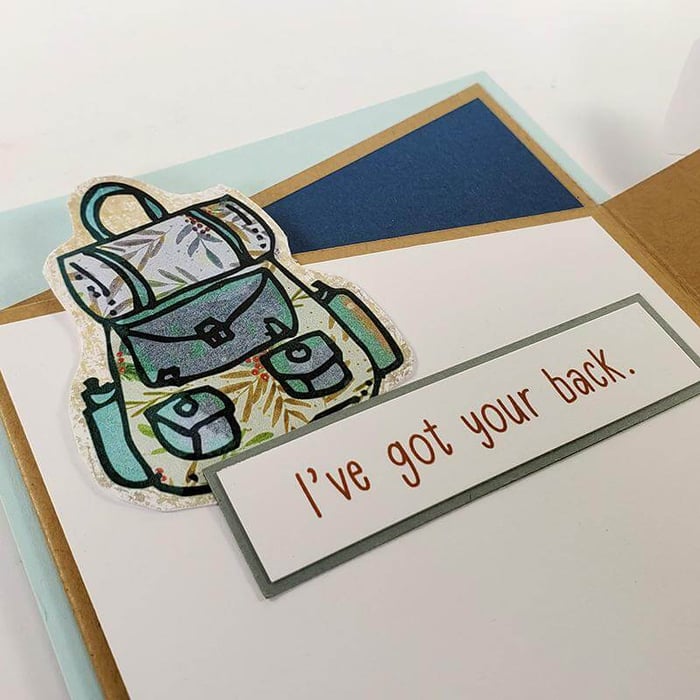
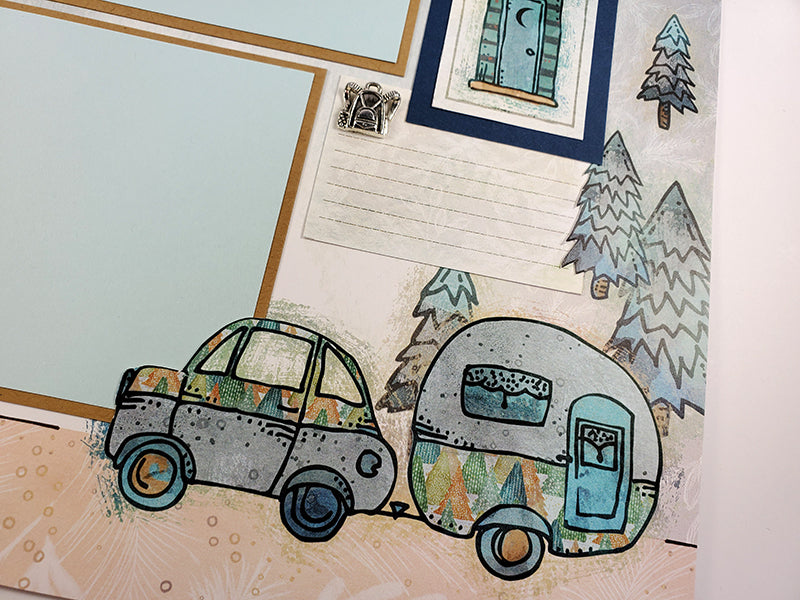
Use a craft knife and cutting mat to cut along the front edge of the car. Then, slide the nested photo mat behind the image to allow it to remain in the foreground. The same can be done with the pine tree and journaling prompt. Adhere the silver backpack charm with CS® Bookbinding Glue.
Layouts 7 & 8
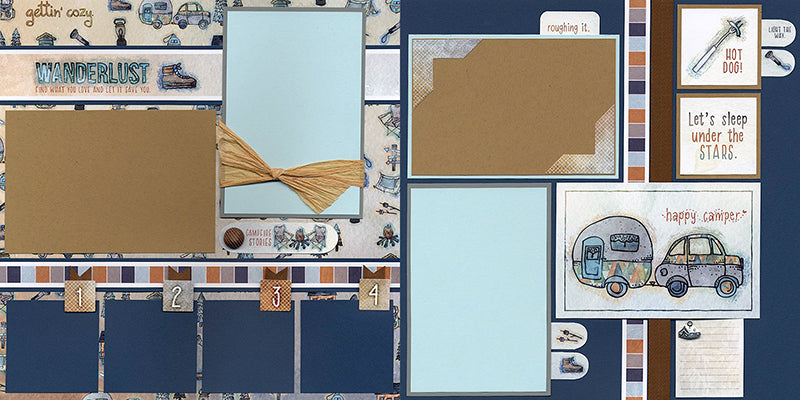
Create a simple yet attractive page accent for the four boxes at the bottom of the left page. Trim a small piece of brown twill and tape to the back of each number. Next, add foam adhesive to the top half of the number and adhere to the layout. Keep the area overlapping the Dk. Blue mat completely free of adhesive so a photo can be placed beneath the embellishment.

To learn more about the entire Happy Camper collection, visit yesterday's blog.
As always, our goal is to delight our members every month. Thank you so much for your loyalty and for joining us on this exciting adventure! If you haven't taken the membership plunge, I invite you to become a member, risk free. Give us a jingle at 888.634.9100 if you have any questions. We're here to help.
Thankful for you!
Tricia