
The moment Brenda shared the Treble Clef Pins to be included as a goodie in The Blues Lite kit, I knew what I wanted to make!
THE BLUES PHOTO BLOCKS
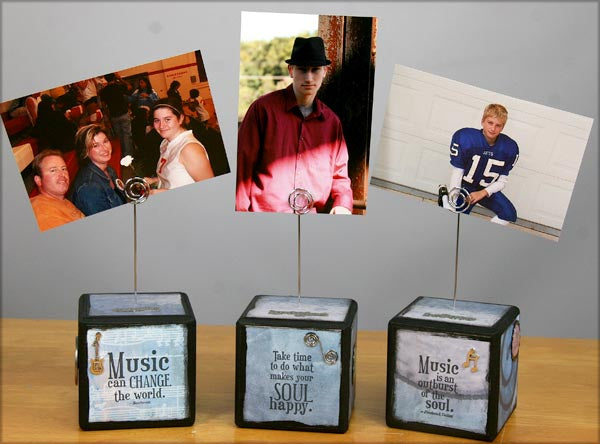
I'm always looking for fun and interesting ways to display photos. After all, you can't carry a 12x12 scrapbook around with you all day!
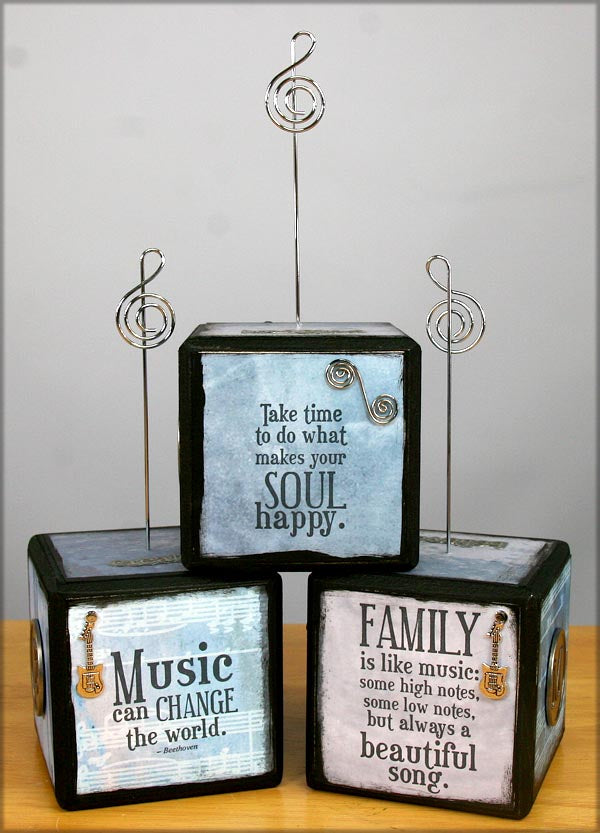
I had a set of wooden cubes that spelled the word "Laugh" I had totally out-grown as home decor. They had been languishing in a storage bin for almost a year.

Follow the steps below to create the blocks:
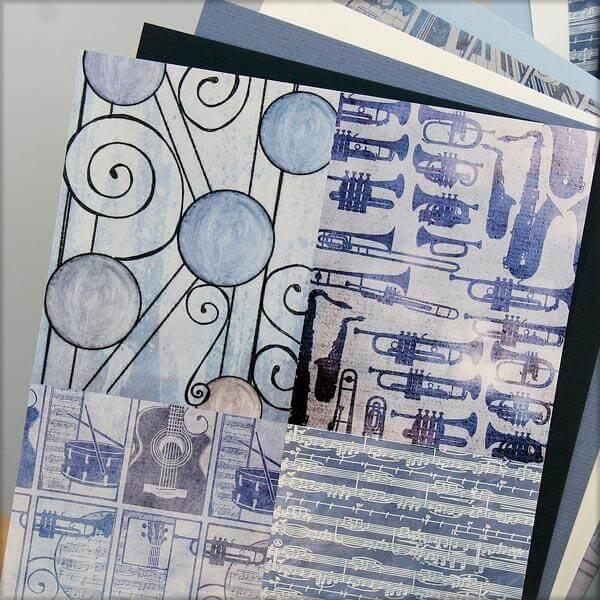
1. Trim enough 3-inch squares of The Blues printed paper to decorate each side. Adhere to the blocks using Bookbinding glue.

2. Use a foam brush to paint each corner on the blocks with black acrylic paint. Don't worry about getting a small amount of paint on the edges of the paper. I think it adds a rustic look to the project.

Each cube has five sides that are blank canvases just begging to be decorated. (Not counting the bottom of the block, which no one will see.)

3. Embellish the sides of the cubes with sentiment stamps, ribbons and charms from the collection. (I also added a few doo-dads from my stash.)


4. Use an awl to pierce a hole in the center of the top of each block. (A grid ruler will help you find the center.) Add a bit of Bookbinding Glue to the tip a Treble Clef pin and insert into the hole.


The top of each Treble Clef Pin holds photos without damaging them, so you can change out your pics on a whim.
I'll keep these on my desk at work to display photos of each of my children.
Happy crafting!