
The January Greetings to Go Guest Artist is Wendy Bellino, from Alexandria, Louisiana. Let’s take a look at her gorgeous Color Me Happy Greetings to Go cards.
SET A: 5x7” GREEN CARDS

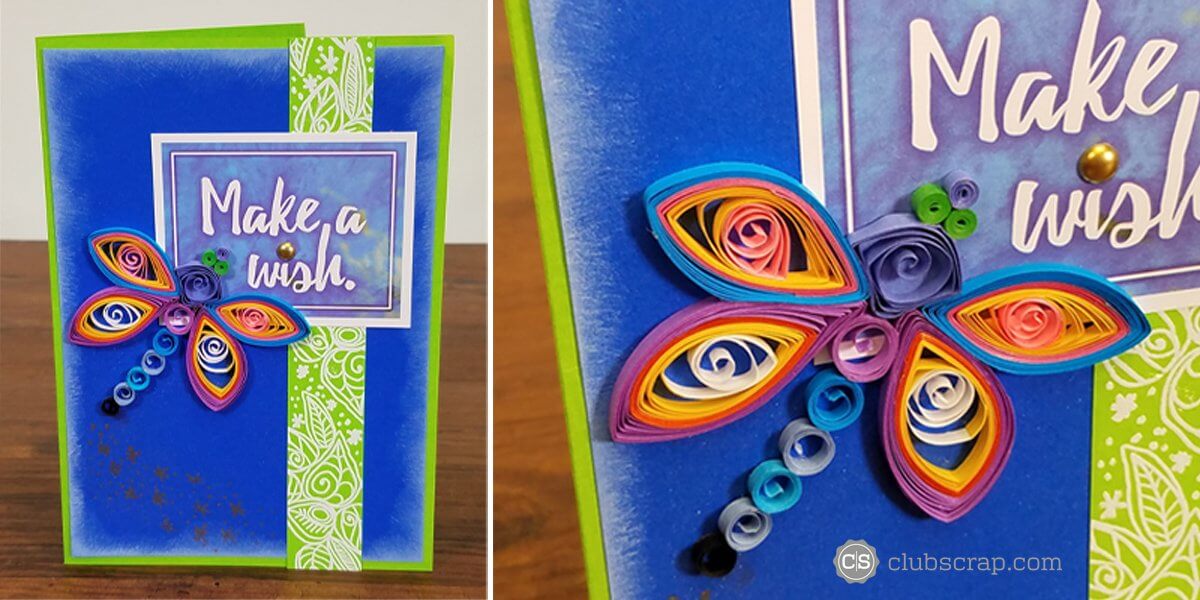
Stamp green strip with floral cluster (Greeting UM) in CS Watermark ink, heat emboss with White EP. Add Metallic Dot Sticker to Cutapart sentiment. Draw stars with embossing pen and dust with Perfect Pearls. (A quilled dragonfly from my stash--made years ago-- was perfect for this card!)

Score and fold according to Tricia's instructions, with a slight alteration to hide the money/gift certificate pocket inside. Fussy cut the floral image from the Embellishment Cutaparts, add Metallic Dot Sticker. Stamp sentiment in White Pigment ink, heat emboss with clear EP. Stamp green strip with floral cluster (Greeting UM) in Watermark ink, heat emboss with clear EP for a tone on tone look. Embellish with more Metallic Dot Stickers and a sheer yellow ribbon closure.

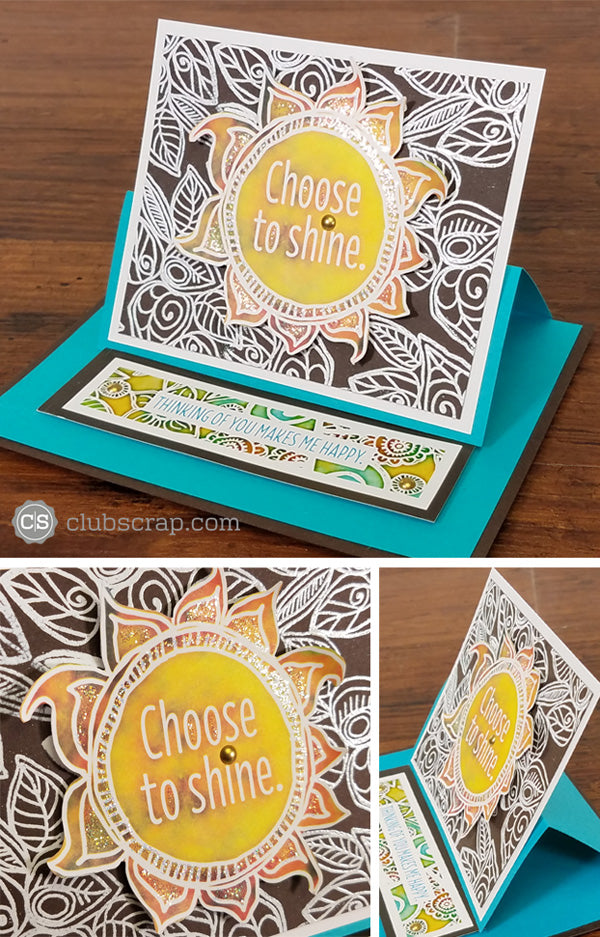
I waited to make this one until I got my Deluxe kit, because I wanted to play with that Yupo Paper! Use coordinating shades of alcohol inks to make the background. Place the Dragonfly Masking Stencil onto panel and apply blending solution with a felt applicator. (The ink will move around to the edges of the stencil and leave an outline.) Fill the open areas with Stickles. For the sentiment I tried a Tim Holtz "oldie but goodie" technique: Trim the sentiment from the center of the sun image stamp (Jumbo UM). Ink sentiment with Archival ink and stamp onto the alcohol-inked background. Buff the inked area with a soft cloth to remove ink and alcohol ink beneath, letting the plain white show through. Cool huh? Embellish with Metallic Dot Stickers.

Instead of scoring per the instructions, I scored this card to make a concertina fold. Fussy cut flowers from the 12x12 Deluxe White Flowers Print, and trim sentiment from Cutaparts. Adhere with foam squares. Embellish with Metallic Dots and Silver Butterfly Charm. Use scraps and fussy cut flower to create a belly band closure.
SET B: 4.5 x 6.25” YELLOW CARDS

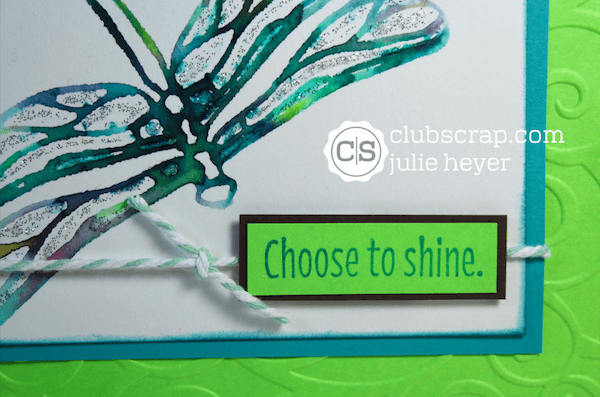
Trim the floral background image from the Cutaparts. Stamp large dragonfly (Jumbo UM) onto White Plain using black ink, heat emboss with clear EP. Color with Derwent colored pencils, and blend using Gamsol and a paper stump. Add Stickles to the wings for sparkle and Glossy Accents to the body of the dragonfly for dimension. Adhere to the Cutapart background with Foam Adhesive. Embellish background with Stickles and Metallic Dots. To make the frame: Create a text frame in Photoshop Elements (PSE) using the Beacon font, type on a path tool ("Dance with dragonflies"). Print onto Teal Plain.

Mask sentiment to stamp "Live, Laugh, Love" (Jumbo UM) in White Pigment ink, heat emboss with white EP. Embellish with Metallic Dots and ribbon from the kit. (Glitter confetti inside the shaker is from my stash.)

I used mostly leftover pieces of card stock and Cutaparts to make this card, using the January 2017 Card Sketch Challenge as inspiration. Embellish with Metallic Dots.

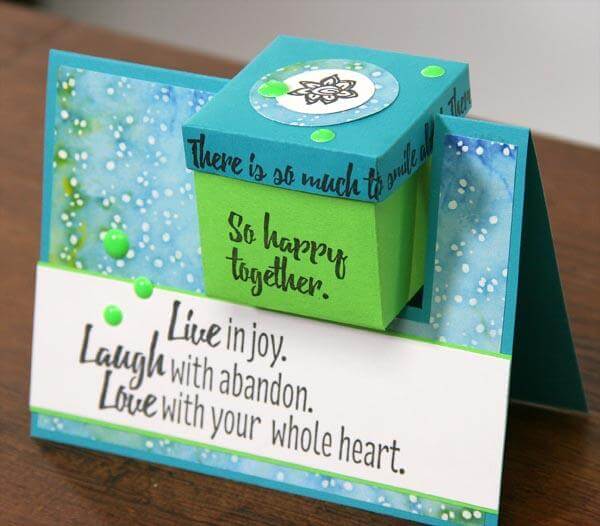
This "bendy card" is my "TA-DAAA!" card. Cut the front flap of blue card base and reassemble horizontally. Fussy cut images from 8.5x11 Deluxe Blue Print and adhere to the yellow card base. Inside sentiment: Stamp with black embossing ink, heat embosse with Stampendous Kaleidoscope transparent EP. Embellish with two small green dragonflies (from my stash), Metallic Dots and Silver Butterfly Charms.
SET C: 4.25 x 5.5” TENT CARDS
Stamp floral cluster (Greeting UM) with Watermark ink, heat emboss with white EP. Fussy cut sun image from Cutaparts, adhere with Foam Adhesive. Finish with Metallic Dots.
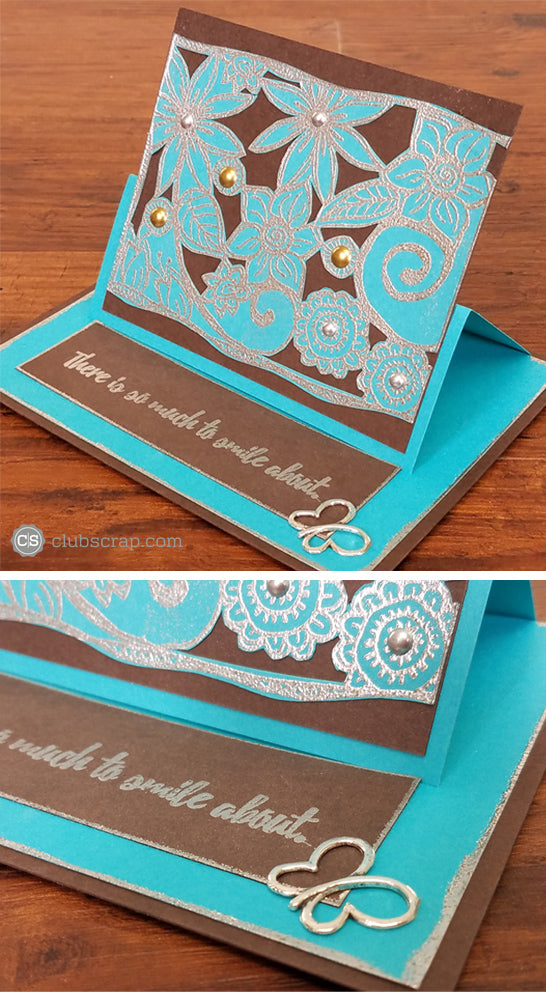
Score and fold the card base and panels according to directions. Stamp floral background (Jumbo UM) onto Teal Plain with Watermark ink, heat emboss with silver EP. Trim away "white" space with a craft knife, adhere to brown panel. Stamp sentiment and ink edges of panel with Watermark ink and heat emboss with silver EP. Embellish with the Metallic Dots and Silver Butterfly Charm.

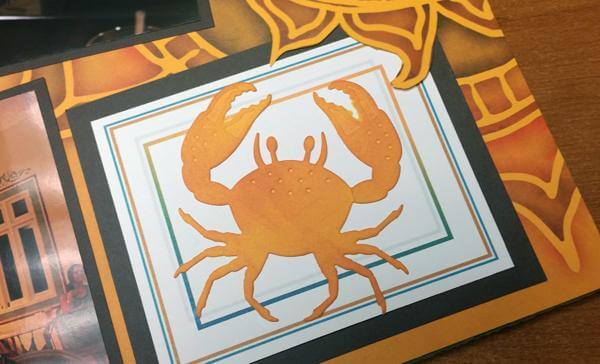
This card was fun! I found a free mini calendar online and printed it onto copy paper. Trim out individual months, bind them with bronze brads, and adhere to a Brown panel. Trim artwork from Cutaparts and mount onto White Plain with Foam Adhesive. Add ribbon. (Puffy sticker numbers from my stash.)

I used the Color Me Happy Digital kit to resize the small dragonfly image to fit the opening, and created a second "mirror" image. I cut the dragonfly from Teal Plain using my Silhouette Cameo. (A dragonfly punch or die would also work.) Trim away the center of the sun Cutapart to create an opening for a dragonfly spinner. Stamp floral cluster image onto dragonflies with Watermark ink, heat emboss with white EP. Assemble the spinner. Add Stickles for sparkle. Adhere Cutapart sentiment with Foam Adhesive. I hope you are inspired by my cards. I had a blast making them!
Wendy https://wendybellino.co/