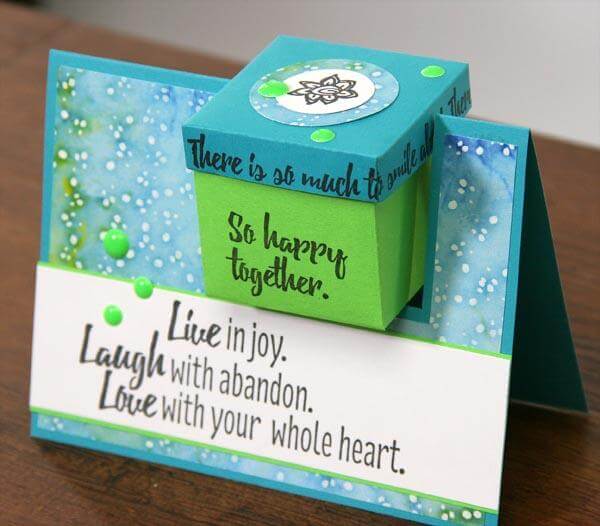
Check out this fun alternative to your typical gift box. Sure, you can't drop this card in the mail, but it's a fun presentation! I created mine with the fun elements in the Color Me Happy Club Stamp kit.

The card measures 4.25x5.5" and holds a 2" square gift box.

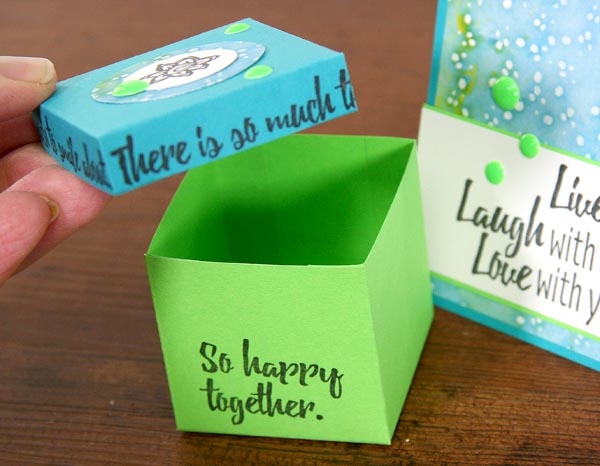
BOX BASE INSTRUCTIONS
1. Score a 6x6" paper vertically and horizontally at 2 and 4".
2. Cut along the vertical score lines until reaching the intersecting horizontal score.

3. Remove a 2x1.5" rectangle from the outside corners to create four 1/2" tabs. Stamp the outside panels of the box with images from the Jumbo UM sheet, if desired.

4. Fold along score lines to create the box shape and glue the tabs to secure.


BOX LID INSTRUCTIONS
1. Score 1/2" from each edge of a 3-1/8" square.
2. Cut along the vertical score lines until reaching the horizontal intersection score. Stamp the outside flaps, if desired.

3. Fold along each score line, apply glue to the tabs, and adhere to form the lid.


CARD BASE
1. Score and fold a 5.5x8.5" card base in half at 4.25".

2. Cut a nook into the folded edge of the card 1" from the right edge, 2.25" wide, and 2" deep.

Voila! The box fits perfectly into the nook!

Add a section of the Color Me Happy Quad Print to the front of the card and finish with a sentiment. Embellish with the fun Enamel Dot Stickers included in the Lite kit.

I'm looking forward to gifting something fun in this Gift Box Card. What should I put inside?
Kay