
Create beachy backgrounds with a variety of techniques. We've got some great ways to play with July's Sea Breeze collection.

Beachy Backgrounds with Torn Papers
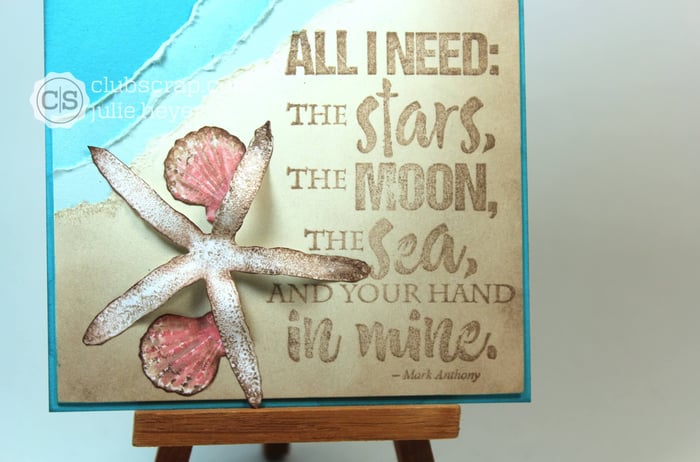
Tear a 4x6" Ivory panel diagonally and highlight the edges with Earth Ink.

Rip a 4x6" Pale Blue Sea Breeze panel diagonally and layer it behind the first torn panel. Use the blade from a pair of scissors to distress the edge of the blue panel for added dimension.
Apply Ocean Ink to the other half of the torn Pale Blue panel.

Continue to tear the layers. Ink the edges to create contrast when the papers are layered.

Repeat the scissors distressing step.

Layer the distressed edged pieces onto a larger Turquoise panel.

I love these Sea Breeze stamps! Use them to create your own stamped embellishments.

Add dimension with pearlized adhesive.

A fun sentiment completes the panel.

Message in a Bottle Stamped Embellishment
You could stop there, but why not go one step further and add a dimensional "message in a bottle"? First, stamp the bottle image onto clear plastic packaging with Permanent Jet Black Ink.

Fussy cut the image. Add a tiny little cork and rolled paper message to the back with Bookbinding Glue dispensed from a Needle-tipped Applicator.

Cut a slit in the Turquoise panel and add a tiny bit of white gel pen accents to the water line where the bottle pops out of the water.

Slide the bottle into the slit, trim to fit and secure with clear tape on the back of the panel.


Here's the finished piece:

Nancy already has a start on the technique challenge with her fun card with a gradient background.

Now it's your turn. Choose your favorite beachy background technique from above, or get creative and make up your own! . Happy Crafting!
 Julie
Julie