
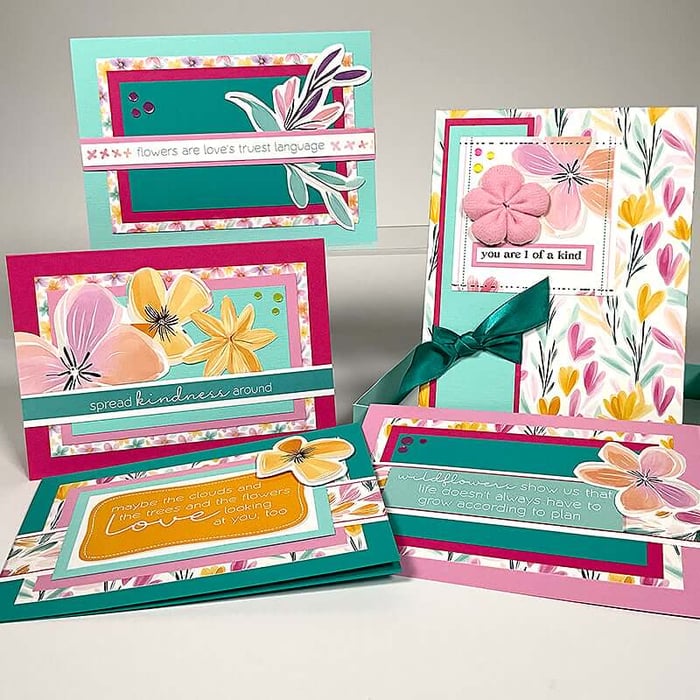
Transform our newest special release page kit, Tiny Blossoms, into twelve cards and two gift boxes, perfect for gifting!

Tiny Blossoms Cards and Gift Boxes
To get started, gather the following:
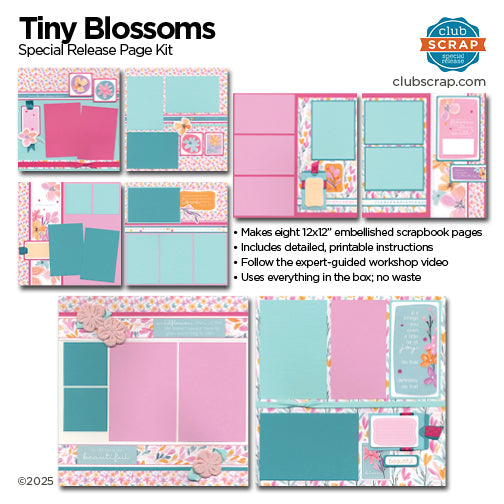
Tiny Blossoms Page Kit
Confetti (01.20) Card Kit Instructions
Kit No. 301 Word Art Strip (or assorted sentiment stamps)
White Envelopes: Four each of A2 Envelopes, A6, and A7, plus two 4-Bar (3-5/8 x 5-1/8") for bonus cards
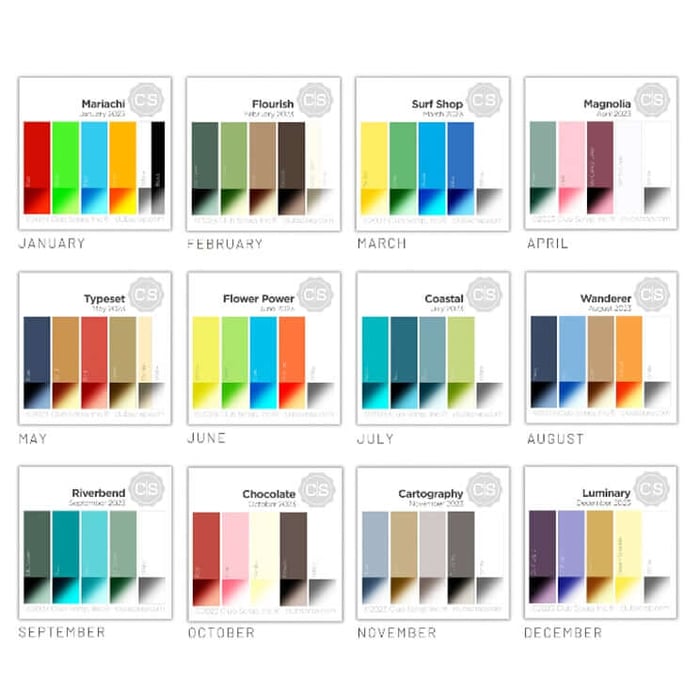
Sort, trim and score your papers according to the sketches and cutting diagrams in the Confetti Card Kit Instructions. I utilized the following paper substitutions for each step below:
- Dk. Pink, Lt. Pink
- Aqua, Seafoam
- Dk. Pink, Lt. Pink
- Large Flower Print
- Aqua, Seafoam
- Lt. Pink, Soft White
Trim the Tiny Blossoms cutaparts as normal. Modify as needed to decorate the inside and outside of the cards.
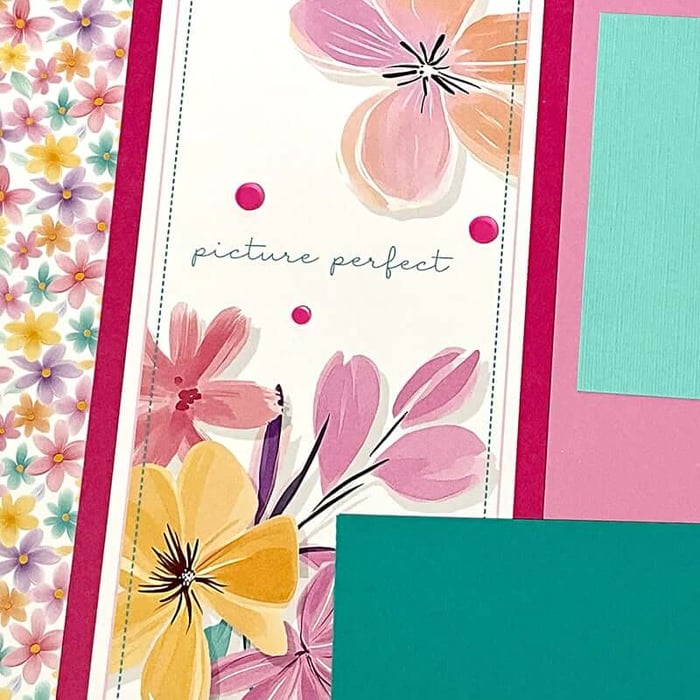
Create two 3x4.25" panels for the shaker cards by cutting the "picture perfect" cutapart at 8.5 and 4.25". Trim two more 3x4.25 panels from one Small Flower Print. (These panels were originally part of the Confetti Card Kit cutaparts. Set the rest of the print aside for use as decoration later.)
Note: Because this is a special release, you'll have four sheets of paper left over. In this case, one each of the Large Flower Print, Small Flower Print, Dk. Pink and Seafoam will remain—set these aside to construct the gift boxes.
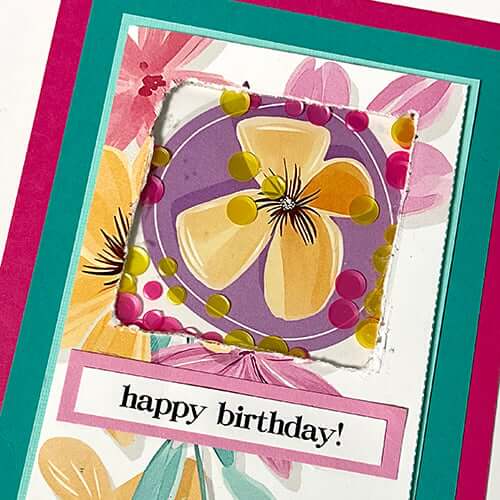
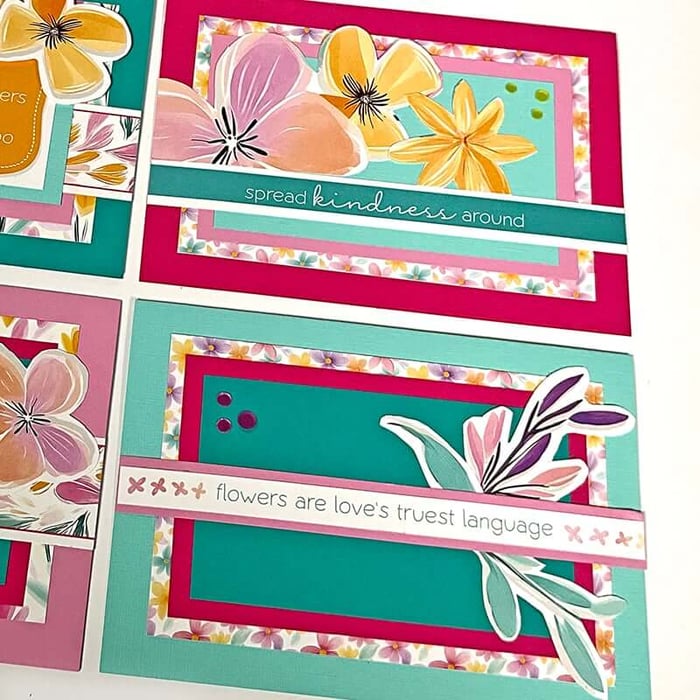
Set A (Four A2 Shaker Cards)
Follow the general assembly guidelines on Page 3 of the instructions, filling each opening with a small scoop of the confetti sequin mix.
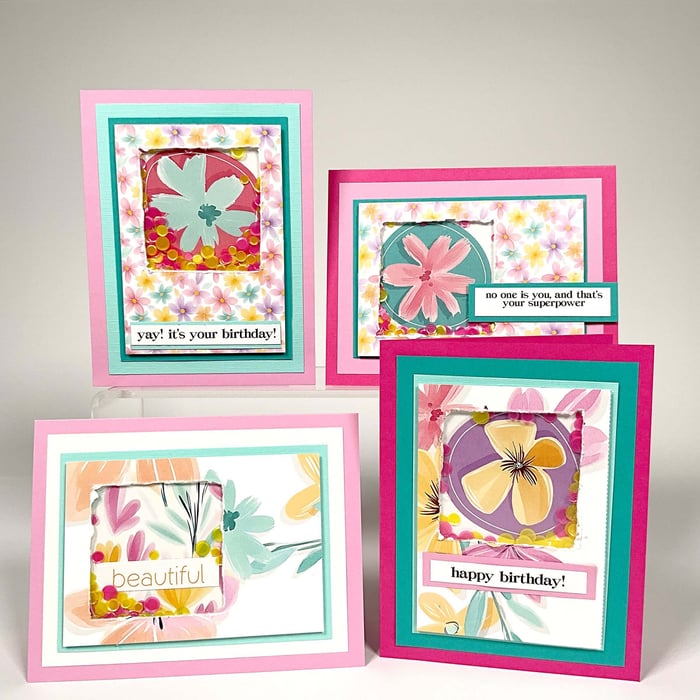
Fill three window "frames" with the round flower images from the cutaparts. The fourth frame features a square cut from a Large Flower Print scrap.
Add stamped sentiments or greetings from the Word Art Strip.
Set B (Four A6 Cards)
Follow the basic assembly as outlined on Page 4 of the instructions. In lieu of the foil included in the Confetti kit, consider adding 1.75x5.75" printed panels (trimmed from the left over Small Flower Print), or adding texture to the plain 2x6" panels with embossing folders.
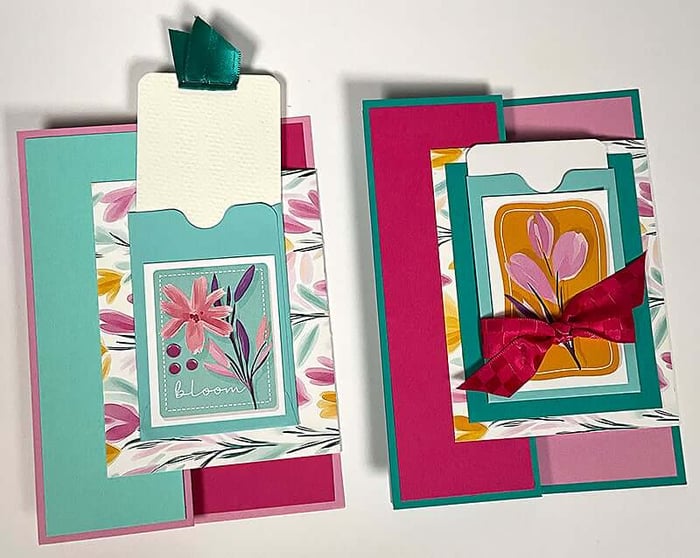
Center a mini sleeve onto the flap of two cards. Make two 2.25x4" tags from scraps of Soft White; round the corners and tuck into each sleeve.

Decorate the two remaining A6 cards with trimmed cutaparts, ribbon and confetti sequins.

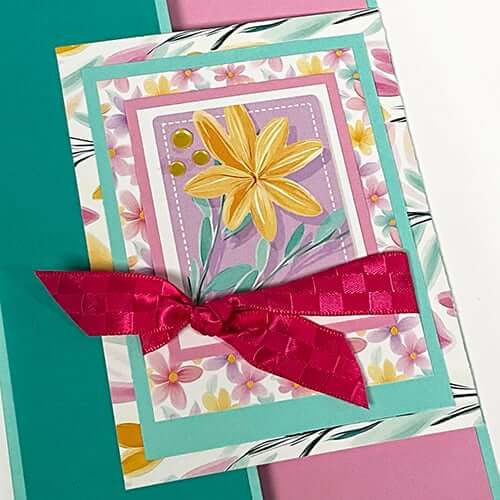
Set C (Four A7 Cards)
Follow the card assembly guidelines on Page 5 of the instructions document. The size and design made these cards perfect for showcasing the sentiment cutapart strips. (The second "half" of the sentiments are used inside the card.)
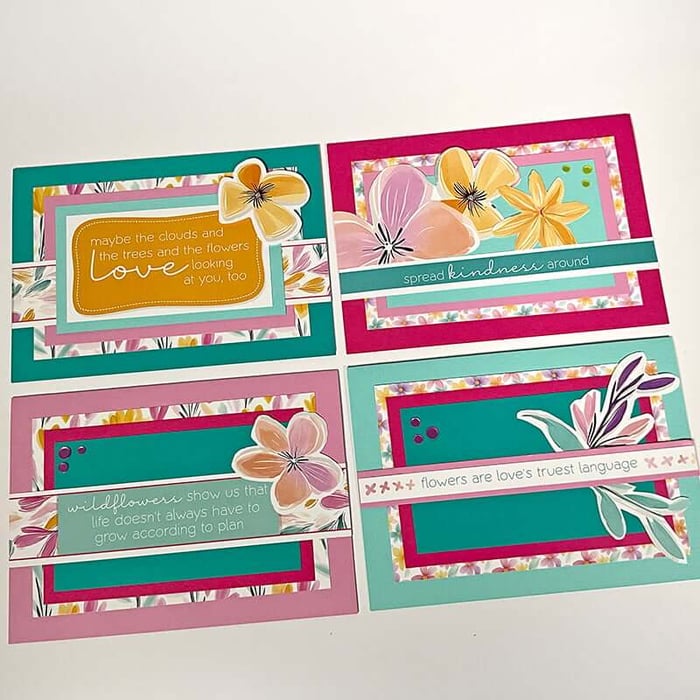
Embellish with fussy cut flowers trimmed from the cutapart artwork with scissors, as well as confetti sequins.
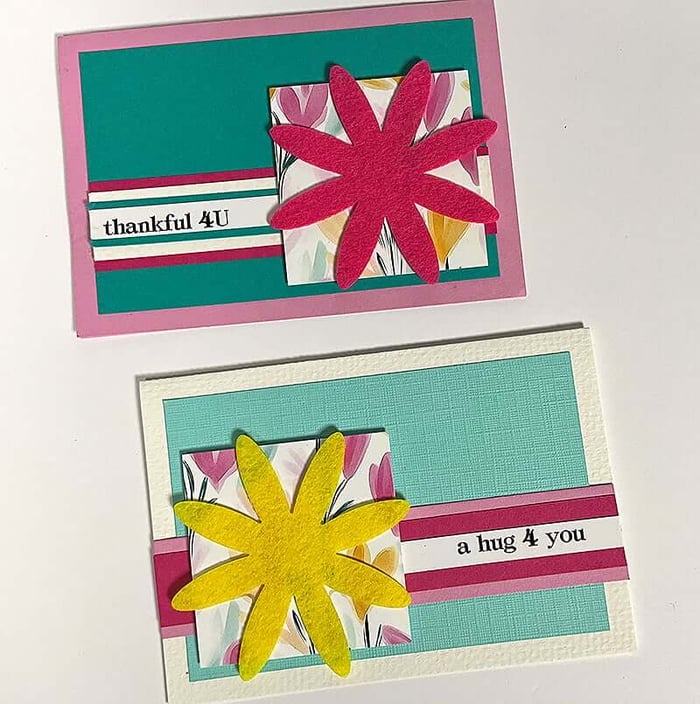
(2) 3.5x5" Bonus Cards
Follow the card assembly guidelines on Page 5 of the instructions document.
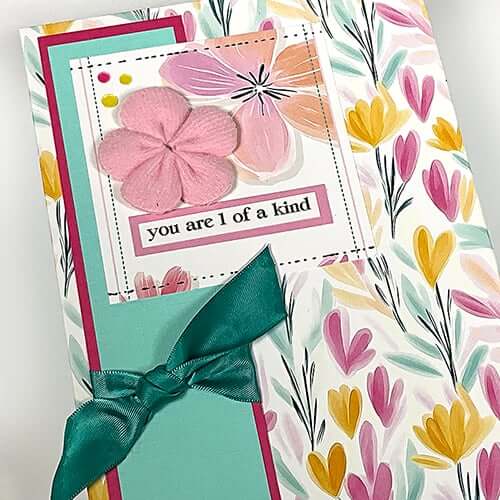
Center a Felt Flower (Happy Life 01.25) onto the printed square on each card. Add a sentiment.
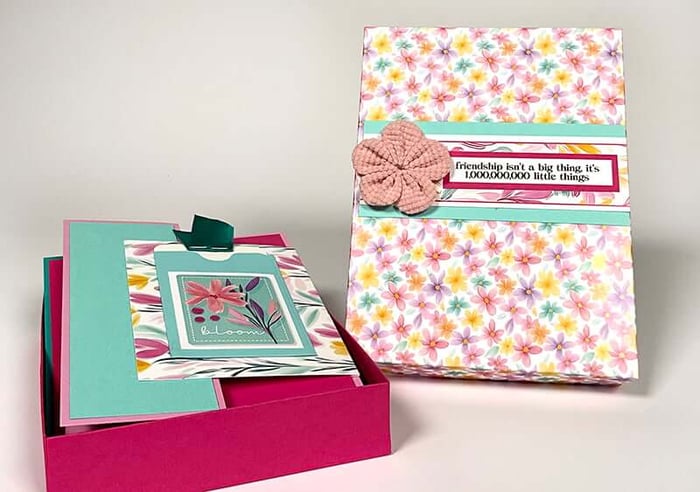
Card Boxes
As mentioned above, you'll have four 12x12 sheets left over creating the Tiny Blossoms cards: One each of the Small Flower Print, Large Flower Print, Dk. Pink and Seafoam. It's easy to create two gifts when you transform these papers into card boxes.
A6 Box
Gather:
Happy Life (01.25) Card Kit Instructions
12x12 Dk. Pink (Base—Step 3)
12x12 Small Flower Print (Lid—Step 4)
- Using the paper assignments above, follow the trimming and scoring instructions for Steps 3 and 4 in the Happy Life Card Kit instructions on Pages 1 and 2.
- Follow the assembly instructions on Page 6 to create the box.
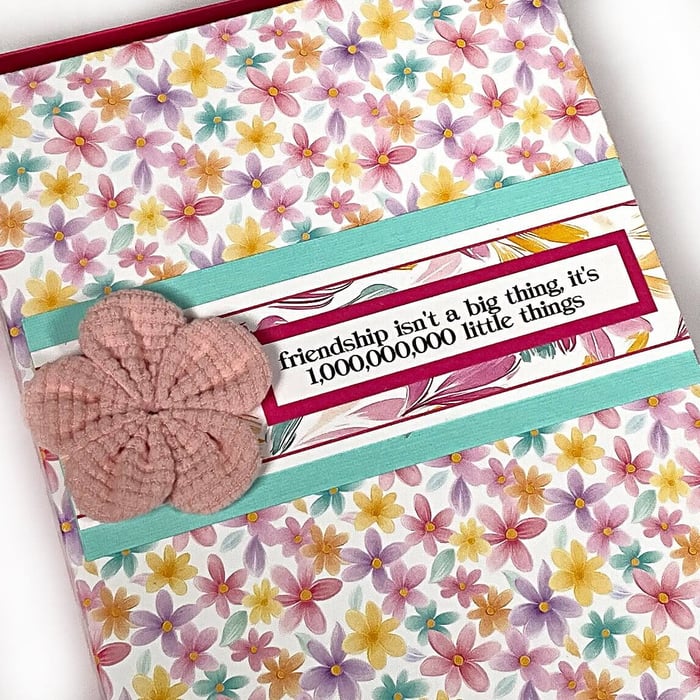
Once the box is fully assembled, trim a printed cutpart border strip and Seafoam scrap to fit the of the box. Nest a sentiment onto a Dk. Pink scrap and adhere it to the strip. Attach a Fabric Flower with Bookbinding Glue. Fill with four Tiny Blossoms A6 cards and envelopes.
A7 Box
Gather:
Abundance (09.24) Card Kit Instructions
12x12 Seafoam (Base—Step 3)
12x12 Large Flower Print (Lid—Step 4)
- Using the paper assignments above, follow the trimming and scoring instructions for Steps 3 and 4 in the Abundance Card Kit instructions on Pages 1 and 2.
- Follow the box assembly instructions on Page 3.
Once the box is fully assembled, cut a Seafoam scrap and Dk. Pink mat to fit the length of the lid. Tie with Teal Ribbon. Add the 3.5" square "picture perfect" cutapart. Cover the words with a matted sentiment. Embellish with a Fabric Flower and a few confetti sequins.

I hope my cards inspire you to look at our special release page kits in a whole new way. Create fourteen cards and two gift boxes from a single page kit? Take my money now!
We invite you to share your finished artwork on our Facebook Chat Group. Not a member of the group yet? Simply answer a few questions and we'll get your request processed in no time!

Shop the items needed to complete these cards at the links below, while supplies last.
Tiny Blossoms Page Kit
$35.95
Kit includes all of the supplies needed to complete eight fully-embellished 12x12 scrapbook pages. Just add a trimmer, scissors and adhesive. Instructions download and video tutorial included. Includes: (4) 12x12 Prints: 2 ea. Large Floral Print, Small Floral Print(3) 12x12… Read More
A2 Envelopes - 25 pk

$6.61
25-pack of A2 Envelopes in Bright White or Ivory. Each measures 4-3/8 x 5-3/4". … Read More