
Today's release of the Navigation Remix is the first of many collections and projects designed for our recent 20th Anniversary Cruise. We adored the collection when it originally released in December of 2015, and we love the remix even more!

Remember, this collection is a special release and will not ship automatically. (Instructions for assembly will be found on the packing list and a link will be sent via email after purchase.)


The kit is jam packed with fabulous goodies that doubled for a project we completed on the cruise. (More on that later . . . )
For now, let's take a peek at the eight pages you can make by following the assembly instructions.
Layouts 1 & 2

I love the word strips provided on the cutaparts. Use scissors to trim each individual word, ink the edges and attach anywhere on a layout, graffiti style. Timesaving tip: Trim the words into a very narrow strip first, and ink the top and bottom of the entire strip. Then, separate each word and simply ink the short edges.

The cutapart sheet also includes several "tags." Use a grid ruler and craft knife to clip off the angled corners. Staple a piece of folded ribbon to the top of the tag.

Layouts 3 & 4

Increase the real estate of a layout with the adorable envelopes included in the collection. Staple folded ribbon to the right edge of a photo mat, and slide the mat into the envelope. When using a page protector, make a slit in the protector and keep the ribbon on the outside of the plastic.

Thread the jute fiber onto a tapestry needle and sew onto a printed wood button by entering from front to back. Tie the thread tails into a sweet little bow.

Layouts 5 & 6

Create an eye catching assembly with a round passport stamp sticker nested with a bow-tied wood button. Make a small loop of gold ribbon and tape to the back of the journaling prompt. Finish with an inked-edge word cutapart.

The print used on this layout is torn at an angle with the help of a grid ruler. To create contrast between the print and the base paper, wrap wine cotton ribbon along the torn edge.

Layouts 7 & 8

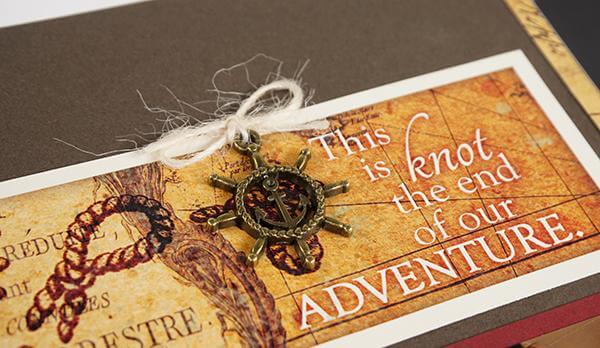
Top the anchor/wheel charm with a jute bow and add to the fun cutapart.

Create visual interest in the lower right corner of layout eight with an assortment of cutaparts, a word tile, envelope, jute-topped charm, and a beautiful bow.

Visit Karen's blog to see how she finished her pages with photos and journaling.
Pick up your Navigation Remix Page Kit today, and visit the blog tomorrow to learn more about the brand new Navigation Card Kit which makes twelve beautiful cards from eleven sheets of 12x12" paper!
Tricia