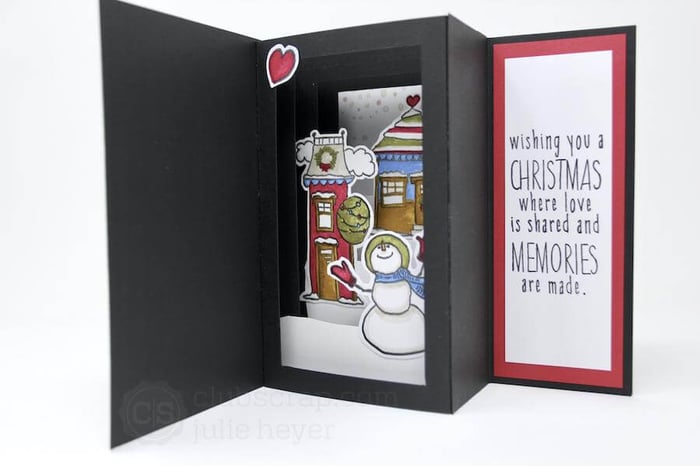

Create a storybook tunnel card with incredible depth and dimension featuring the Christmas in the Neighborhood collection. I found this adorable fun fold idea on Pinterest and couldn't wait to give it a try.

Storybook Tunnel Card assembly
Gather four 4.25x5.5 black panels scored vertically at .5 and 3.75, one 4.25x5.5 black panel scored vertically at 2.25, and one 5.5x11 black card base scored horizontally at 5.5".

Remove rectangular windows from each of the 4.25x5.5" black panels with a craft knife and grid ruler. The largest window measures 2.5x4.75" and then decreases in size by 1/8" for the remaining windows. Note: The original tutorial utilized nesting dies to achieve the tunnel effect.


Open the card base and adhere a 3x5" print panel to the card base aligned 1/4" to the right of the score line.

Add Bookbinding Glue dispensed form a Needle-tipped Applicator to the left .5" scored tab on the smallest window panel. Note: Be sure to apply glue to the front of the panel with the bumps of the scores facing down.

Align the outside of the tab directly next to (not not covering) the scored line on the card base.

Repeat the process for the remaining window panels.

Lay the card base flat, exposing the free tabs on the right side of each of the window panels.

Adhere Scor-Tape strips to these tabs and remove the paper backing.


Cover the tape with the left 2" scored area of the remaining black panel. Adhere the 2.25" side of the panel flush with the edge of the card base.


Stamped Embellishments
Stamp the Christmas In The Neighborhood snowman and two homes onto Super Smooth White Coverstock in Ash Hybrid Ink with a stamping platform. Tip: Keep the stamps attached to the platform for later use.

Color the images with markers.

Place the paper with the colored images back onto the stamping platform. Ink the stamps again, but this time with black India Ink.

Stamp over the colored images to make all the details pop!

Free hand cut scraps from the white coverstock into snowy hillsides. Stamp sentiments for the front and inside panels of the card.

Fussy cut the snowman, houses and the small heart. Adhere the layered scene elements onto alternating sides of the tunnel walls with Bookbinding Glue.

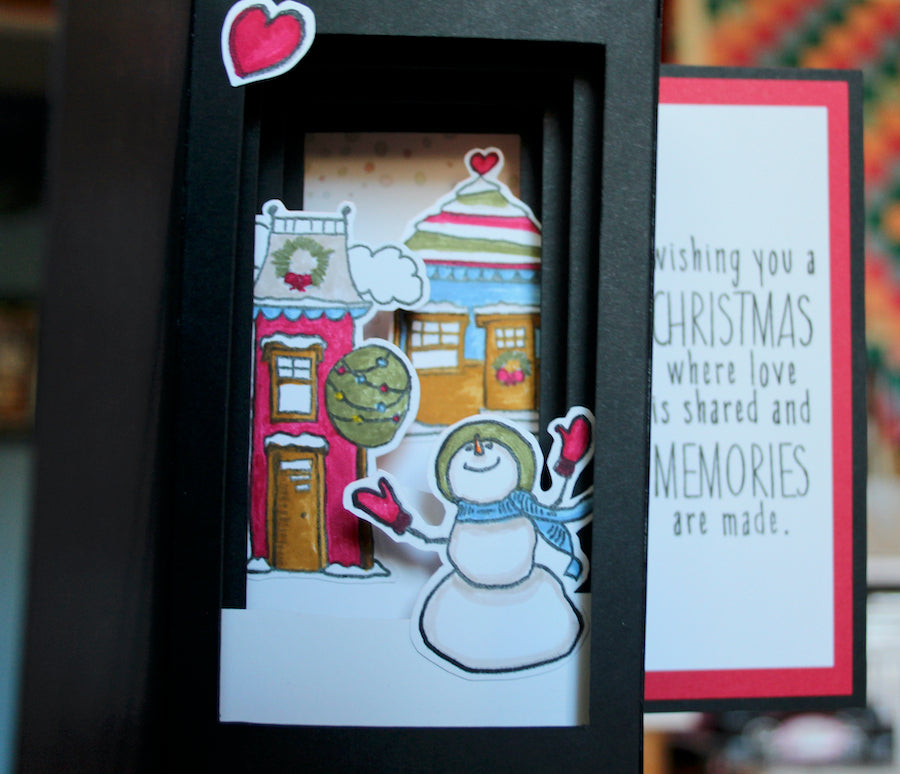
Let's take a look at the completed card.

I love how this square card folds flat for mailing. Remember, bulky cards more than 1/8" thick will require a bit more postage. I plan on including this card in a package mailed to my folks for Christmas.

I hope you will give this fun card structure a try. Once you have made one, you will certainly want to create more. Enjoy this crafty holiday season!
Julie