
Let's take a closer look at the layouts we created with the Steamworks Page Kit.

I had a ball filming the assembly video because it gave me an opportunity to share a lot of extra tips. I began by sorting the photo mats and papers, then did the trimming and filing, and finished by dry fitting the elements on the base papers from layout eight to layout one. If you create the pages with me, press pause as needed!
Members, you'll find the video link included in the email sent on your kit's shipping day . . .

Read on for additional page details . . .
Steamworks Page Kit
LAYOUTS 1 & 2

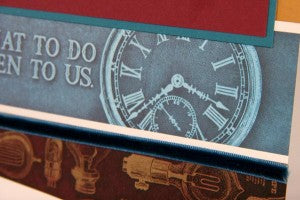
Apply a thin line of bookbinding glue to the bottom edge of the printed border strip and add the velvet ribbon. Trim the edges of the ribbon rather than wrapping the ends around to the back, which creates excessive bulk.
Nest the cutapart onto a Teal panel and partially slide into an adorable miniature vintage envelope. (Styles may vary.)

LAYOUTS 3 & 4

Nest the page title onto a Brick strip and trim horizontally at 6.5". (The cut will occur between the words "the" and "new." Spread the two pieces between the gutter of the left and right page. Cover the left and right edges of the strip with a trimmed cutapart attached with foam adhesive circles.

Decorate the 12x12 Ivory Plain paper used for the right base of the layout with the Gear Stencil and Earth Ink.

LAYOUTS 5 & 6

Trim the cutapart with detail scissors, but don't get too caught up in cutting around every nook and cranny. Apply Earth ink to the perimeter with an ink applicator to give it a warm, finished look.

Tie a simple knot in the metallic gold ribbon, trim the ends, and adhere to the oval-shaped cutapart. Finish with a few brass gear charms.

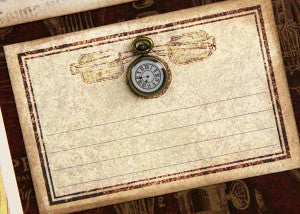
Overlay the miniature pocket watch charm to the place marker on the Ivory cutapart.
LAYOUTS 7 & 8

After using most of the velvet ribbon on the first two pages, tie the last bit around the brass key and nest onto the Ivory cutapart. Mat with Teal and tuck onto the border strip on the upper left corner of the layout.

Have an inventive month!
Tricia