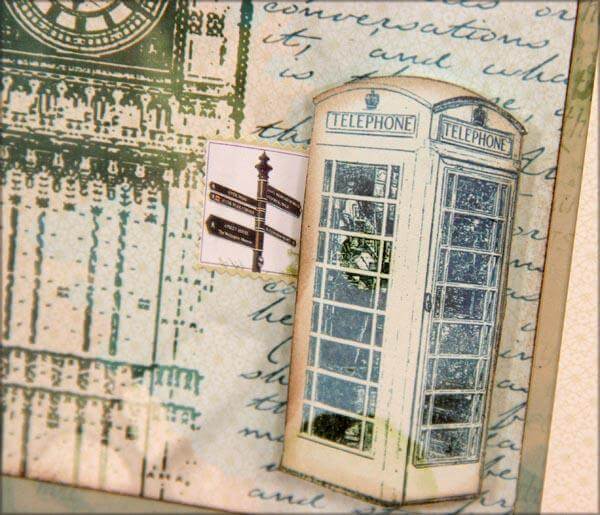
The long, vertical shape of the London Calling Lite Phone Booth Masking Stencil is perfect for both a scrapbook page and a business envelope-sized greeting card. The shape of the phone booth door "called to me" to create a hidden greeting on this card panel.

Here are the steps to make the card:
1. Trim paper to 7-3/4x8-1/2" and fold in half to create a 3-3/4x8-1/2" card base. Cut 3-1/2x8-1/4 and 3-3/8x8-1/8" panels.
2. Stencil the phone booth image onto the smallest panel. TIP: Blue painter's tape can be used to help hold the stencil in place. Use Foam Applicators to apply Sapphire Ink in window areas, and Earth Ink for the remaining areas.


3. Rubber stamp over the mask with the UM Art Nouveau script image.


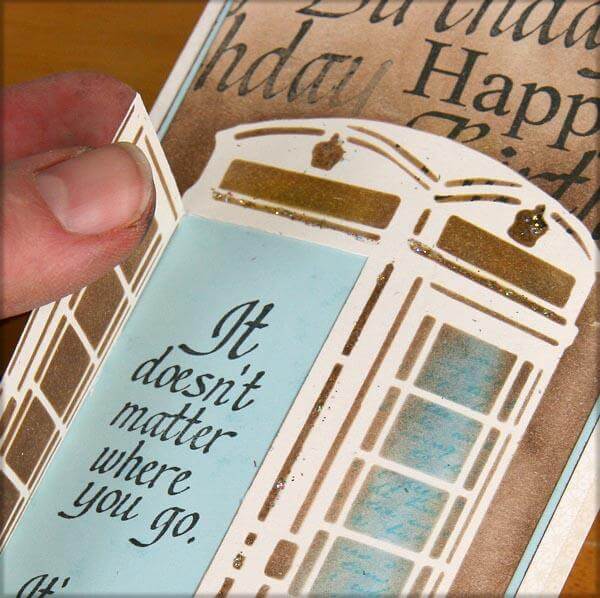
4. Use a grid ruler and bone folder to score along the left edge of the door.

5. Cut along the right, top and bottom edges of the left door with a sharp craft knife and ruler.

6. Bend the door open on the score.

7. Temporarily center the art panel on top of the nesting matte and mark the location of the door opening with a pencil.

8. Stamp the sentiment (Collection UM) onto the panel within the pencil marks and erase.


9. Adhere the art panel to the matte and card base.


This technique would also be cute on a scrapbook page to reveal a photo or journaling within the door. That may have to be my next project!
Kay