
The stunning artwork on the Fairytale Stamps provides everything needed to create beautiful cards and projects!

Fairytale Stamps
Take a peek at the first cards created made with this set and just a few basic supplies . . .
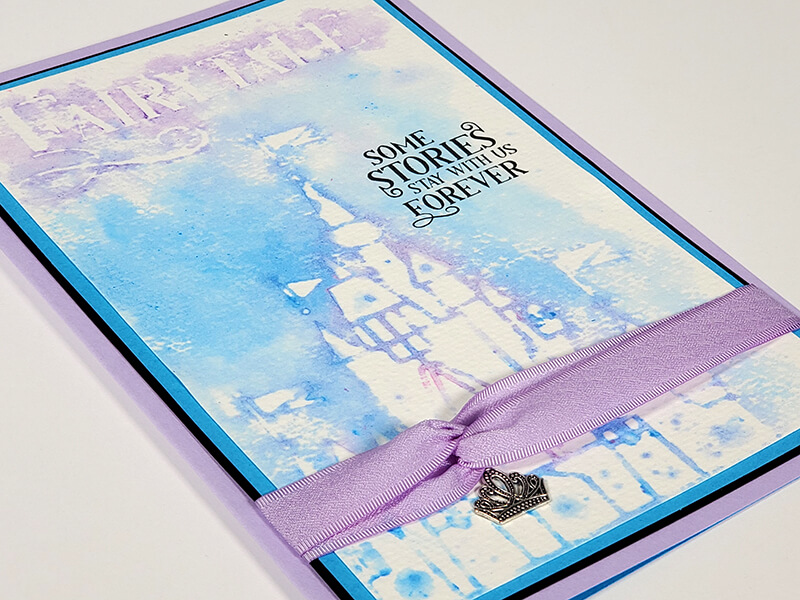
Card 1
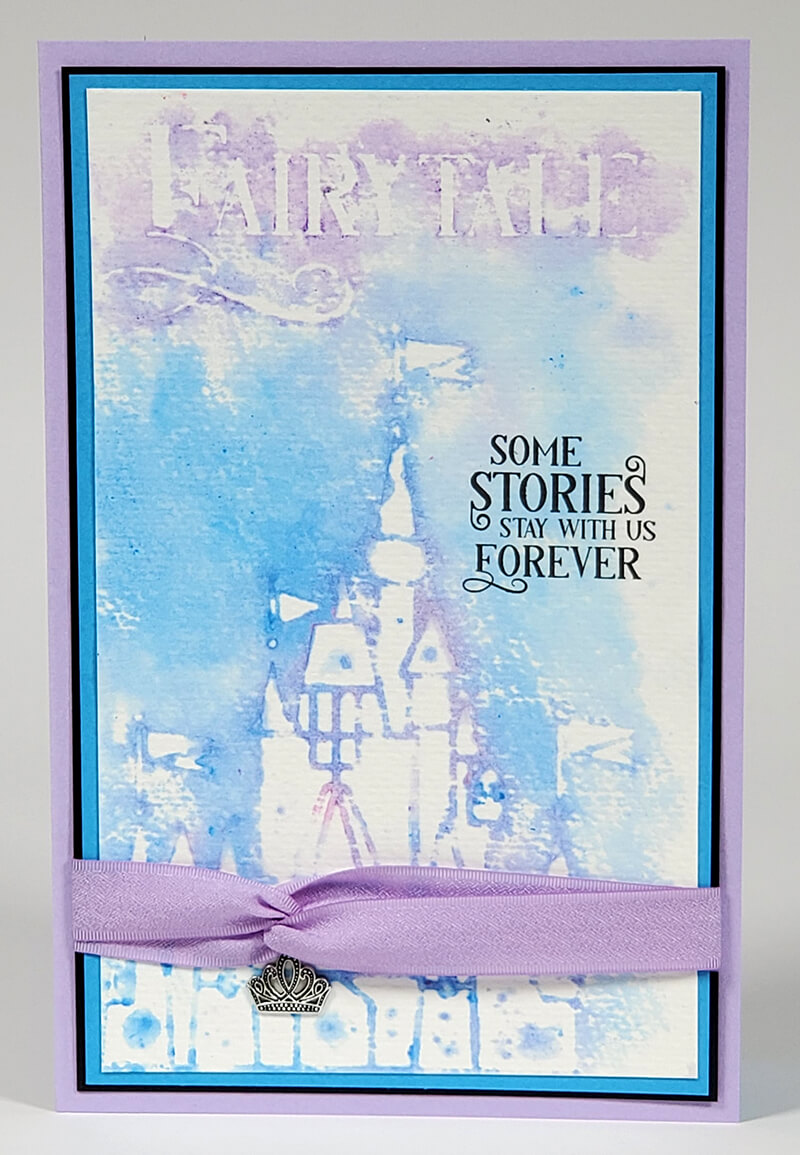
This card features such a wonderful sentiment! It's perfect for birthdays, anniversaries, weddings, grads, etc. Combine with any image from the sheet, or pair it with the bonus castle stencil we've designed to coordinate with the collection. To create this card, mist the stencil with water and color the surface with watercolor crayons. Press a 5.5x8.5" sheet of watercolor paper or heavy card stock directly onto the stencil to transfer the color and art to the paper. Allow it to air dry completely or heat set to speed the process. Stamp the sentiment, crop and nest the art panel, wrap with ribbon, and layer onto a 5.5x8.5" folded card base. Finish with a silver tiara charm.
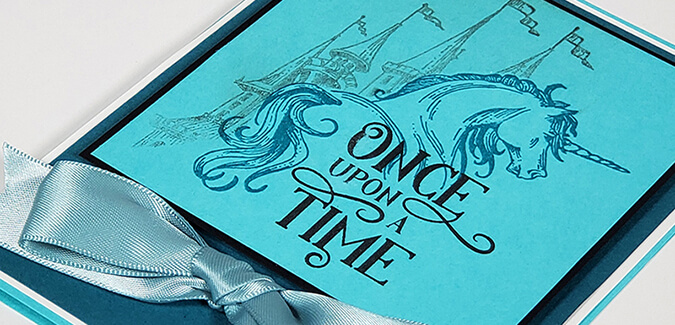
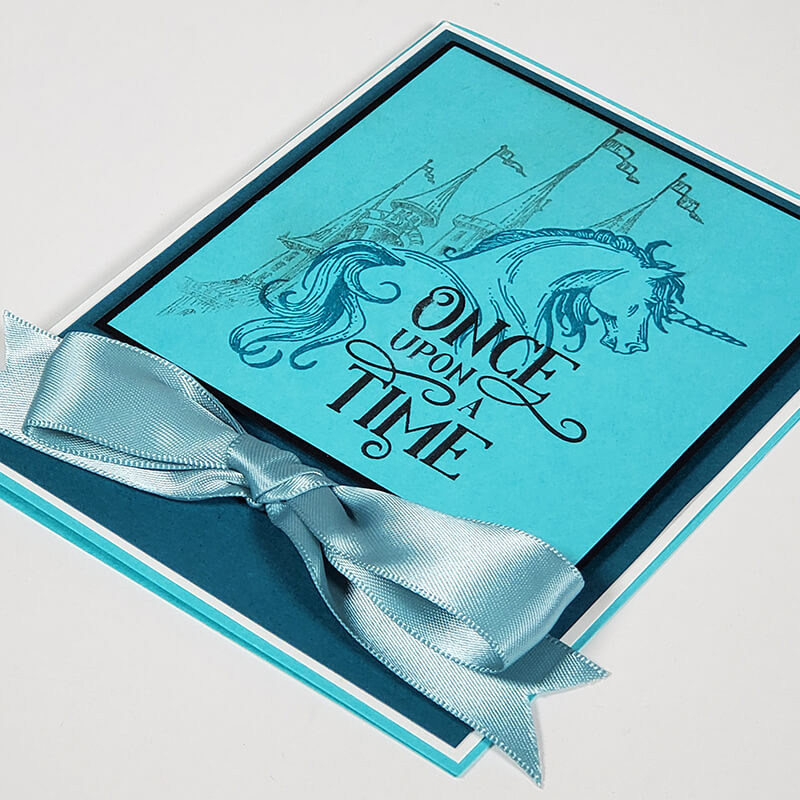
Card 2
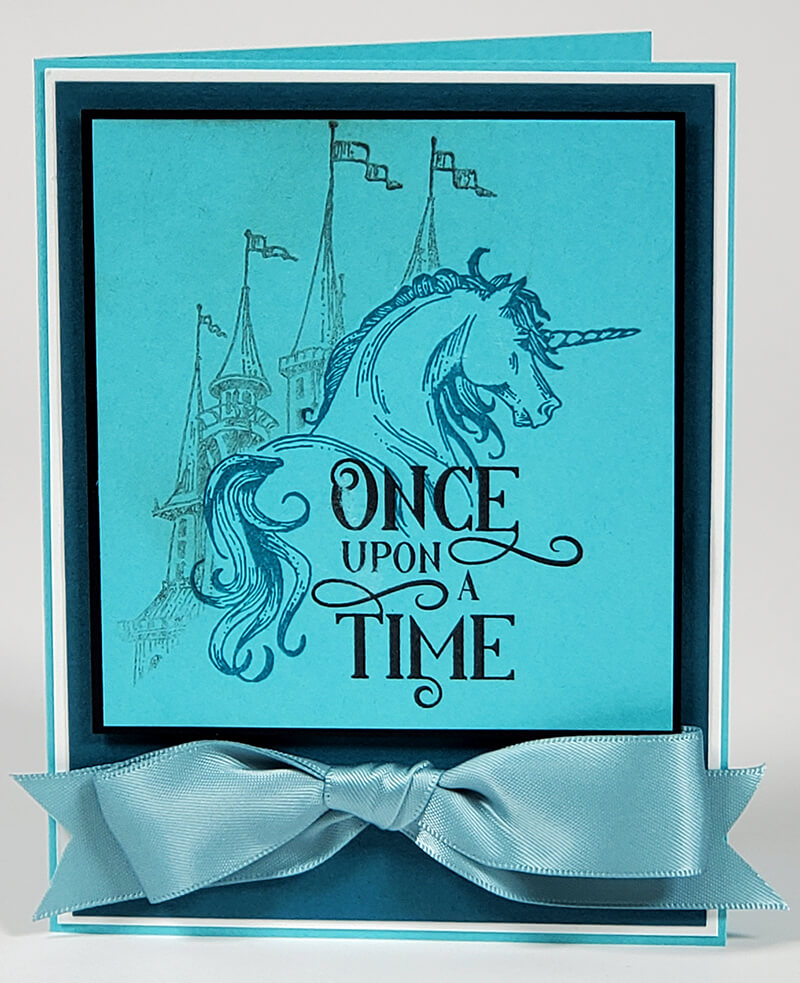
This card features a simple masking technique. Stamp the unicorn image onto an Aqua panel with Ocean ink. Stamp a second time onto a piece of scrap or masking paper, and cut around the image. Temporarily place the mask over the unicorn, and stamp the castle image onto the panel with Ash ink. Remove the mask and add the sentiment with black ink. Crop and nest onto Turquoise and White panels and layer onto a folded card base. Tie a bow from satin ribbon and adhere to the card. (See my ribbon basics video to learn how to make the perfect bow!)
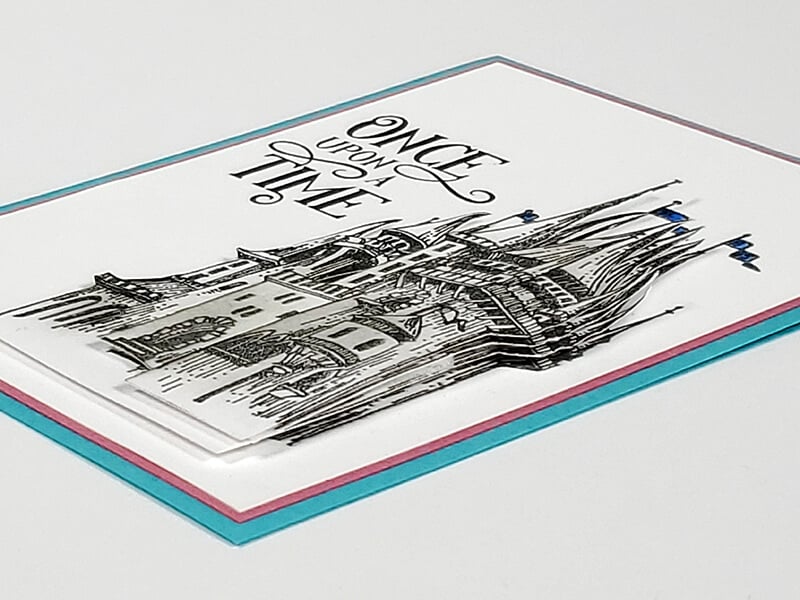
Card 3
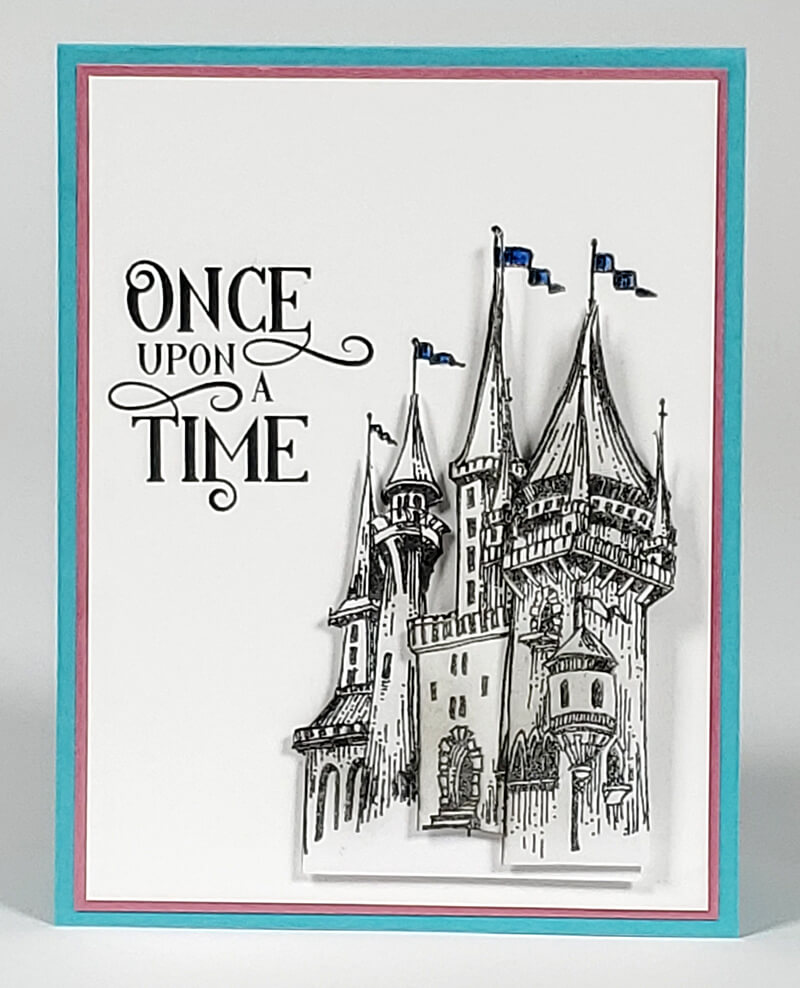
Admittedly, this is my favorite, and also the quickest card to come together in my first play session with the Fairytale images! Simply stamp the castle image onto white paper four times with black ink. Fussy cut portions of the castle in smaller and smaller sizes. Don't worry about the flag poles/flags on the trimmed images. Stamp the full castle image and sentiment onto a white card panel with black ink and layer the prepared image portions in place with foam adhesive. Add the sentiment and layer onto a Pink panel and folded Aqua card base.
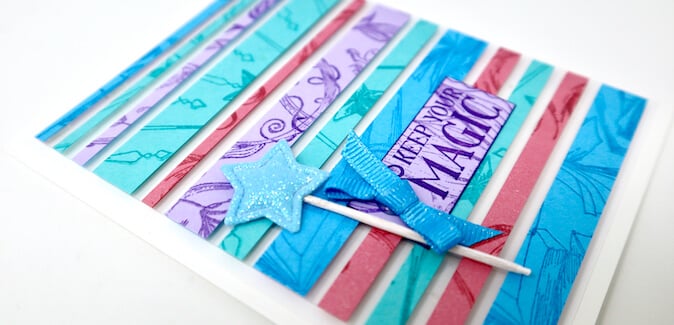
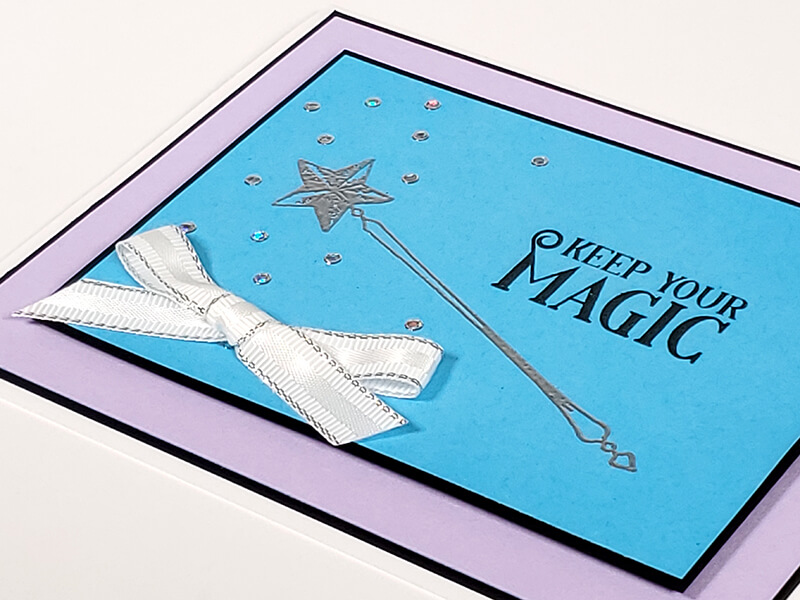
Card 4
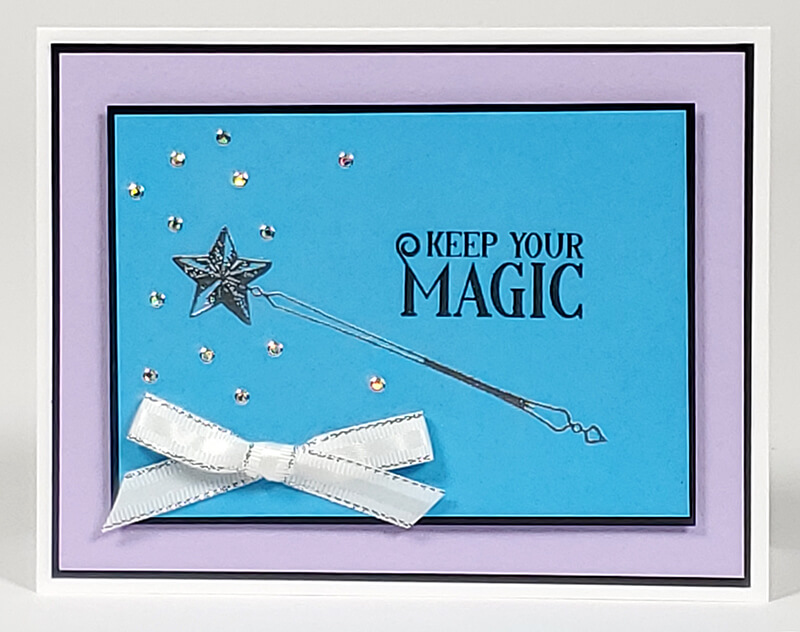
To re-create this simple card, simply stamp and emboss the wand image on Blue duplex paper with silver embossing powder, and stamp the sentiment with black ink. Nest each panel with black and layer onto a white folded card base. Form a basic bow with ribbon and adhere to the card. Finish with silver jewel Dazzles stickers.
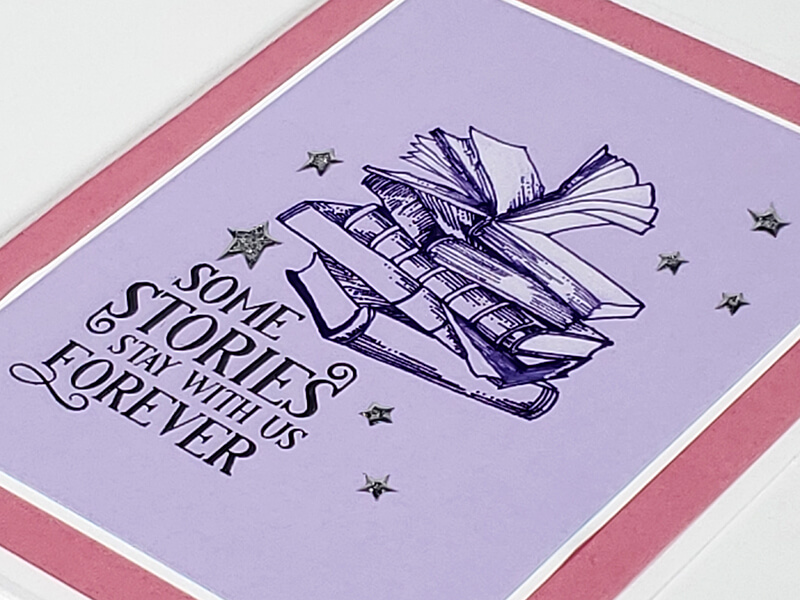
Card 5
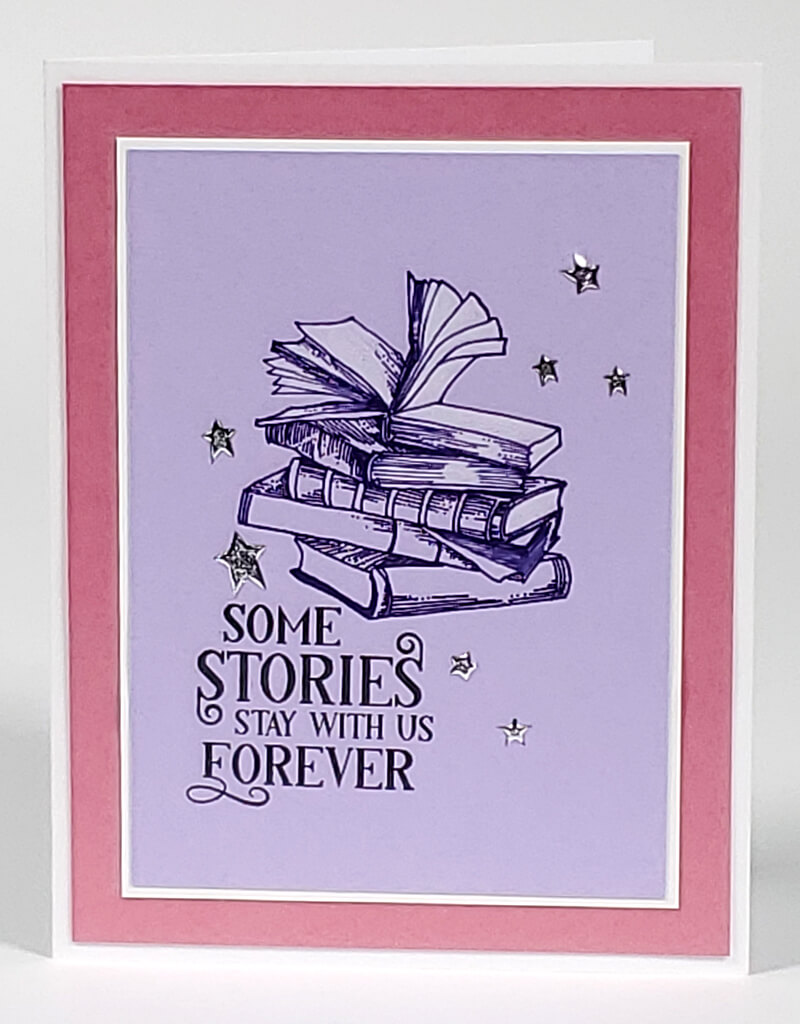
There is one crafty item that makes a huge difference on this simple card. Stamp the stack of books with Amethyst ink onto Purple Duplex paper. Color the pages of the books with a white colored pencil. Add a sentiment and star Dazzles stickers, nest onto several layered panels and add to a white folded card base.
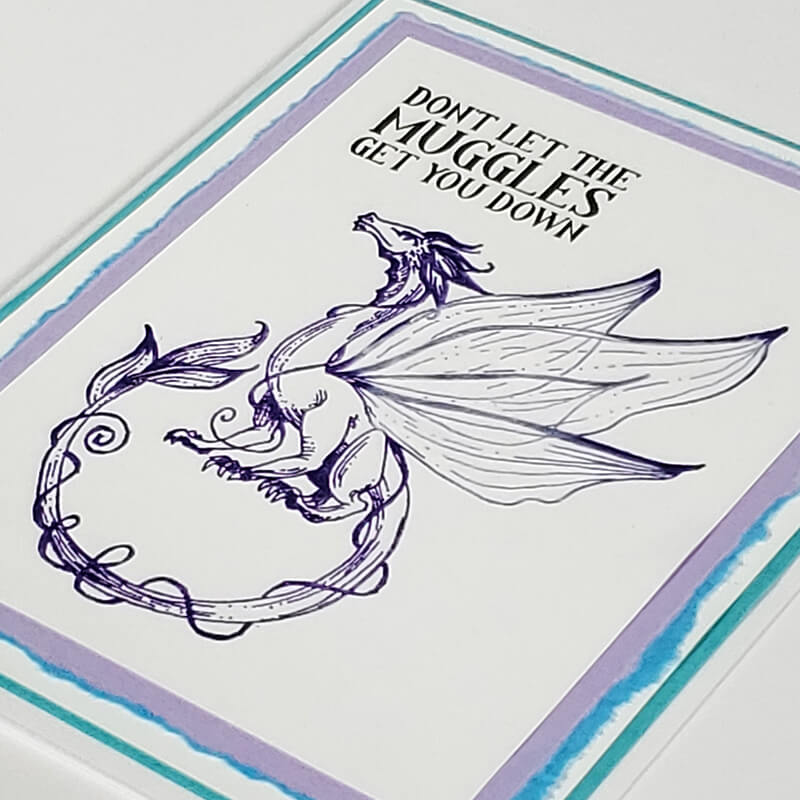
Card 6
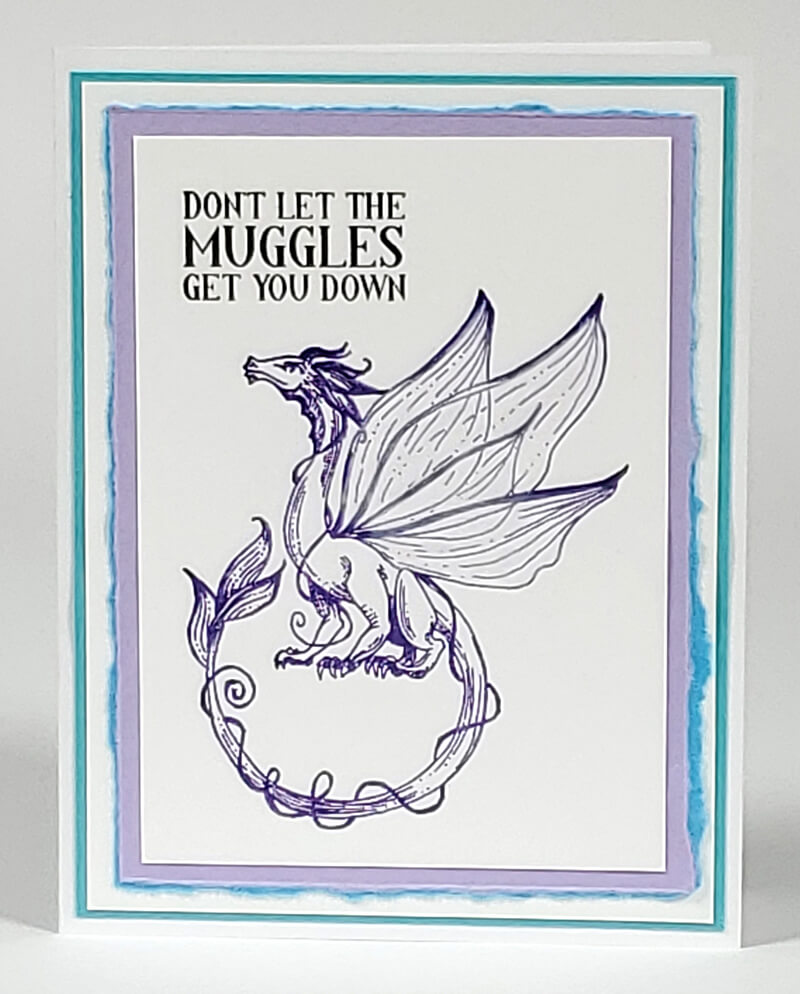
Stamp the dragon image onto a white panel with Amethyst ink and add sparkle to the wings with a Wink of Stella pen. Stamp the sentiment and nest onto a panel of Duplex paper with torn outside edges to reveal both colors of the layered paper.
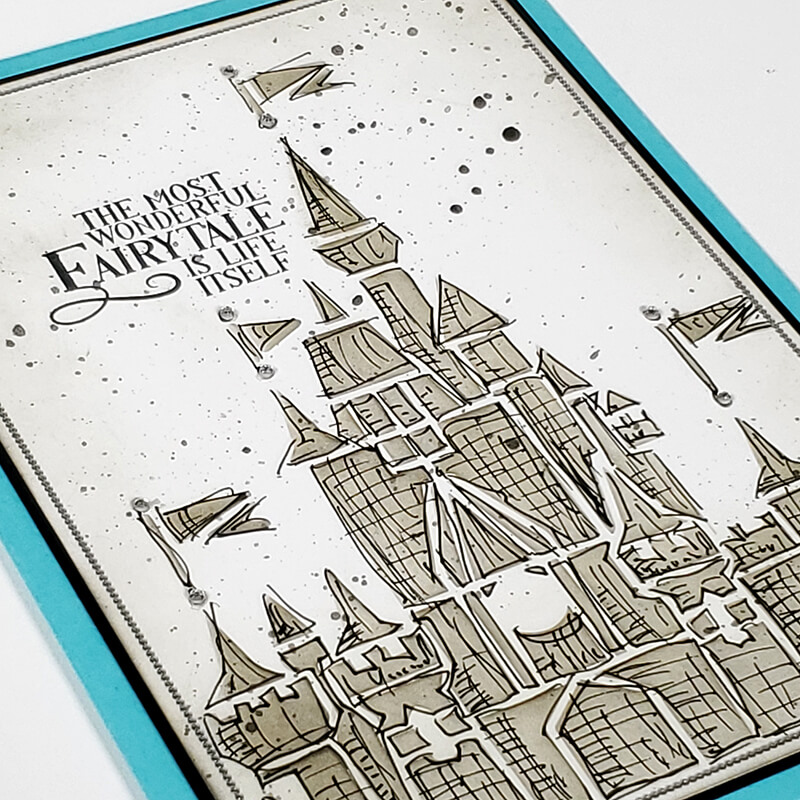
Card 7
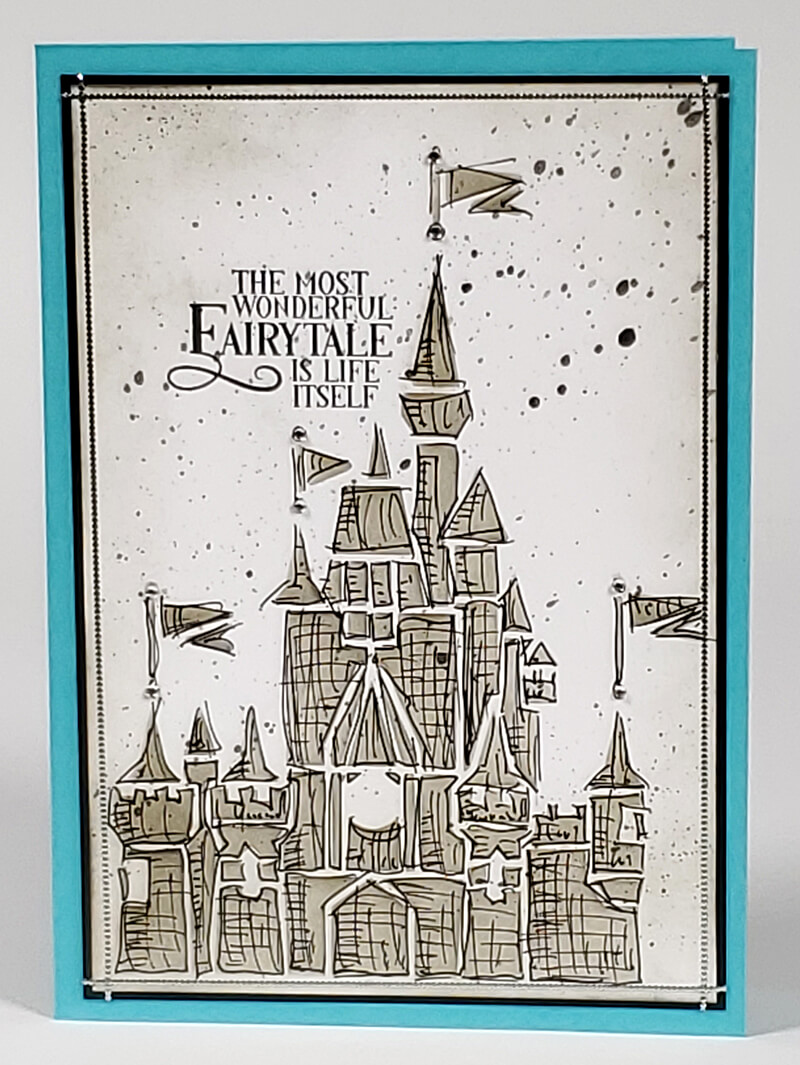
Channel your inner "messy sketchy" with this fun stenciled card. Simply stencil the castle onto a white card panel with Ash ink. Outline each stenciled shape with a black fine-tip pen, and add messy hash marks to fill in the shapes. (This works best when done quickly and with little care!) Add a stamped sentiment and splatter the card with black watercolor splotches. Nest onto a black panel and wrap the outside perimeter with silver thin line Dazzles (Geodes 10/20). Layer onto a 5x7" Aqua folded card base.
What are your plans for the Fairytale stamps? Watch the conversation on the Club Scrap Chat group on Facebook to see what your fellow members are creating, and don't forget to share your projects!
I look forward to seeing your stamped stories . . .
Tricia