
Create a lovely, soft textured background for any card with embossed vellum and your favorite set of brush tipped markers.

I was lucky enough to receive some papers from the vintage 2001 Sunken Treasure kit and have been hoarding saving them for just the right time. Among the papers were several sheets of vellum in green, teal, and a white print. Thanks to Loree Karan's new Past and Present Challenge on the Club Scrap Forum I now have the perfect excuse to work with them.

Steps to Create the Card
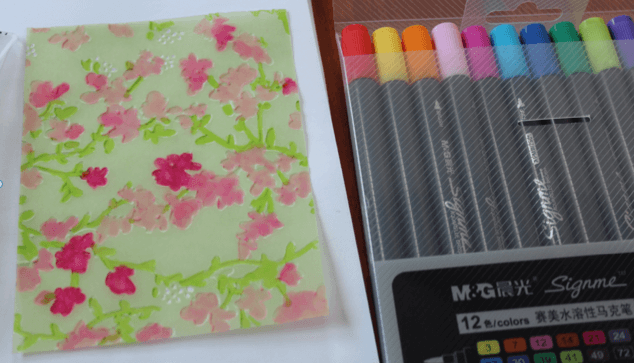
Dry emboss the Sunken Treasure green vellum with the Sizzix Texture Fades Floral folder.

Add color to the back (de-bossed side) of the panel with Aquarelle Brush set markers in Lt. Pink, Fuschia and Lt. Green.

Flip the panel and adhere to a folded 5.5x8.5" Sunken Treasure White card base.

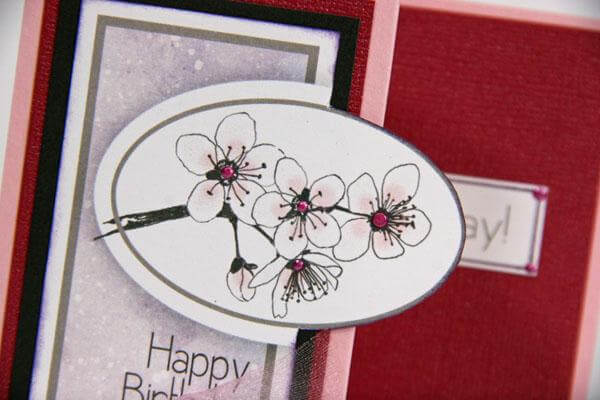
Embellish with punched flowers, sequins, and the beautiful satin ribbon included in the Cherry Blossoms fiber pack.

Add details with Aquarelle Fuschia fine tip marker lines radiating from the middle of each flower. Complete the look with black dots made with a fine-tipped journaling pen. Attach the sequins to the centers with Bookbinding Glue dispensed from a Needle-tipped Applicator.

Stamp the Jumbo UM sentiment onto a Cherry Blossoms Pink panel with Permanent Jet Black Ink. Stamp the single blossom with a second generation technique to create a lighter image.

There are so many wonderful challenges every month on the Club Scrap Forum. Please visit us and join the fun.
 Julie
Julie