
Create more scrapbook pages when you pair the June Bonus Formula with paper and embellishments from your stash. Make the layout even more special by creating a DIY "print" with a variety of stamps. I've challenged myself to find items in my stash that mimic the current paper collection, in this case Nantucket.
DIY Print Tutorial
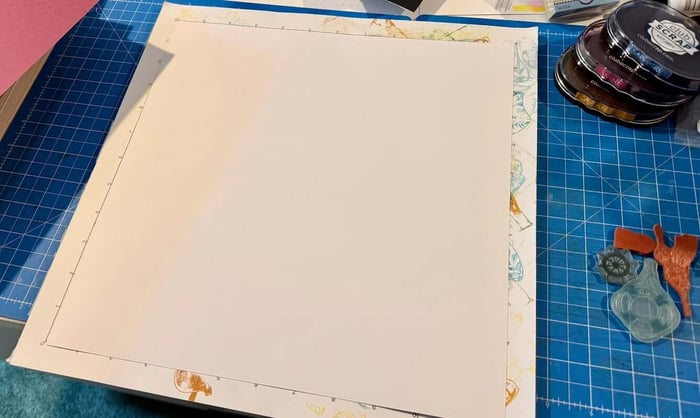
Place a 12x12 White onto a padded work surface. (I use my Club Scrap grid paper pad.)
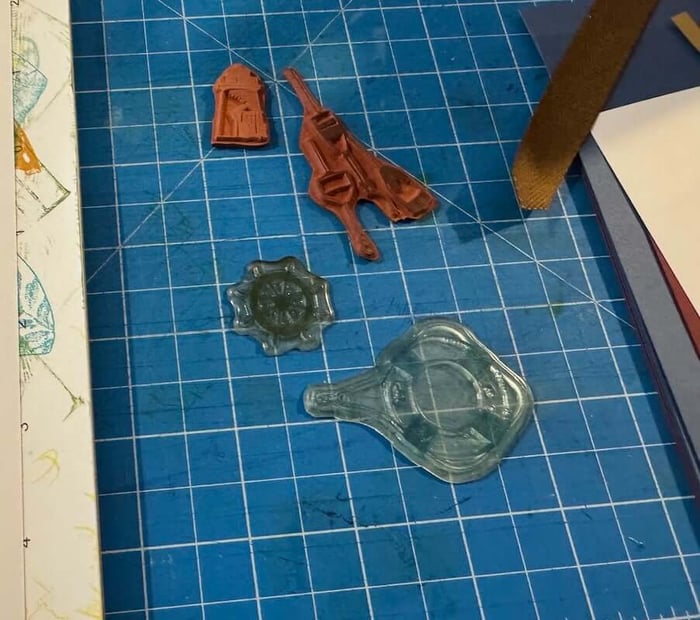
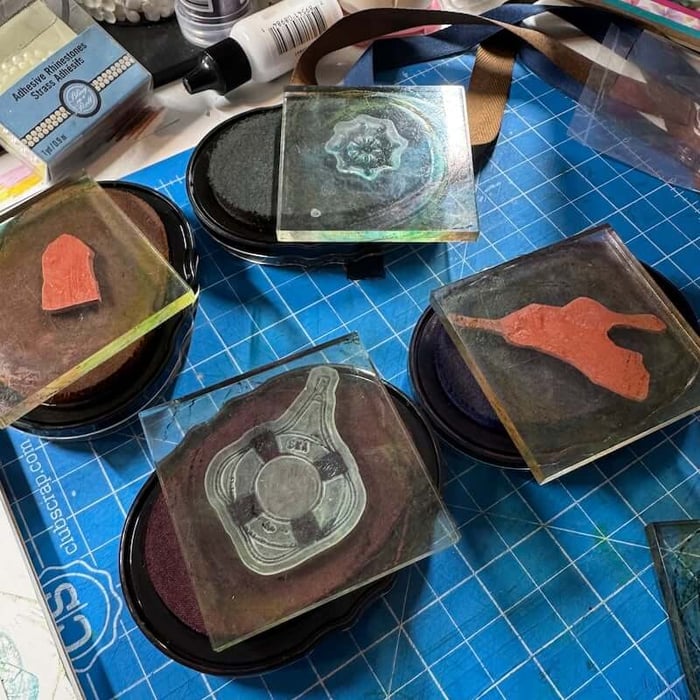
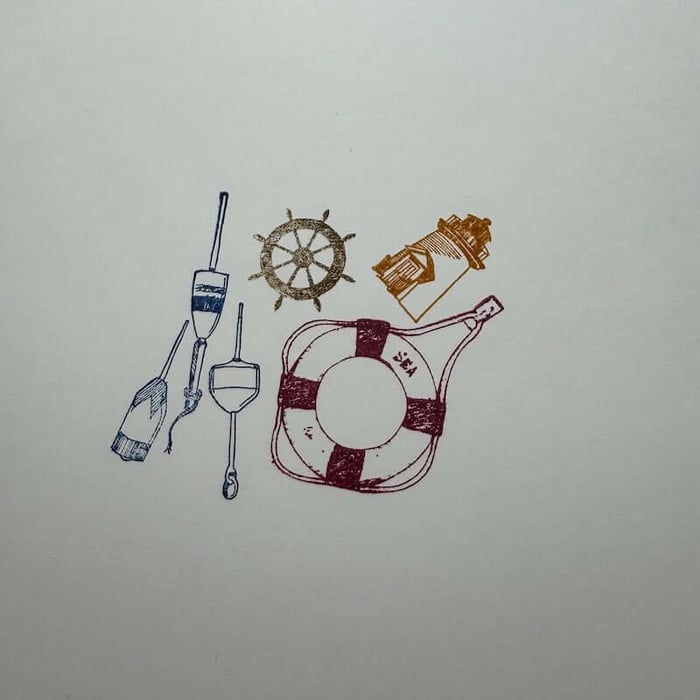
Select nautical themed stamp images including a lighthouse and buoys (Cape Cod 05.13) and ship's wheel and life preserver (Coastal 07.23).
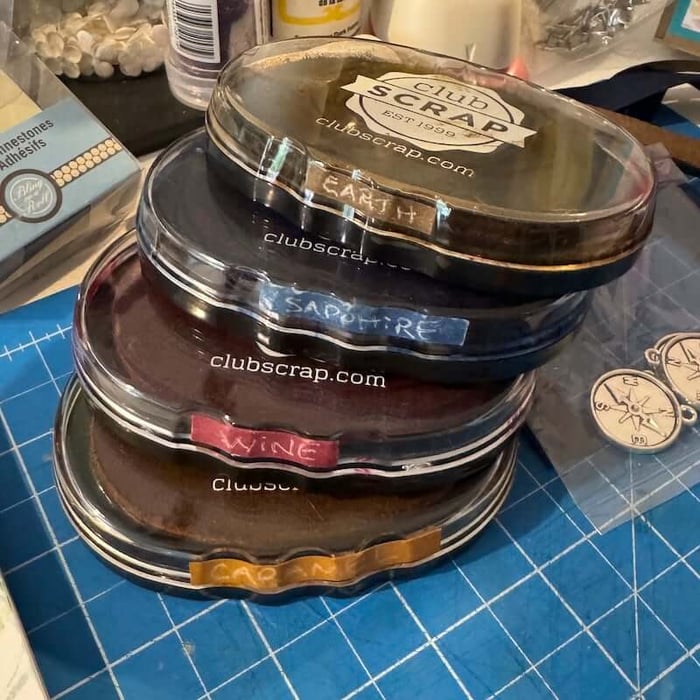
A Club Scrap Ink color swatch helps me find the perfect ink color to coordinate with the chosen papers; in this case, Earth, Sapphire, Wine and Caramel CS® Hybrid inks.
Mount each image on it's own clear acrylic block. Designate an ink color to each stamp image. (I find it helpful to rest them on the ink pad between impressions.)
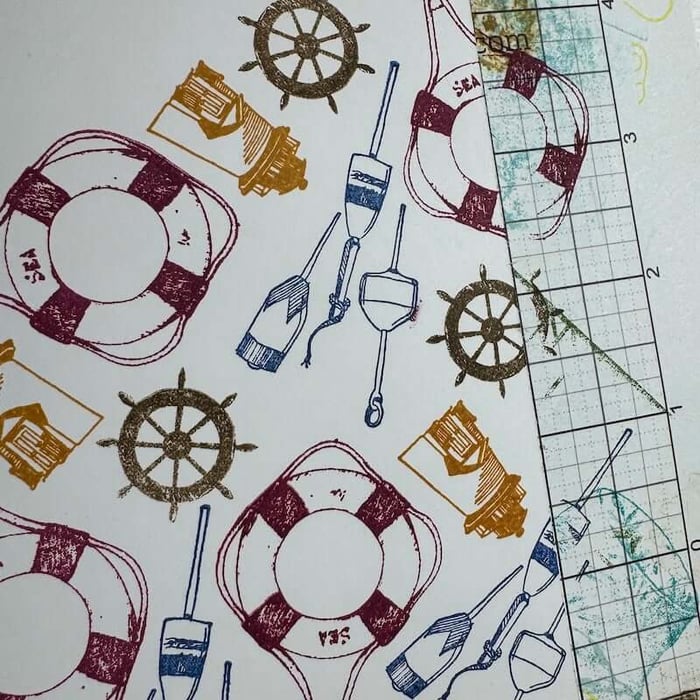
Stamp the images, one at a time, onto the White paper. I find it helpful to begin in the center of the sheet.
Continue to fill the paper with images. Remember to allow the stamped images to "fall off" the edges of the paper to mimic the look of real printed paper.
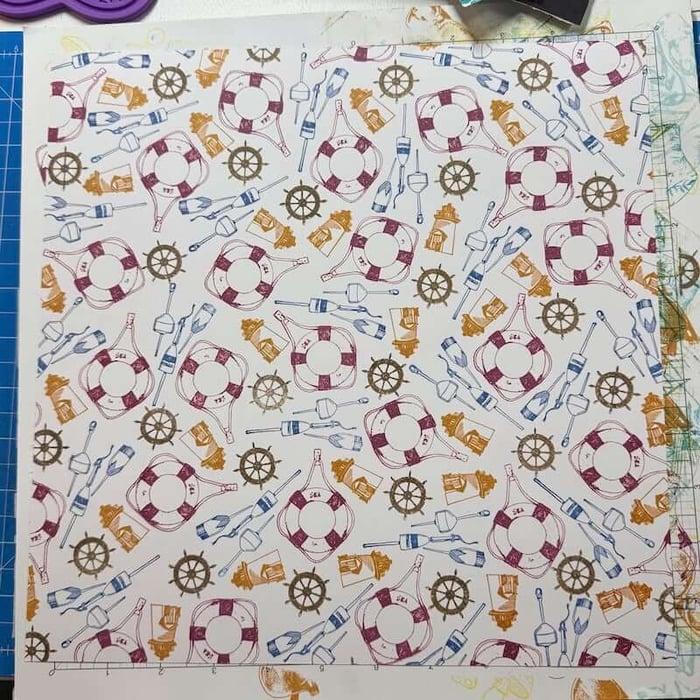
Continue adding images until the paper is full.
Create the Layout
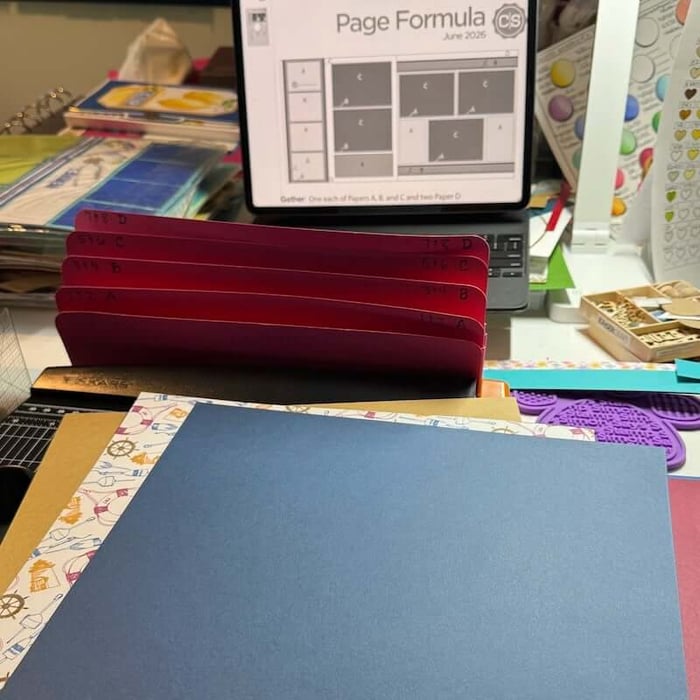
Choose a Page Formula
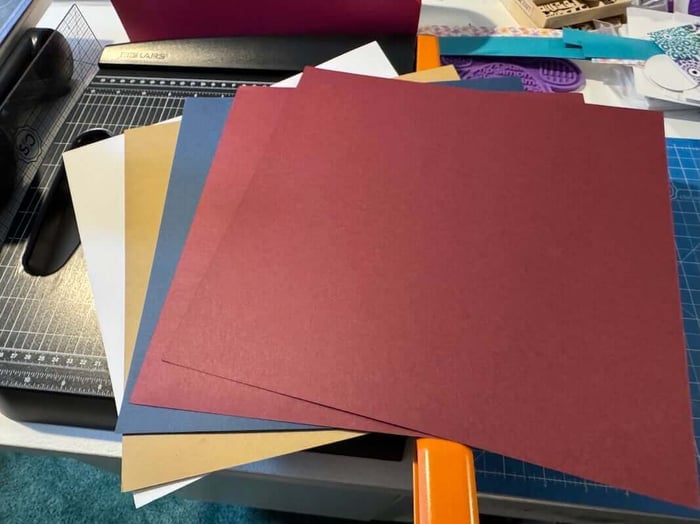
Gather 12x12" plain papers from your stash as indicated in the June Bonus Formula. I chose papers that are similar to the Nantucket color palette.
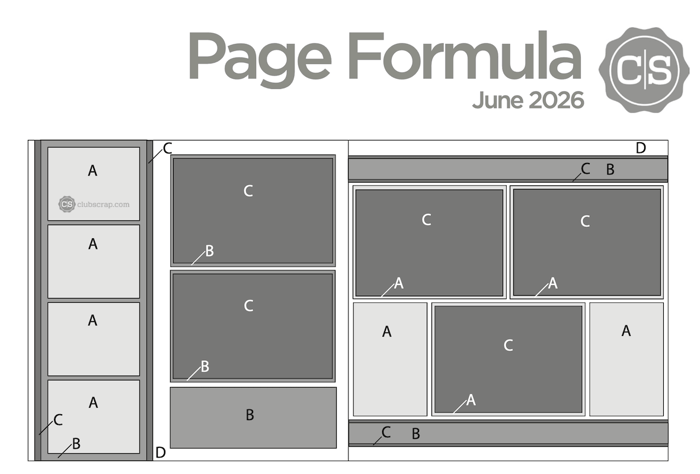
To recreate my layout, utilize the following paper assignments:
- Wanderer Kraft (Paper A)
- White DIY Print (Paper B)
- Western Navy (Paper C)
- (2) Western Red (Paper D)
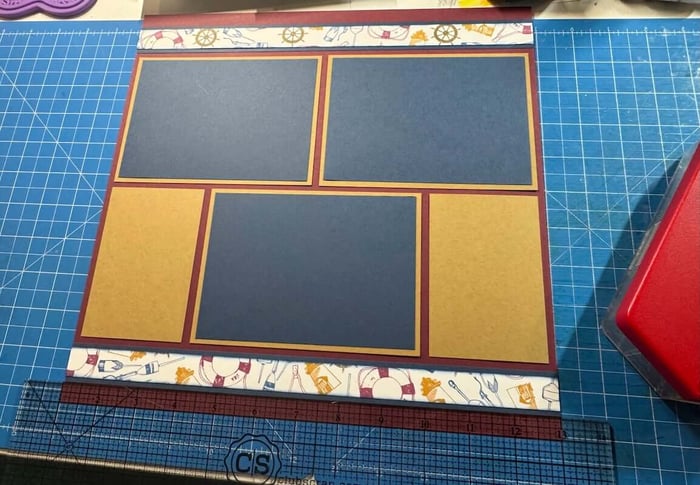
Trimming and Assembly
Sort the 12x12" papers: Wanderer Kraft (Paper A), White DIY Print (Paper B), Western Navy (Paper C) ; cut the paper with a trimmer* according to the formula's instructions and sort the pieces.
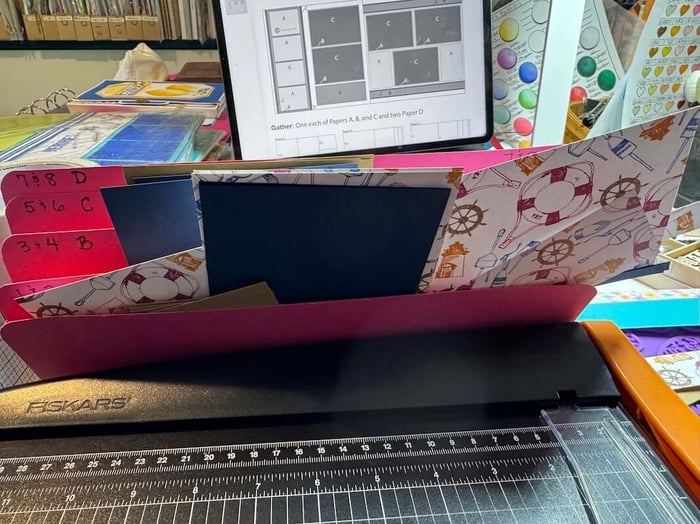
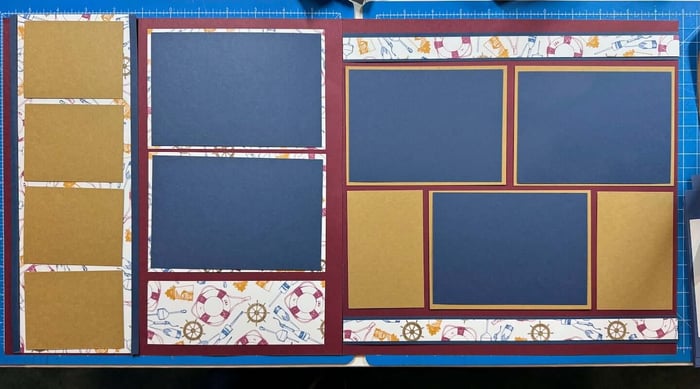
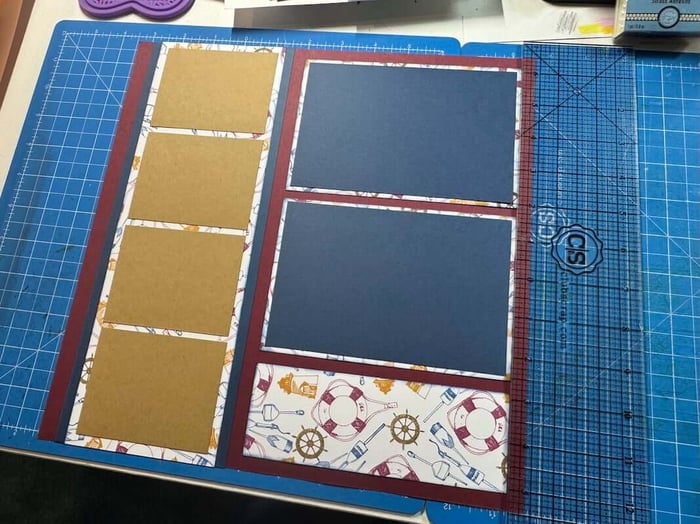
Once all trimming is complete, refer to the sketch to dry fit the pieces.
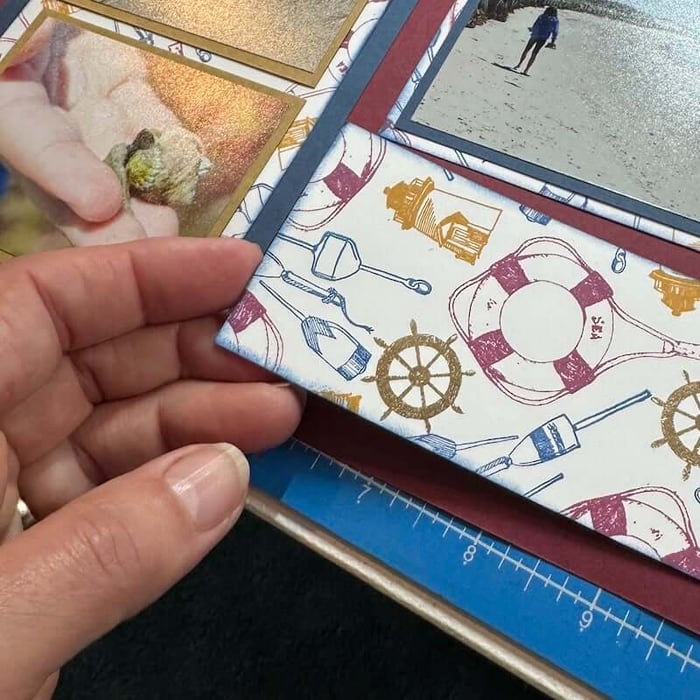
Separate all of the DIY print panels from the layout.

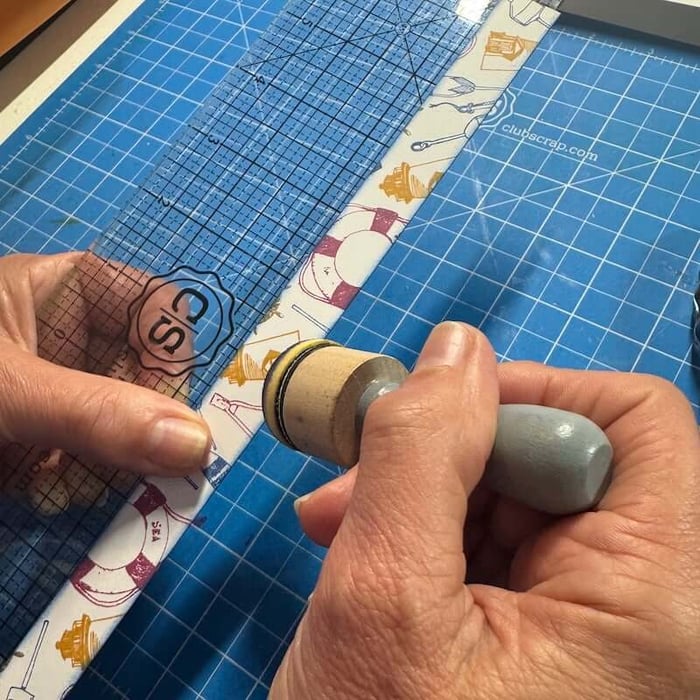
Distress the edges with Sapphire Ink.

Place the 3x14" acrylic ruler behind the long skinny border strips for added stability.
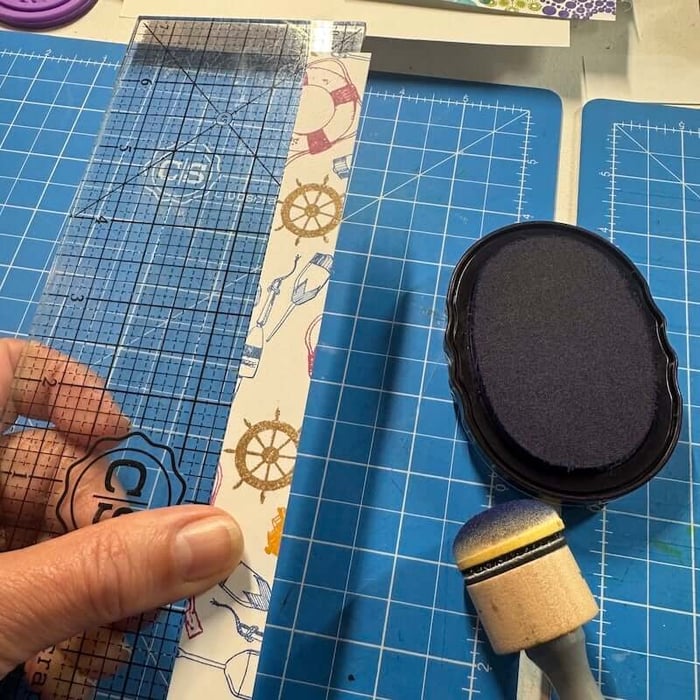
This makes inking those edges much easier.
Position the Kraft rectangles on the wide 'print' strip with the help of a 3x14" acrylic ruler and adhere.

Apply Bookbinding Glue dispensed from a Needle-tipped Applicator to the back of one of the skinny Navy accent strips on the left page.

Adhere the first strip 1/2" from the left side of the Red background paper. Add the wide "print" anchor strip and repeat for the second Navy skinny strip along the right side of the "print".
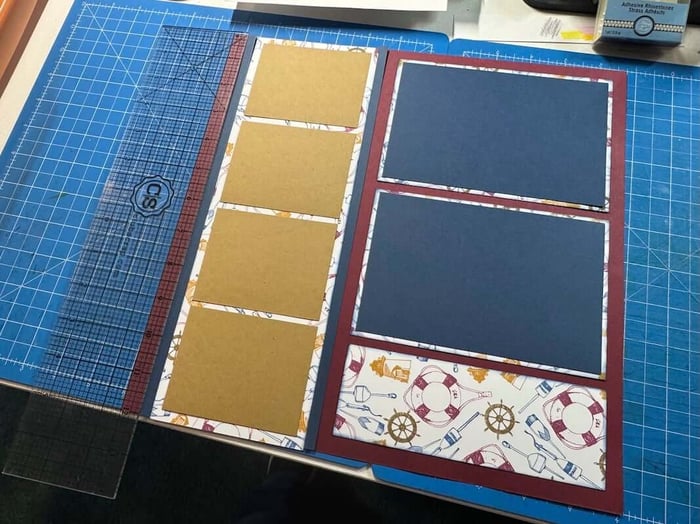
Continue to adhere all of the layered photo mats, accent panels, and border strips with the ruler to ensure perfect placement.
Once the layout is complete, test-fit photos over the mats until you're happy with the arrangement.
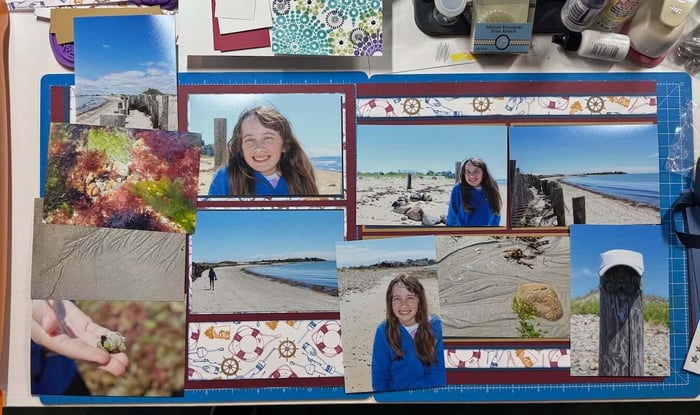
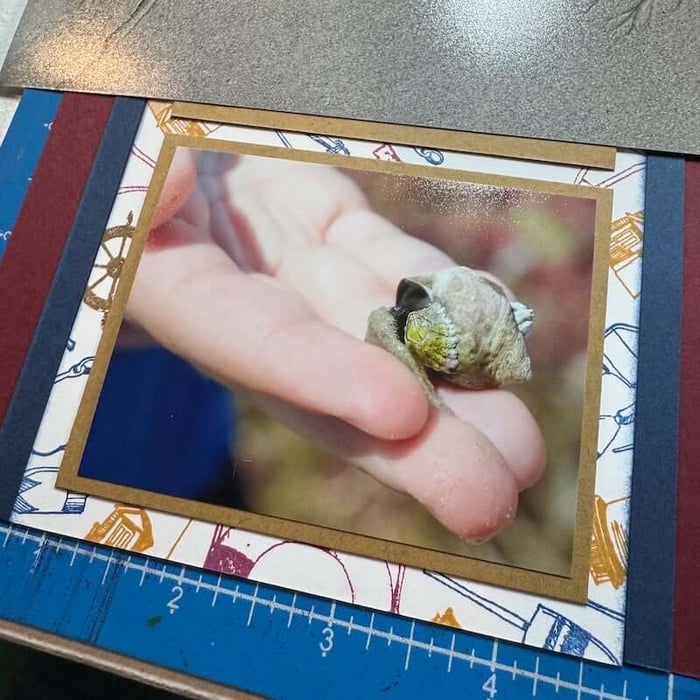
Hover a 8x8 grid ruler over the photo mats to determine the ideal photo size.
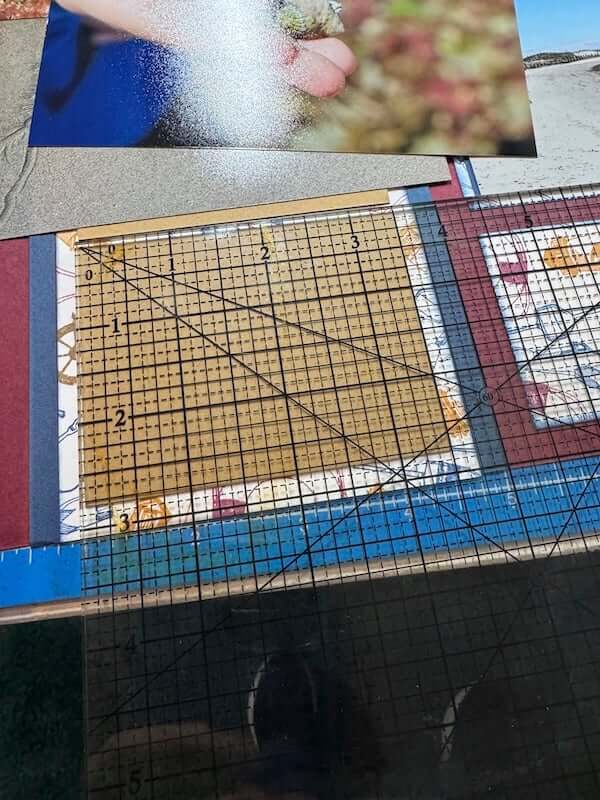
One the ideal photo size is determined, hover the ruler over the chosen photo—can it be cropped to size without losing any important subject matter?
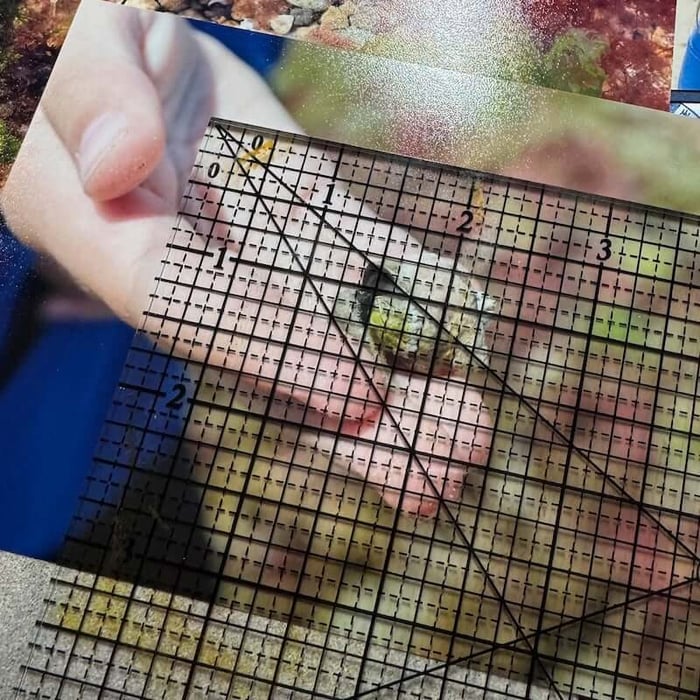
Crop each photo to fit its corresponding mat and adhere.
Embellishments
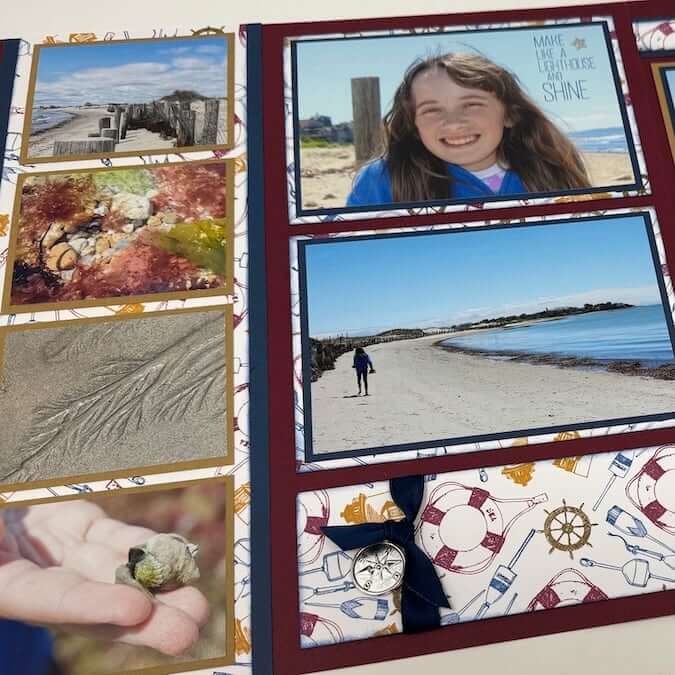
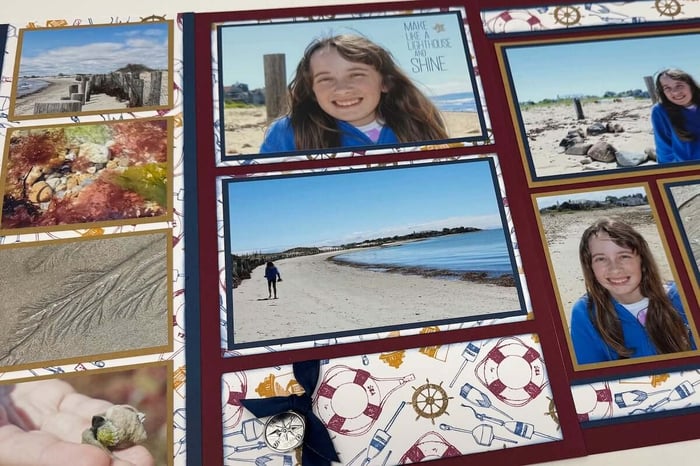
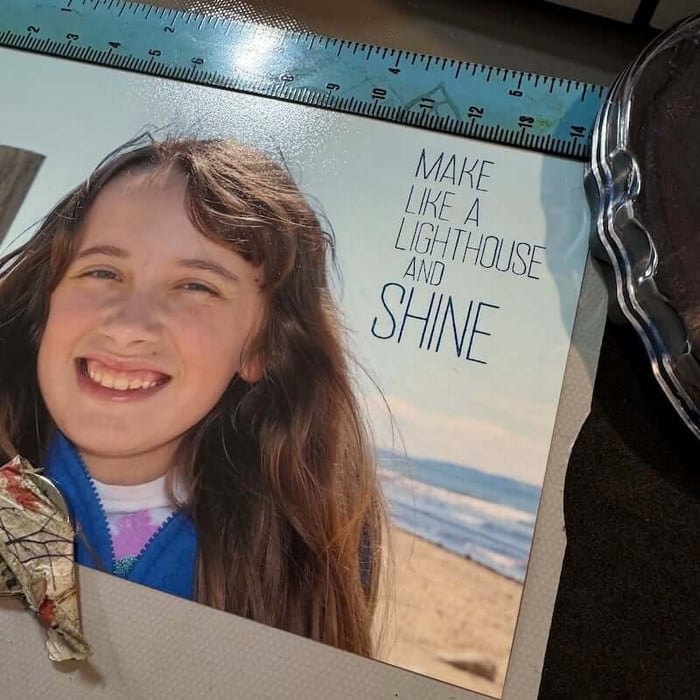
Stamp a sentiment into the open space on one of the photos with Sapphire Ink. Allow the ink to dry to avoid smudging. Adhere the photo to the mat.
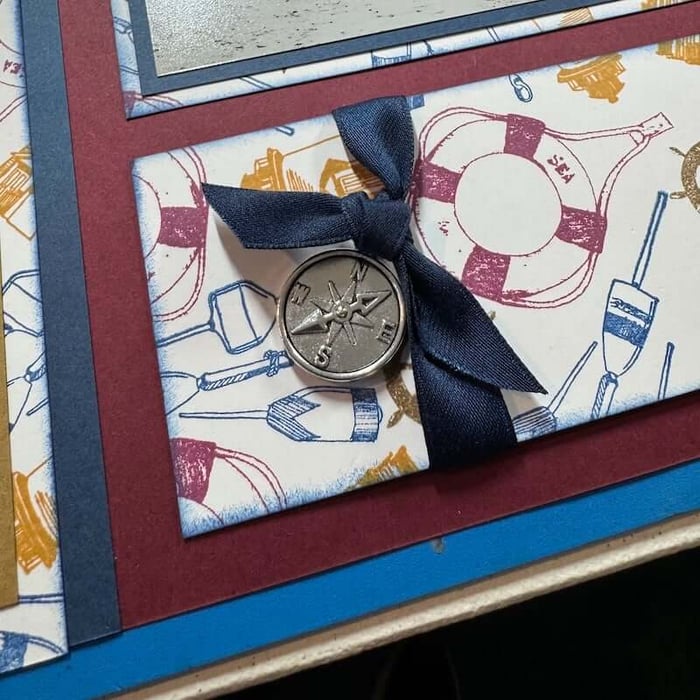
Carefully lift one side of the long rectangle on the bottom of the left page.
Wrap a blue ribbon around the panel and secure with a knot. Trim the ends with Fabric Scissors*.

Apply Bookbinding Glue to a compass charm (Happy Camper 11.19); tuck beneath the knot.
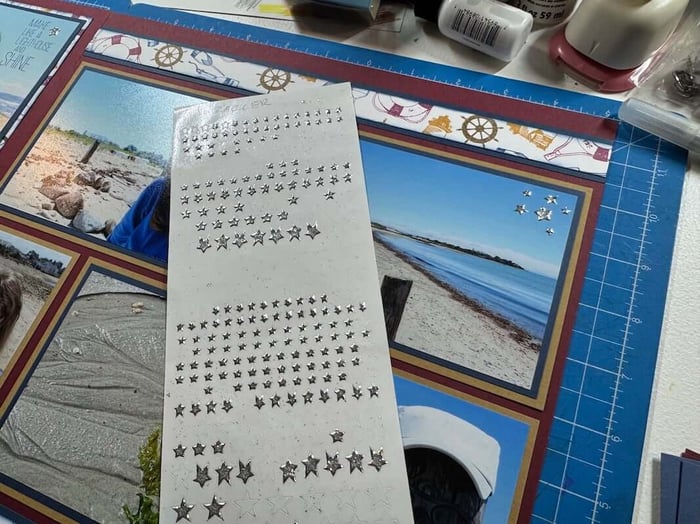
Add Silver Star Dazzles (Firecracker 06.18) to the photos for added sparkle and interest.
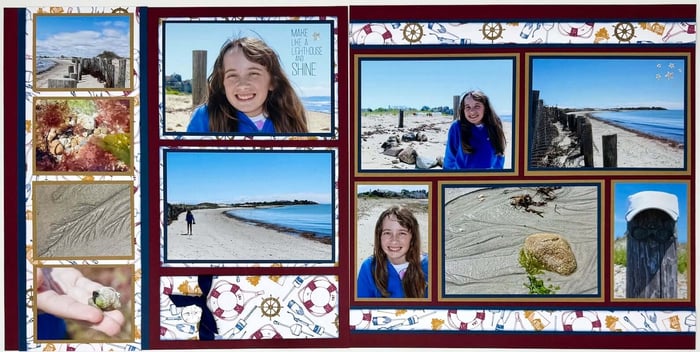
Let's take another look at the finished bonus formula layout.
Have you made pages with the June Bonus Formula?
We invite you to share your finished artwork on our Facebook Chat Group. Not a member of the group yet? Simply answer a few questions and we'll get your request processed in no time!
*As an Amazon Associate, Club Scrap earns from qualifying purchases. This means we may earn a commission if you make a purchase through links on our site. Thank you for supporting us!

Shop the links below to recreate this layout with the June Bonus Formula. Happy scrapping!
CS Hybrid Ink Pads - New Colors

$6.35
Exclusively Club Scrap®, this hybrid craft ink combines the most exceptional ingredients of both pigments and dyes for a fine, crisp, fast-drying image! Don't forget to stock up on the coordinating re-inkers! Each ink pad sold separately. Please select the… Read More
CS Hybrid Ink Pads

$6.35
Exclusively Club Scrap®, this hybrid craft ink combines the most exceptional ingredients of both pigments and dyes for a fine, crisp, fast-drying image! Don't forget to stock up on the coordinating re-inkers. Each ink pad sold separately. Please select the… Read More
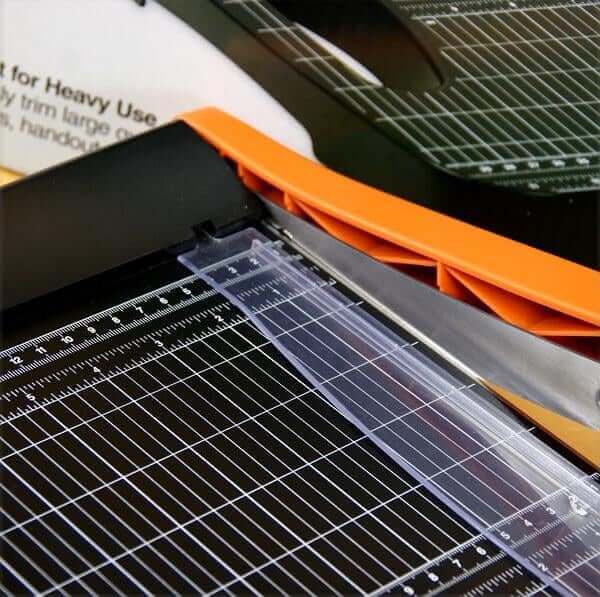
12-inch Paper Trimmer*
Available via Club Scrap's Amazon Affiliate Storefront
*As an Amazon Associate, Club Scrap earns from qualifying purchases. This means we may earn a commission if you make a purchase through links on our site. Thank you for your support!