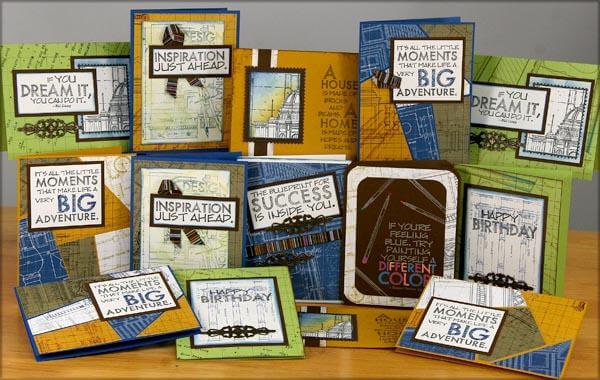
I'm so excited about the
Blueprints cards for Club Stamp! We were able to make fourteen A2 cards with our 12-pack of paper. I measured all of the images on the
Collection UM included in the kit and was able to incorporate many of them onto just one sheet. There are trimming and stamping sketches below to help you make sense of the pieces.
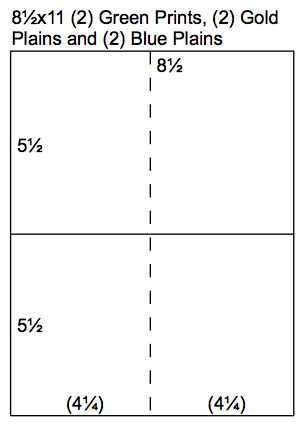
Let's trim first and then assemble . . .
1. Score two 8.5x11 Green Prints, two Gold Plains and two Blue Plains vertically at 4.25". Trim horizontally at 5.5". Fold each 5.5x8.5 horizontally on the scoreline to create twelve card bases. (Scoring prior to trimming cuts your scoring time in half!)
2. Trim each 8.5x11 White Text Print vertically at 4.5 and 4". Cut each 4x11 horizontally at 5.75 and 5.25".

3. Cut one 8.5x11 Brown Plain horizontally at 10.5, 8 and 5.5". Trim each 2.5x8.5 horizontally at 5.75 and 3". Cut the .5x8.5 horizontally at 4.25". Score and fold the 5.5x8.5 horizontally at 4.25".

4. Trim one 8.5x11 White Plain horizontally at 10, 7.75 and 5.5". Cut each 2.25x8.5 horizontally at 8, 5.5 and 3". Trim the 1x8.5 horizontally at 4.25". Score and fold the 5.5x8.5 horizontally at 4.25".

Here is the same print with the stamp images placed onto the trimmed panels. The "big adventure" quote is from the
Blueprints UM Borders & Backgrounds sheet.

5. Trim the other 8.5x11 White Plain vertically at 6.25 and 3.25". Cut the 3.25x11 horizontally at 9.5 and 4.75". Trim the 3x11 horizontally at 9.5, 8 and 4". Cut the 2.25x11 horizontally at 9, 6 and 3". Trim one 2.25x3 vertically at 2 and 1".

The same White Plain below is shown with UM stamps from the
Blueprints Collection UM sheet. (This sheet is
included in your Club Stamp kit.)

6. Trim one 8.5x11 Brown Plain horizontally at 7.75 and 4.5". Cut the 4.5x8.5 horizontally at 7.5, 6.25, 5, and 3.25". Trim the 1.75x4.5 horizontally at 3.5". Cut each 1.25x4.5 horizontally at 3.25". Trim one 3.25x8.5 horizontally at 4.25". Cut the other 3.25x8.5 horizontally at 6.75, 5 and 2.5".

That's it. Not exactly "easy" . . . but at least you've been saved the hours it took to get to this point!
Next, it's time to stamp panels, sort the pieces and assemble cards. This is how they'll come together.

Attach the metal embellishments with Glue Lines or Bookbinding Glue.

The "Happy Birthday" sentiment comes from the
Greeting UM sheet.

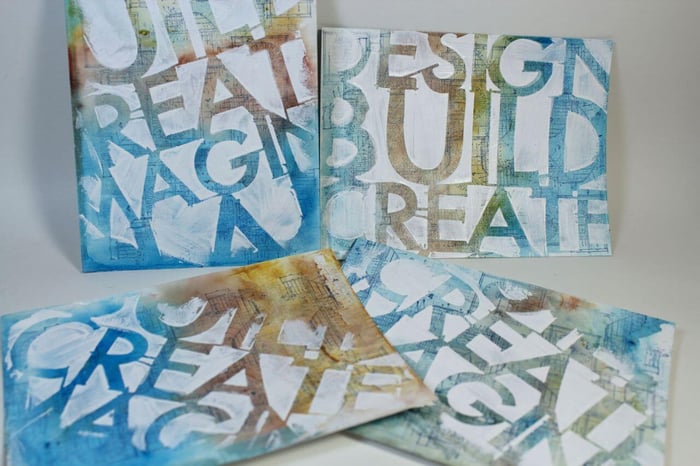
Four different text weight art panels were stacked and trimmed into six randomly shaped sections. Be careful to keep the pieces in order after trimming, or you'll have a puzzle on your hands! (To save time, skip this step and simply layer the complete panel onto the card base.)

This sketch shows how I trimmed my four stacked panels. In this case, you can be a rebel and not measure a thing; simply keep your stacked panels in order.

Watch for tangents when layering the matted sentiment onto the card. Avoid having the corners of the matte in a gutter between the angled pieces.

Stamp the large UM collage image with Topaz, Leaf and Sapphire
inks. Begin with the lightest color first to avoid contaminating the inkpad.

Make a loop with the striped ribbon and tape to the back of the sentiment prior to layering on the card.

Make a mask to cover the dome-shaped building on this stamped image. Sponge with Topaz and Sapphire inks to create a setting sun skyline.

Trim the edges of the stamped image and Brown panel with a postage edge scissors.

For a different look, mask the entire "postage stamp" image and sponge the outside edges with Sapphire ink.

The ink application does a great job of defining the stamped image.

Round the corners of the Brown card base and panel with a Corner Chomper. Color the tips and ends of the stamped markers with a gel pen. (Images for the card below are from the
Greeting UM.)

Fill in the stamped lettering, as well.
And there 'ya have it! Fourteen terrific cards with just one 12-sheet pack of paper. Enjoy making yours!
Tricia